'Most Escape Alive' Main Quest
Stats (Solo): Difficulty - 8/10, Est. Completion Time - 1:45 Hr to 2:15 Hrs, RNG Rating - 1/5 (The Bird locations are random, but you don't have to burn rounds)
| Perks | Special Weapons | Elixirs | Equipment |
|---|---|---|---|
|
|
|
|
- For the fullest/best experience, play as Richtofen. When you spawn in, if you interact with Samuel's Cryo Pod after the opening voice lines are finished you will hear Richtofen say, "Ahh, you have all remained safe for so long, my little popsicles...". For the remainder of the Easter Egg, Samuel and Richtofen will talk to each other about what is happening during the Easter Egg.
- Activate Pack-a-Punch.
- Obtain the Spectral Shield, Hell's Retriever and Spoon.
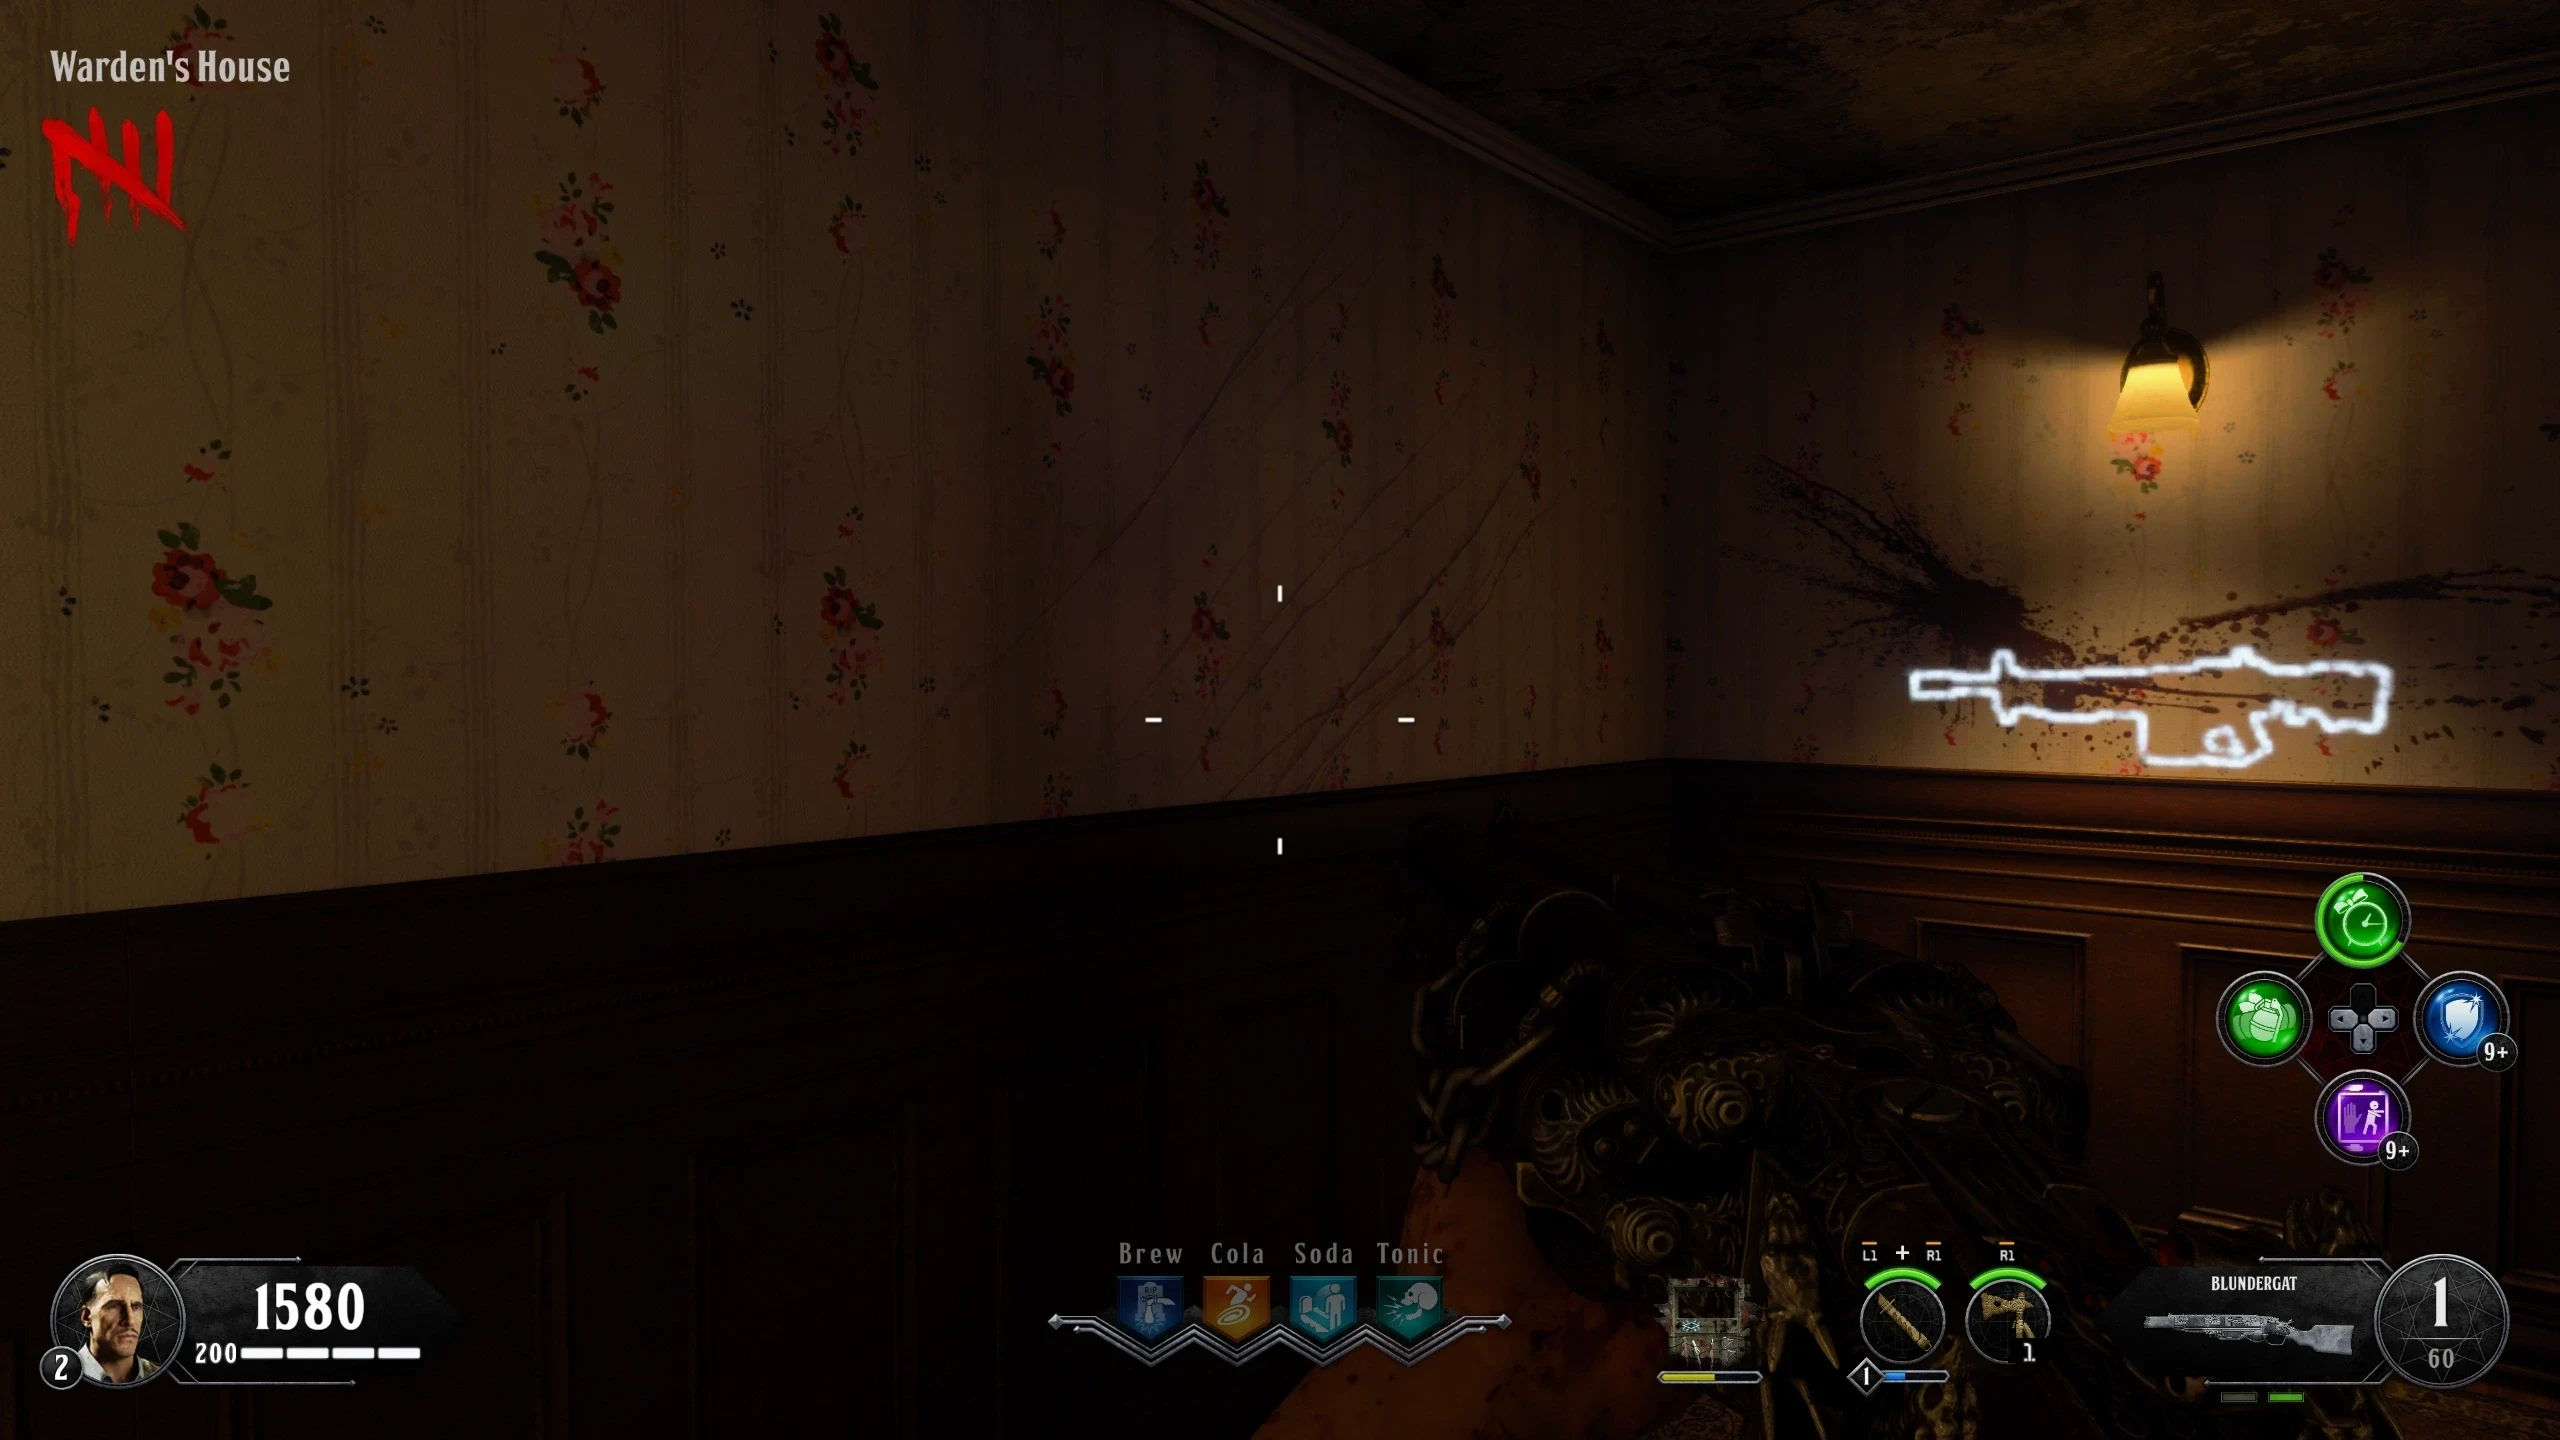
- Melee the wall at the top of the stairs, left of the Titan wallbuy, in the 'Warden's House' with the Spoon. If done correctly, the wall will become scratched.
- You need to have the Warden slam the ground in front of the scratched wall. You can spawn the Warden by entering "666" into the Number Pad in the 'Citadel Tunnels' (this can only be done once per game). The Warden's slam attack can be triggered in two ways:
- Obtain Monkey Bombs. Wait for/Spawn the Warden. Throw a Monkey Bomb below the scratched wall and run down the stairs (No players should be near the wall with the Warden). If done correctly, the Warden should run to the Monkey Bomb and perform a slam.
- Starting on Round 18, the Warden will gain an electric slam attack when near a player (not recommended due to needing to wait for Round 18)
- Once the Warden slams near the wall, the wall should fall, revealing the 'Warden's Ritual Room.' Activate the switch next to the electric chair and pick up the Red Stone from the table near the electric chair.
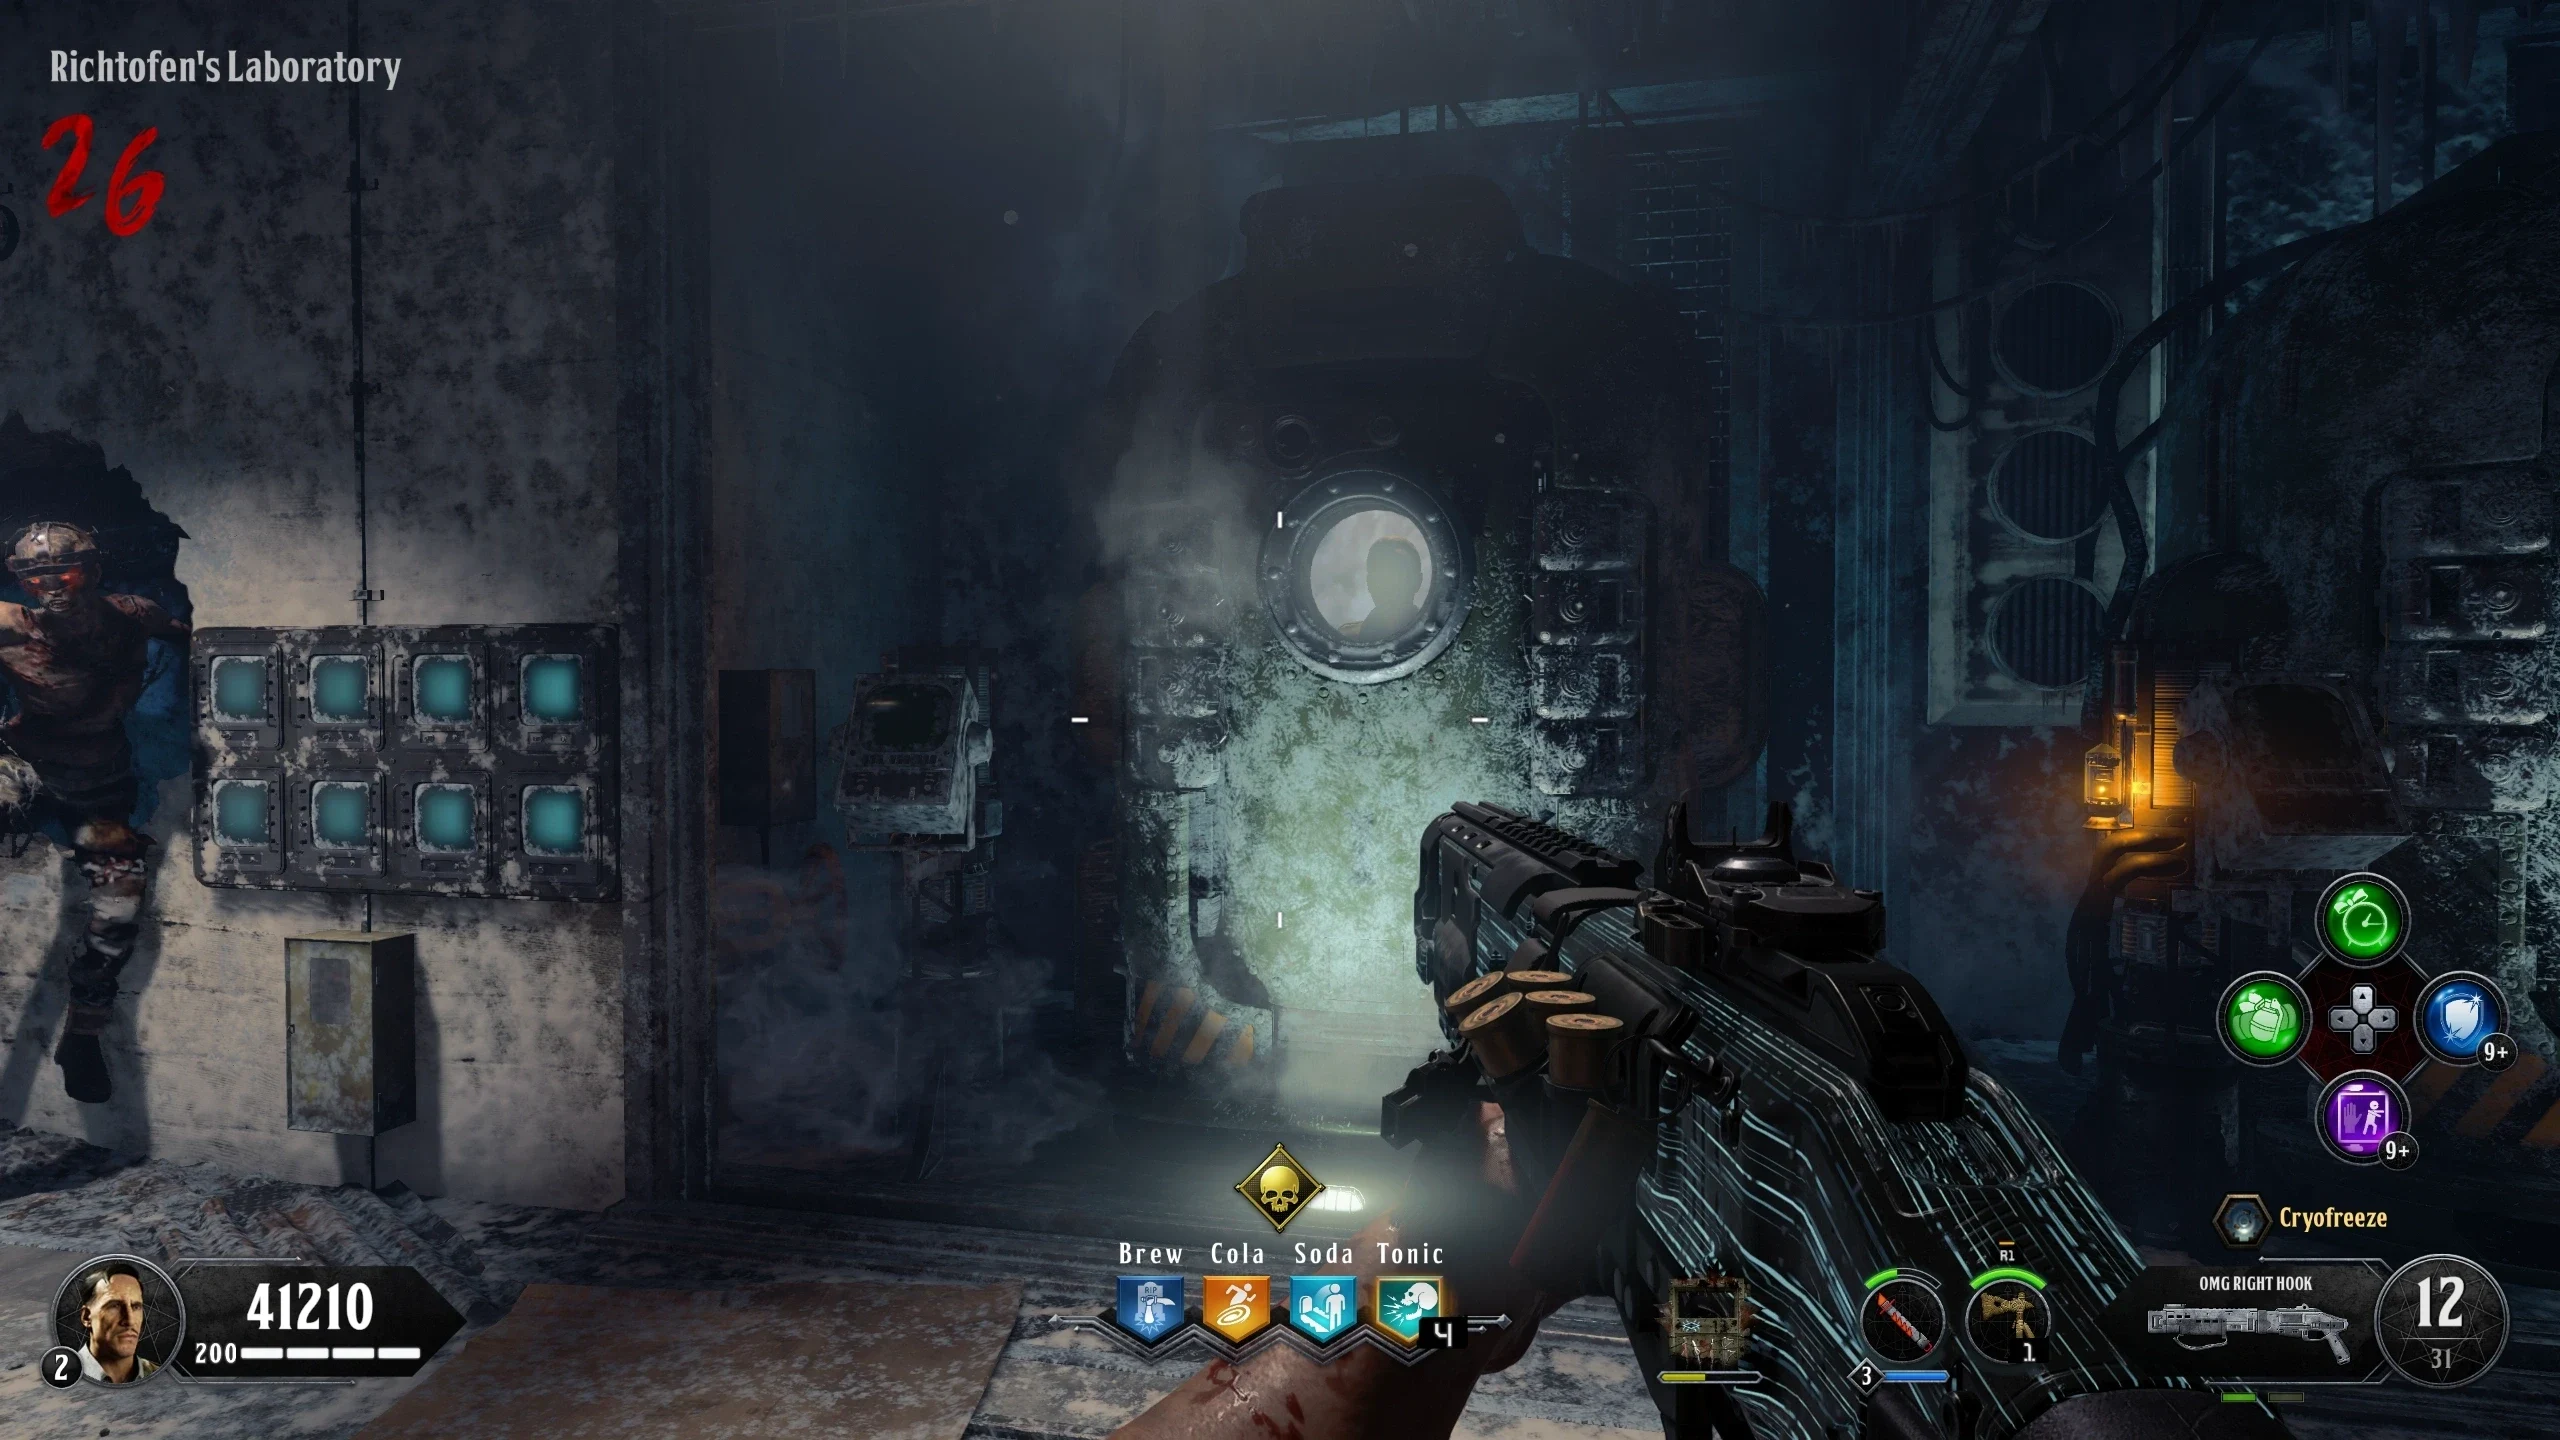
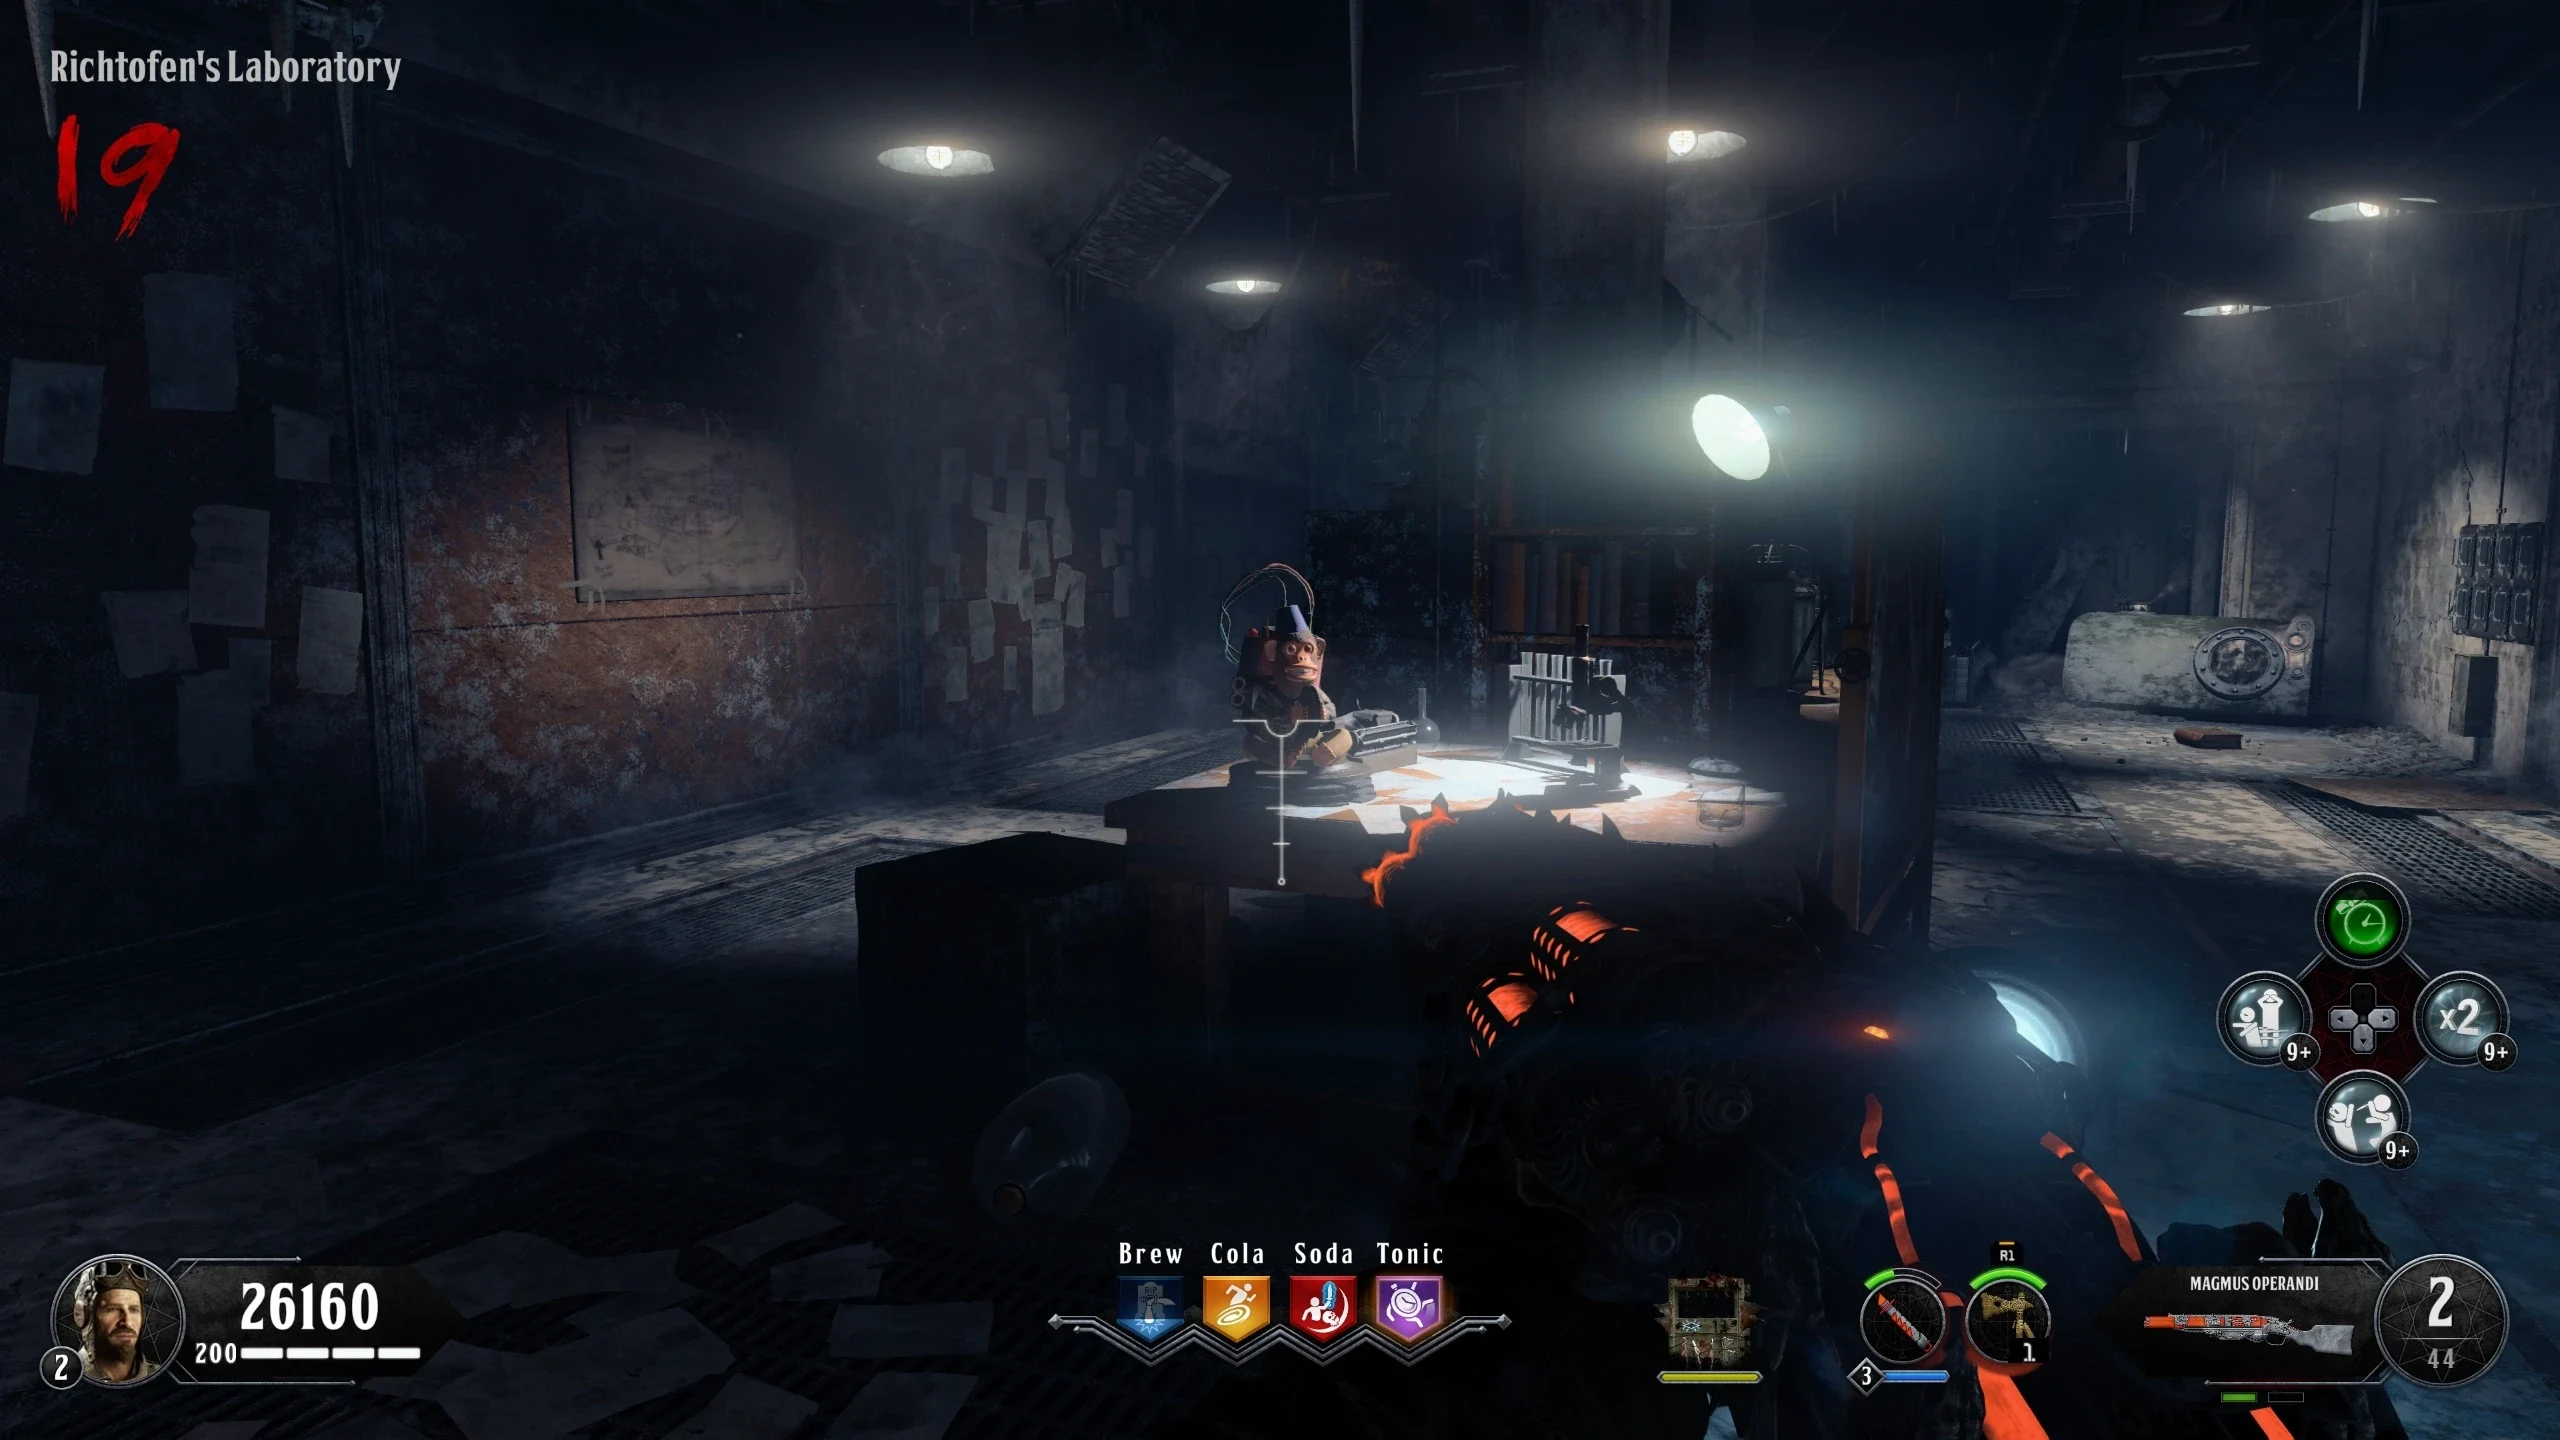
- Go to the 'Richtofen's Laboratory' and place the red stone on the map on the wall.
- Interact with the Kronorium on the floor of the Lab. A Seagull will spawn and take the book.
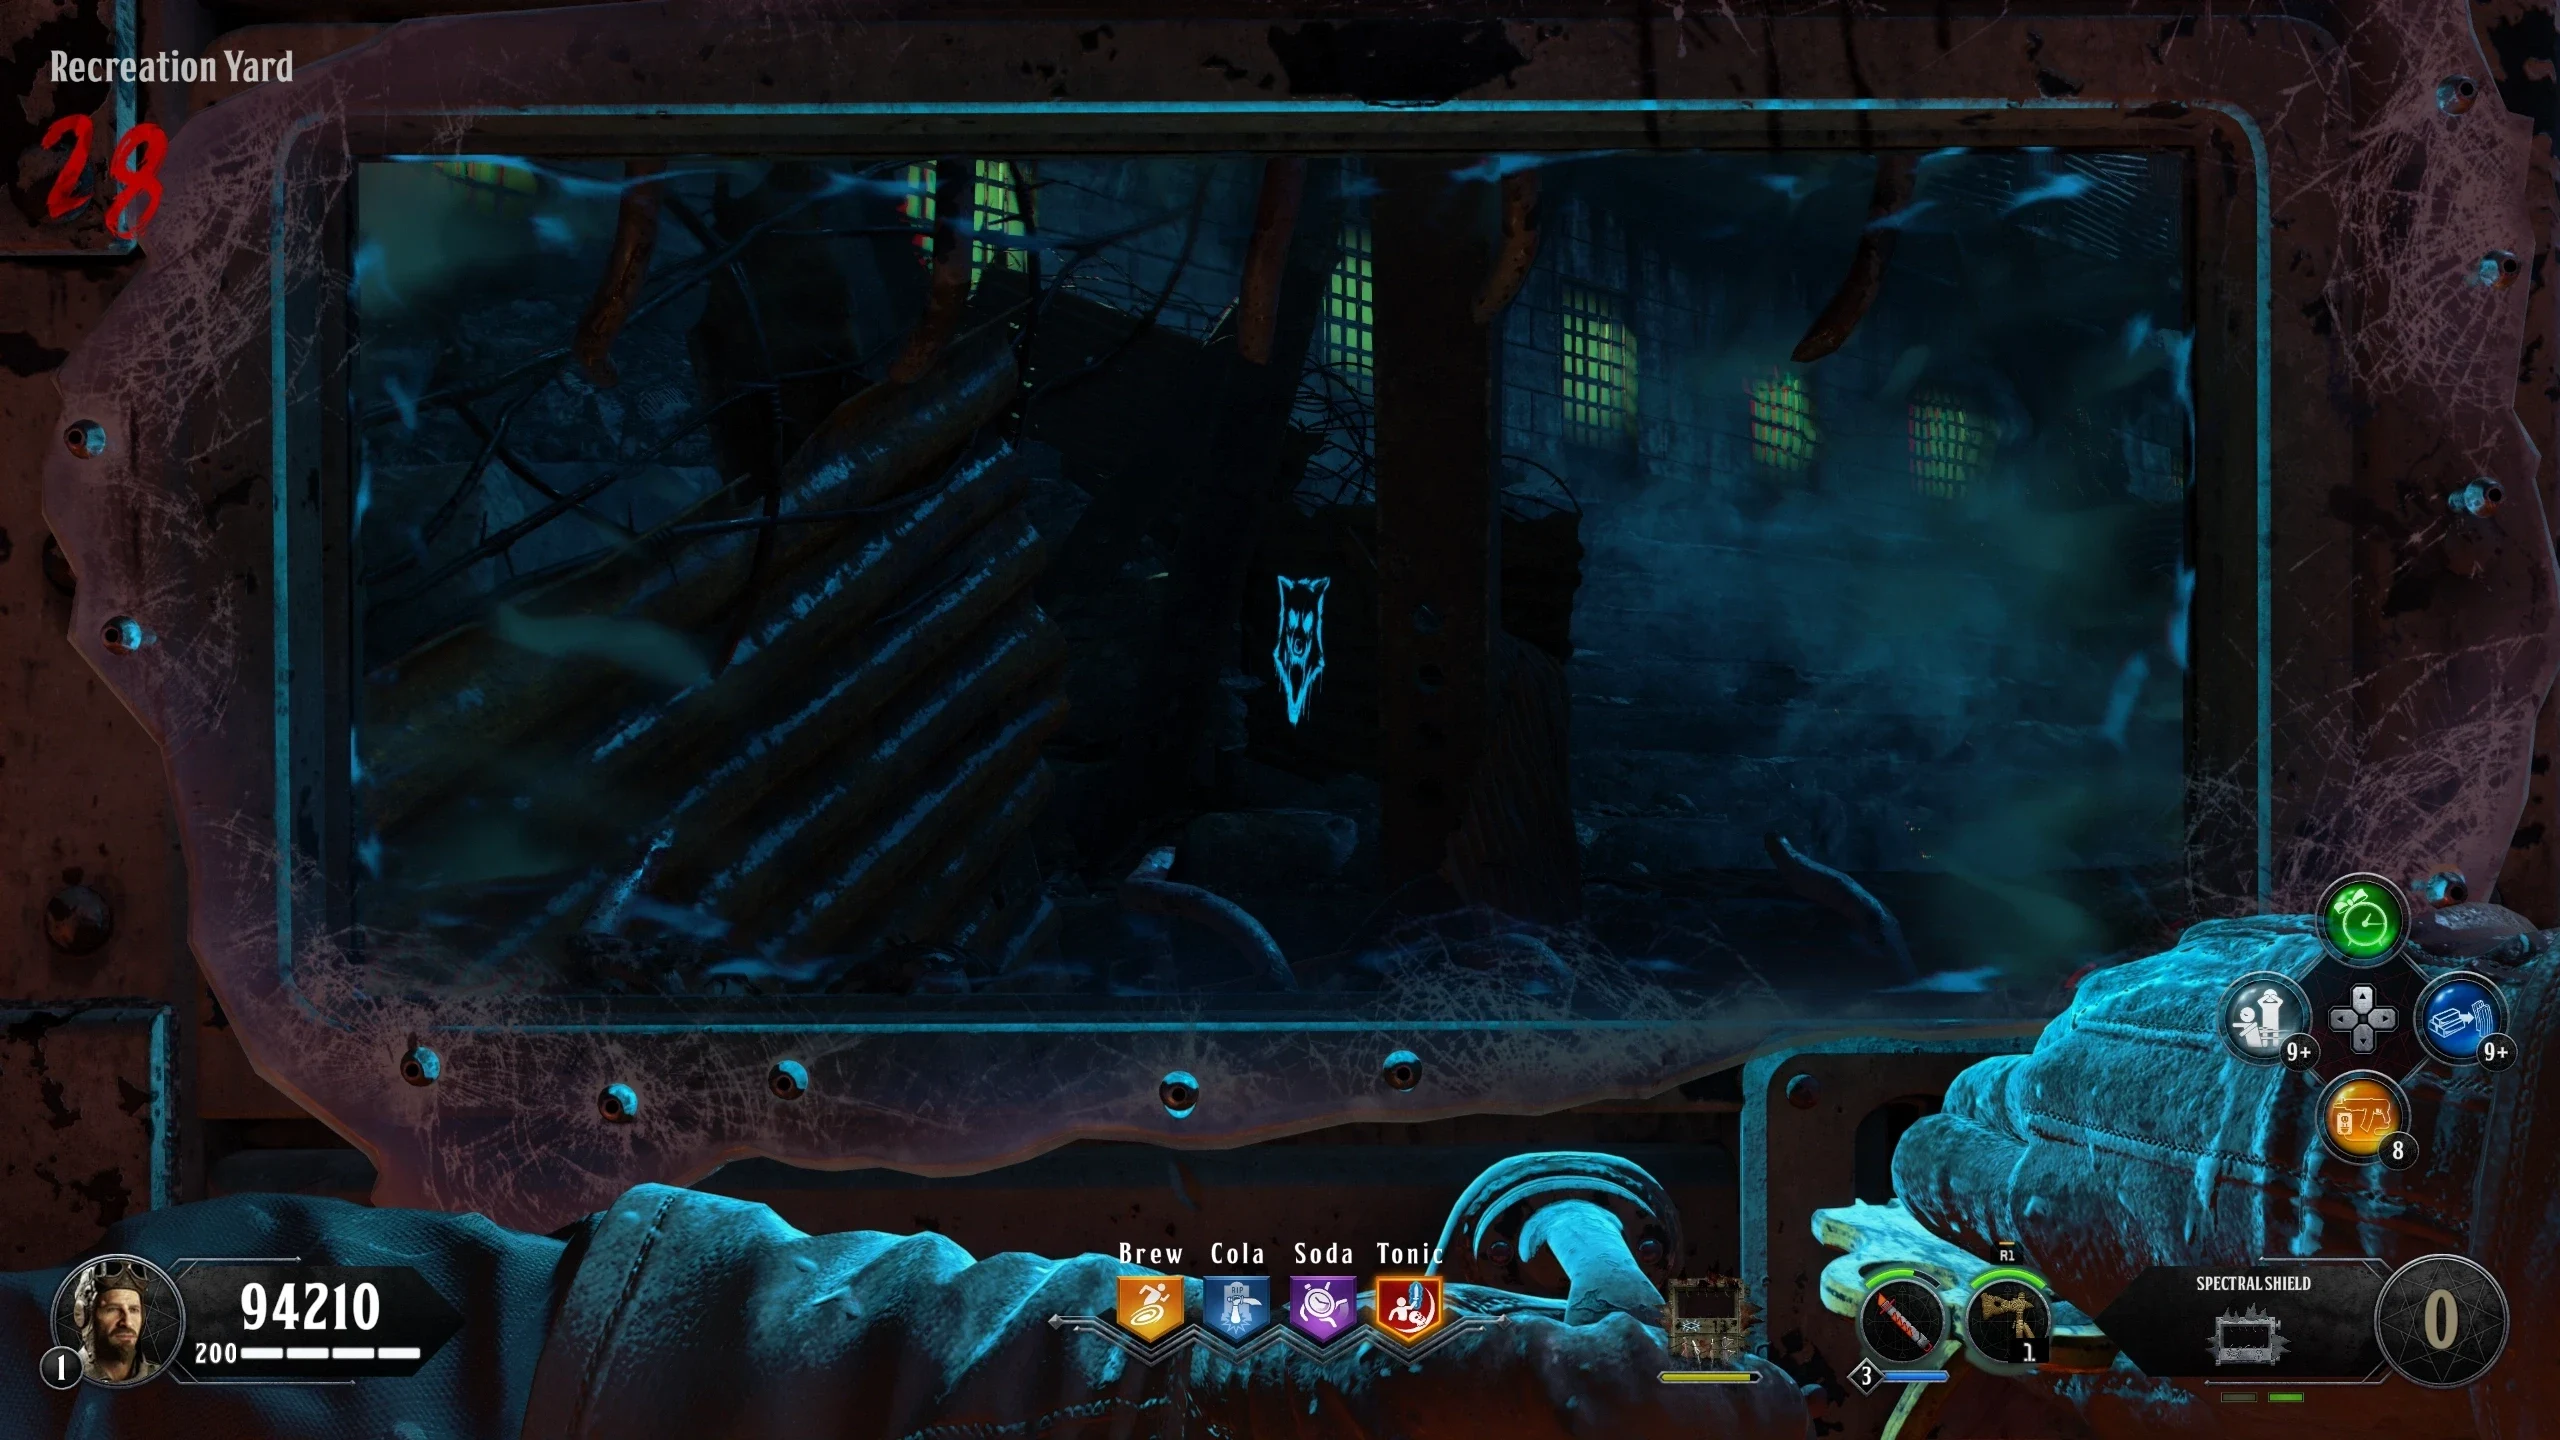
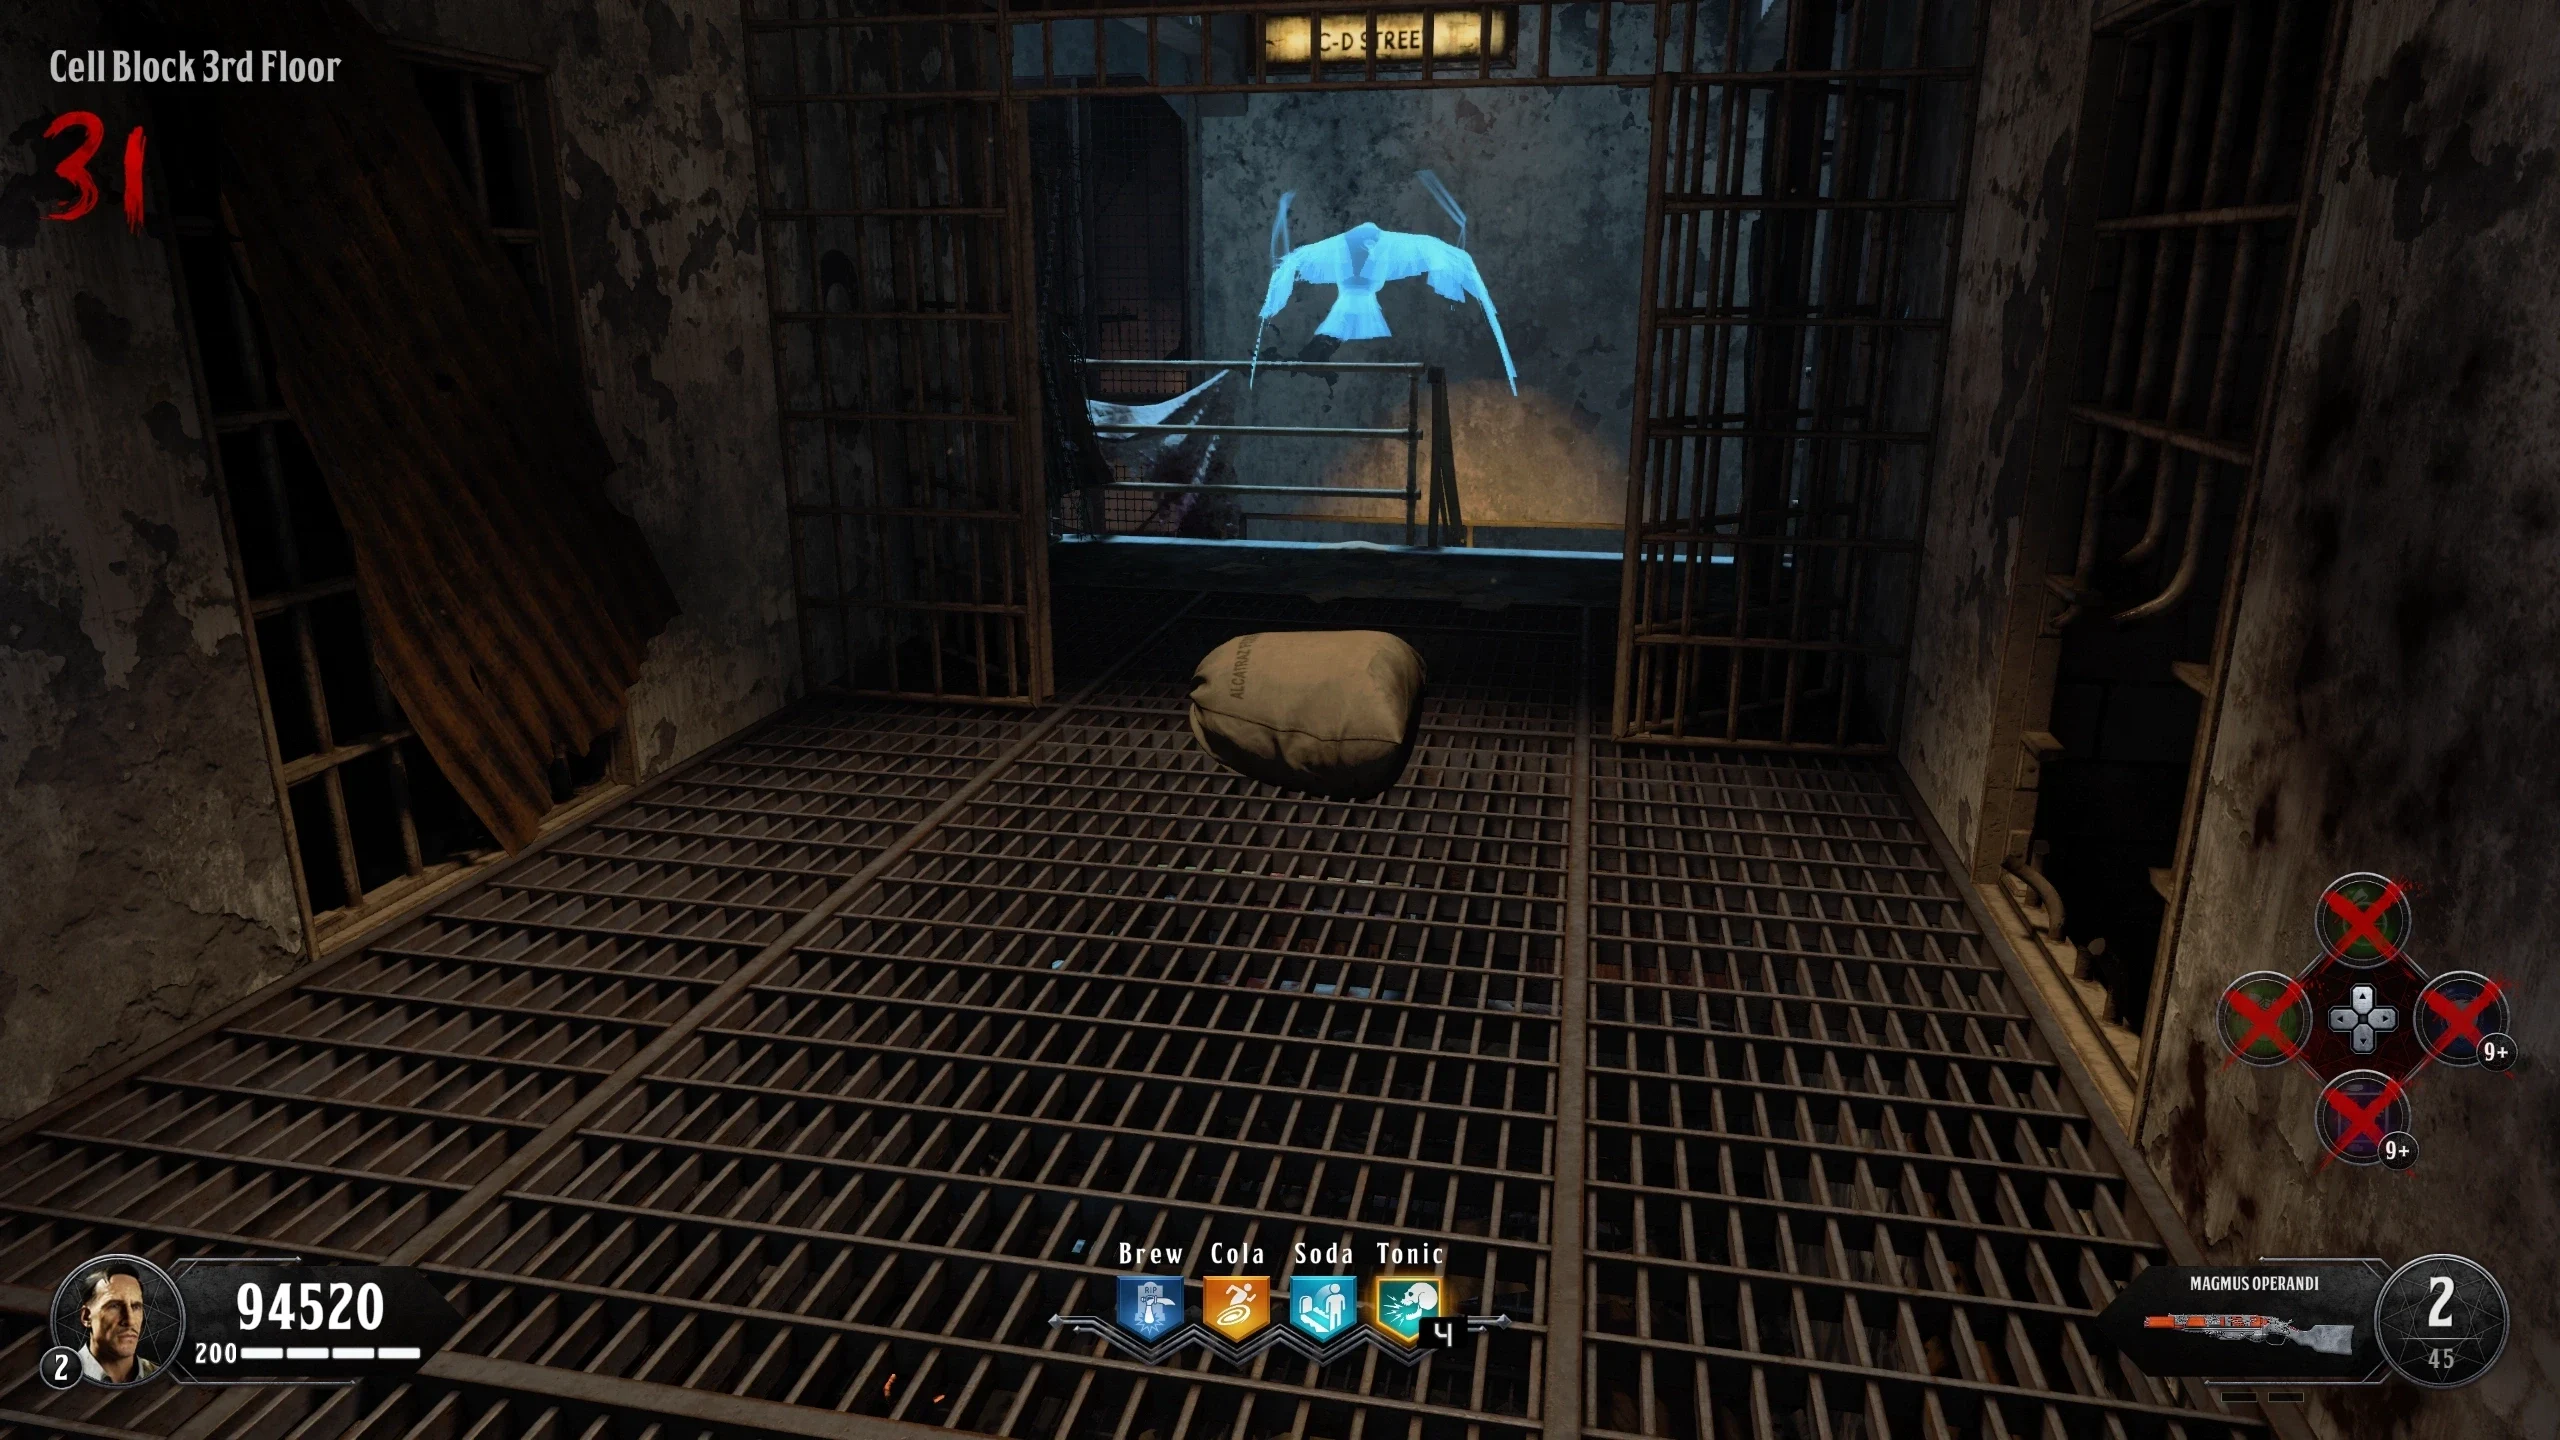
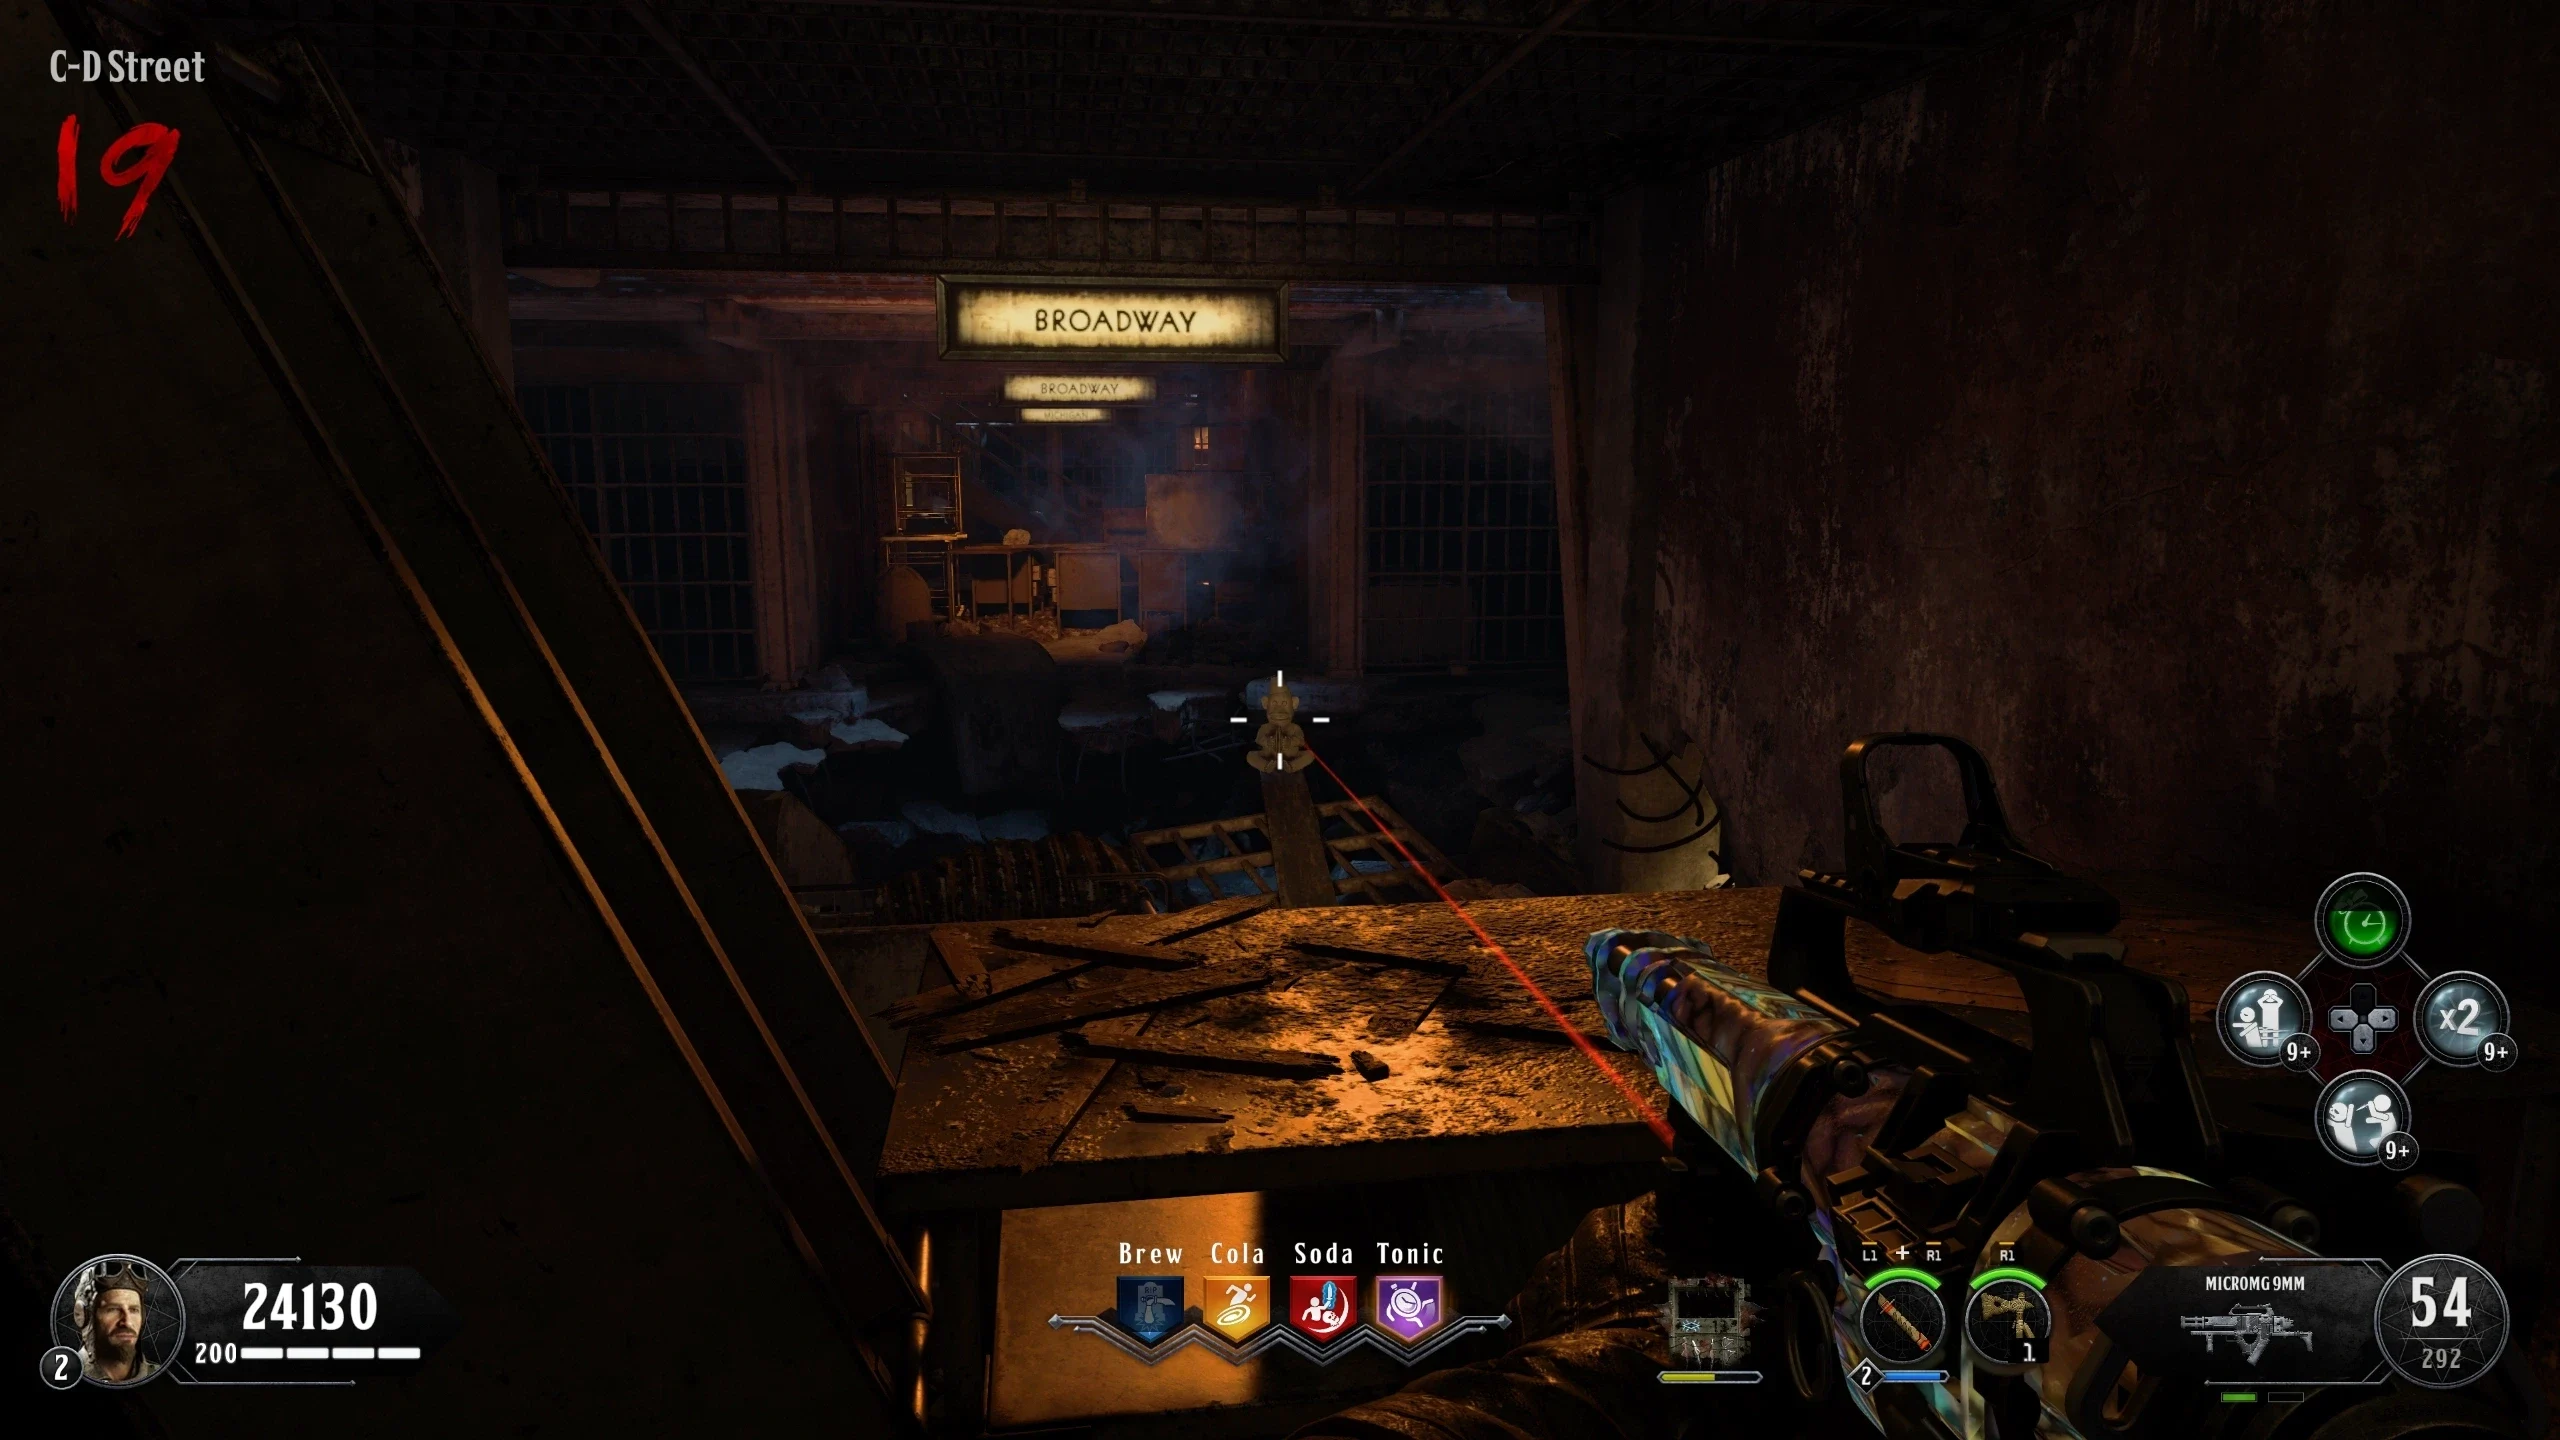
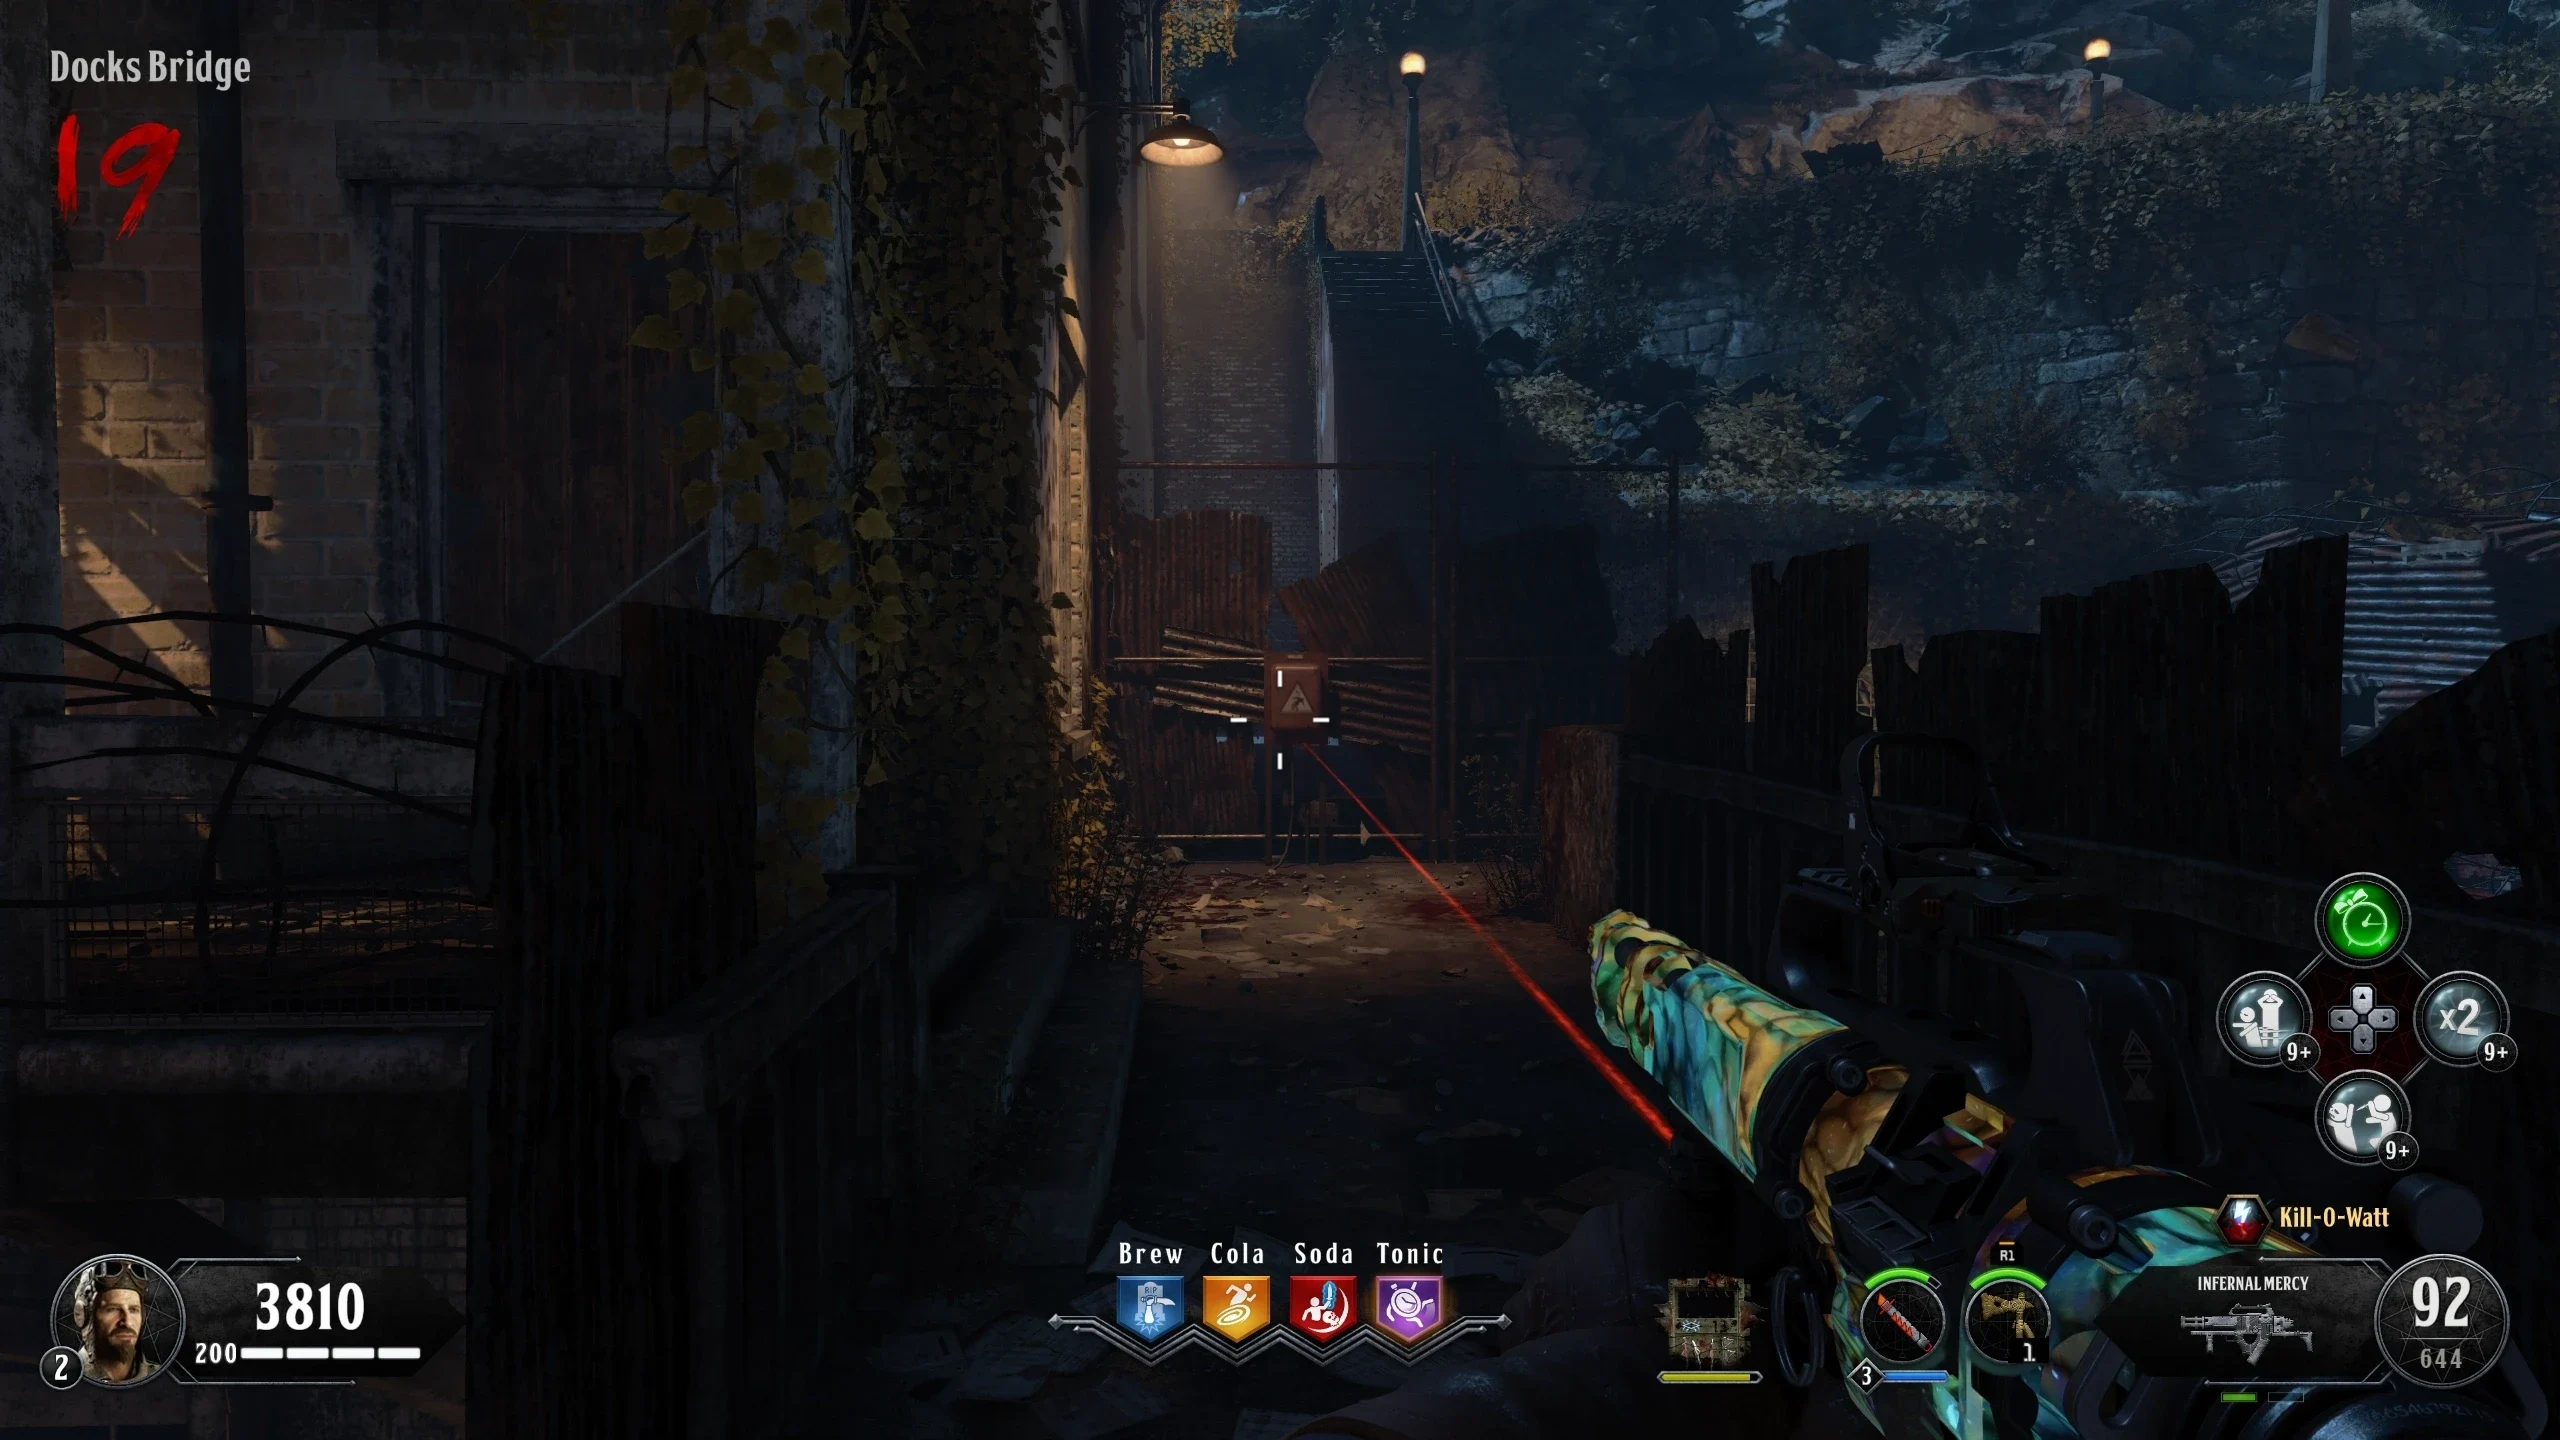
- You must spirit blast the Seagull three times, once per round. The Seagull can only be seen while aiming with the shield, but it can be heard with or without the shield.
- The first seagull might only spawn in five locations, which are marked in green in the list below. If you can't find it in the locations in green, then try the spawns near those.
- Note: There is a way to know roughly where the Seagull is going to be for the second and third spawns. On the round before the second spawn (i.e. the round you found the first location) end the round at the top of the Gondola (the Gondola doesn't have to be there). Once you kill the last zombie, look about here, out to the water and wait for a subtle Blue Light Streak coming from the water to shoot toward somewhere on the map. The light indicates what area of the map the Seagull has spawned: The right of your screen means it spawned in the 'Warden's Office'/'Citadel' area, Down means 'Docks,' and the left side of the screen means Spawn Area/'Catwalk.'
- There are 42 Locations the Seagull can be in. Video Guide by MysteryHQ or Pictures Below:
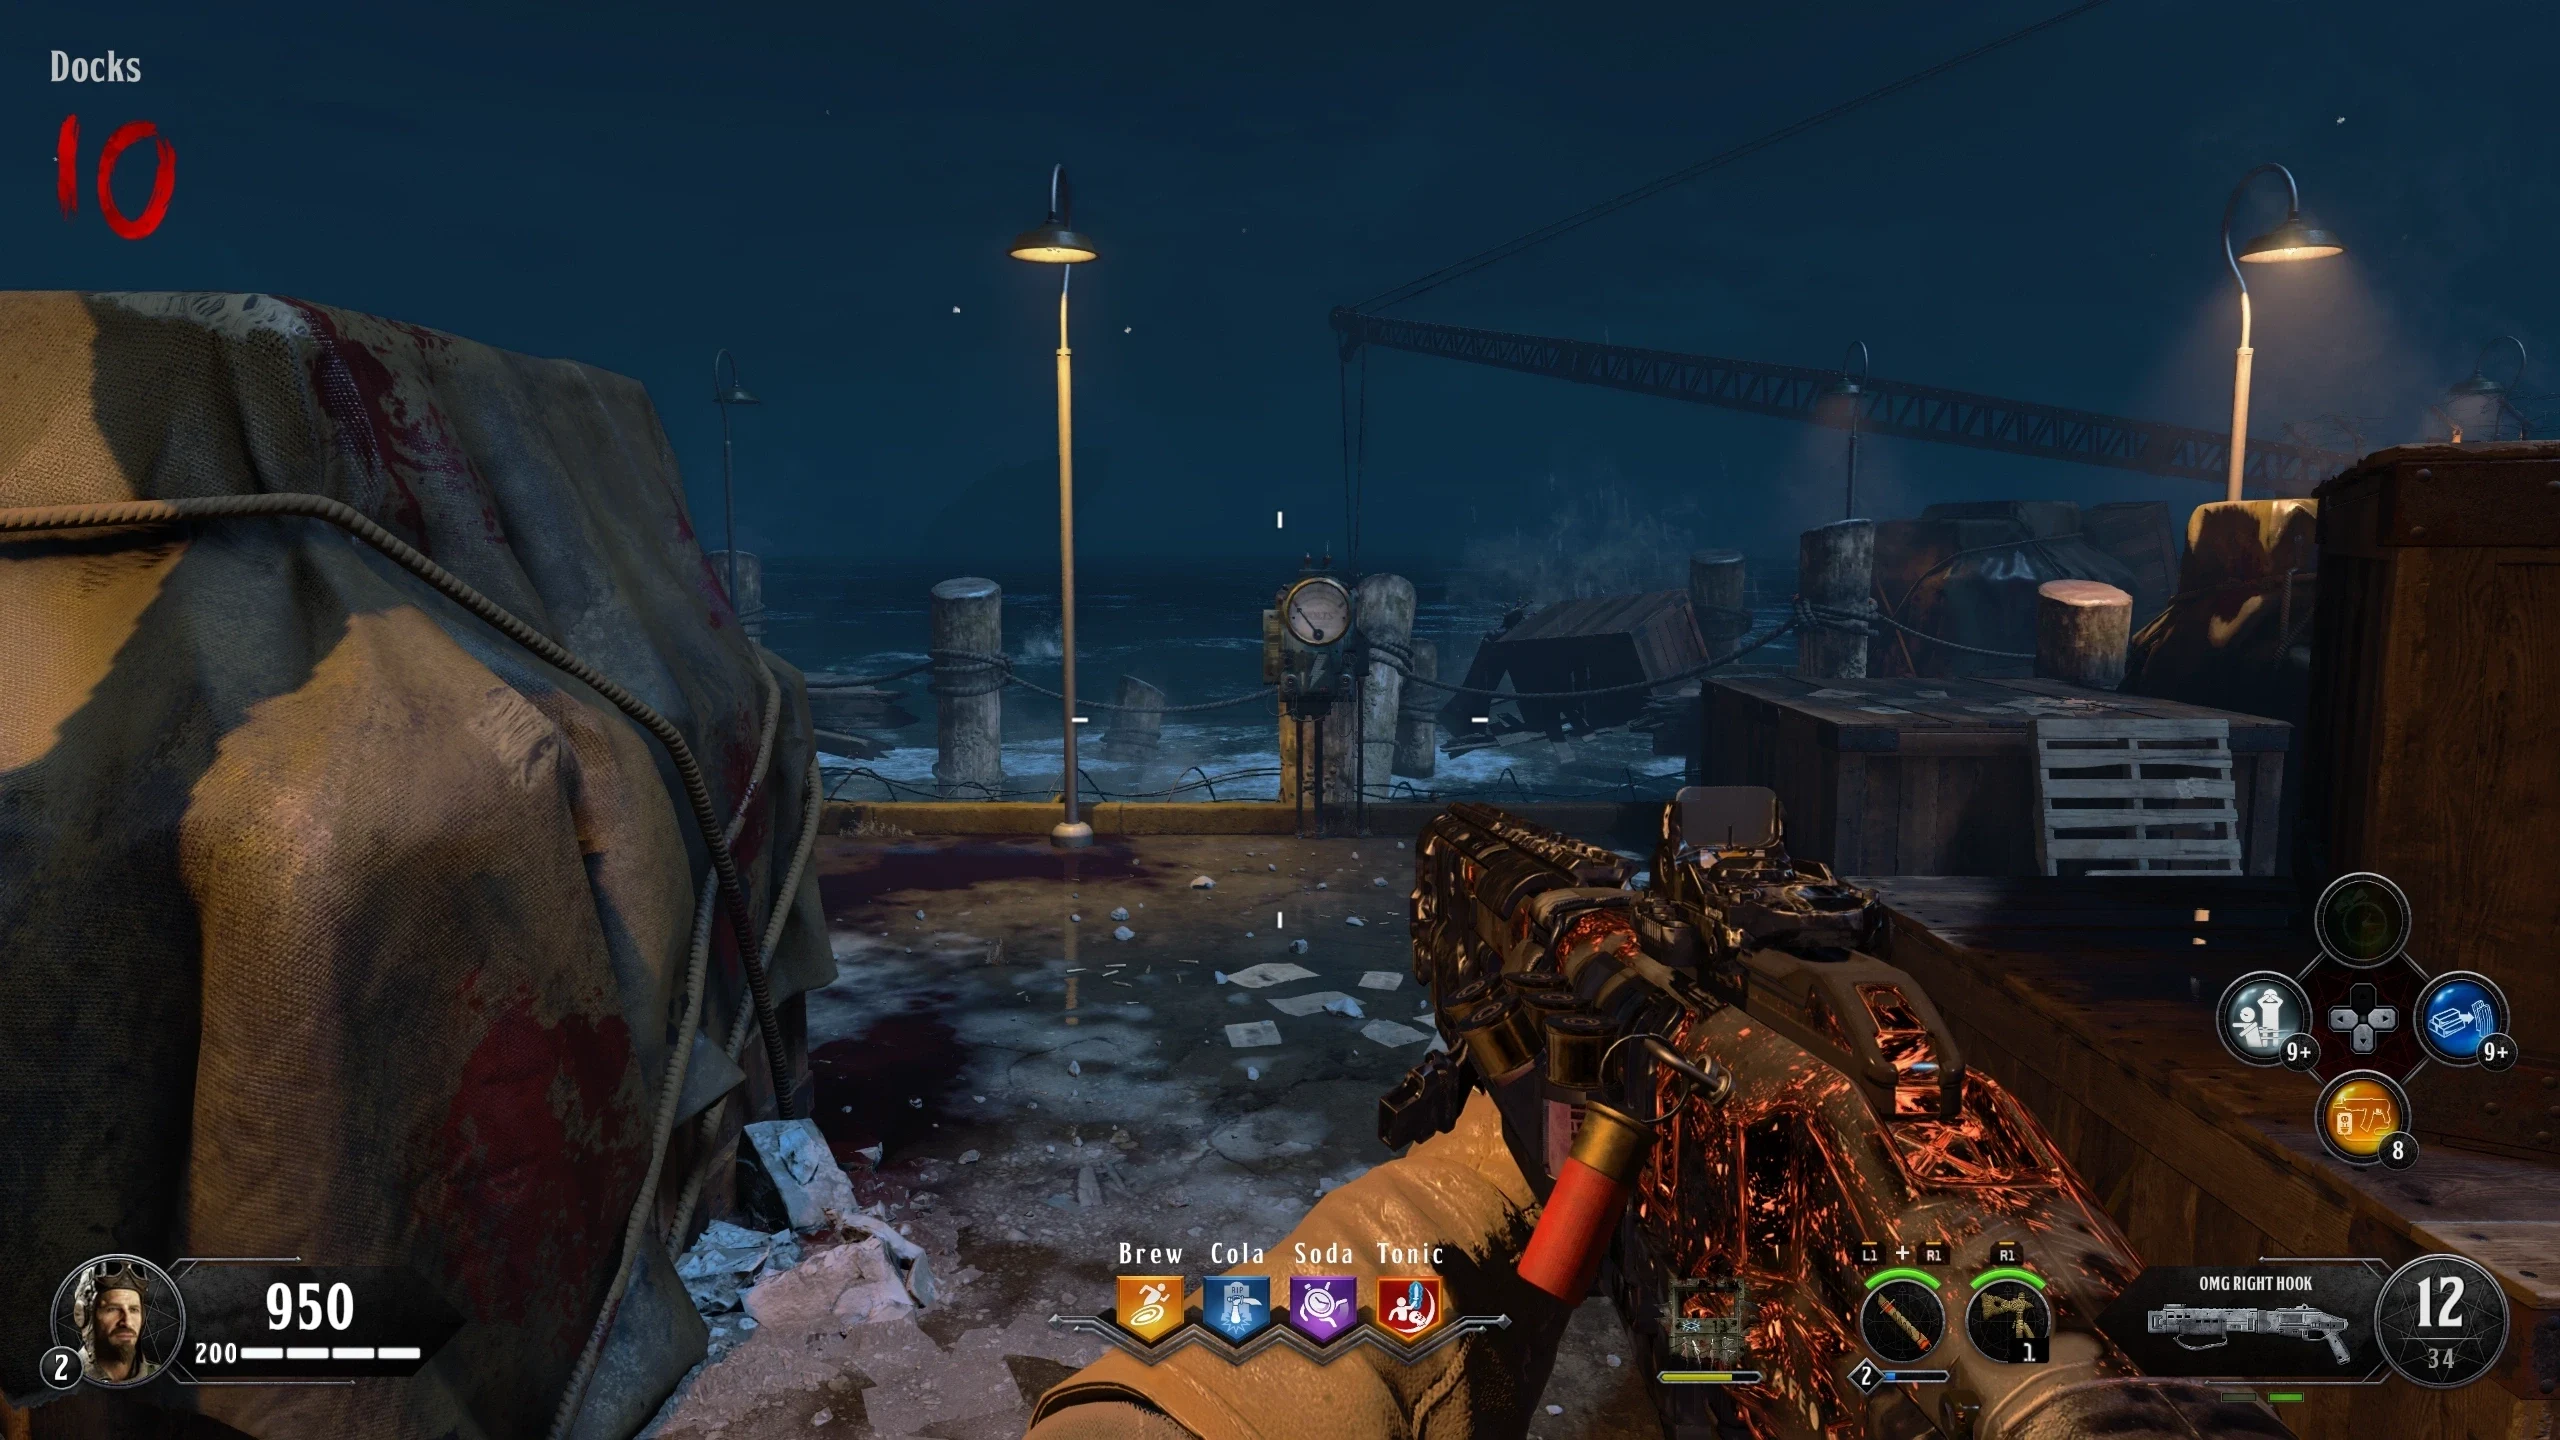
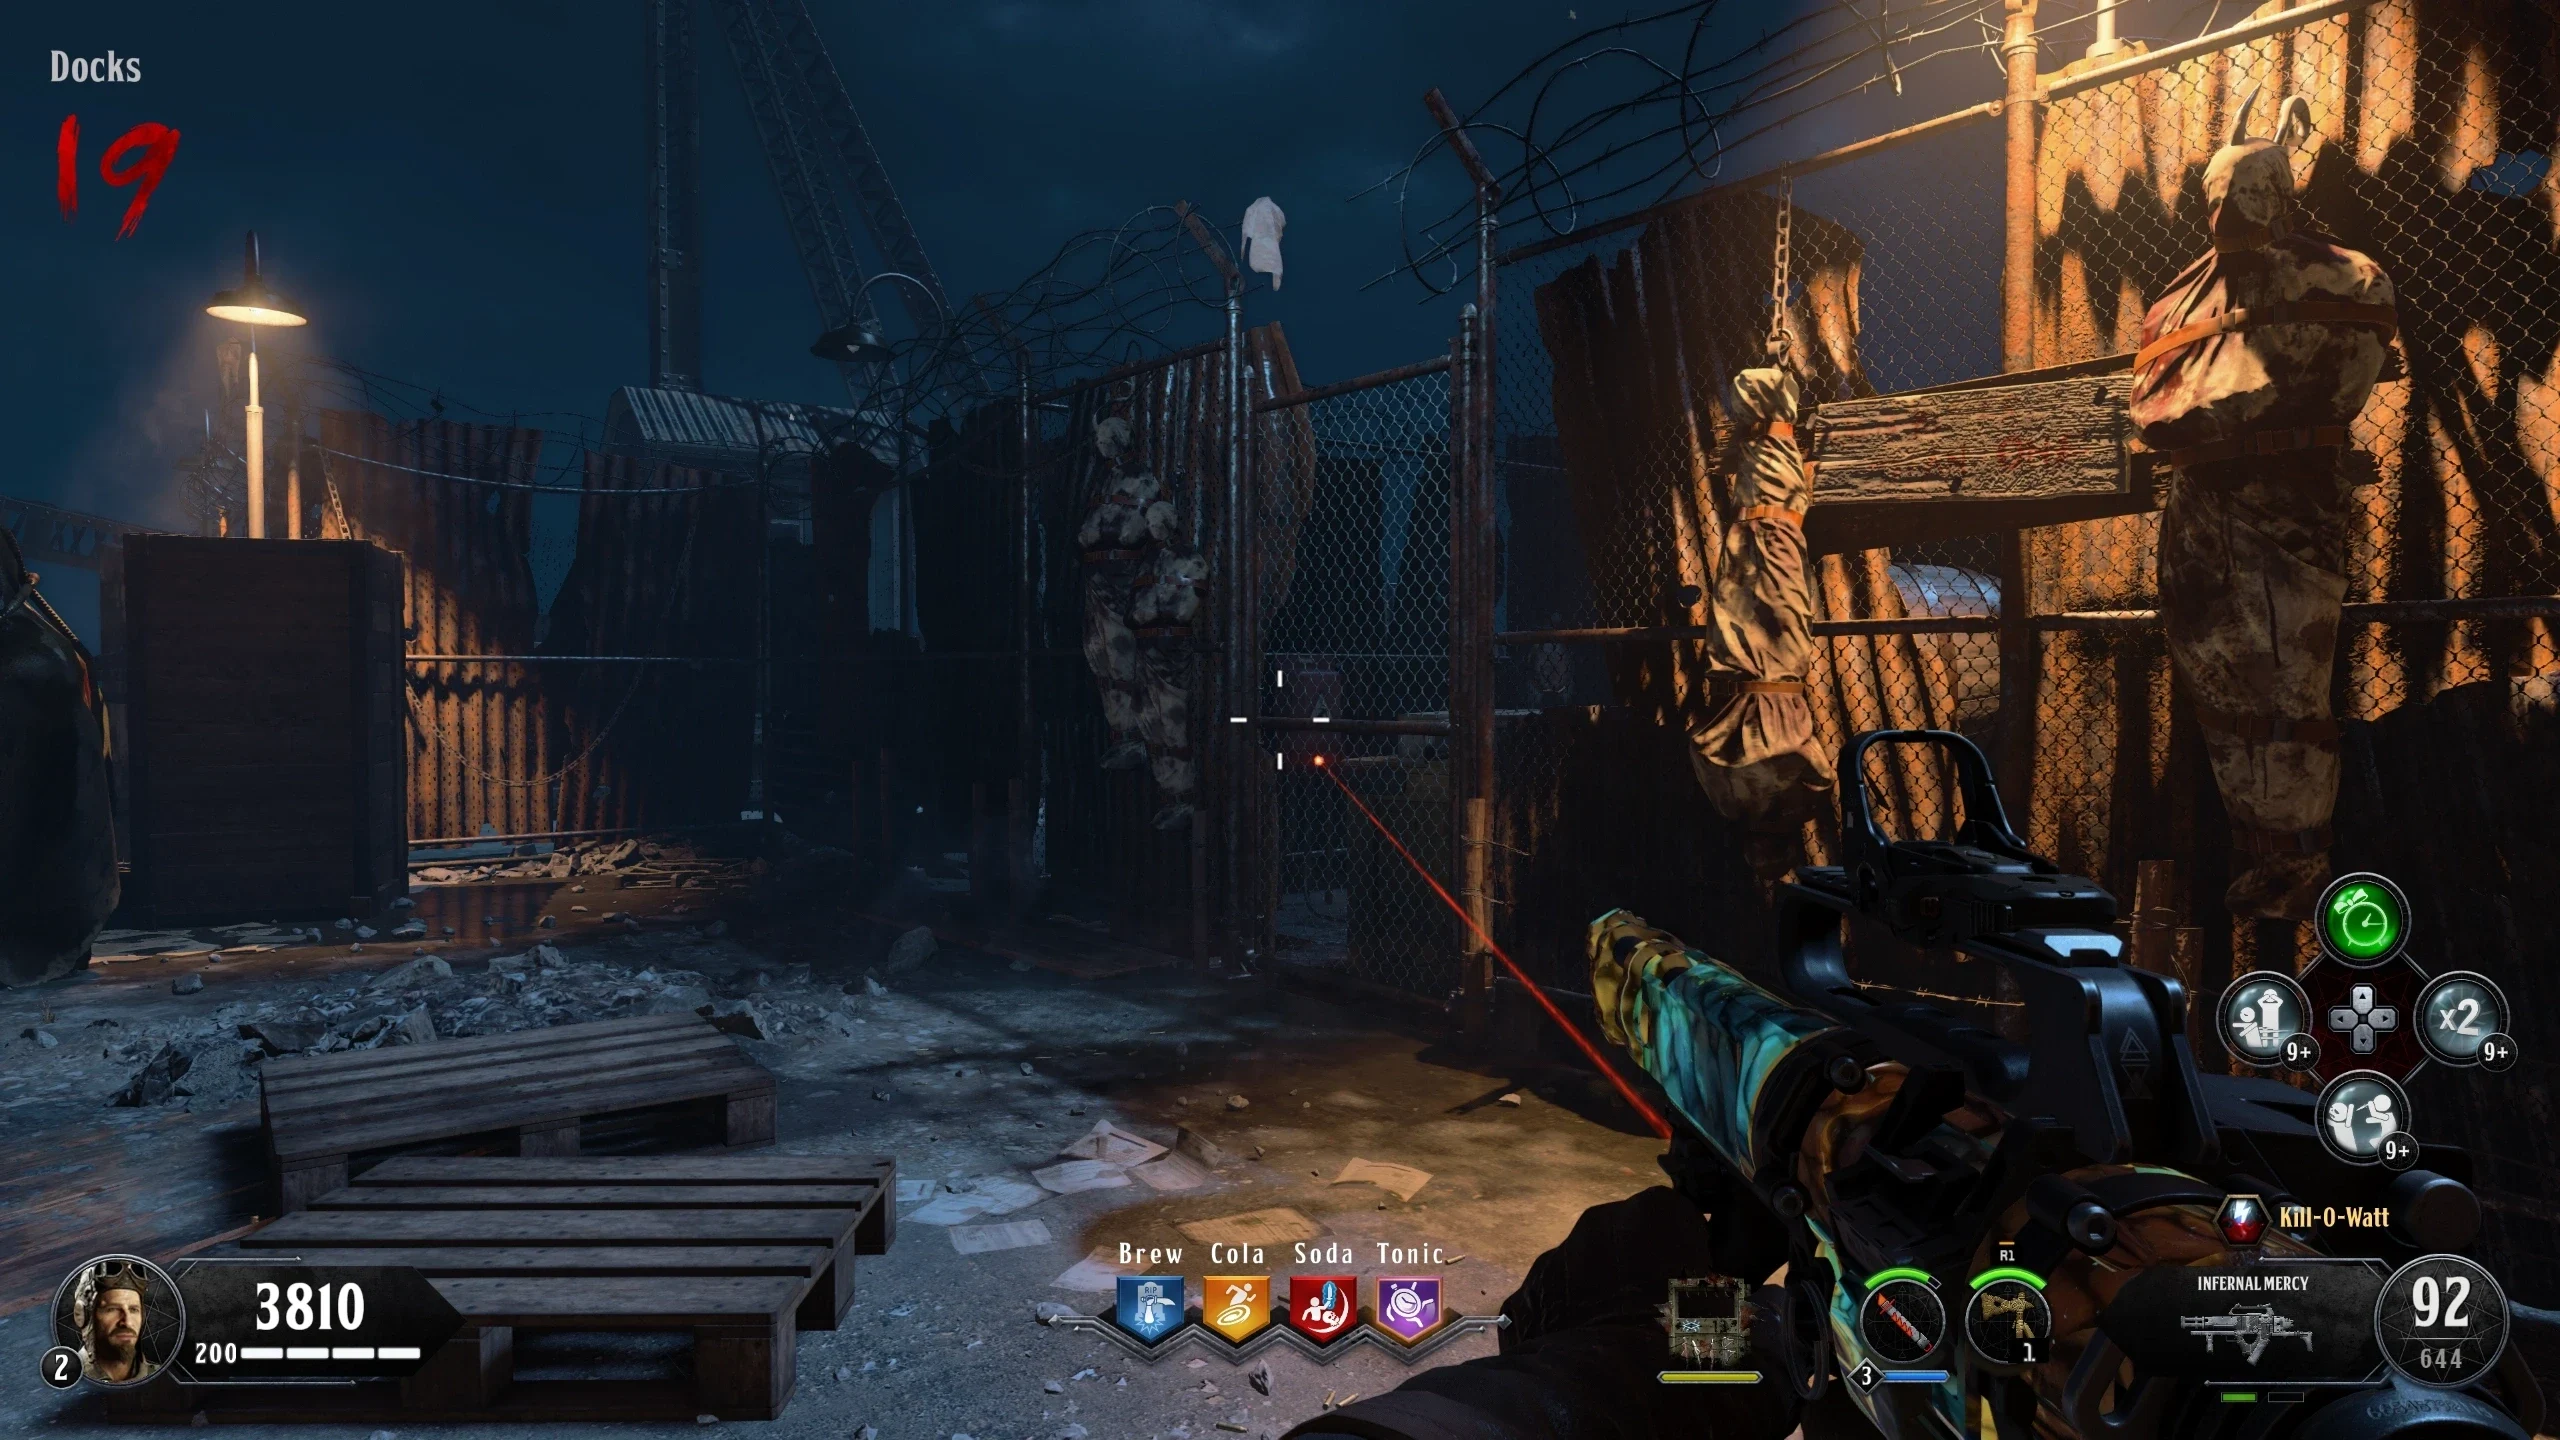
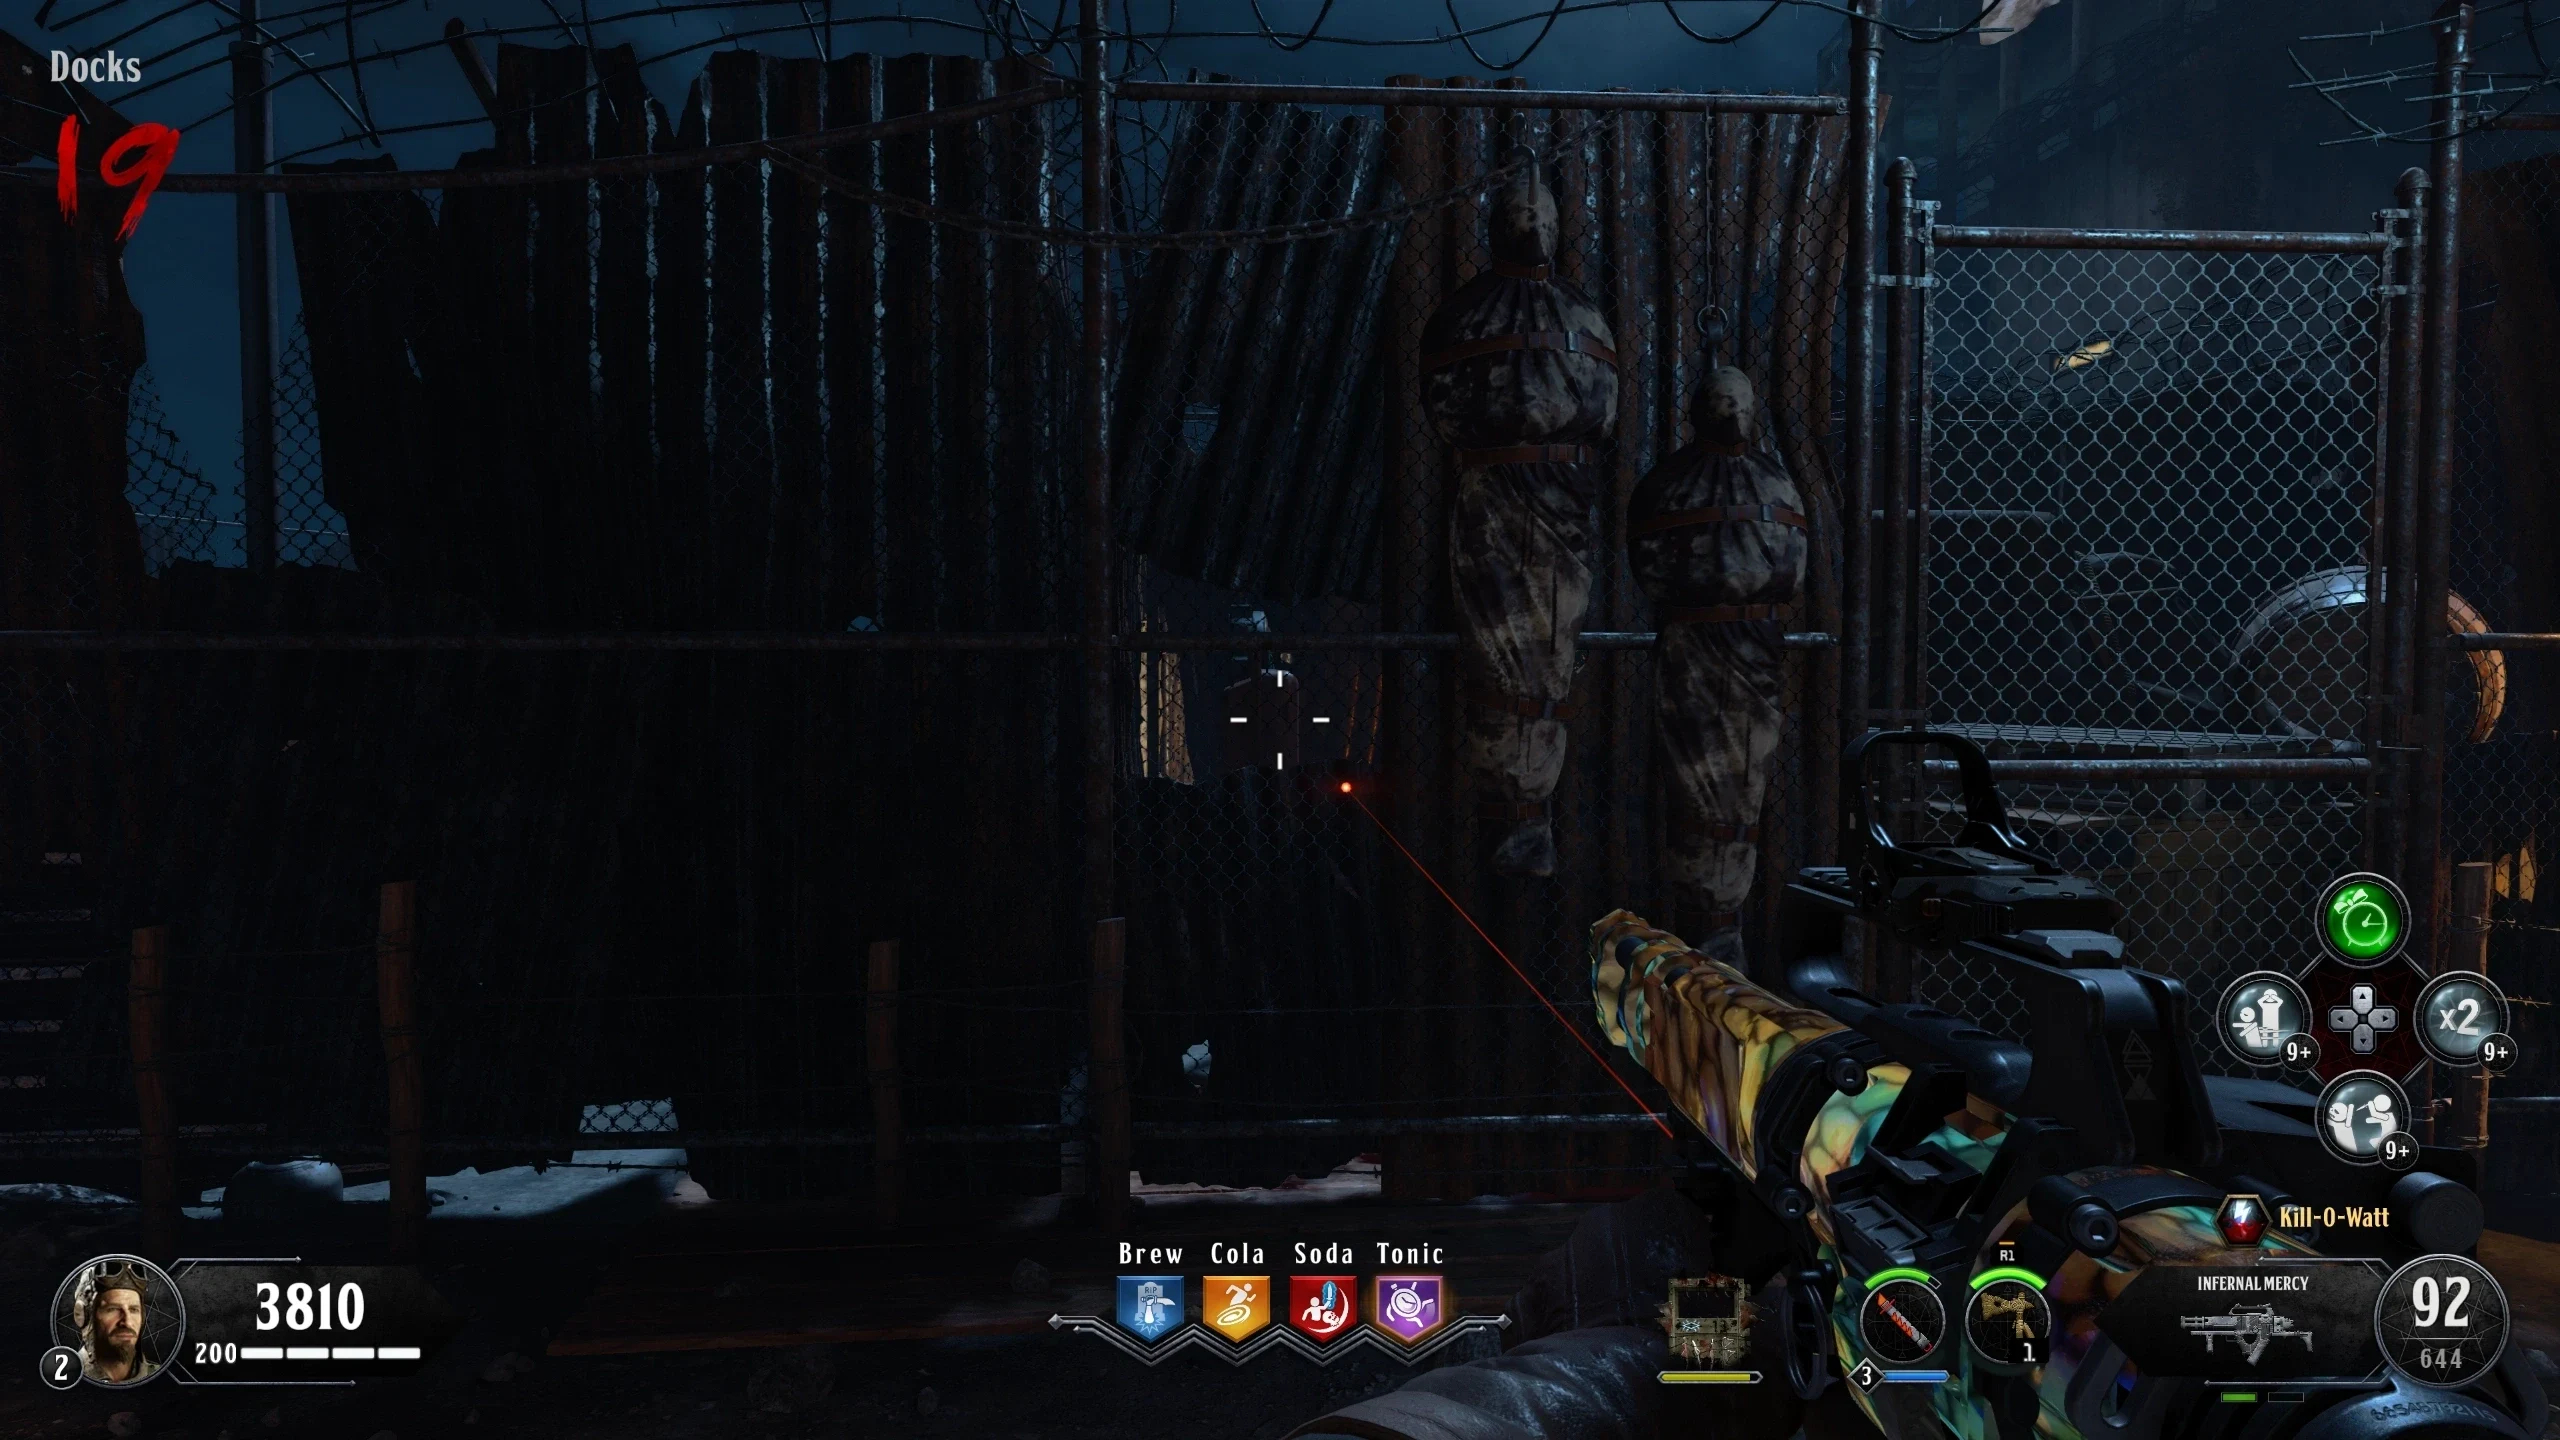
- Docks Bridge - Above the Cola Perk
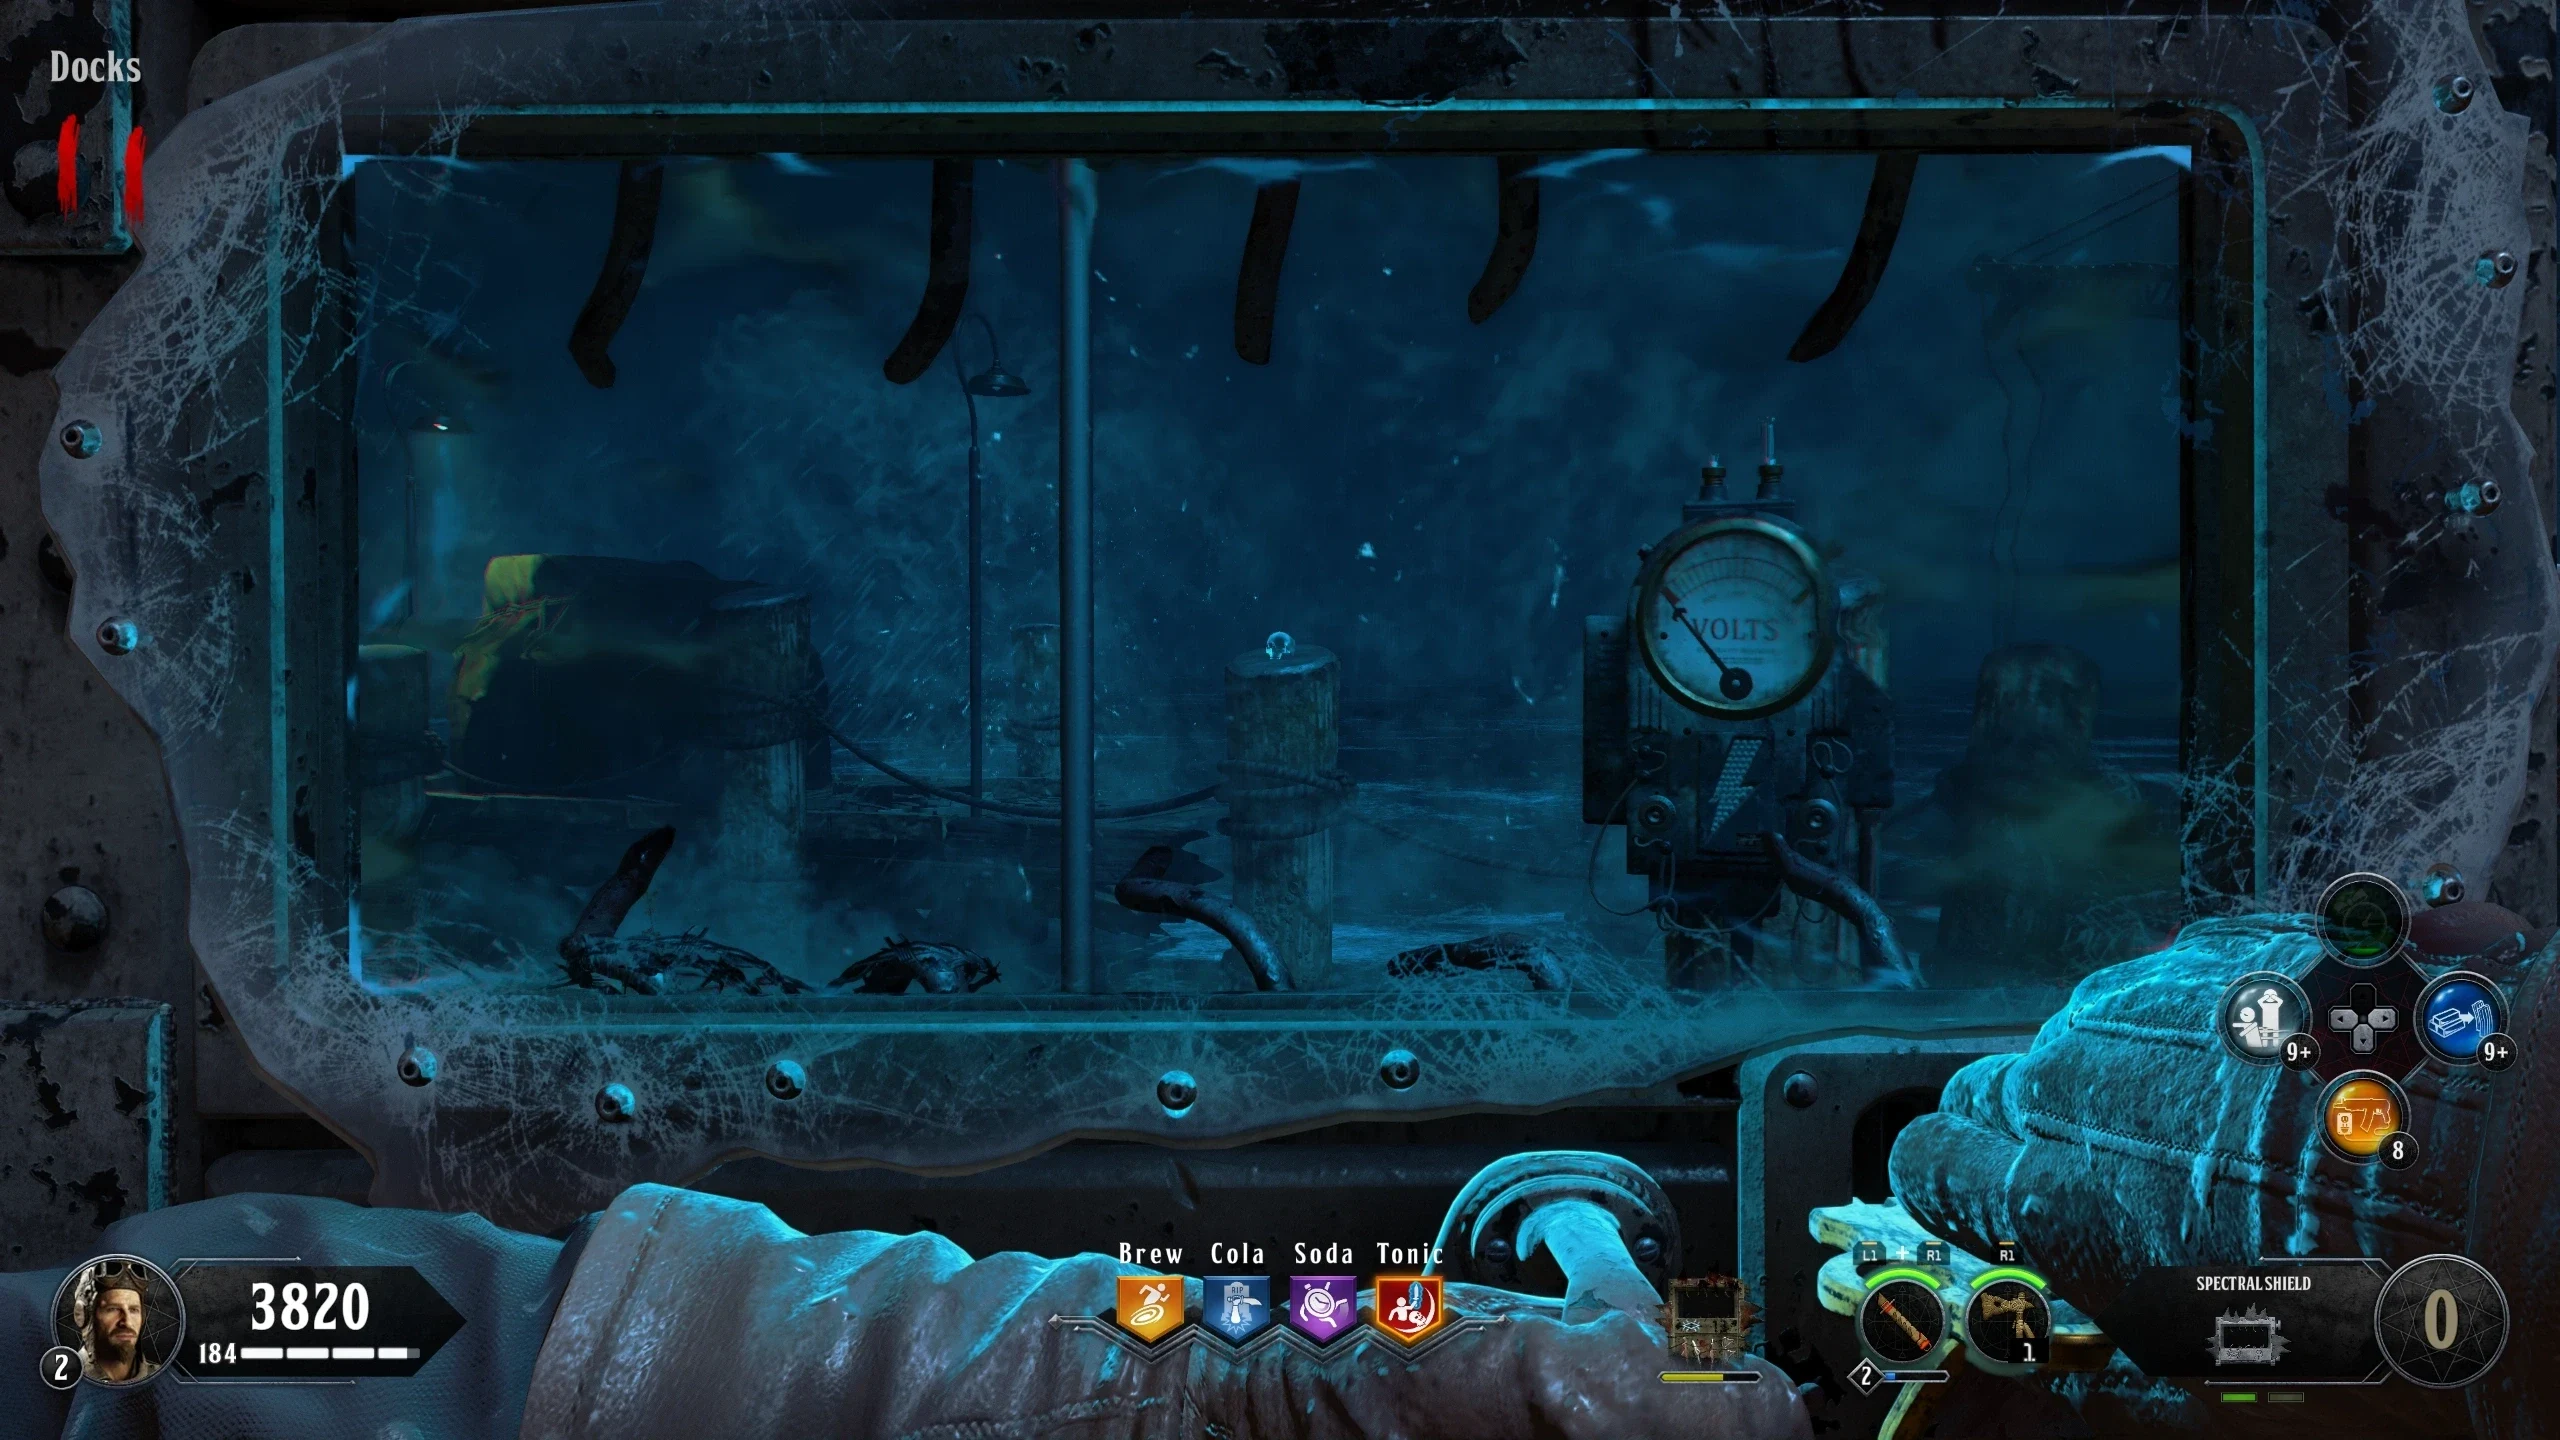
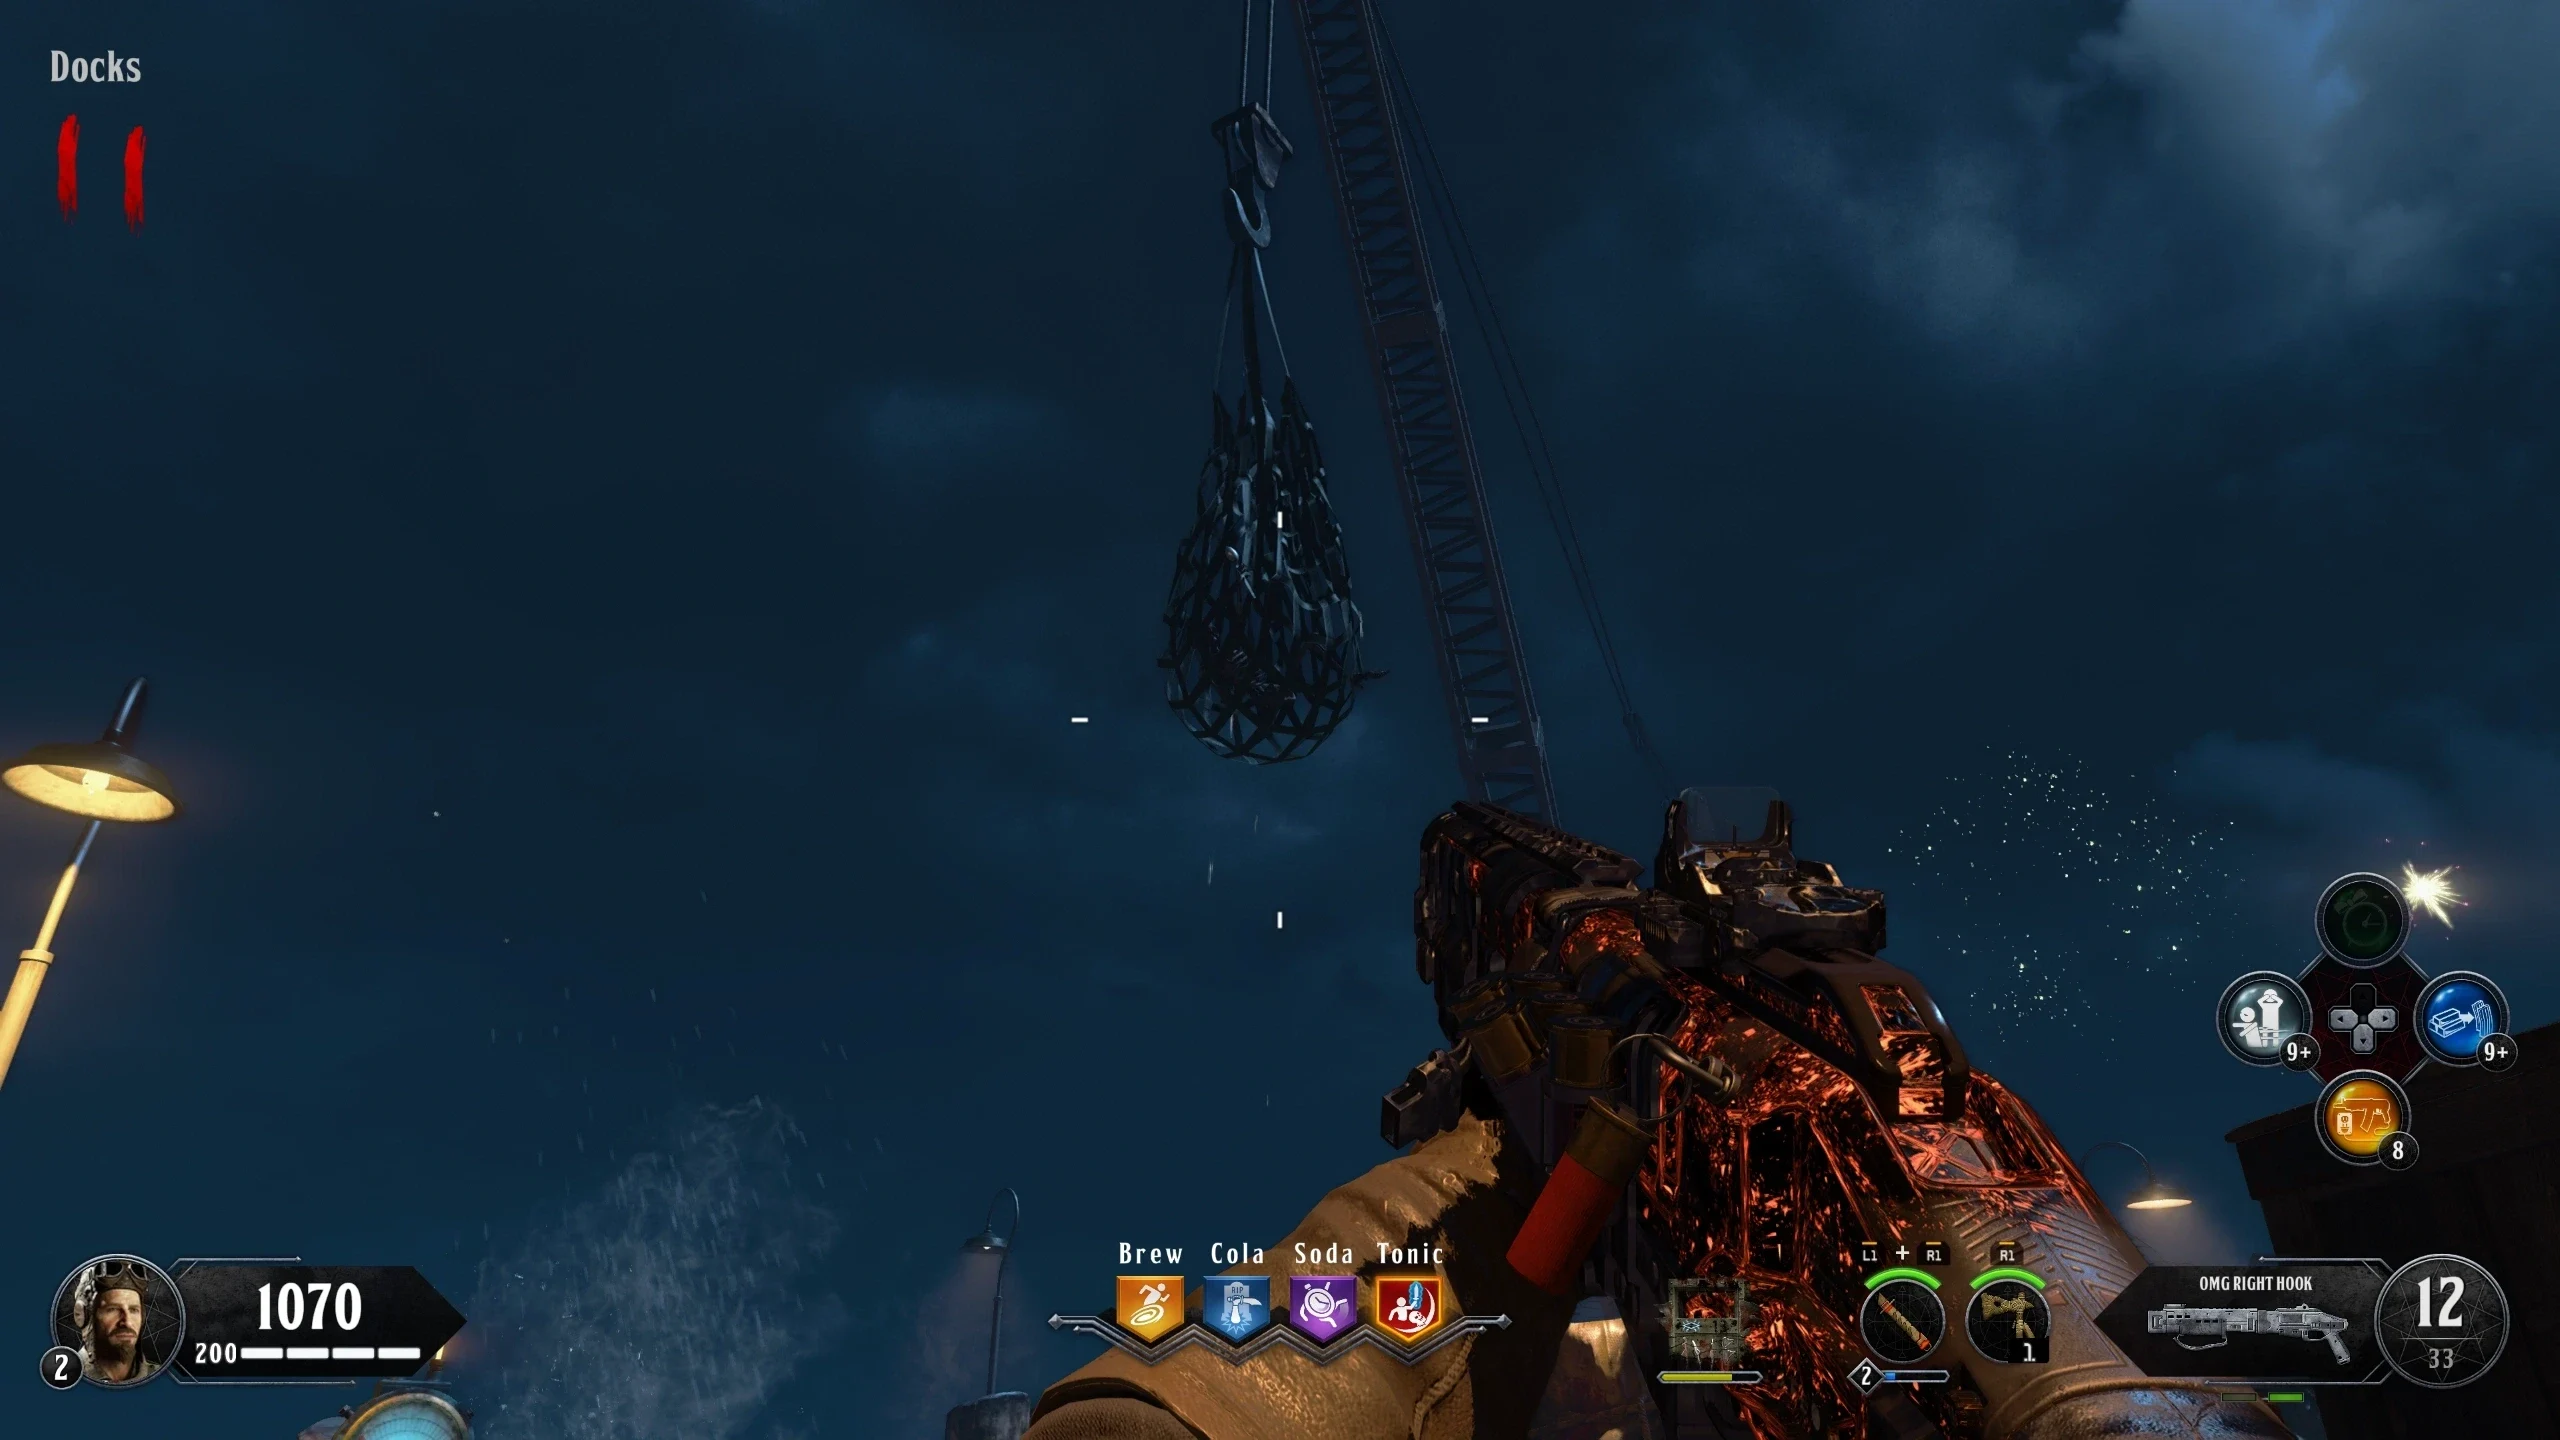
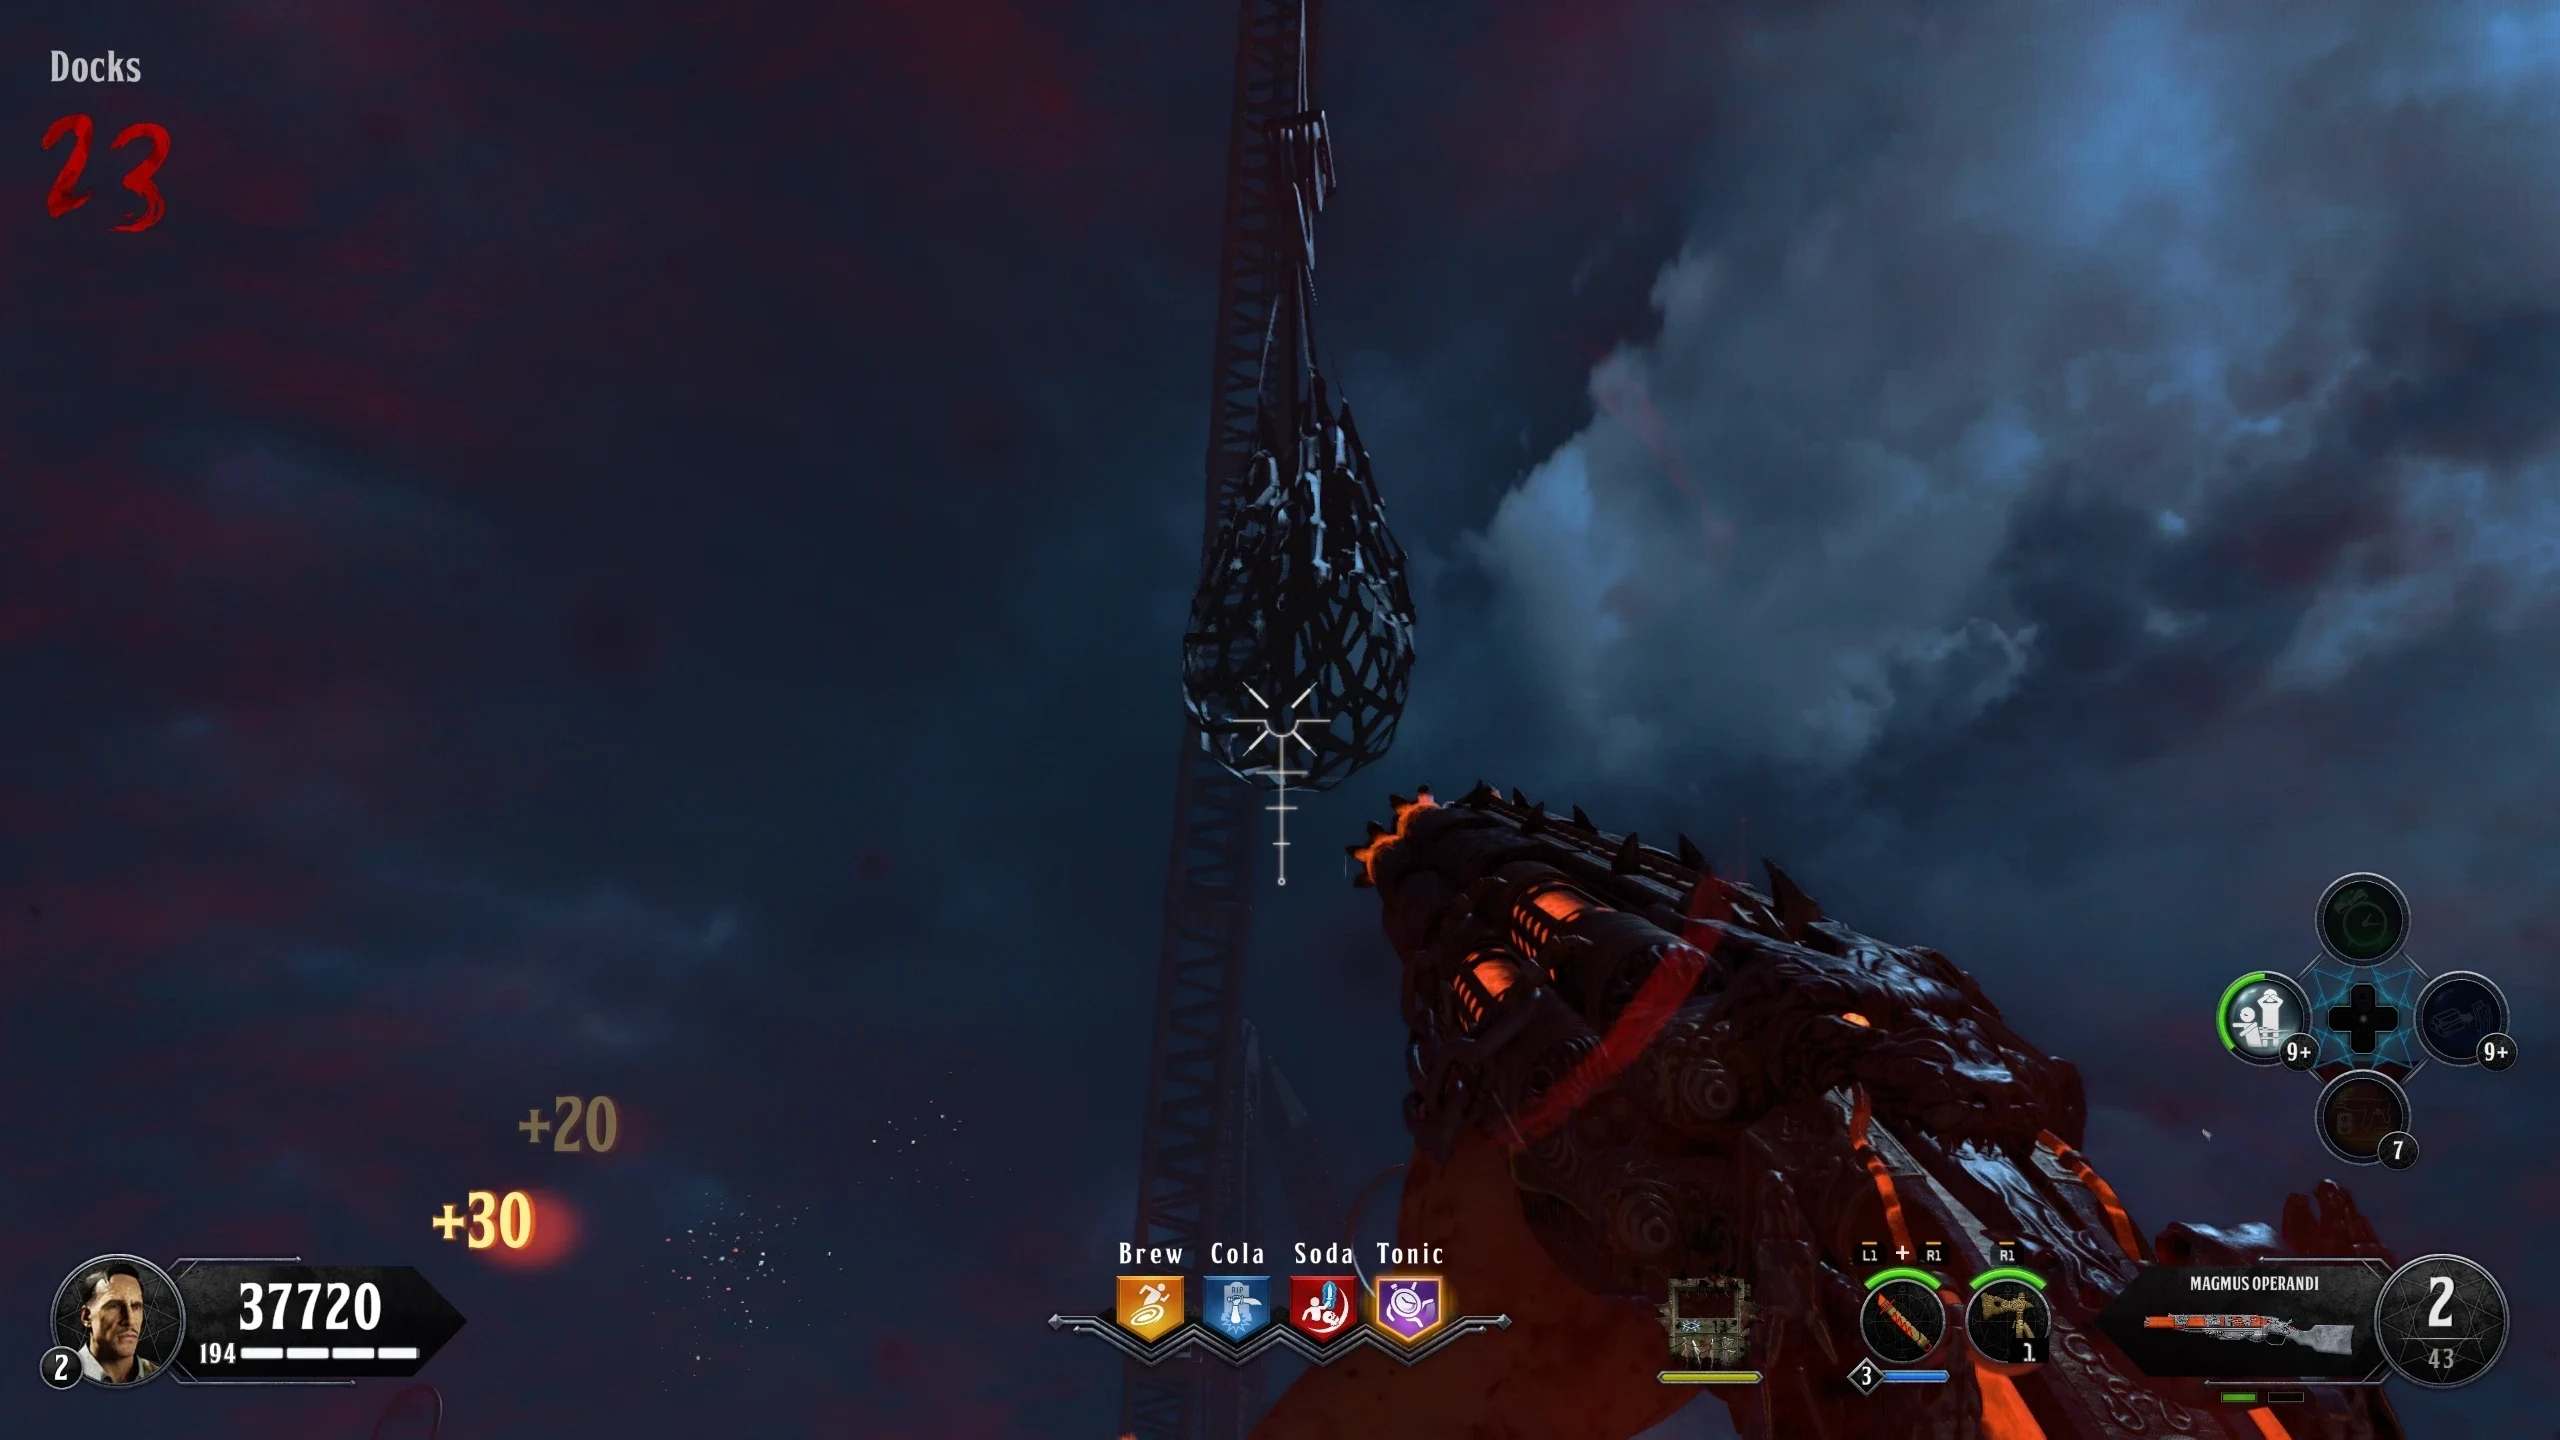
- Docks - Above Mystery Box on Pole
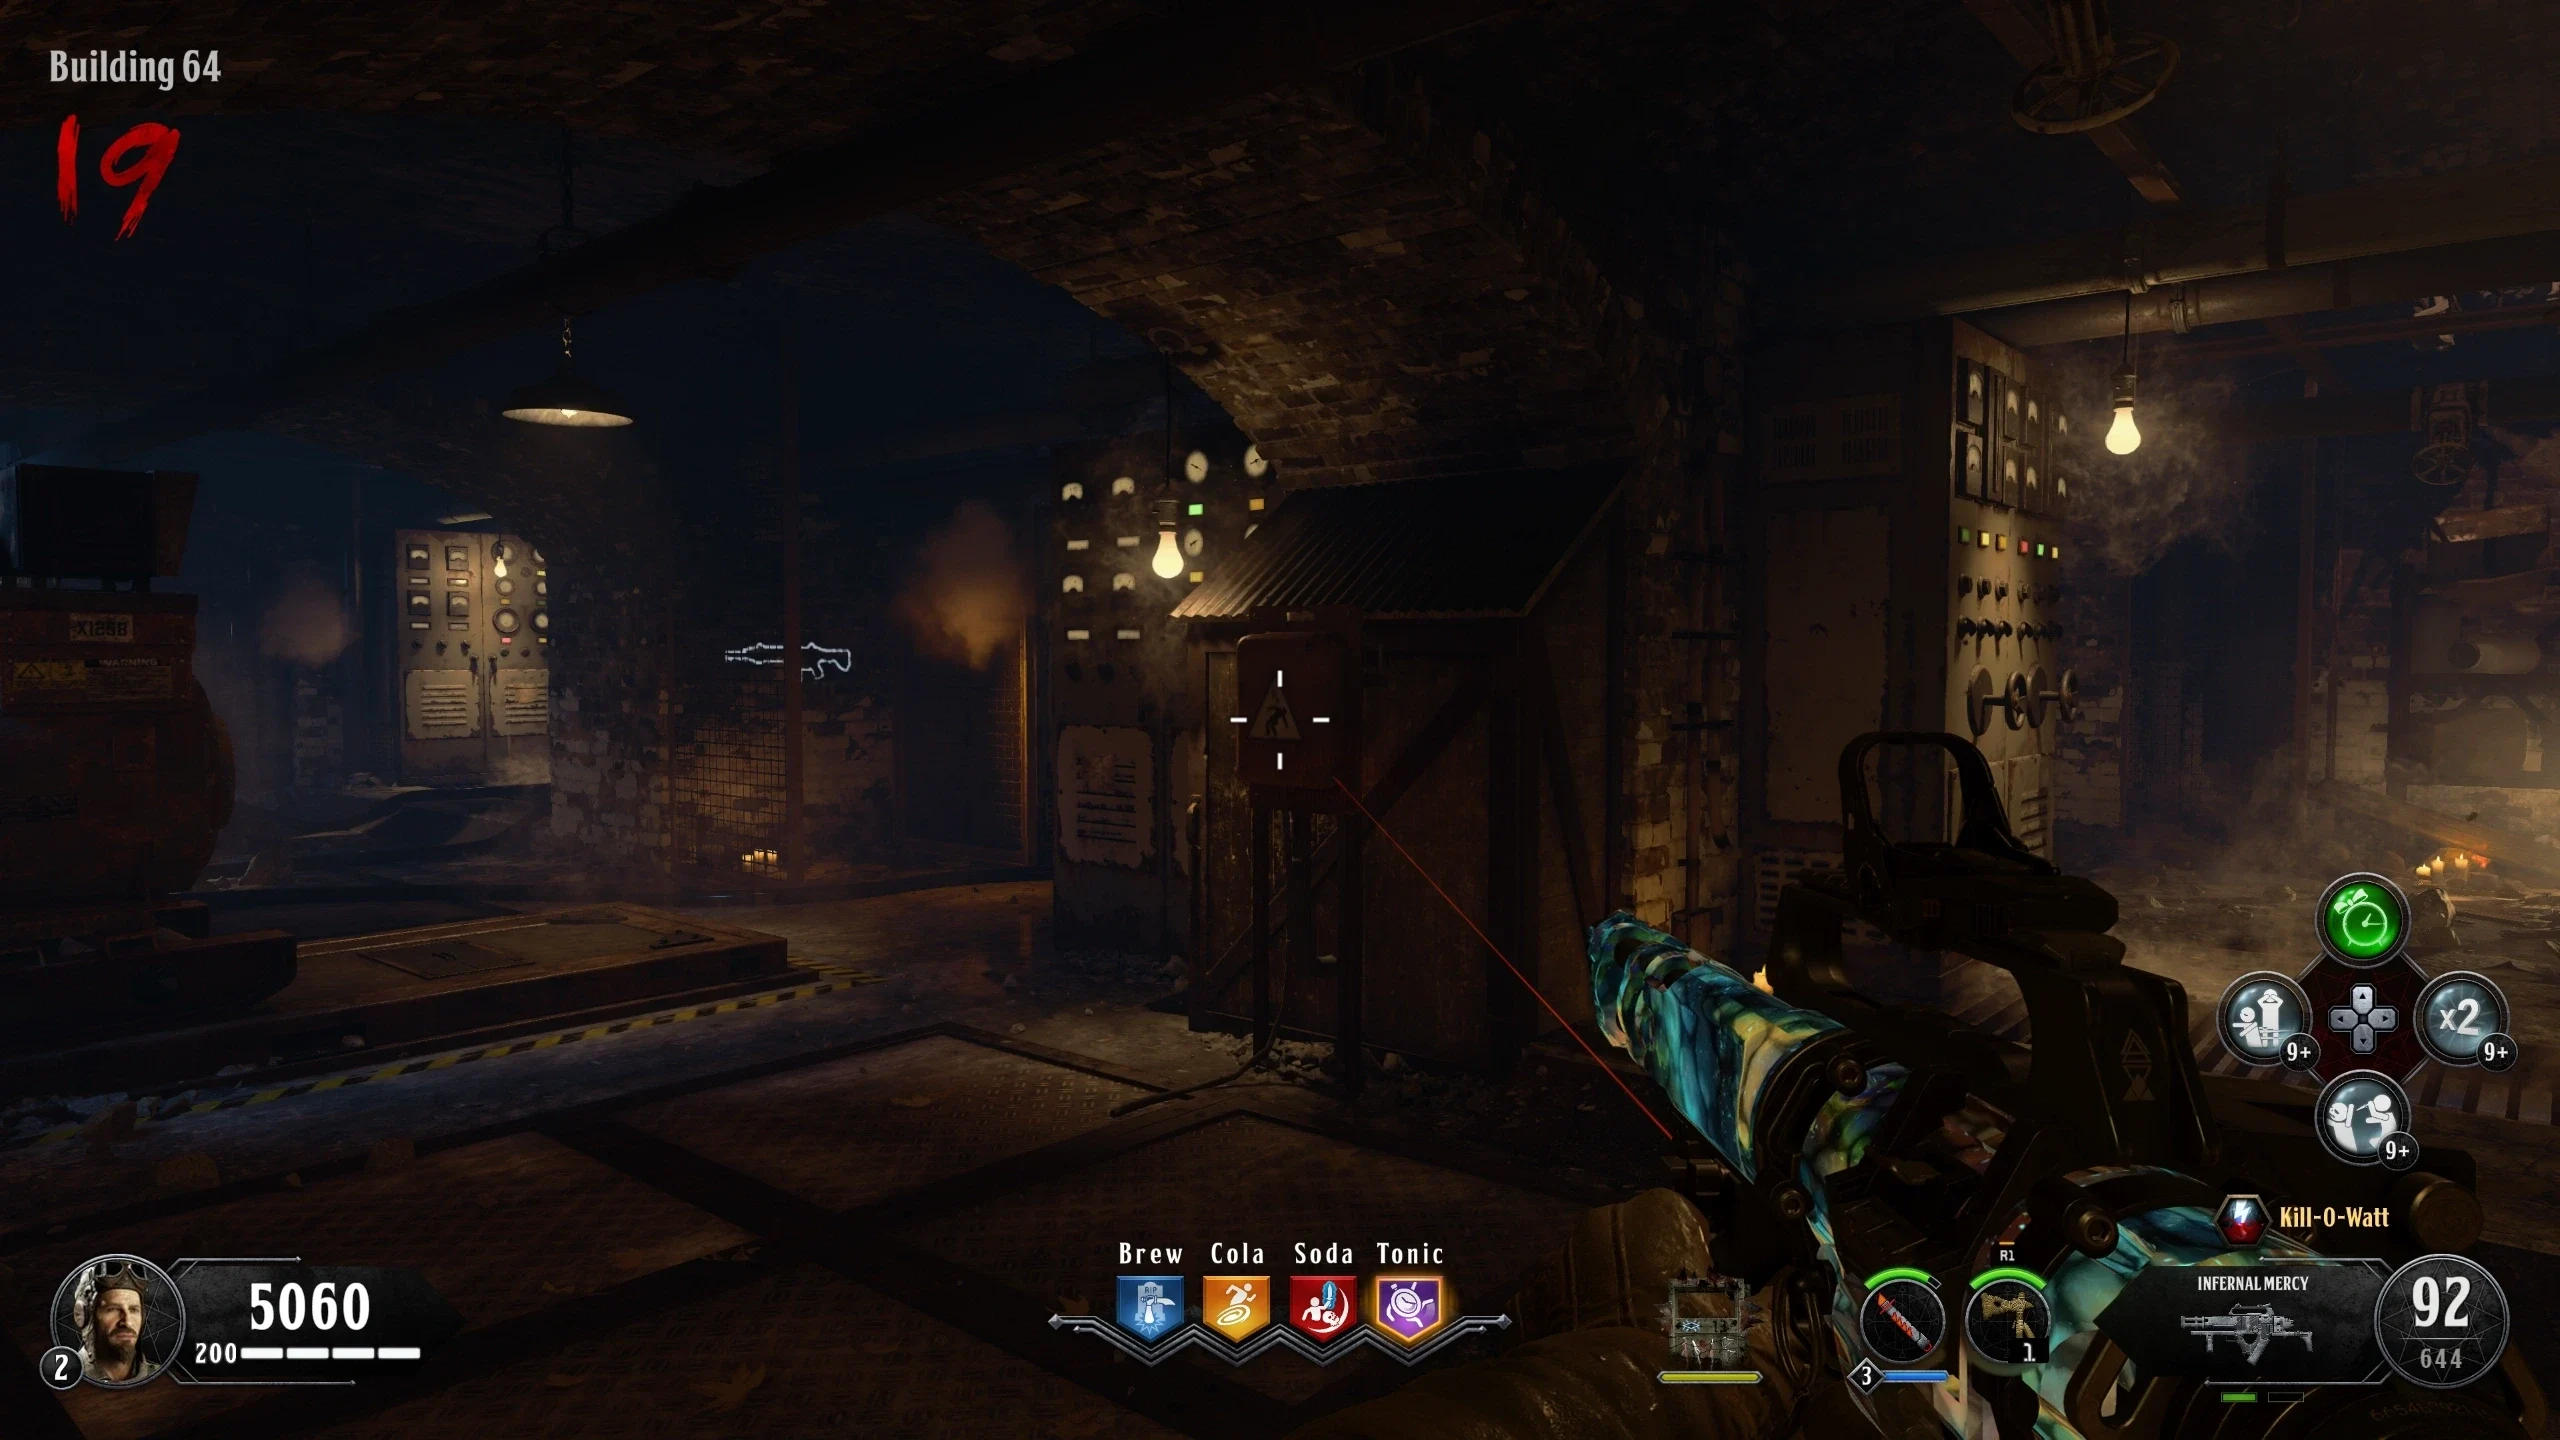
- Building 64 - On a machine near the ICR-7 wallbuy
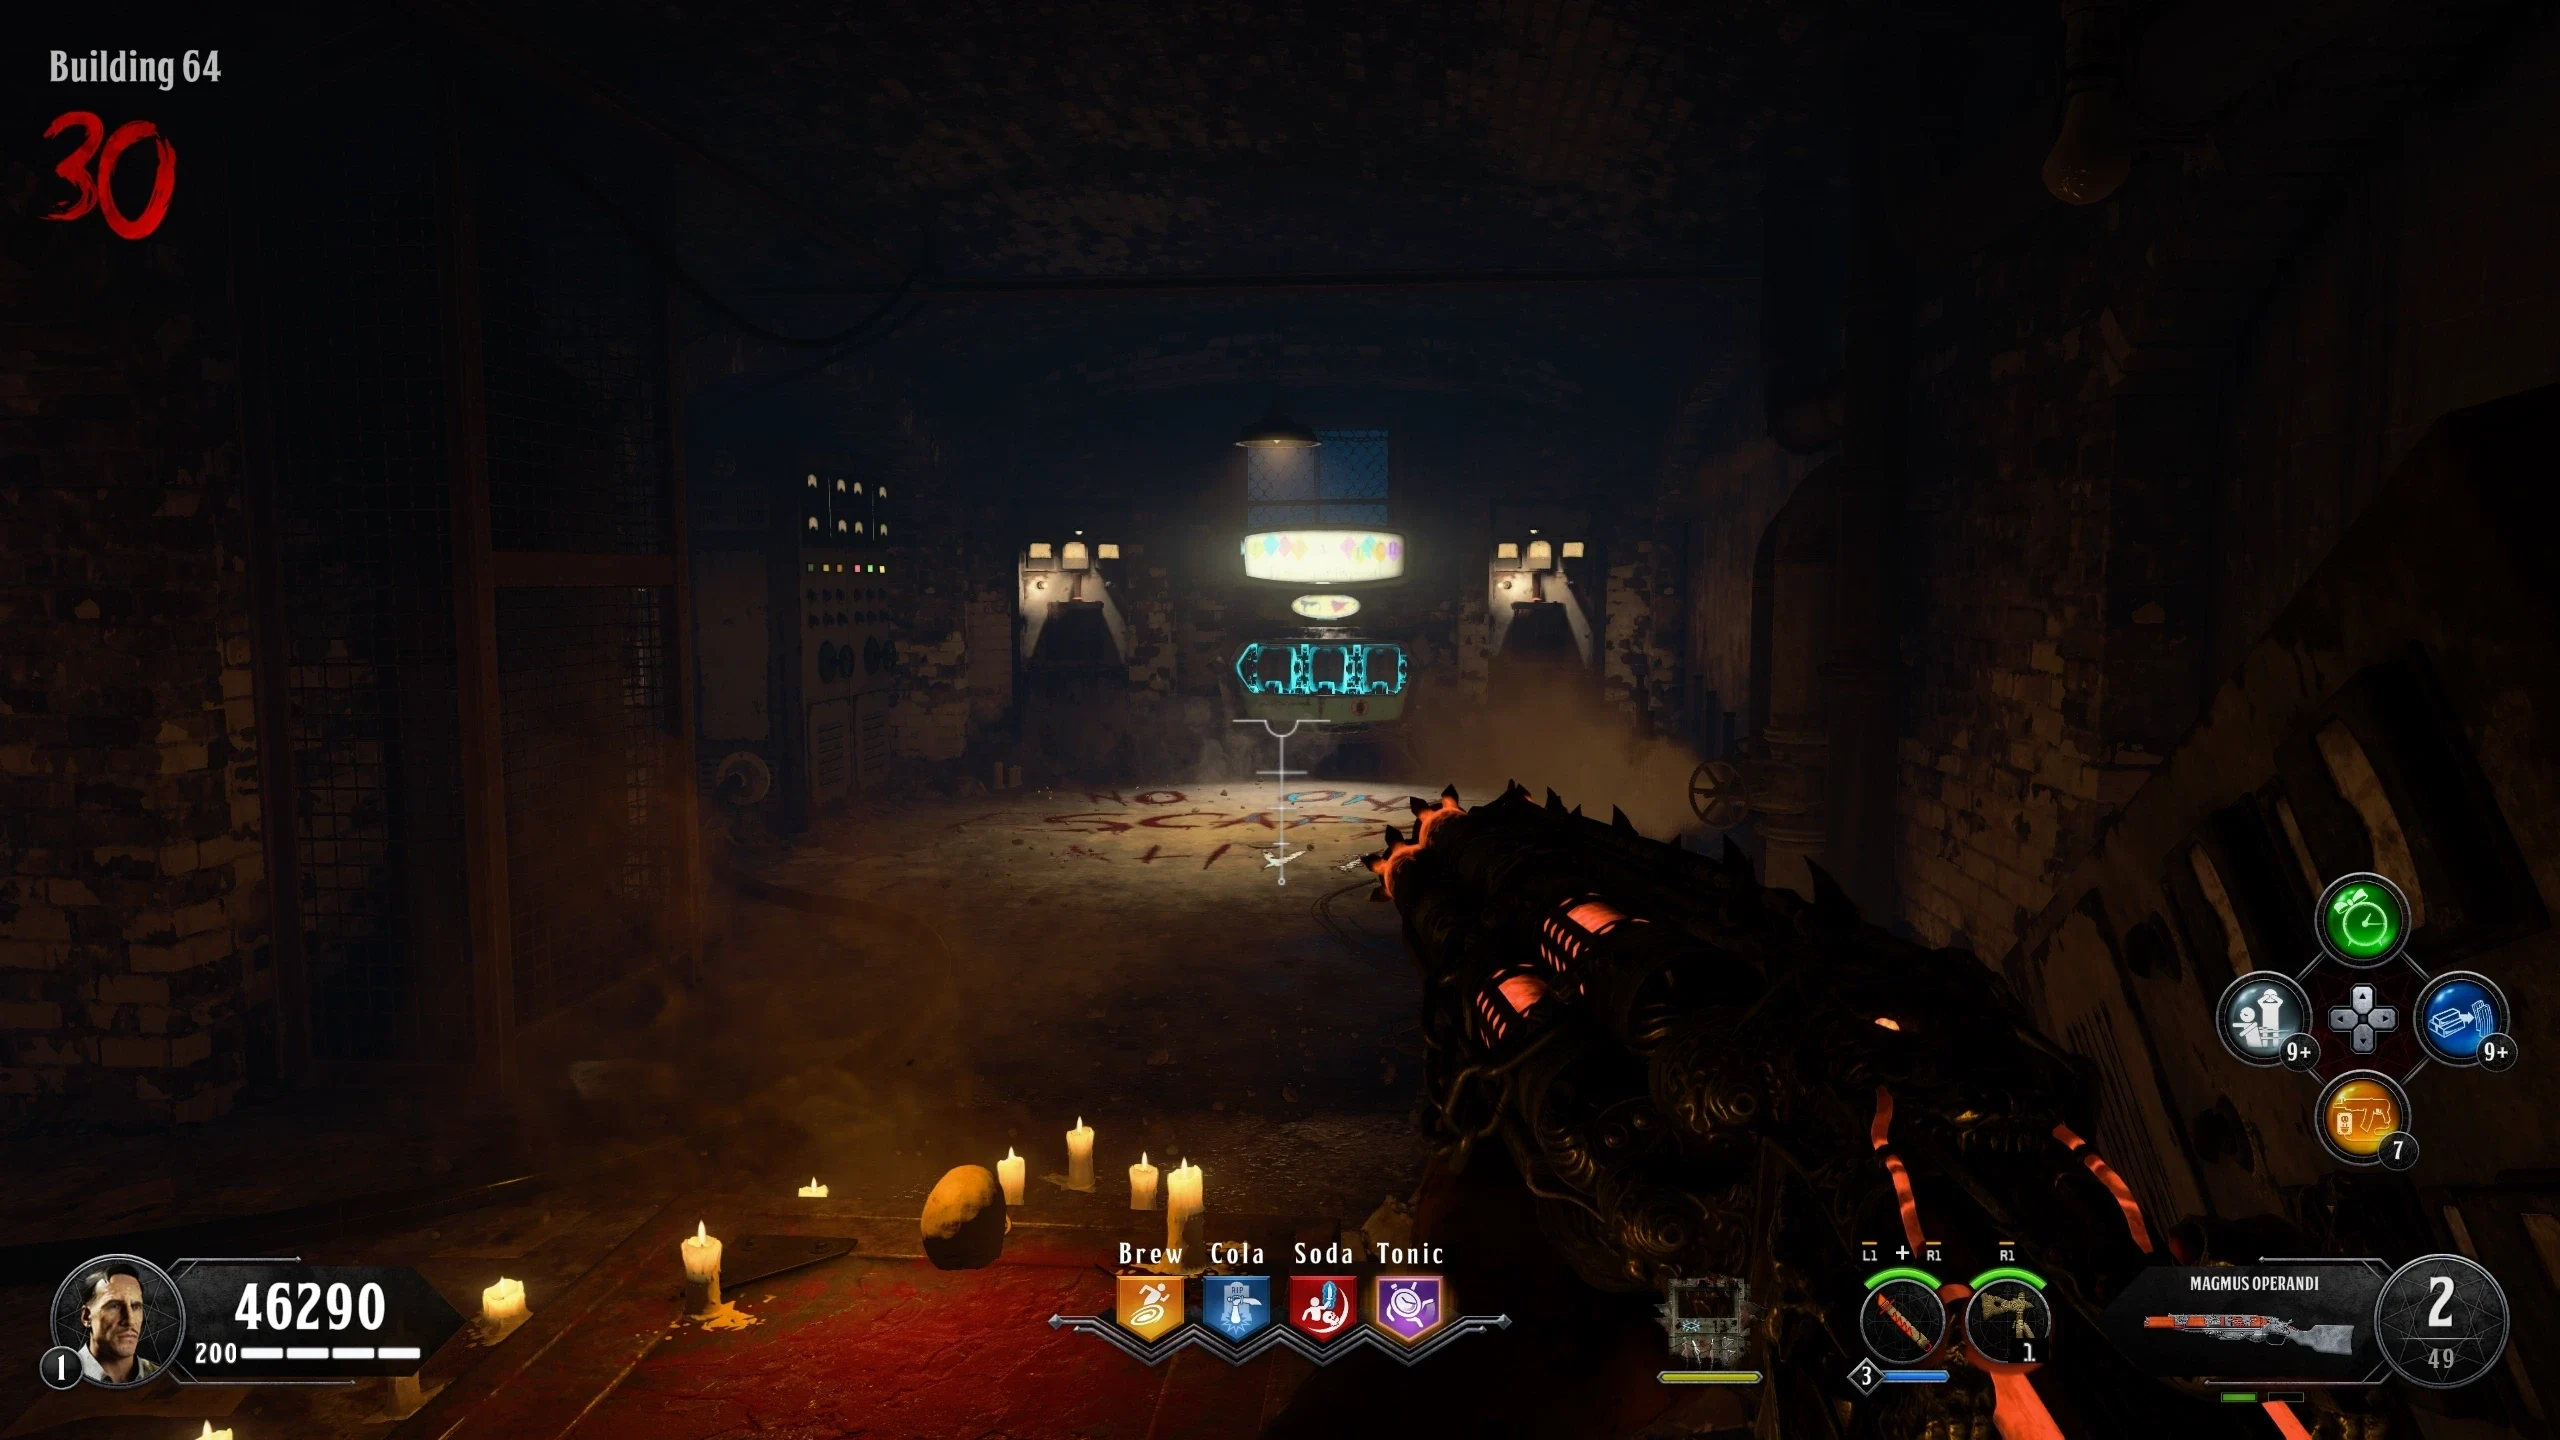
- Building 64 - Above the Pack-a-Punch location
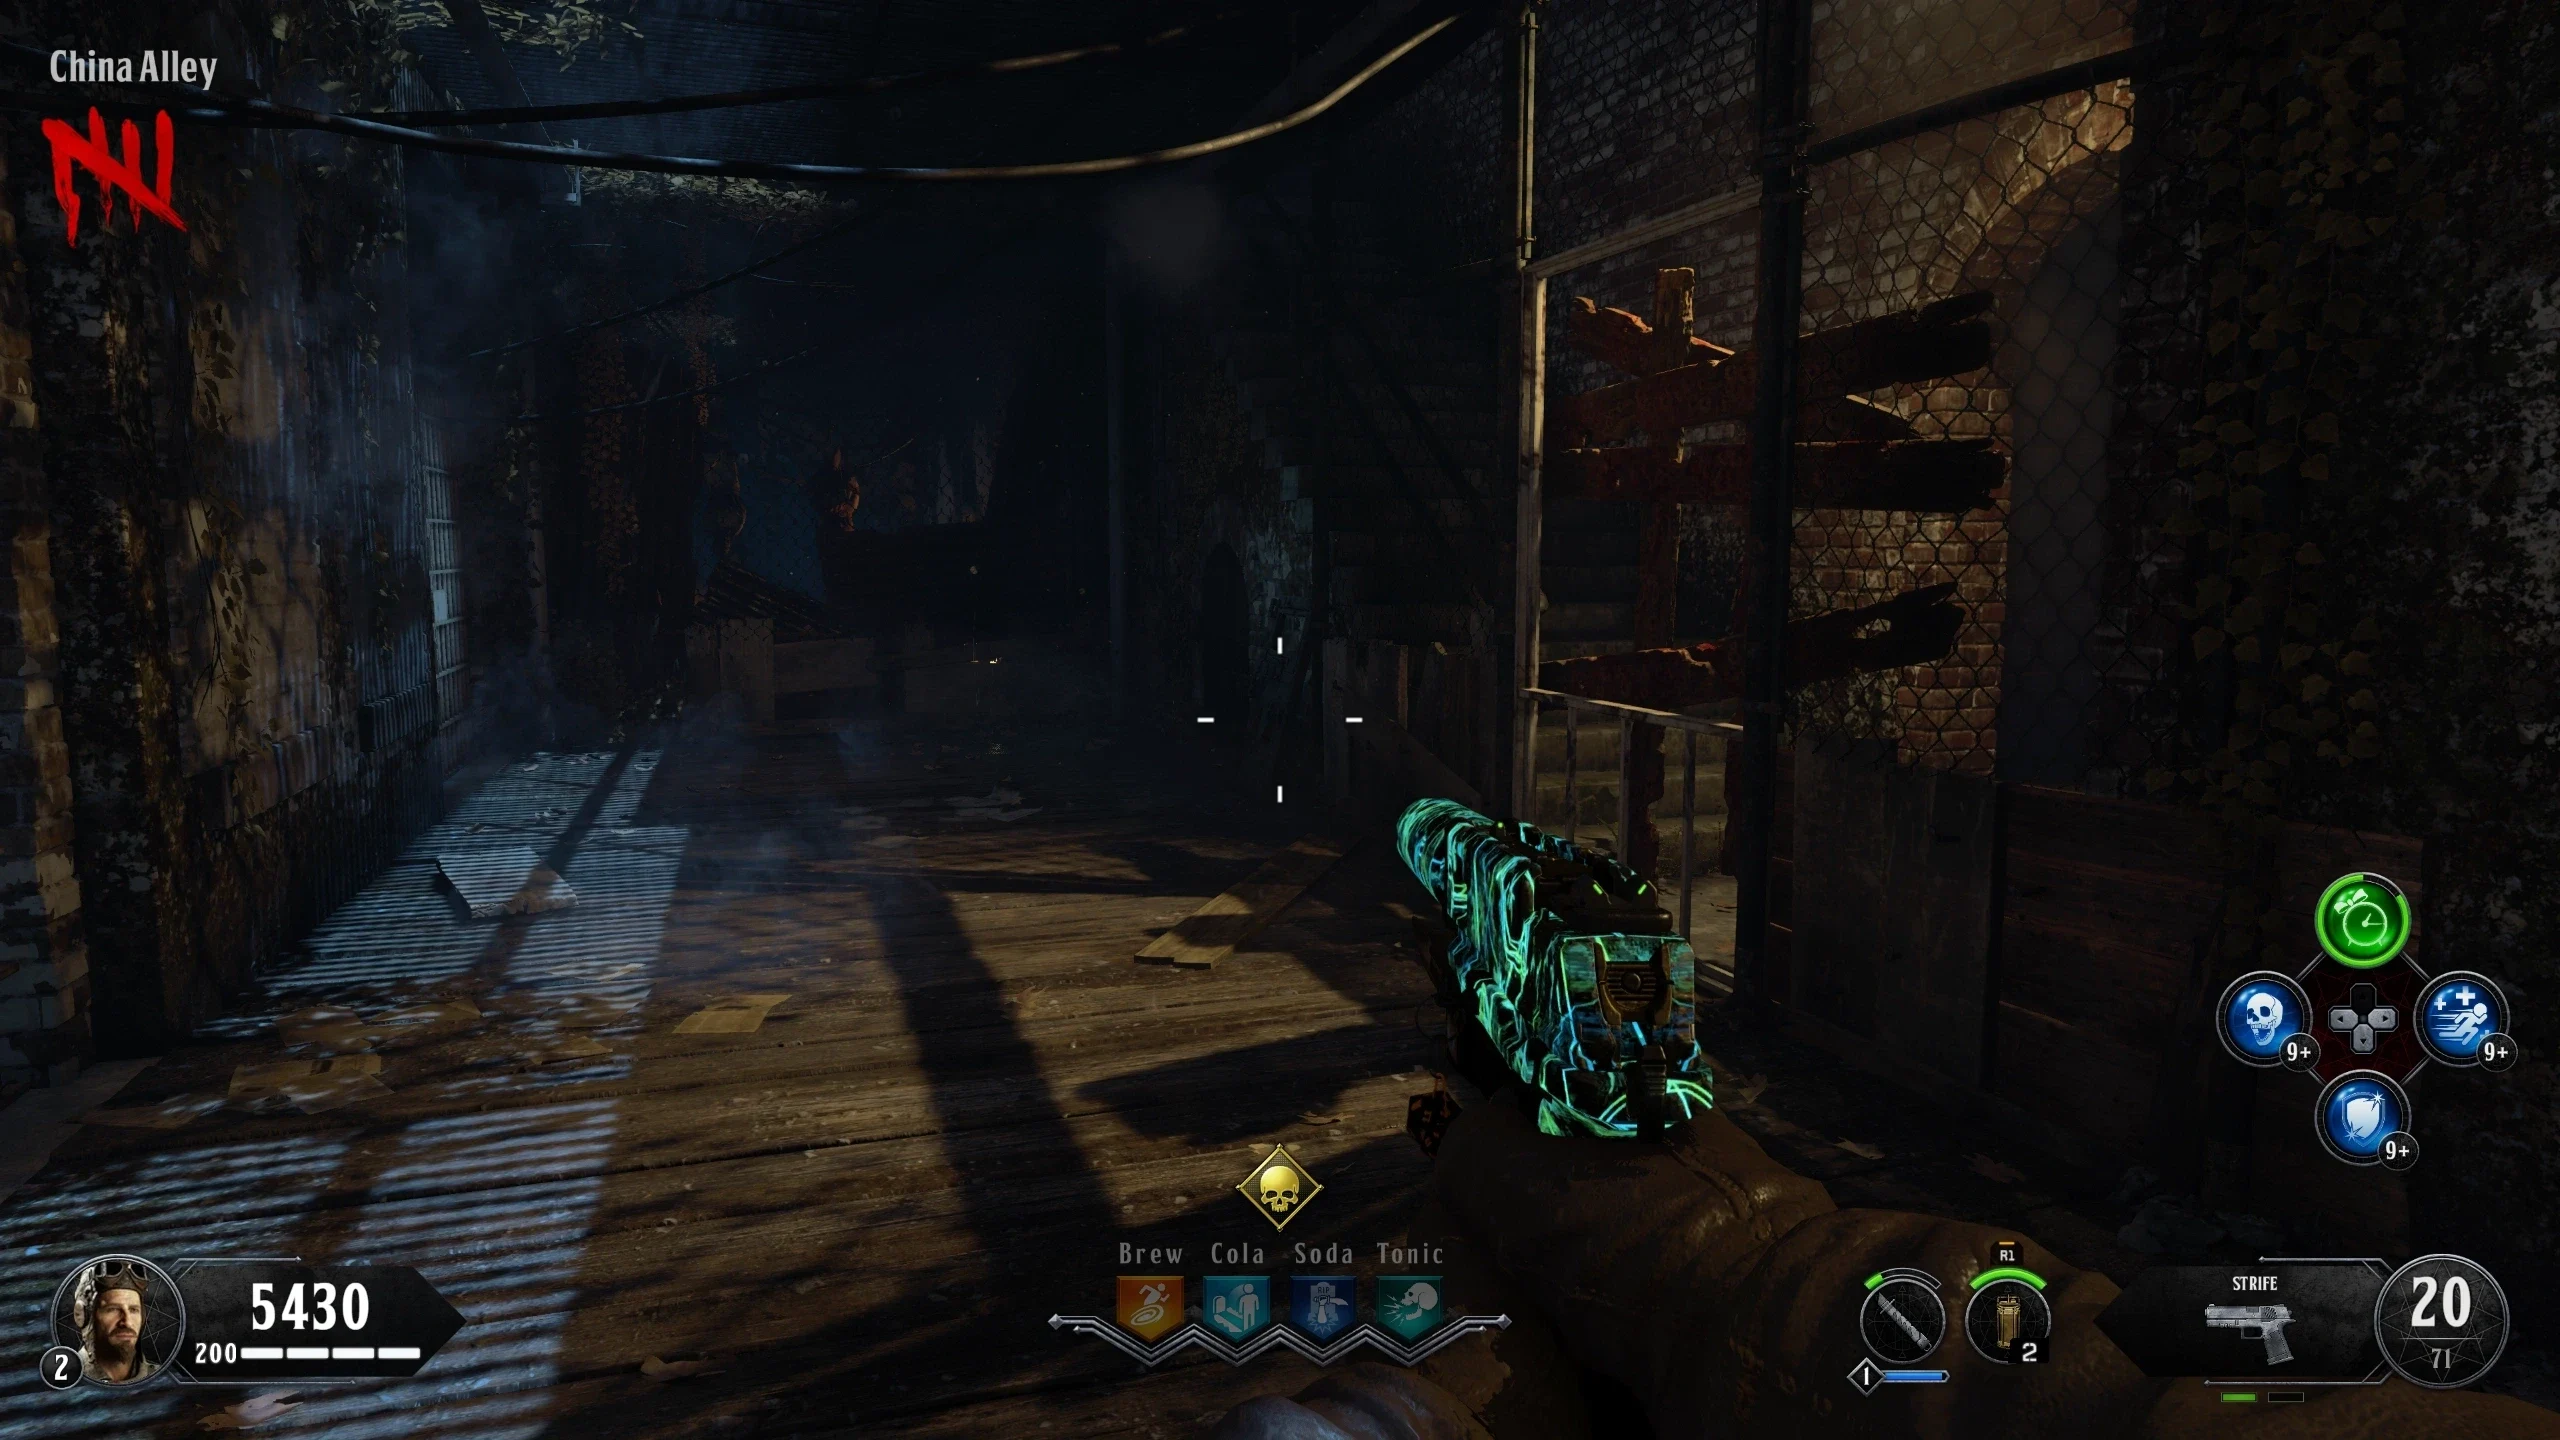
- China Alley - On the stairs outside the map
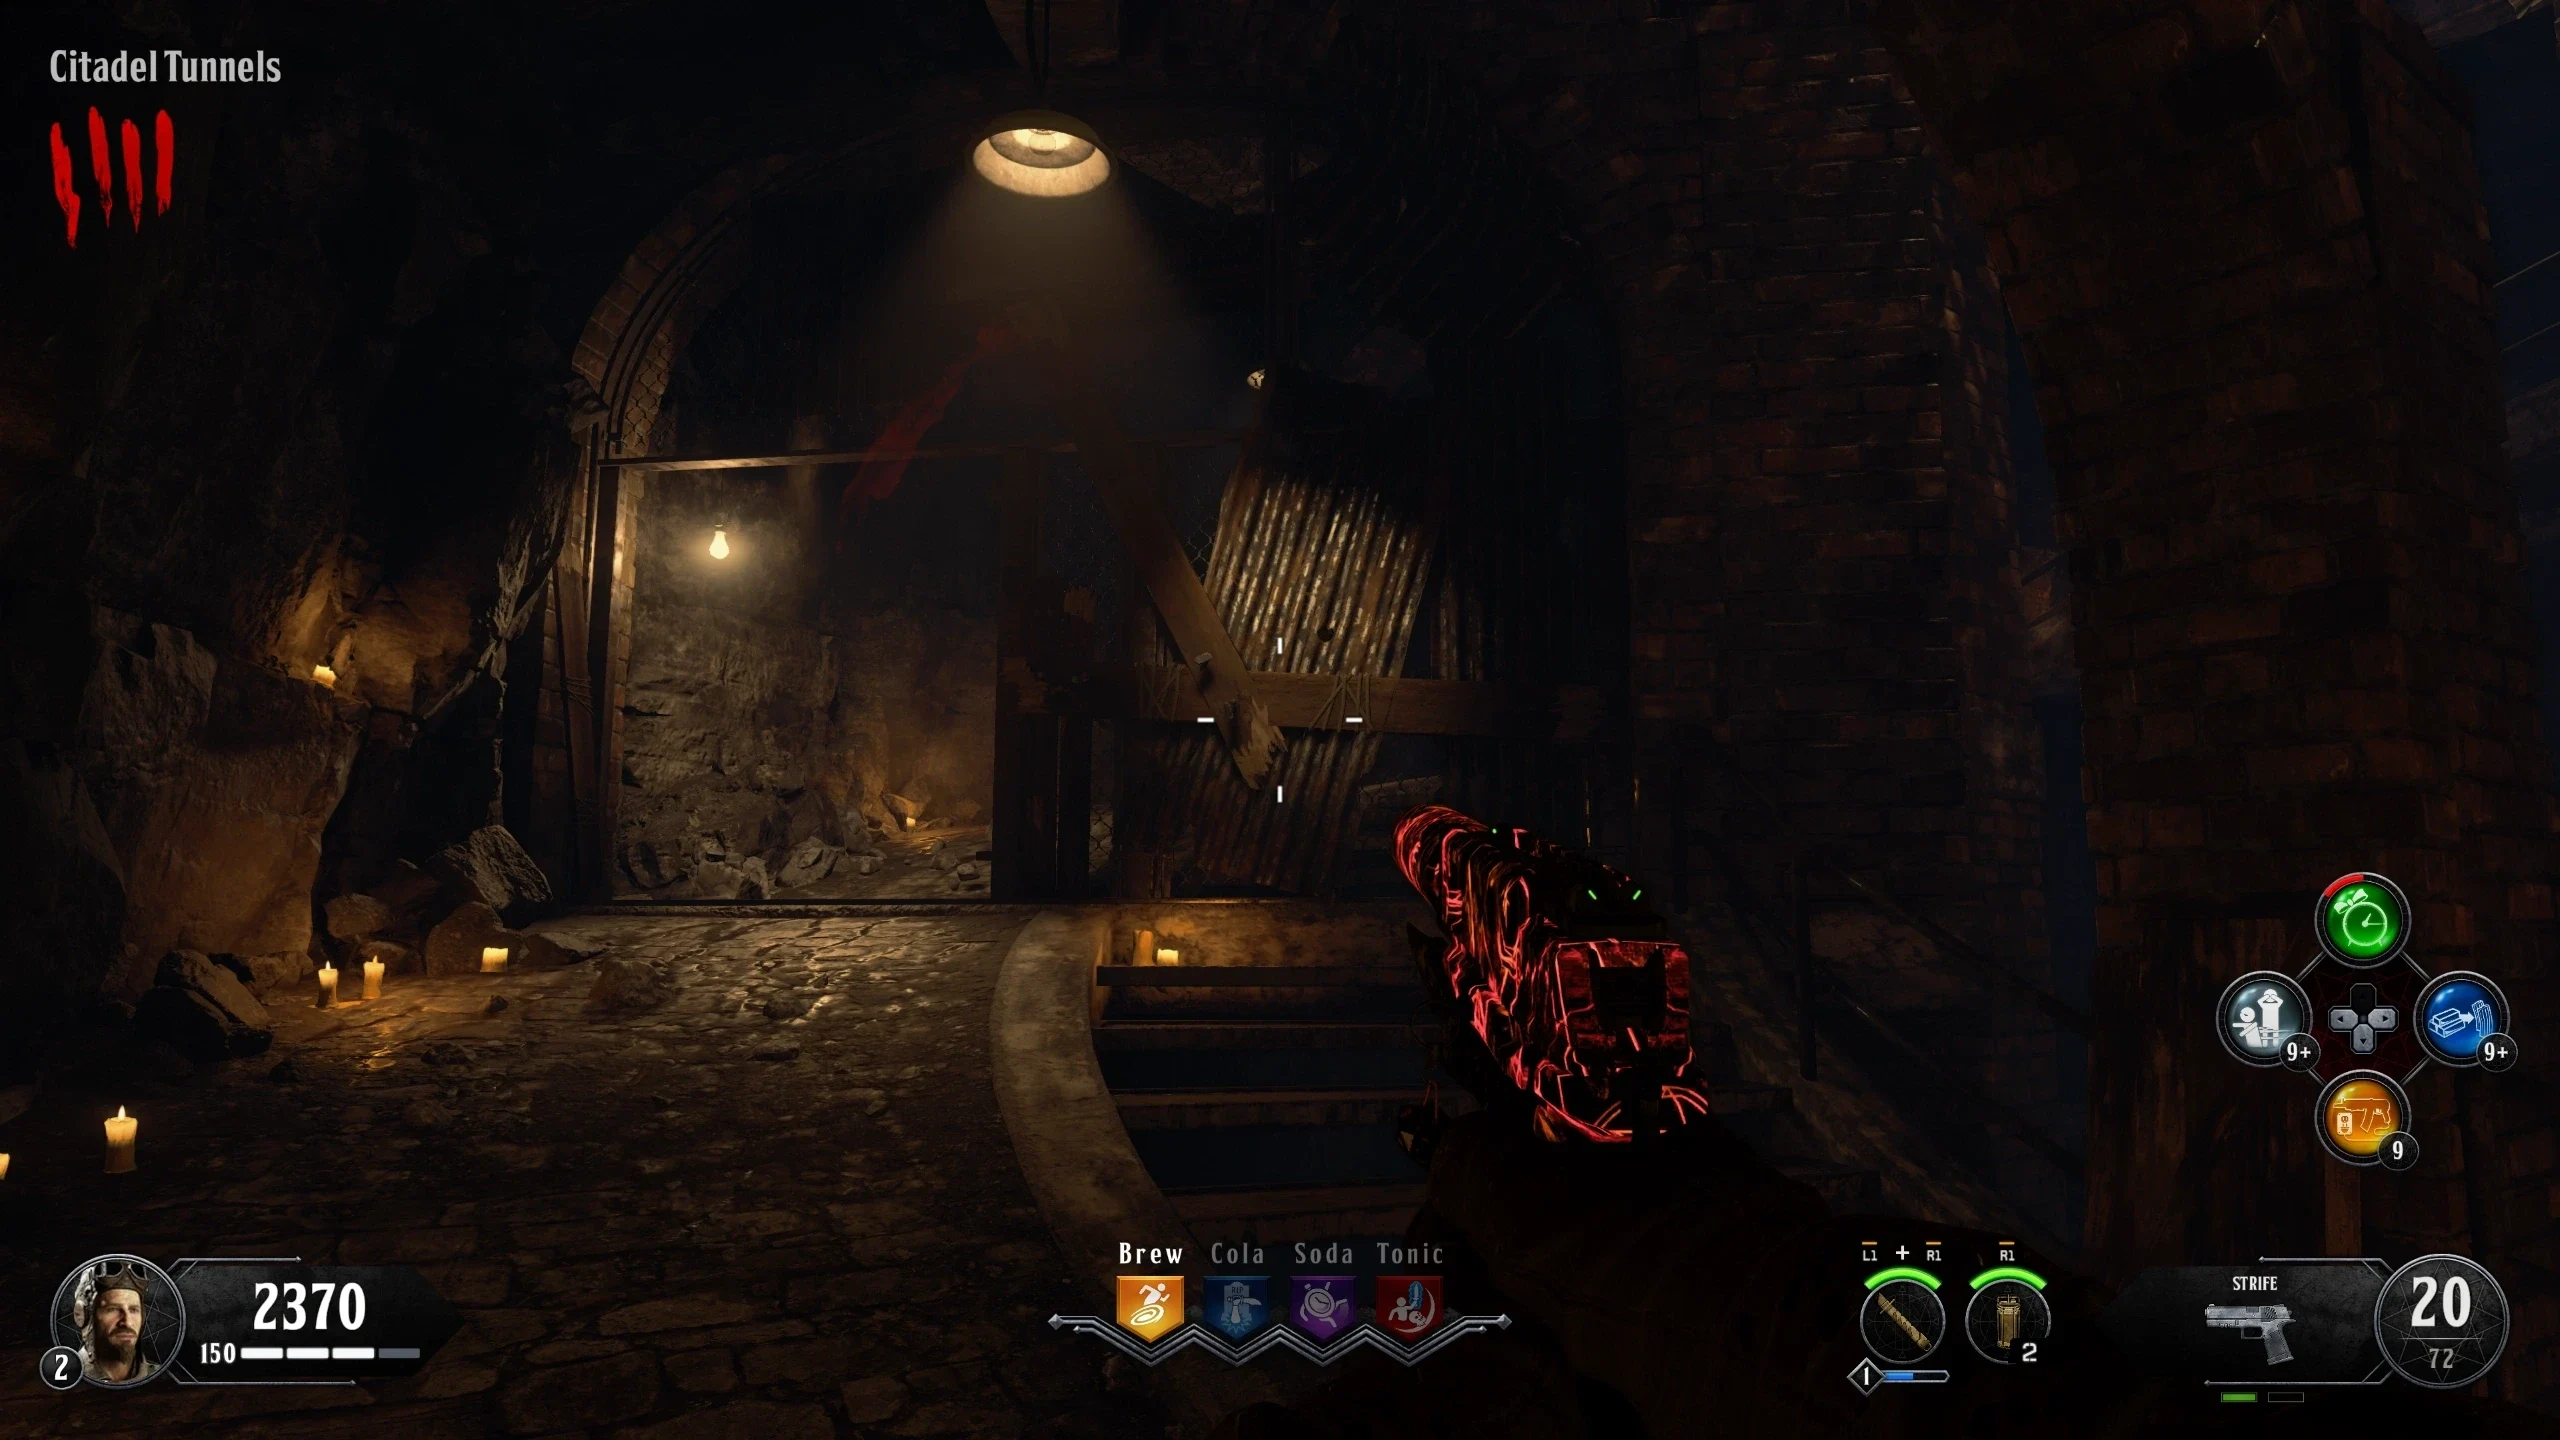
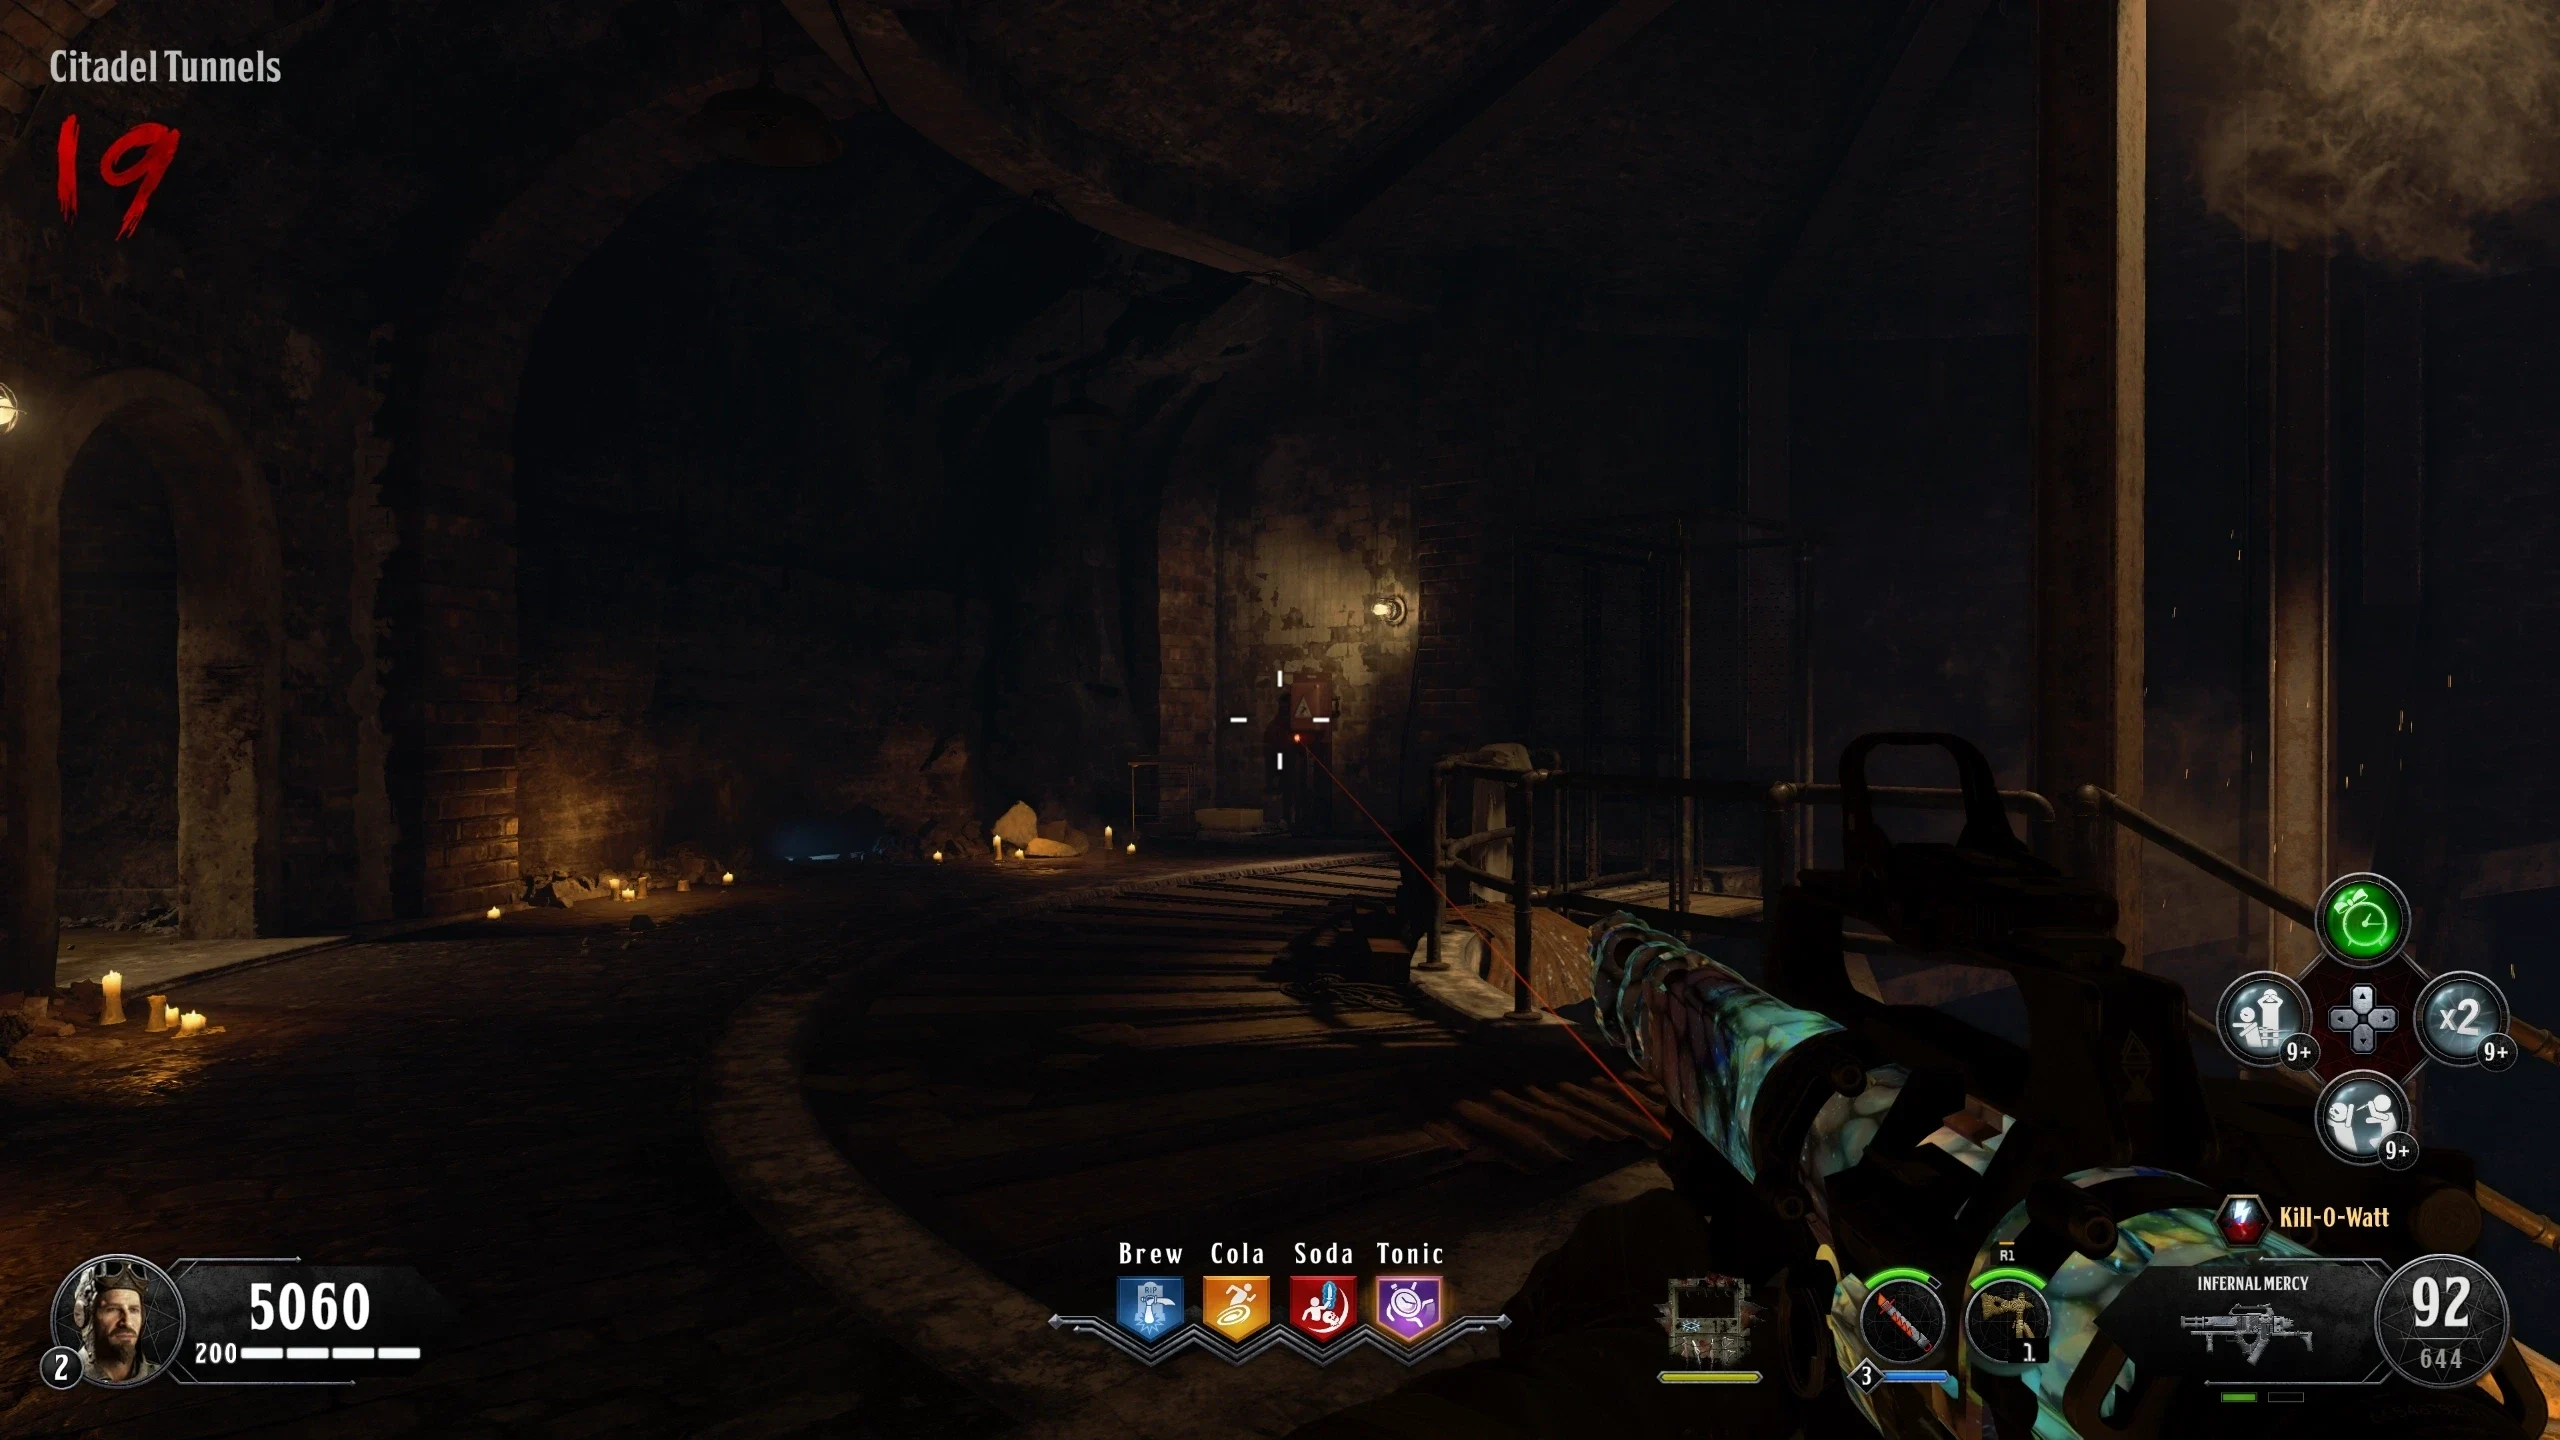
- Citadel Tunnels - In the middle of the Spitfire wallbuy room on a beam near the ceiling
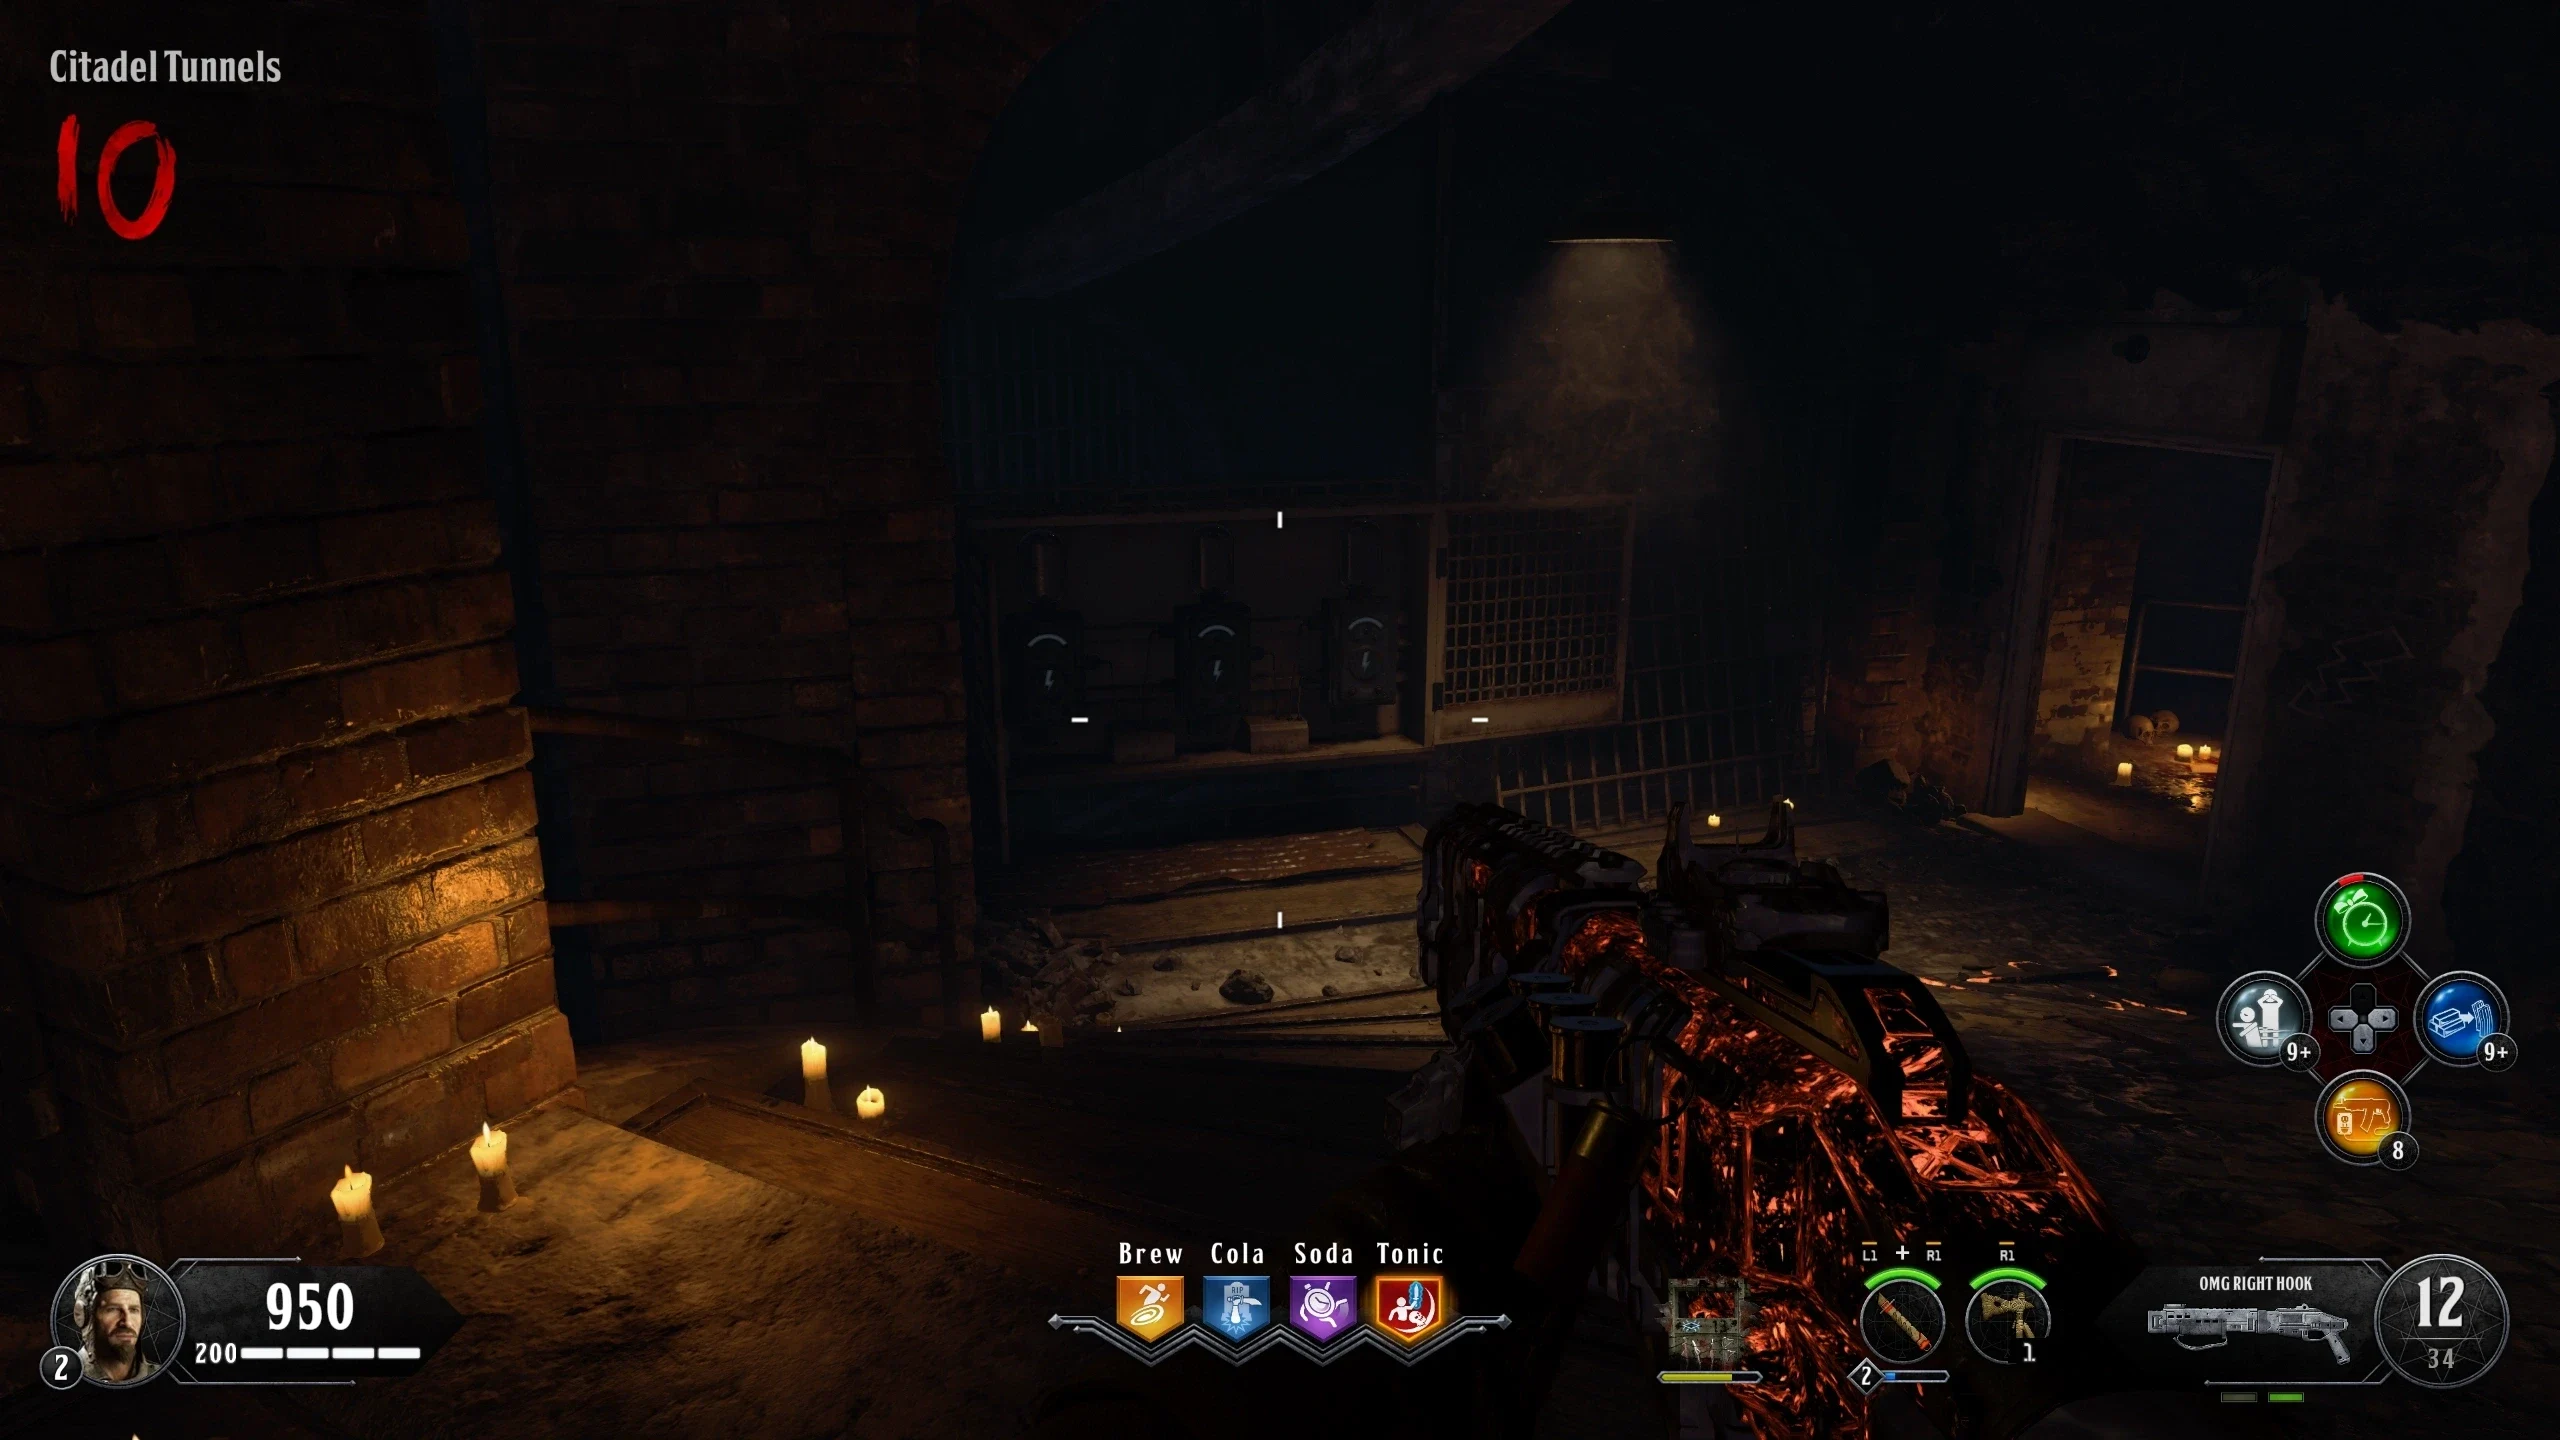
- Citadel Tunnels - On the Number Pad
- Citadel Tunnels - Above a barrier near the middle of the room, one level up from the number pad
- Citadel - On the radiator at the top of the stairs coming from the 'Citadel Tunnels'
- Citadel - On the sandbags near the entrance to the 'Showers'
- Citadel - In the room just before the stairs leading to 'Michigan Avenue'/'Warden's Office'
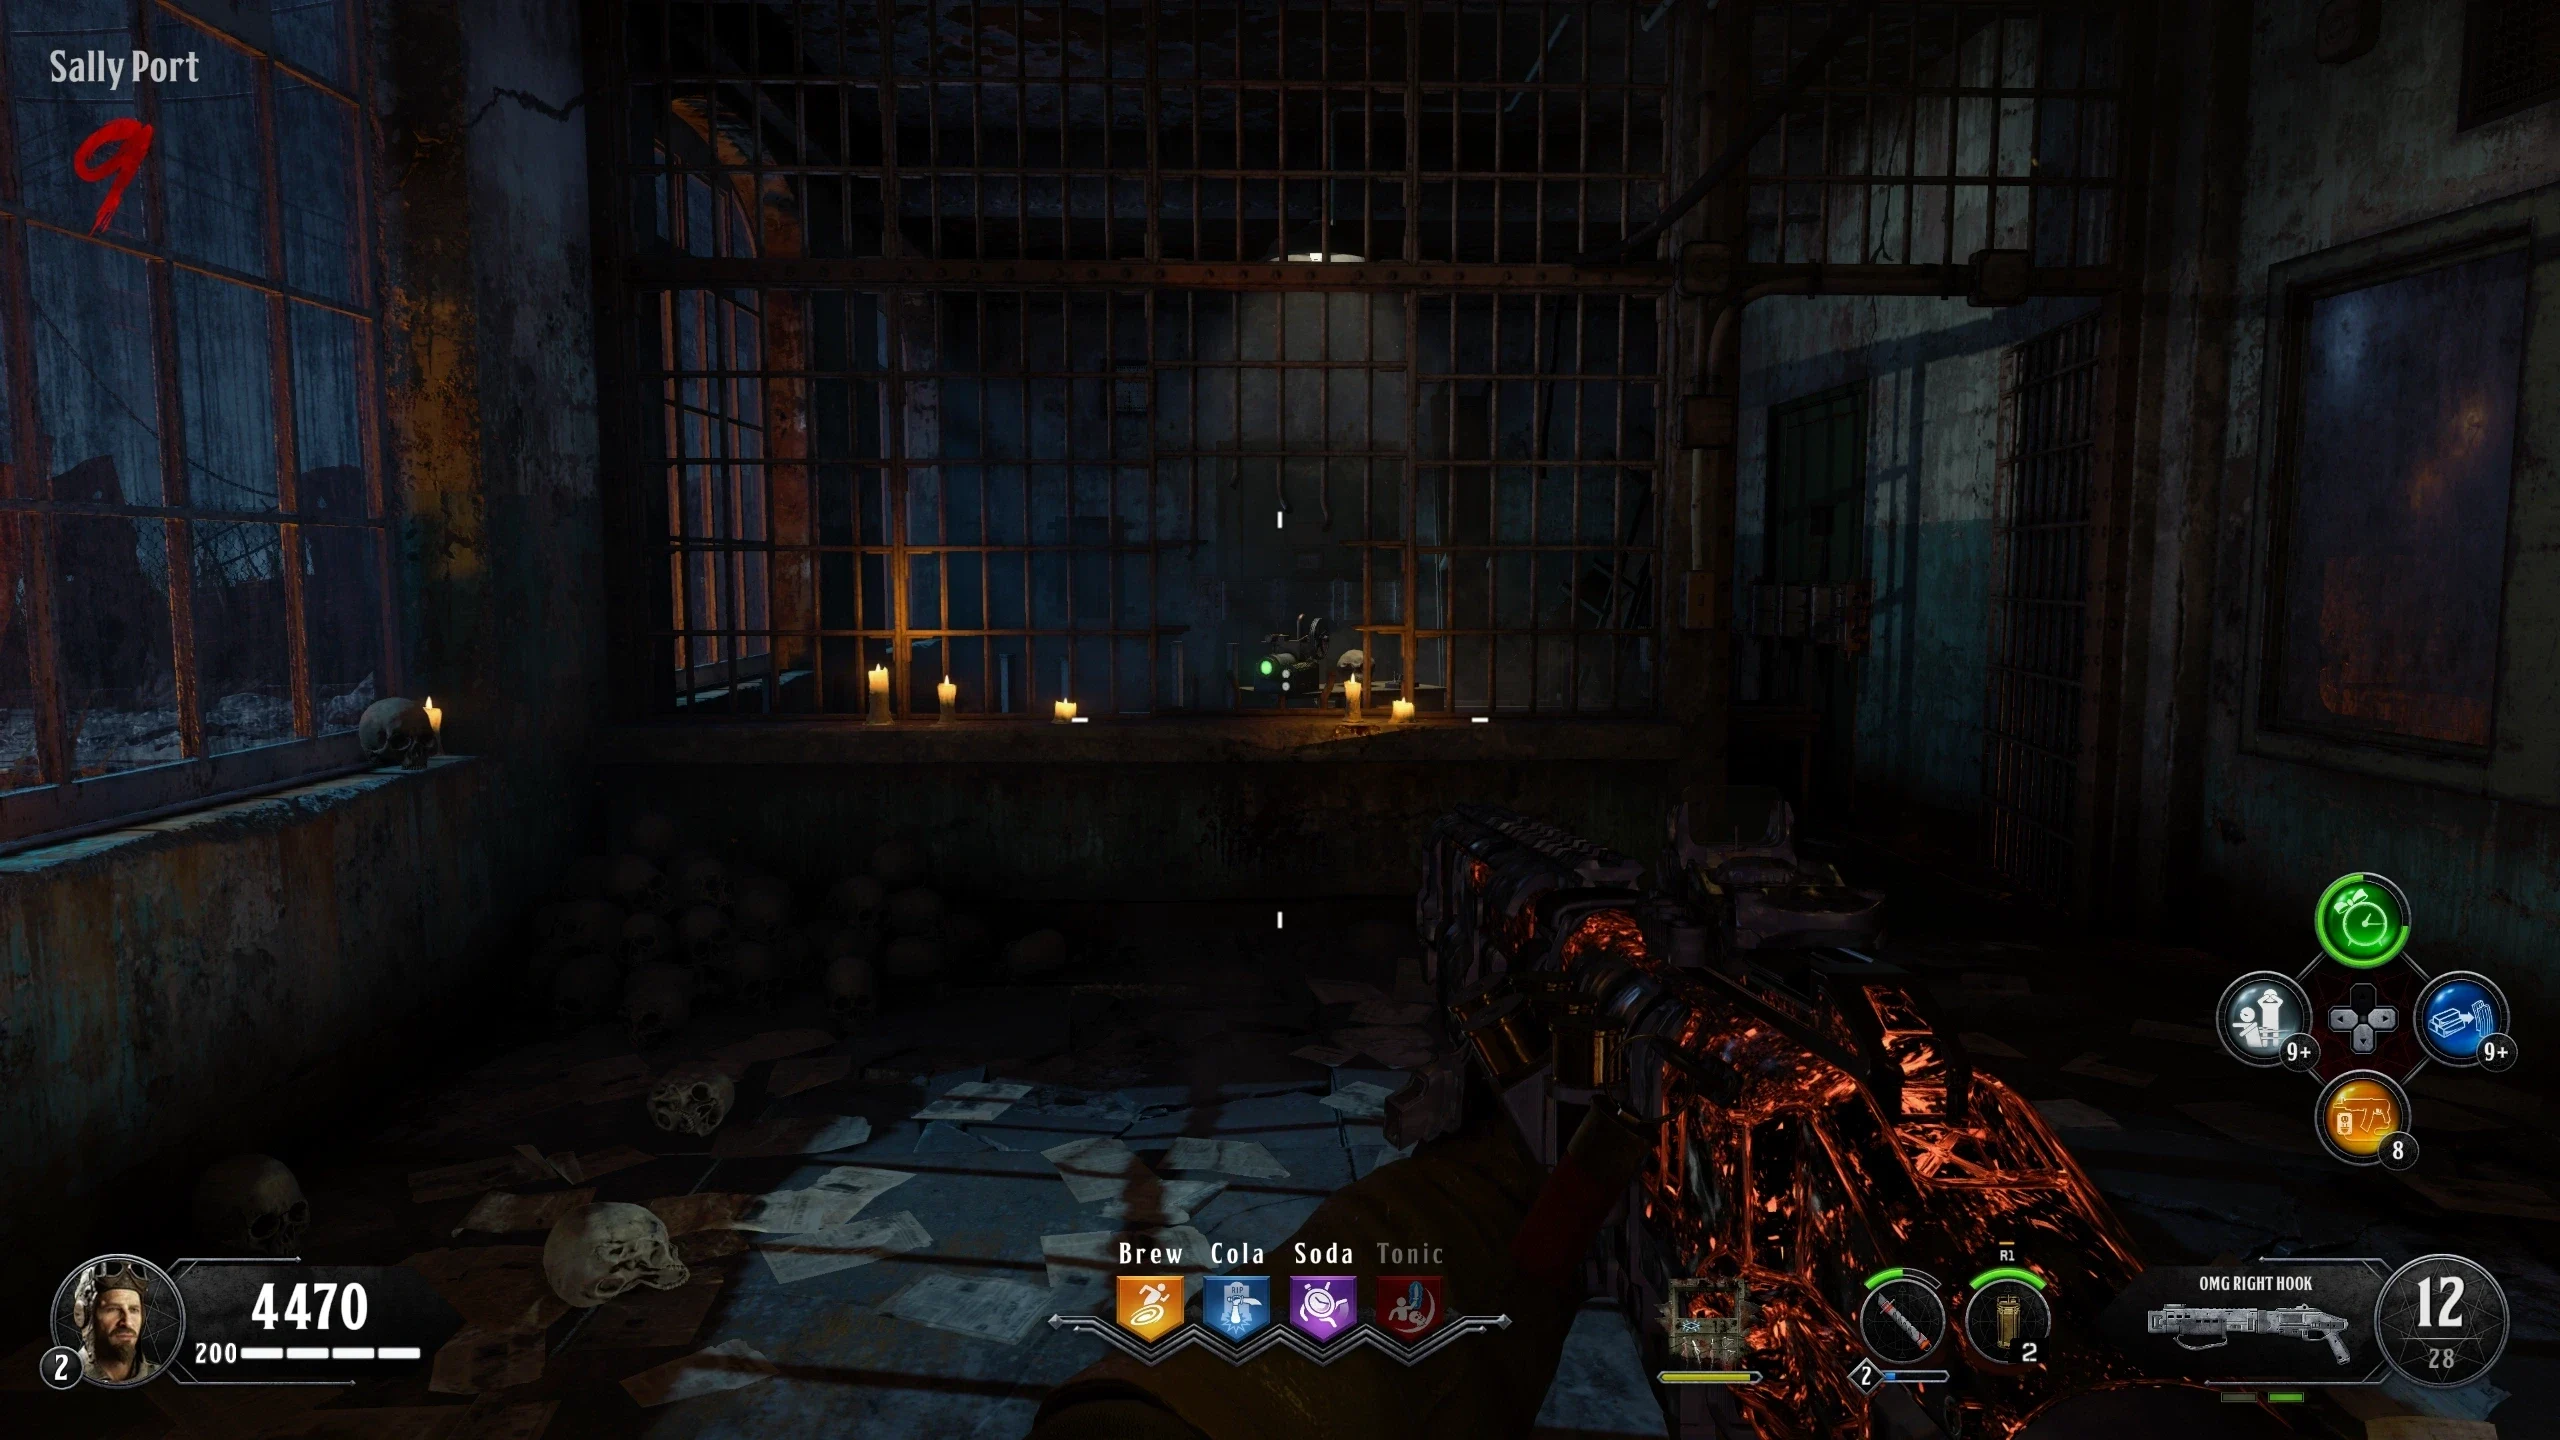
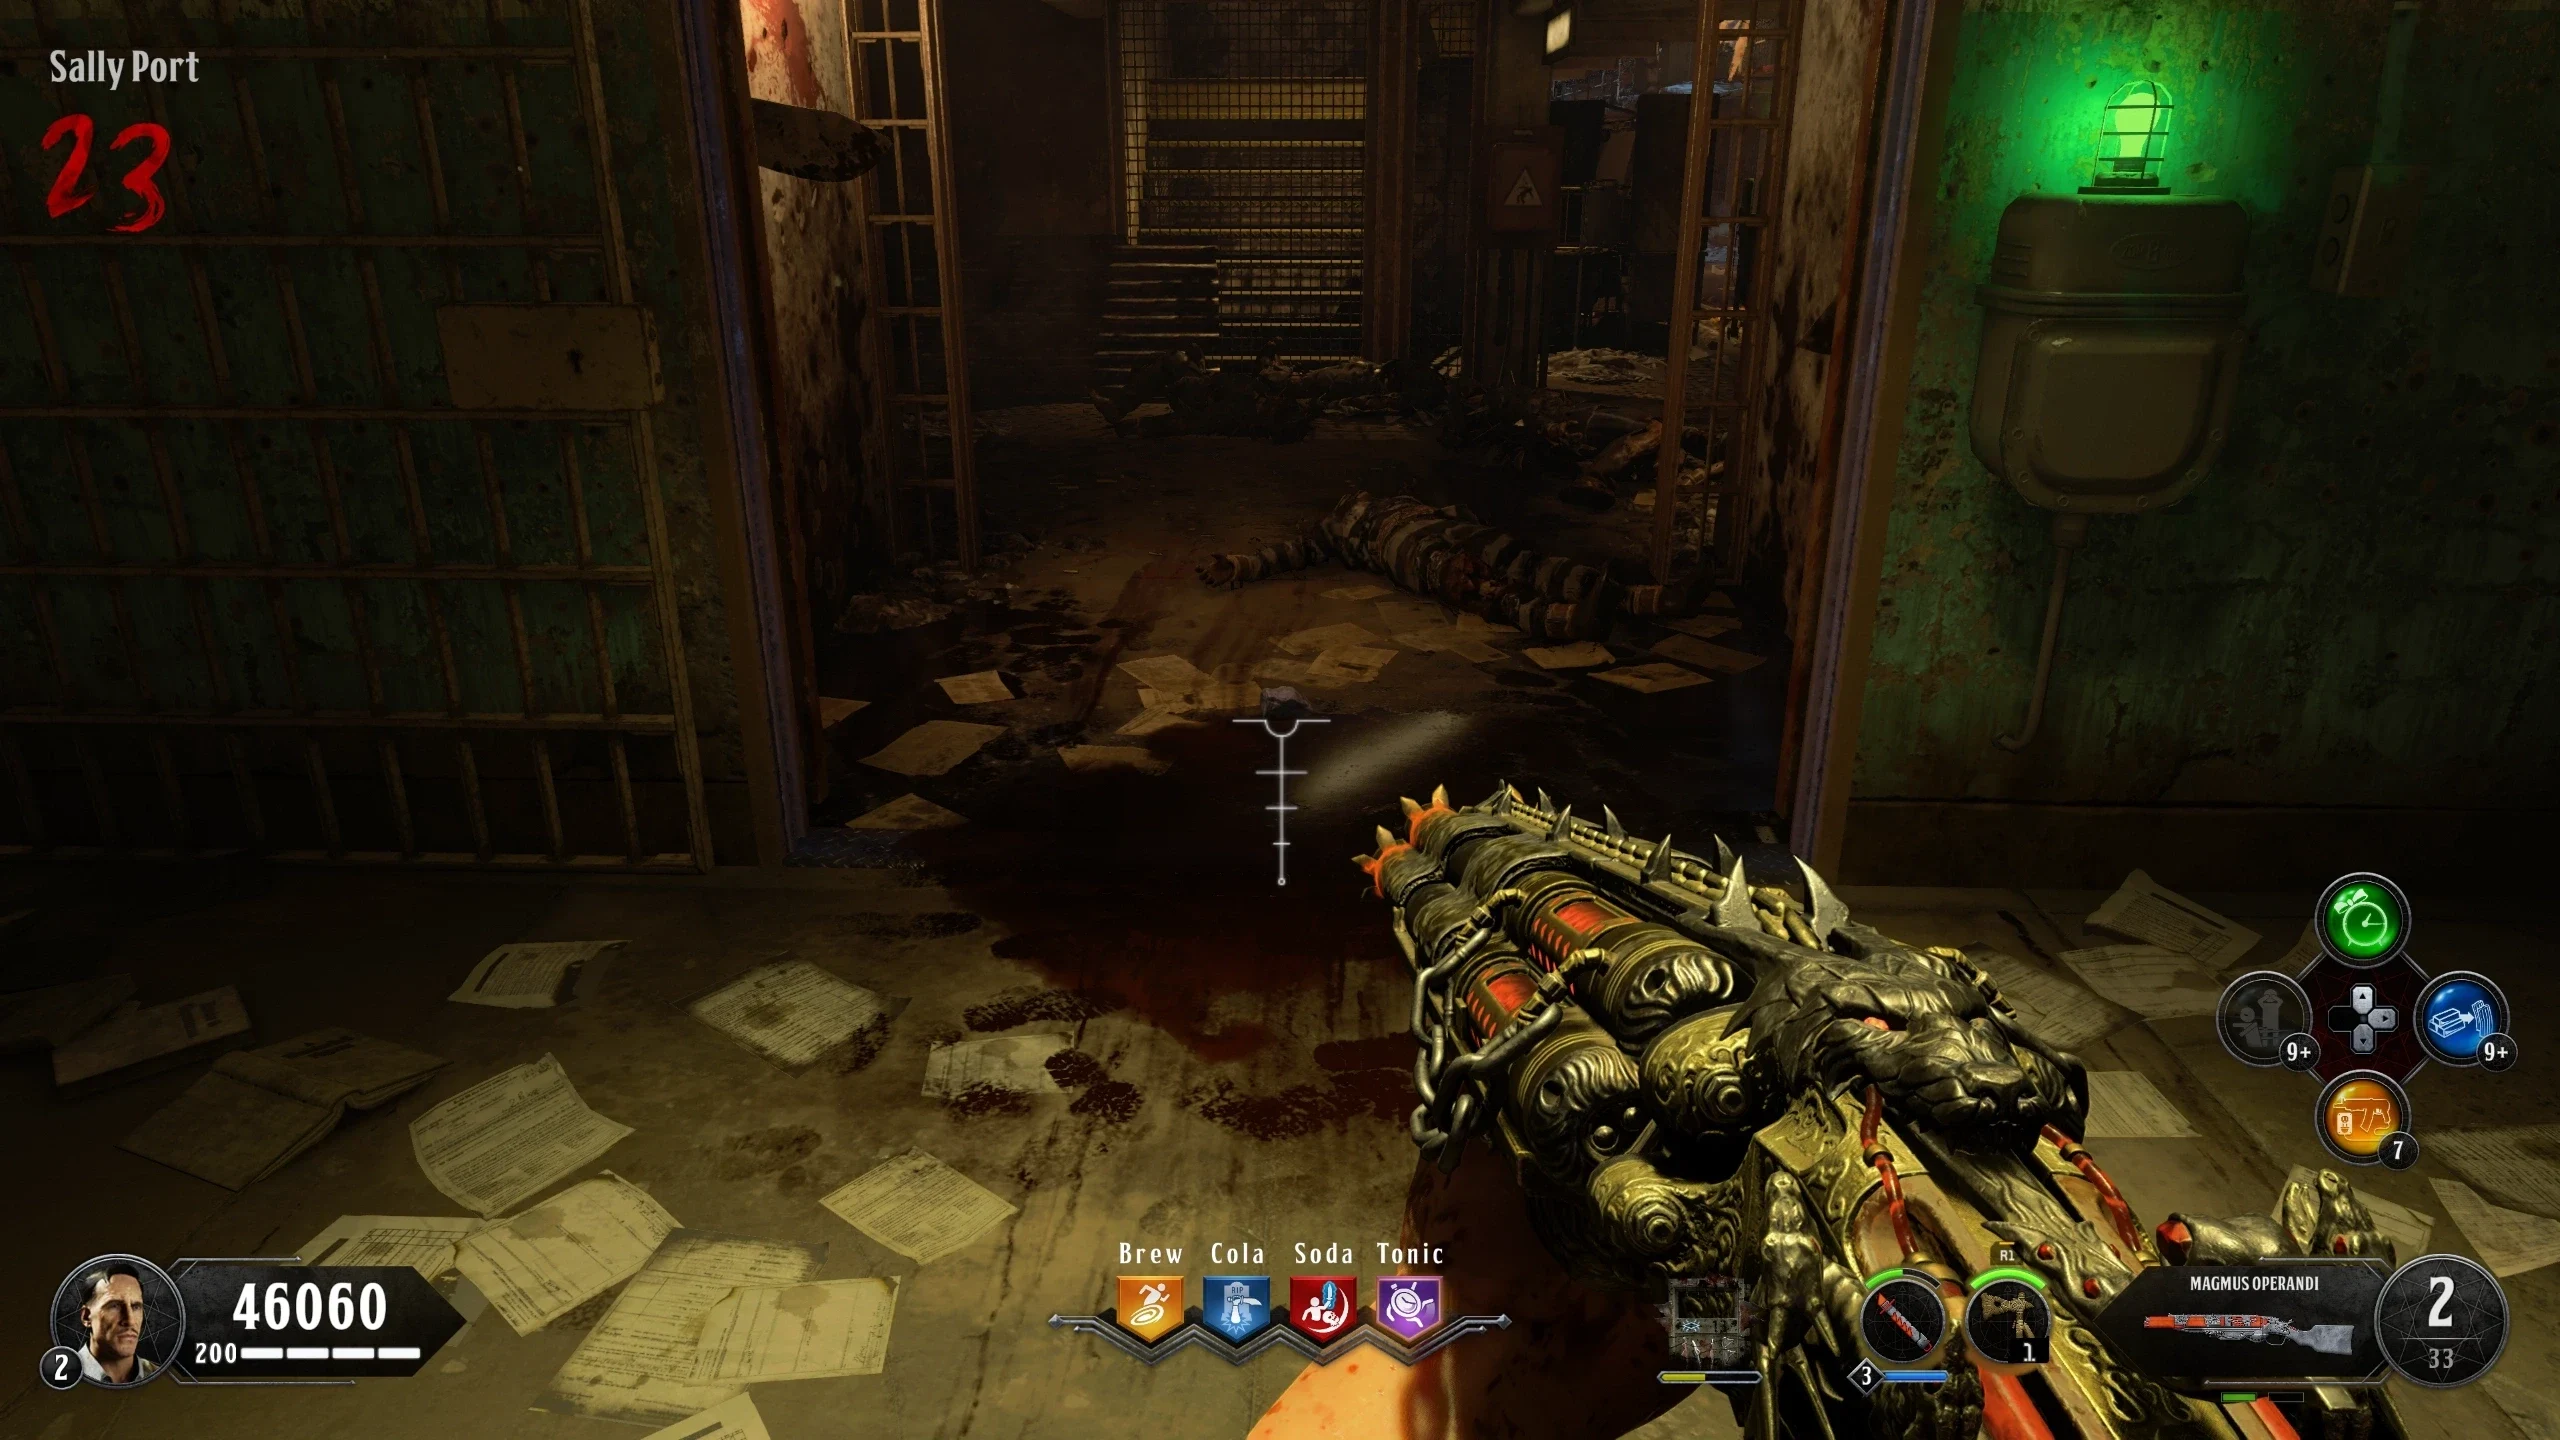
- Sally Port - Above the doorway with the Fan Trap
- Administration - On the top of the door coming from 'Sally Port'
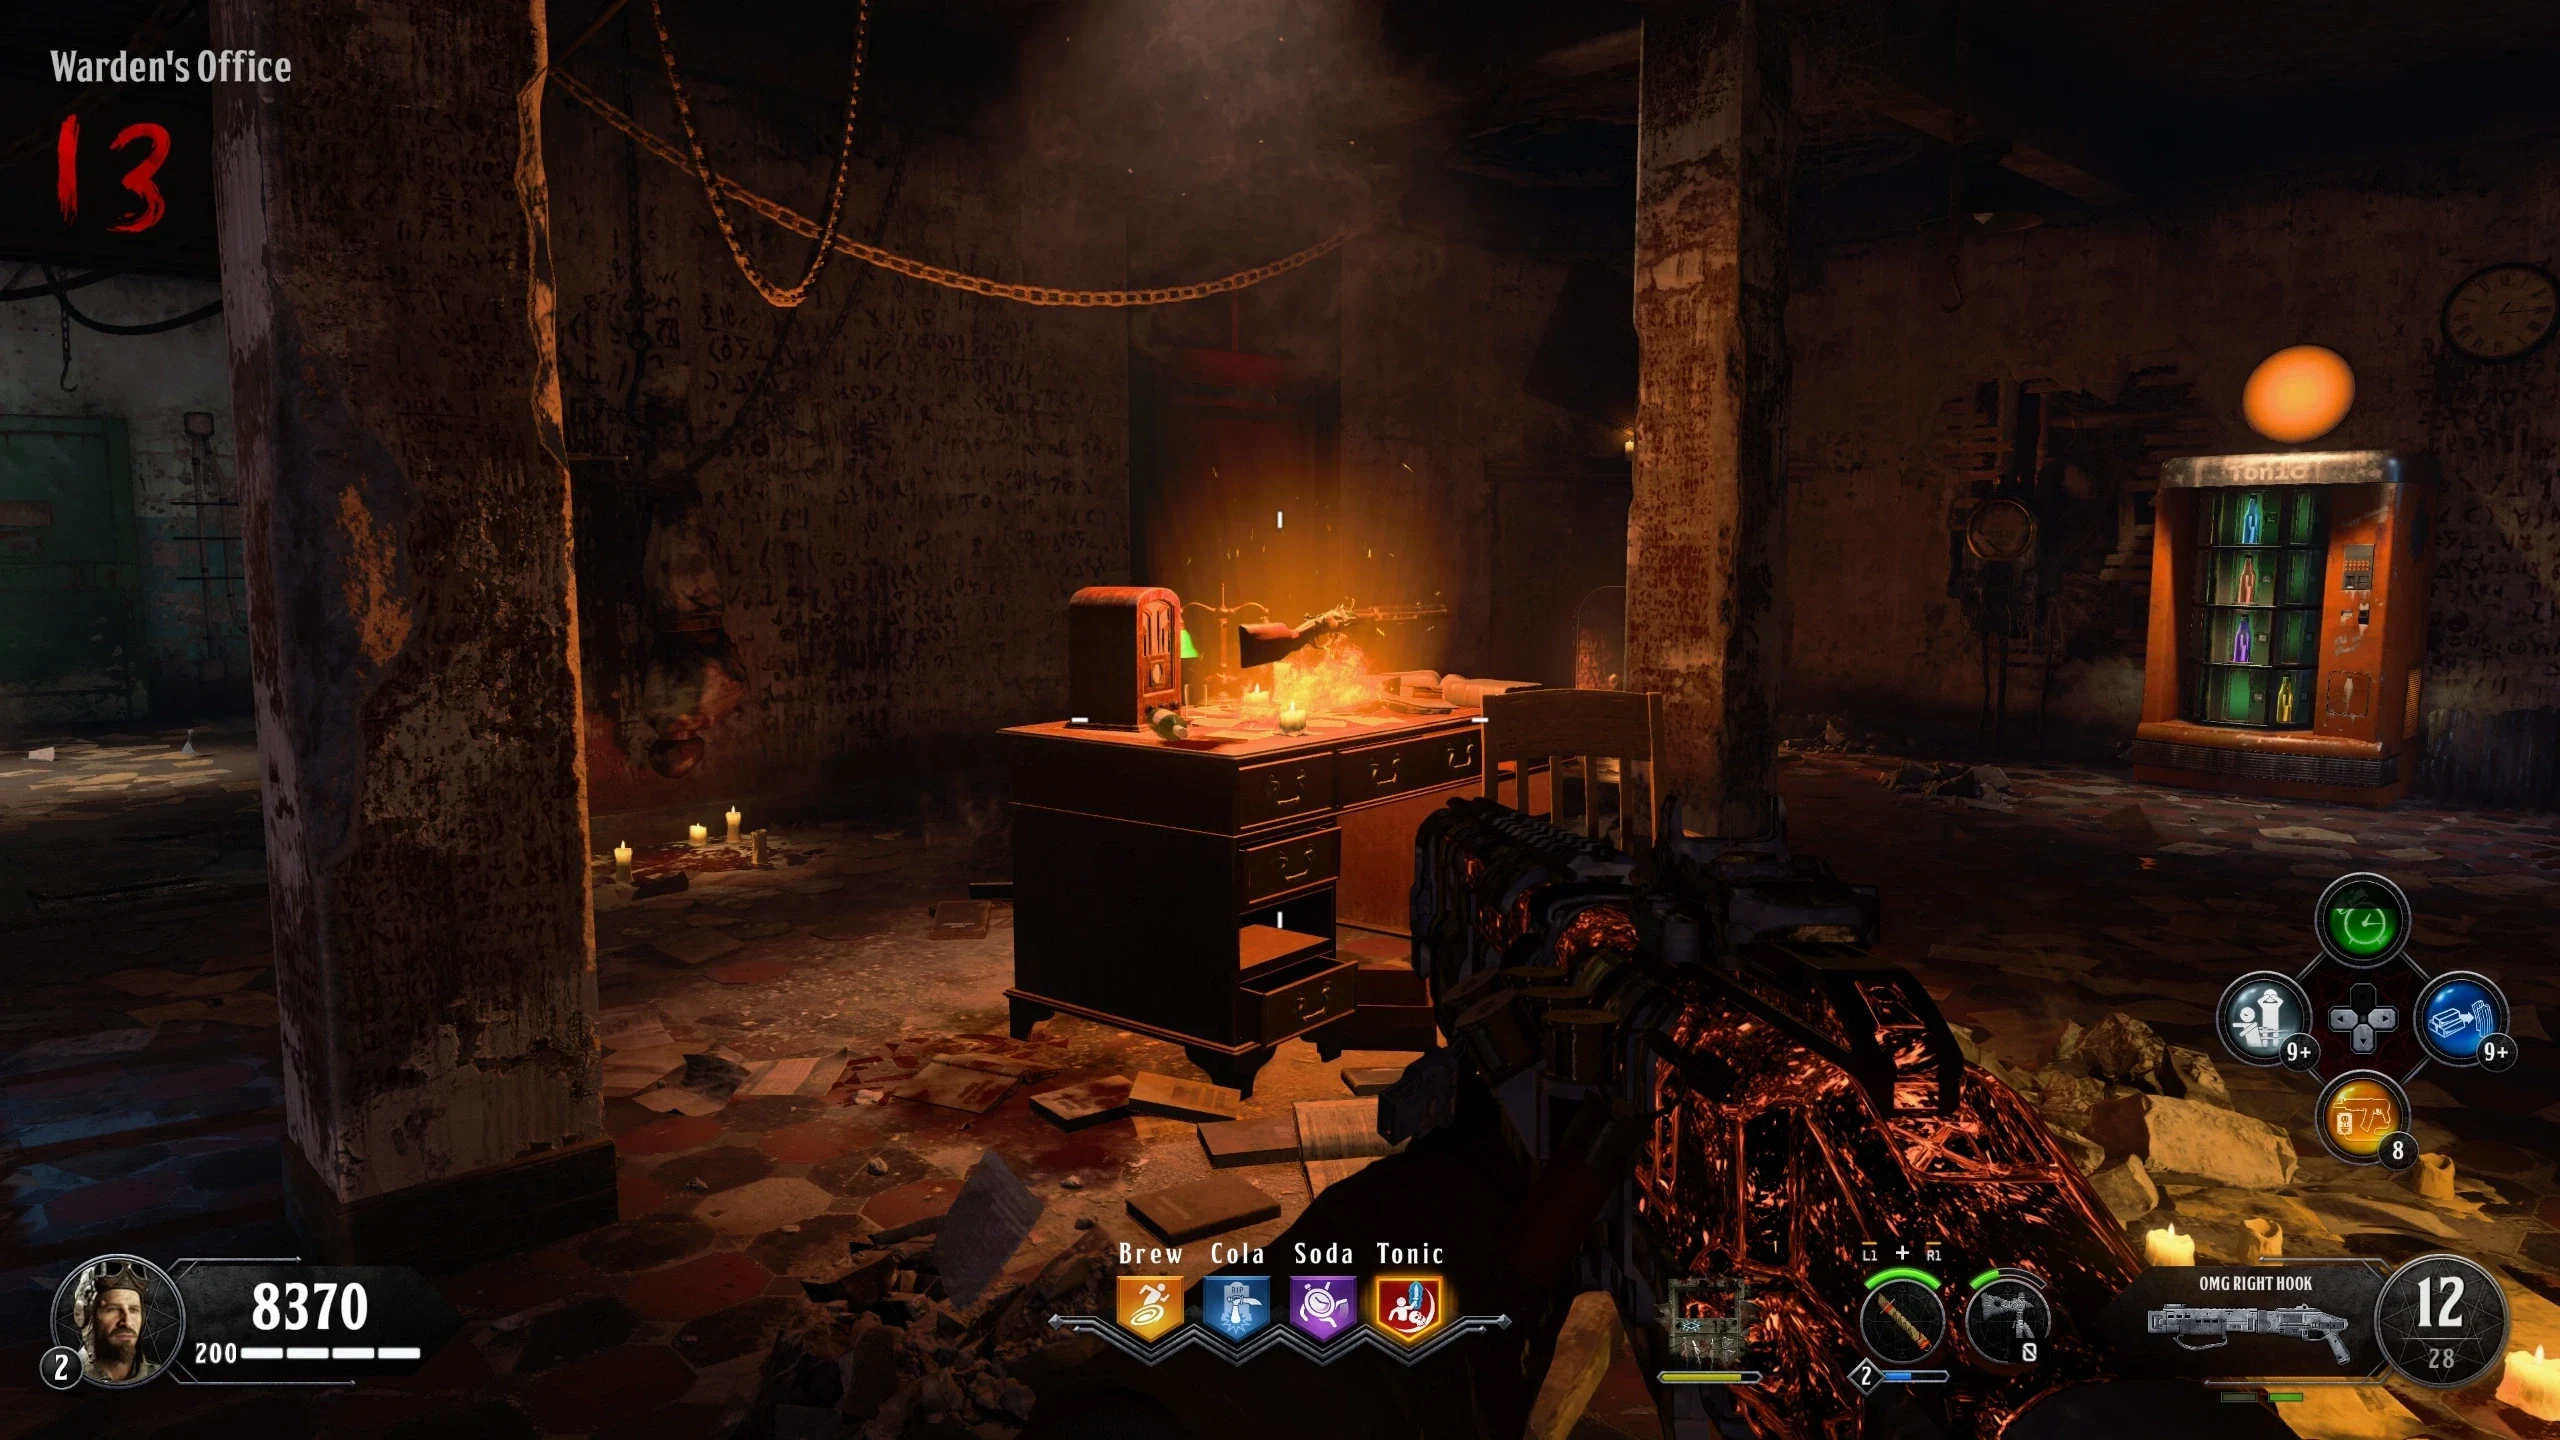
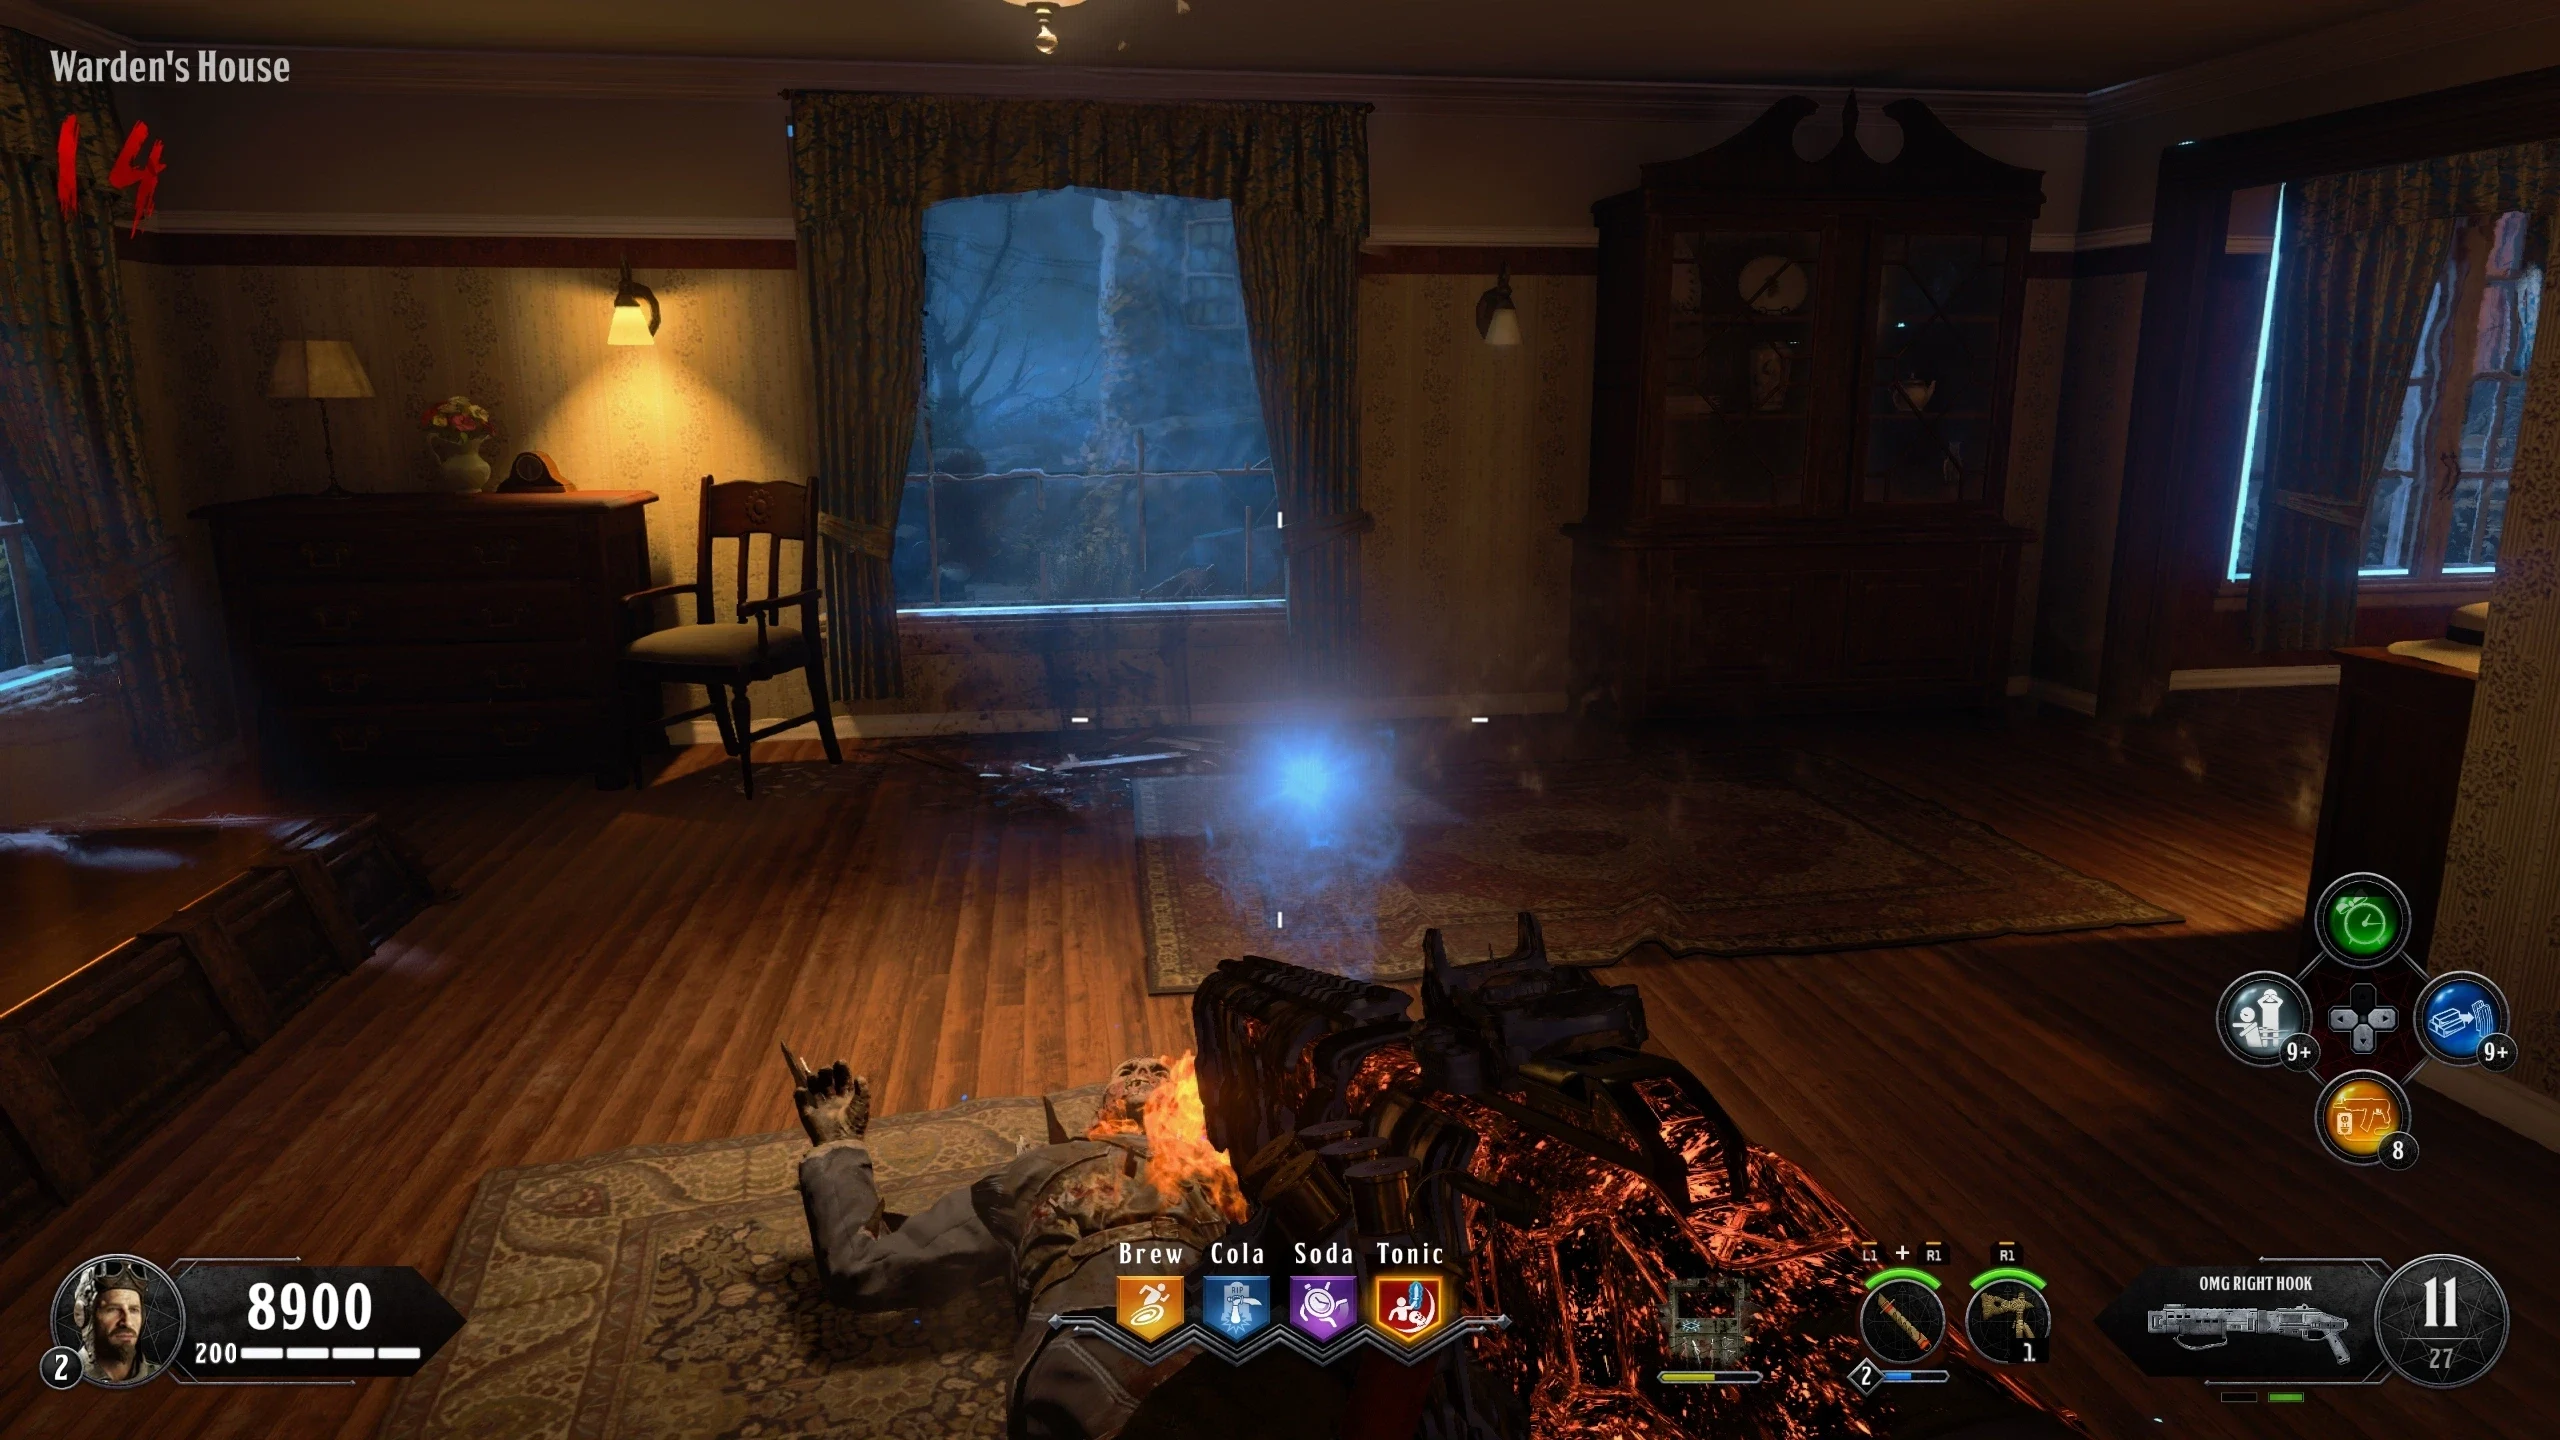
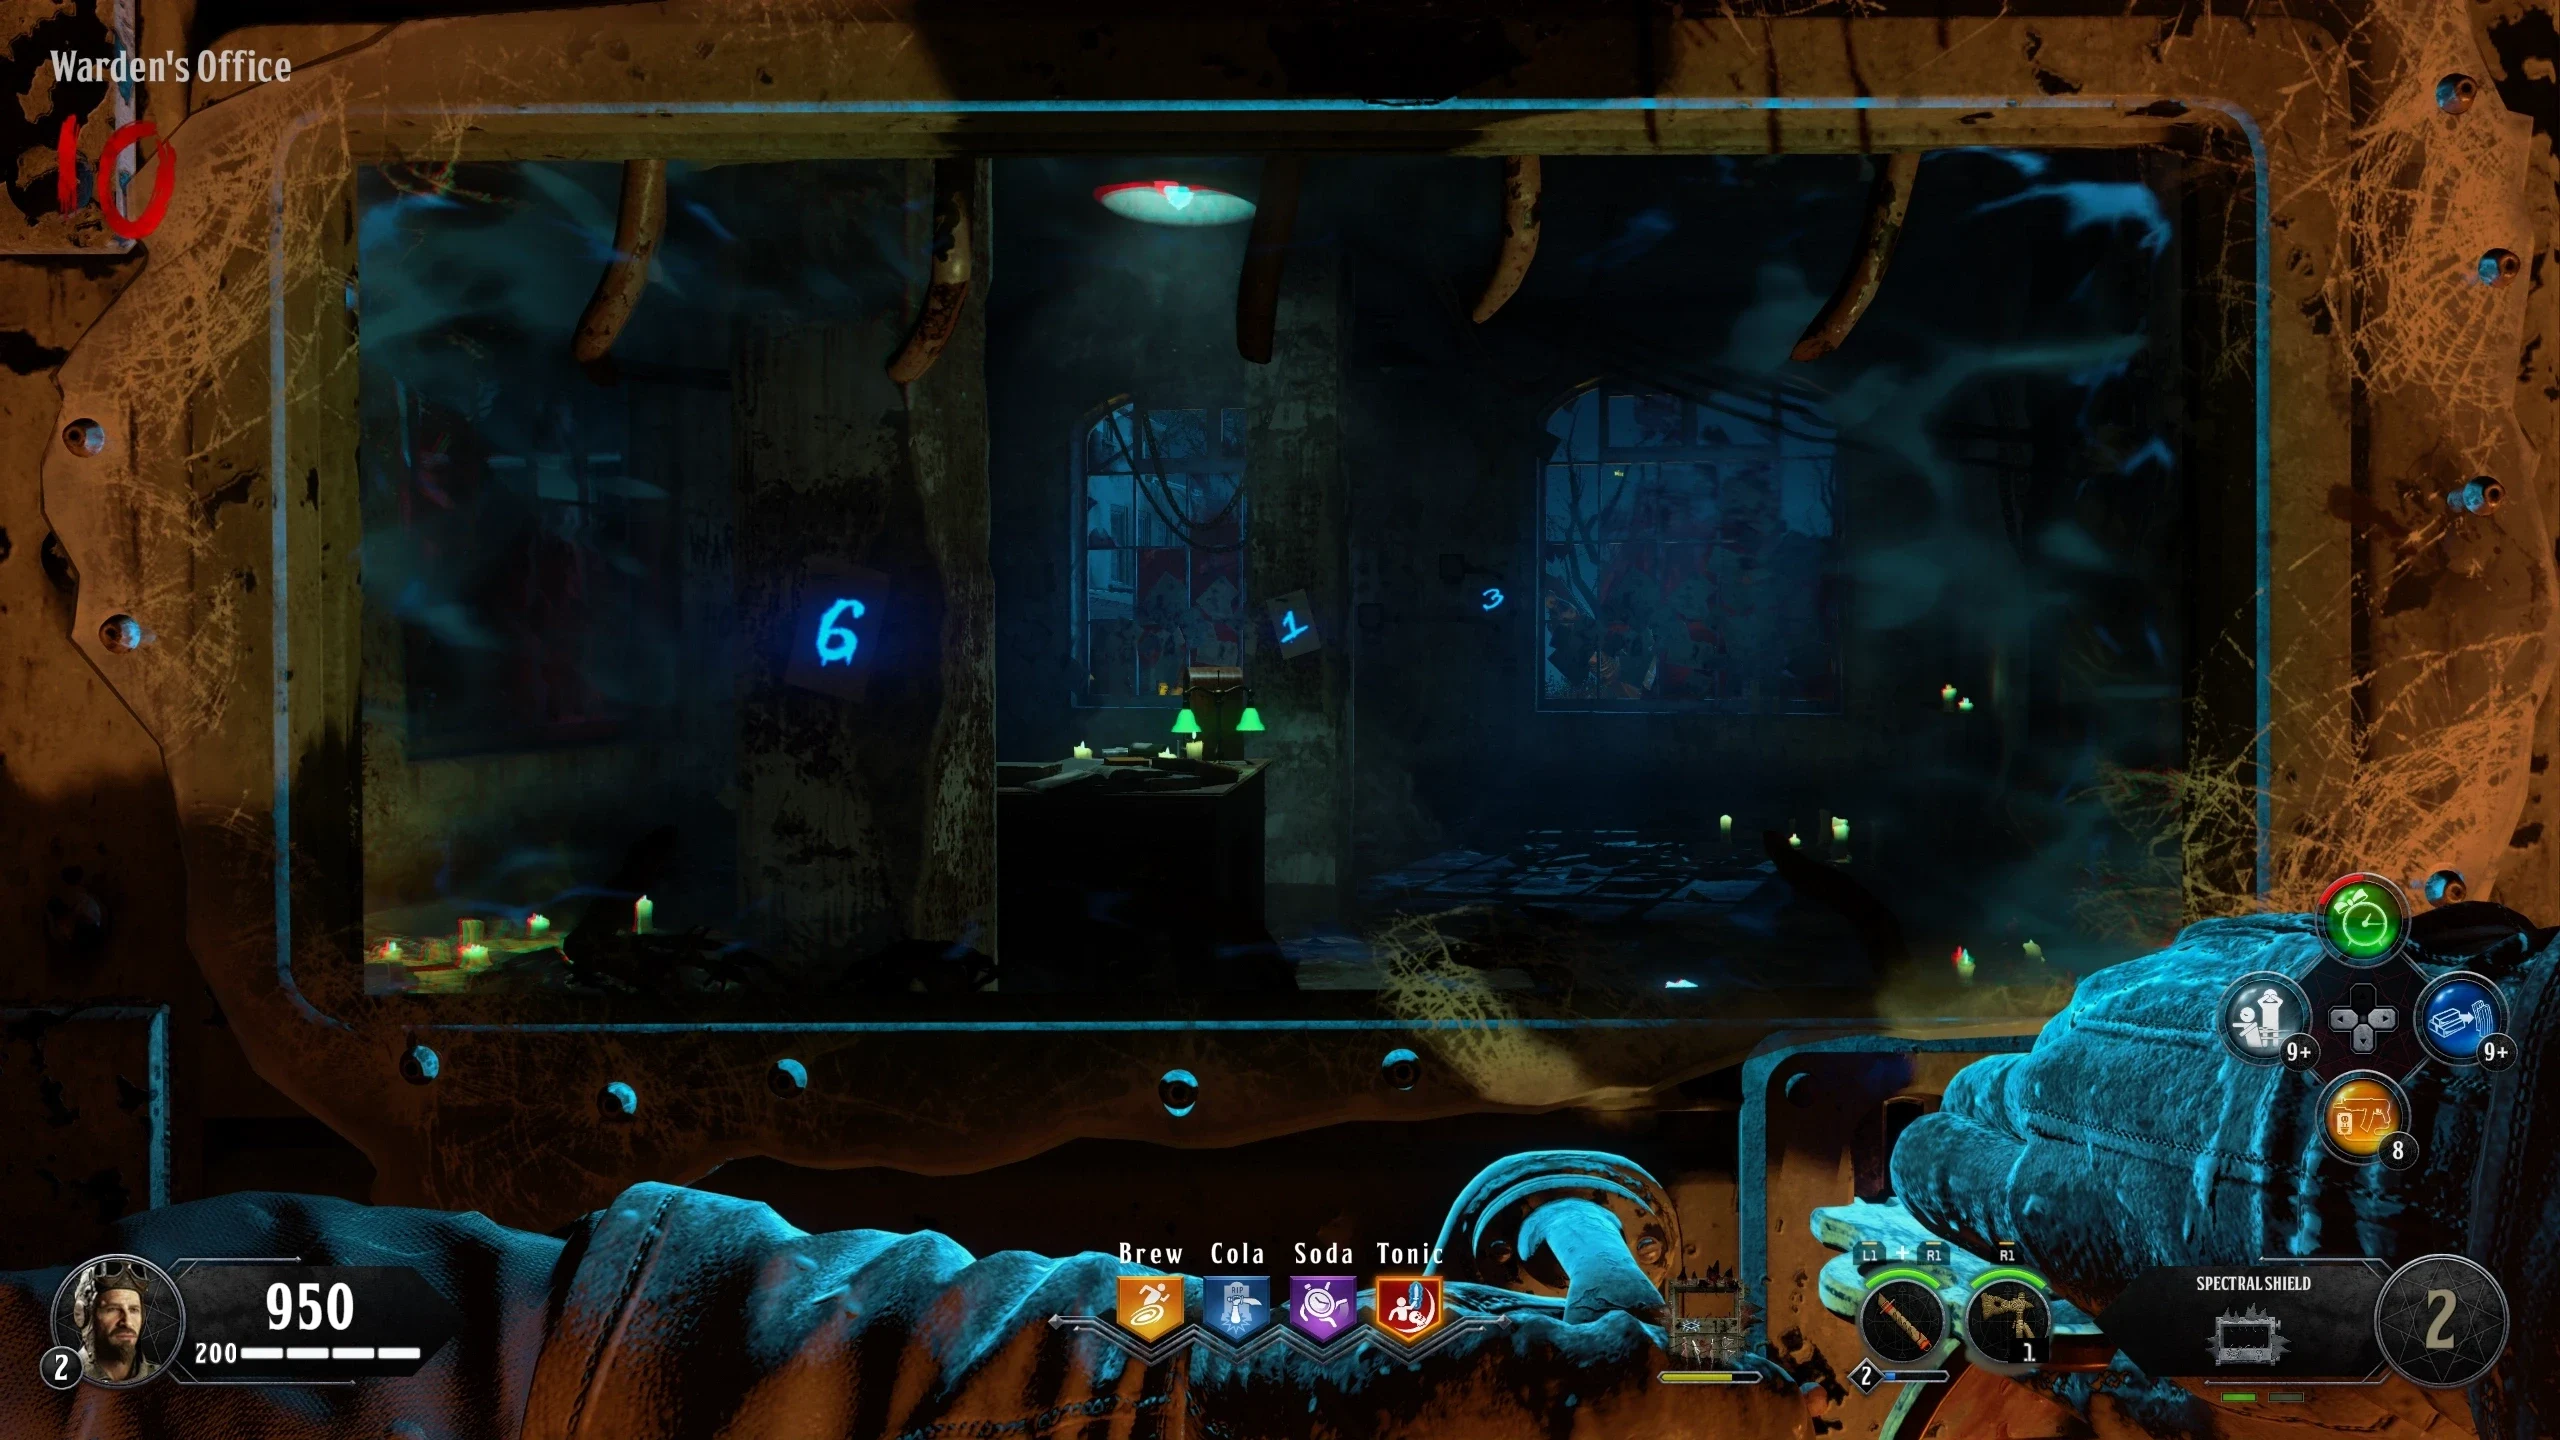
- Warden's Office - Above the Fireplace
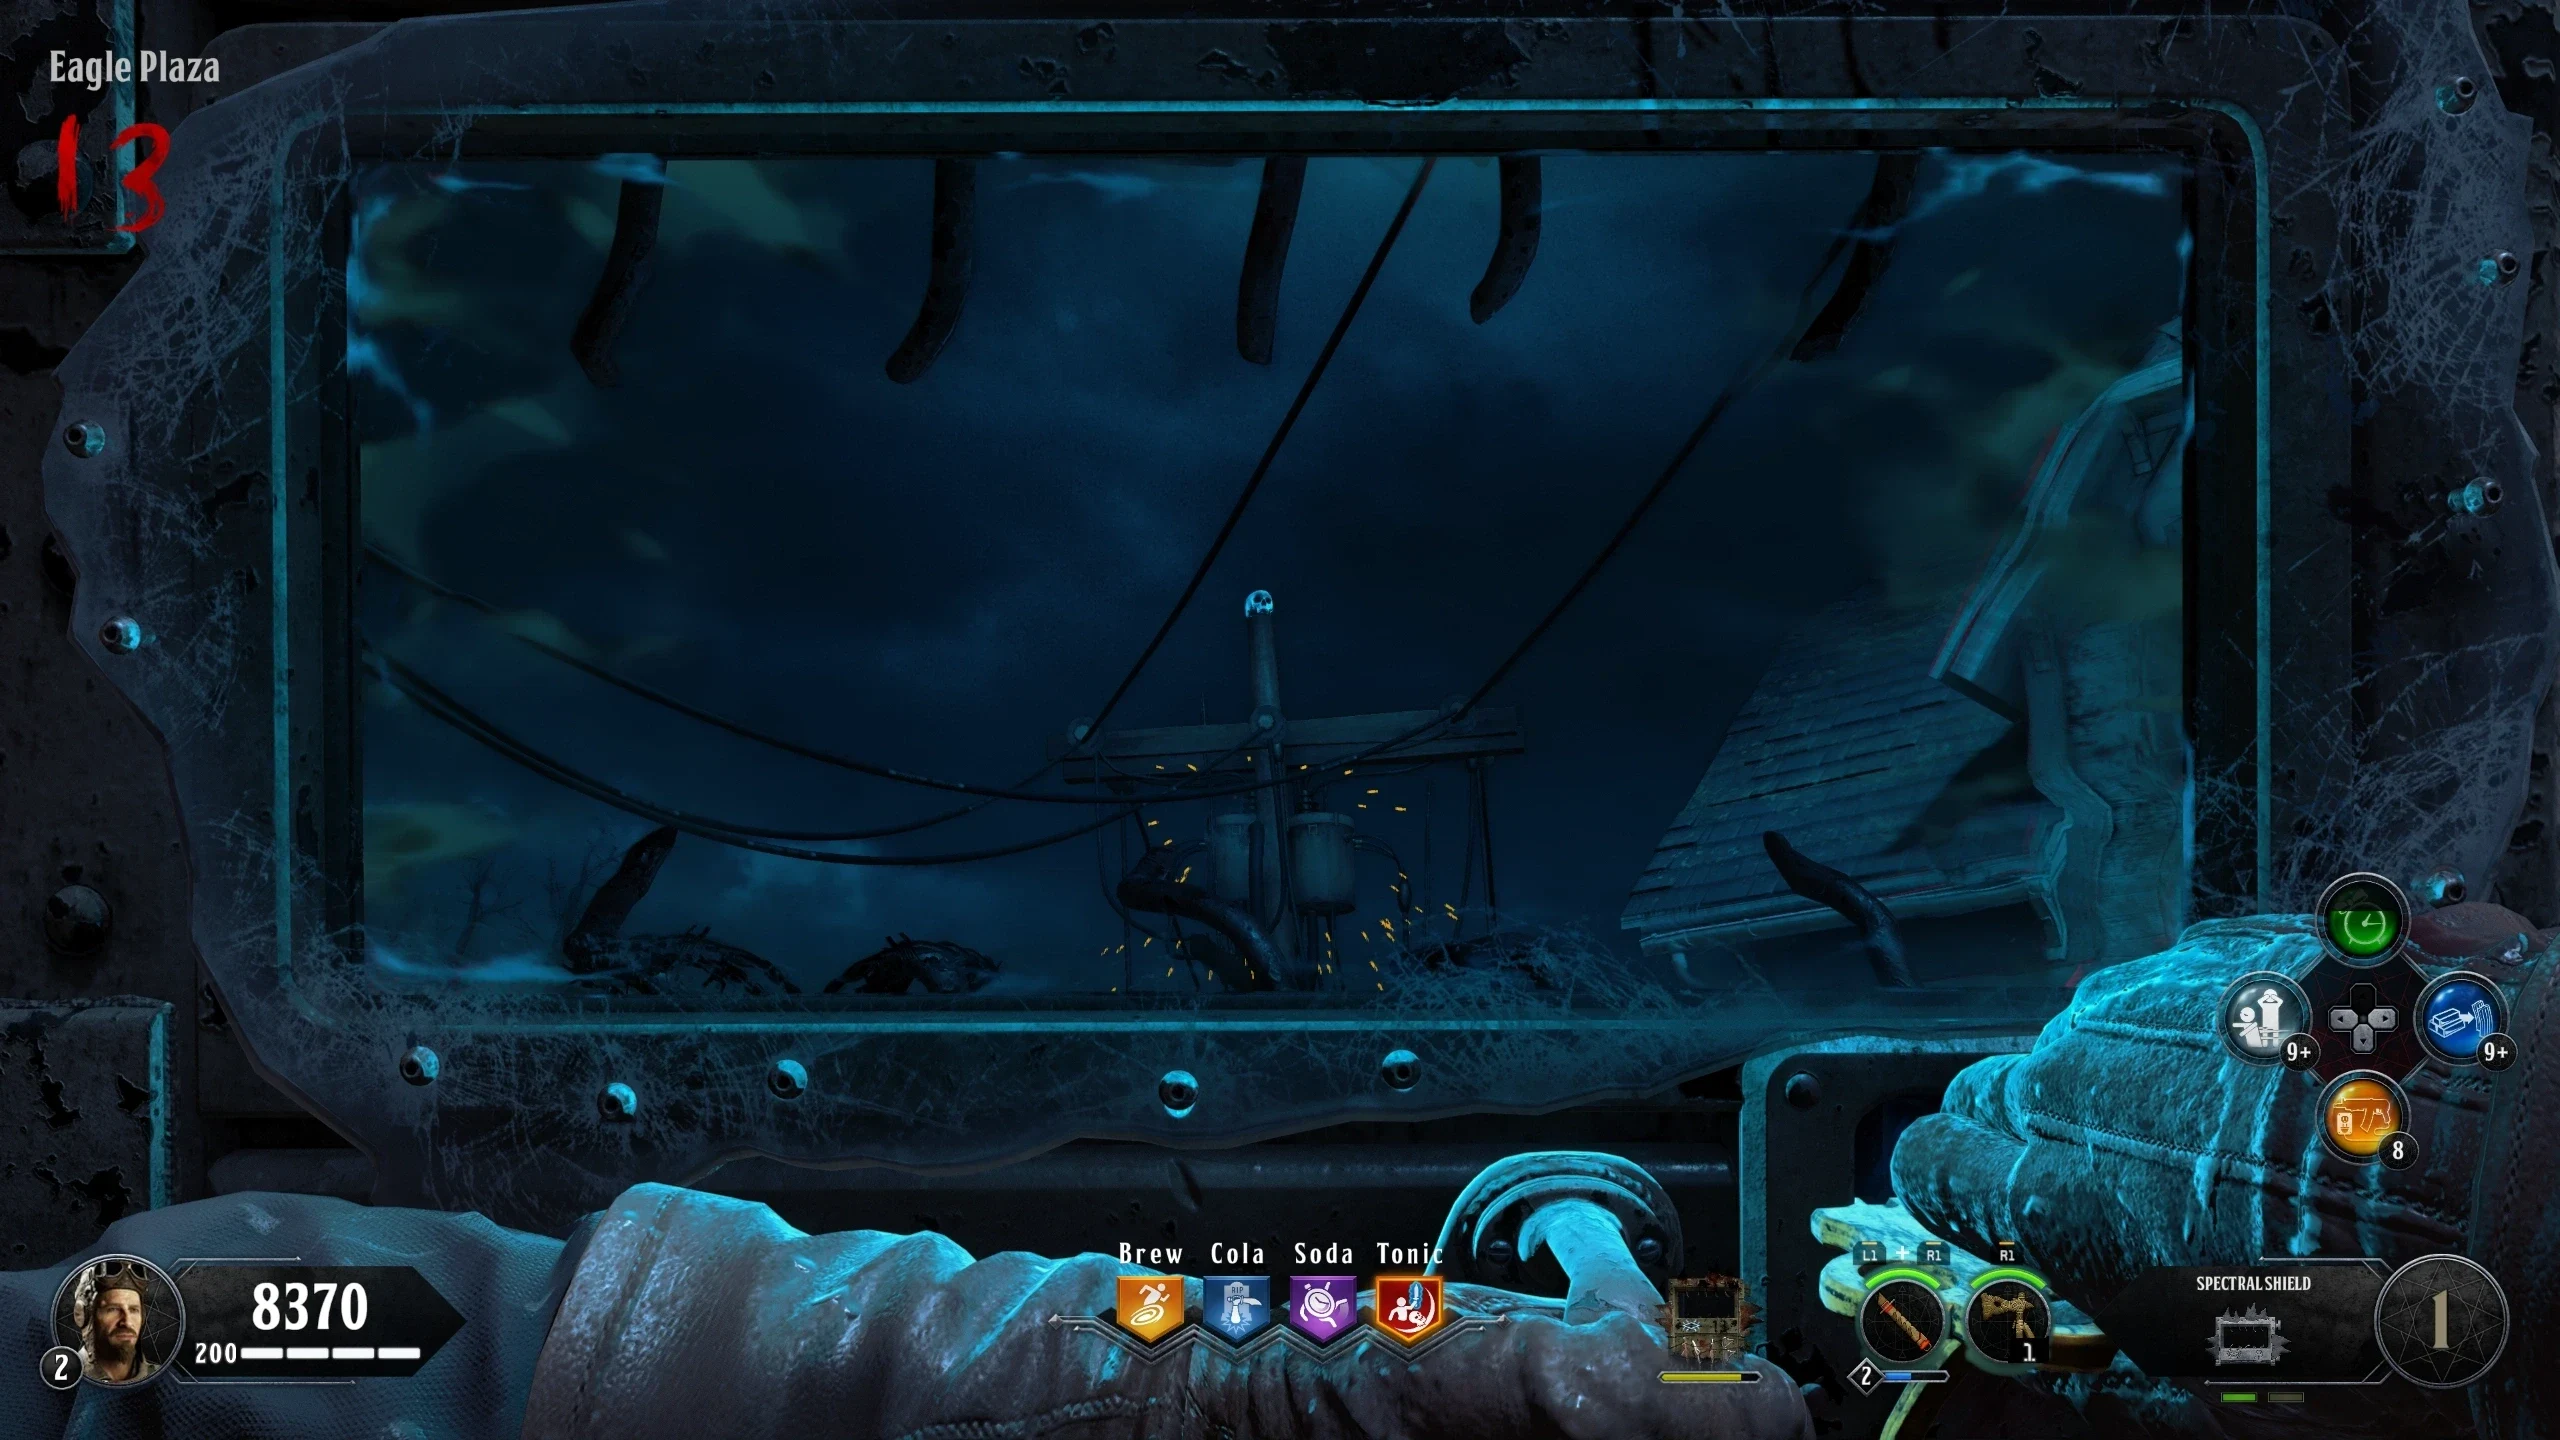
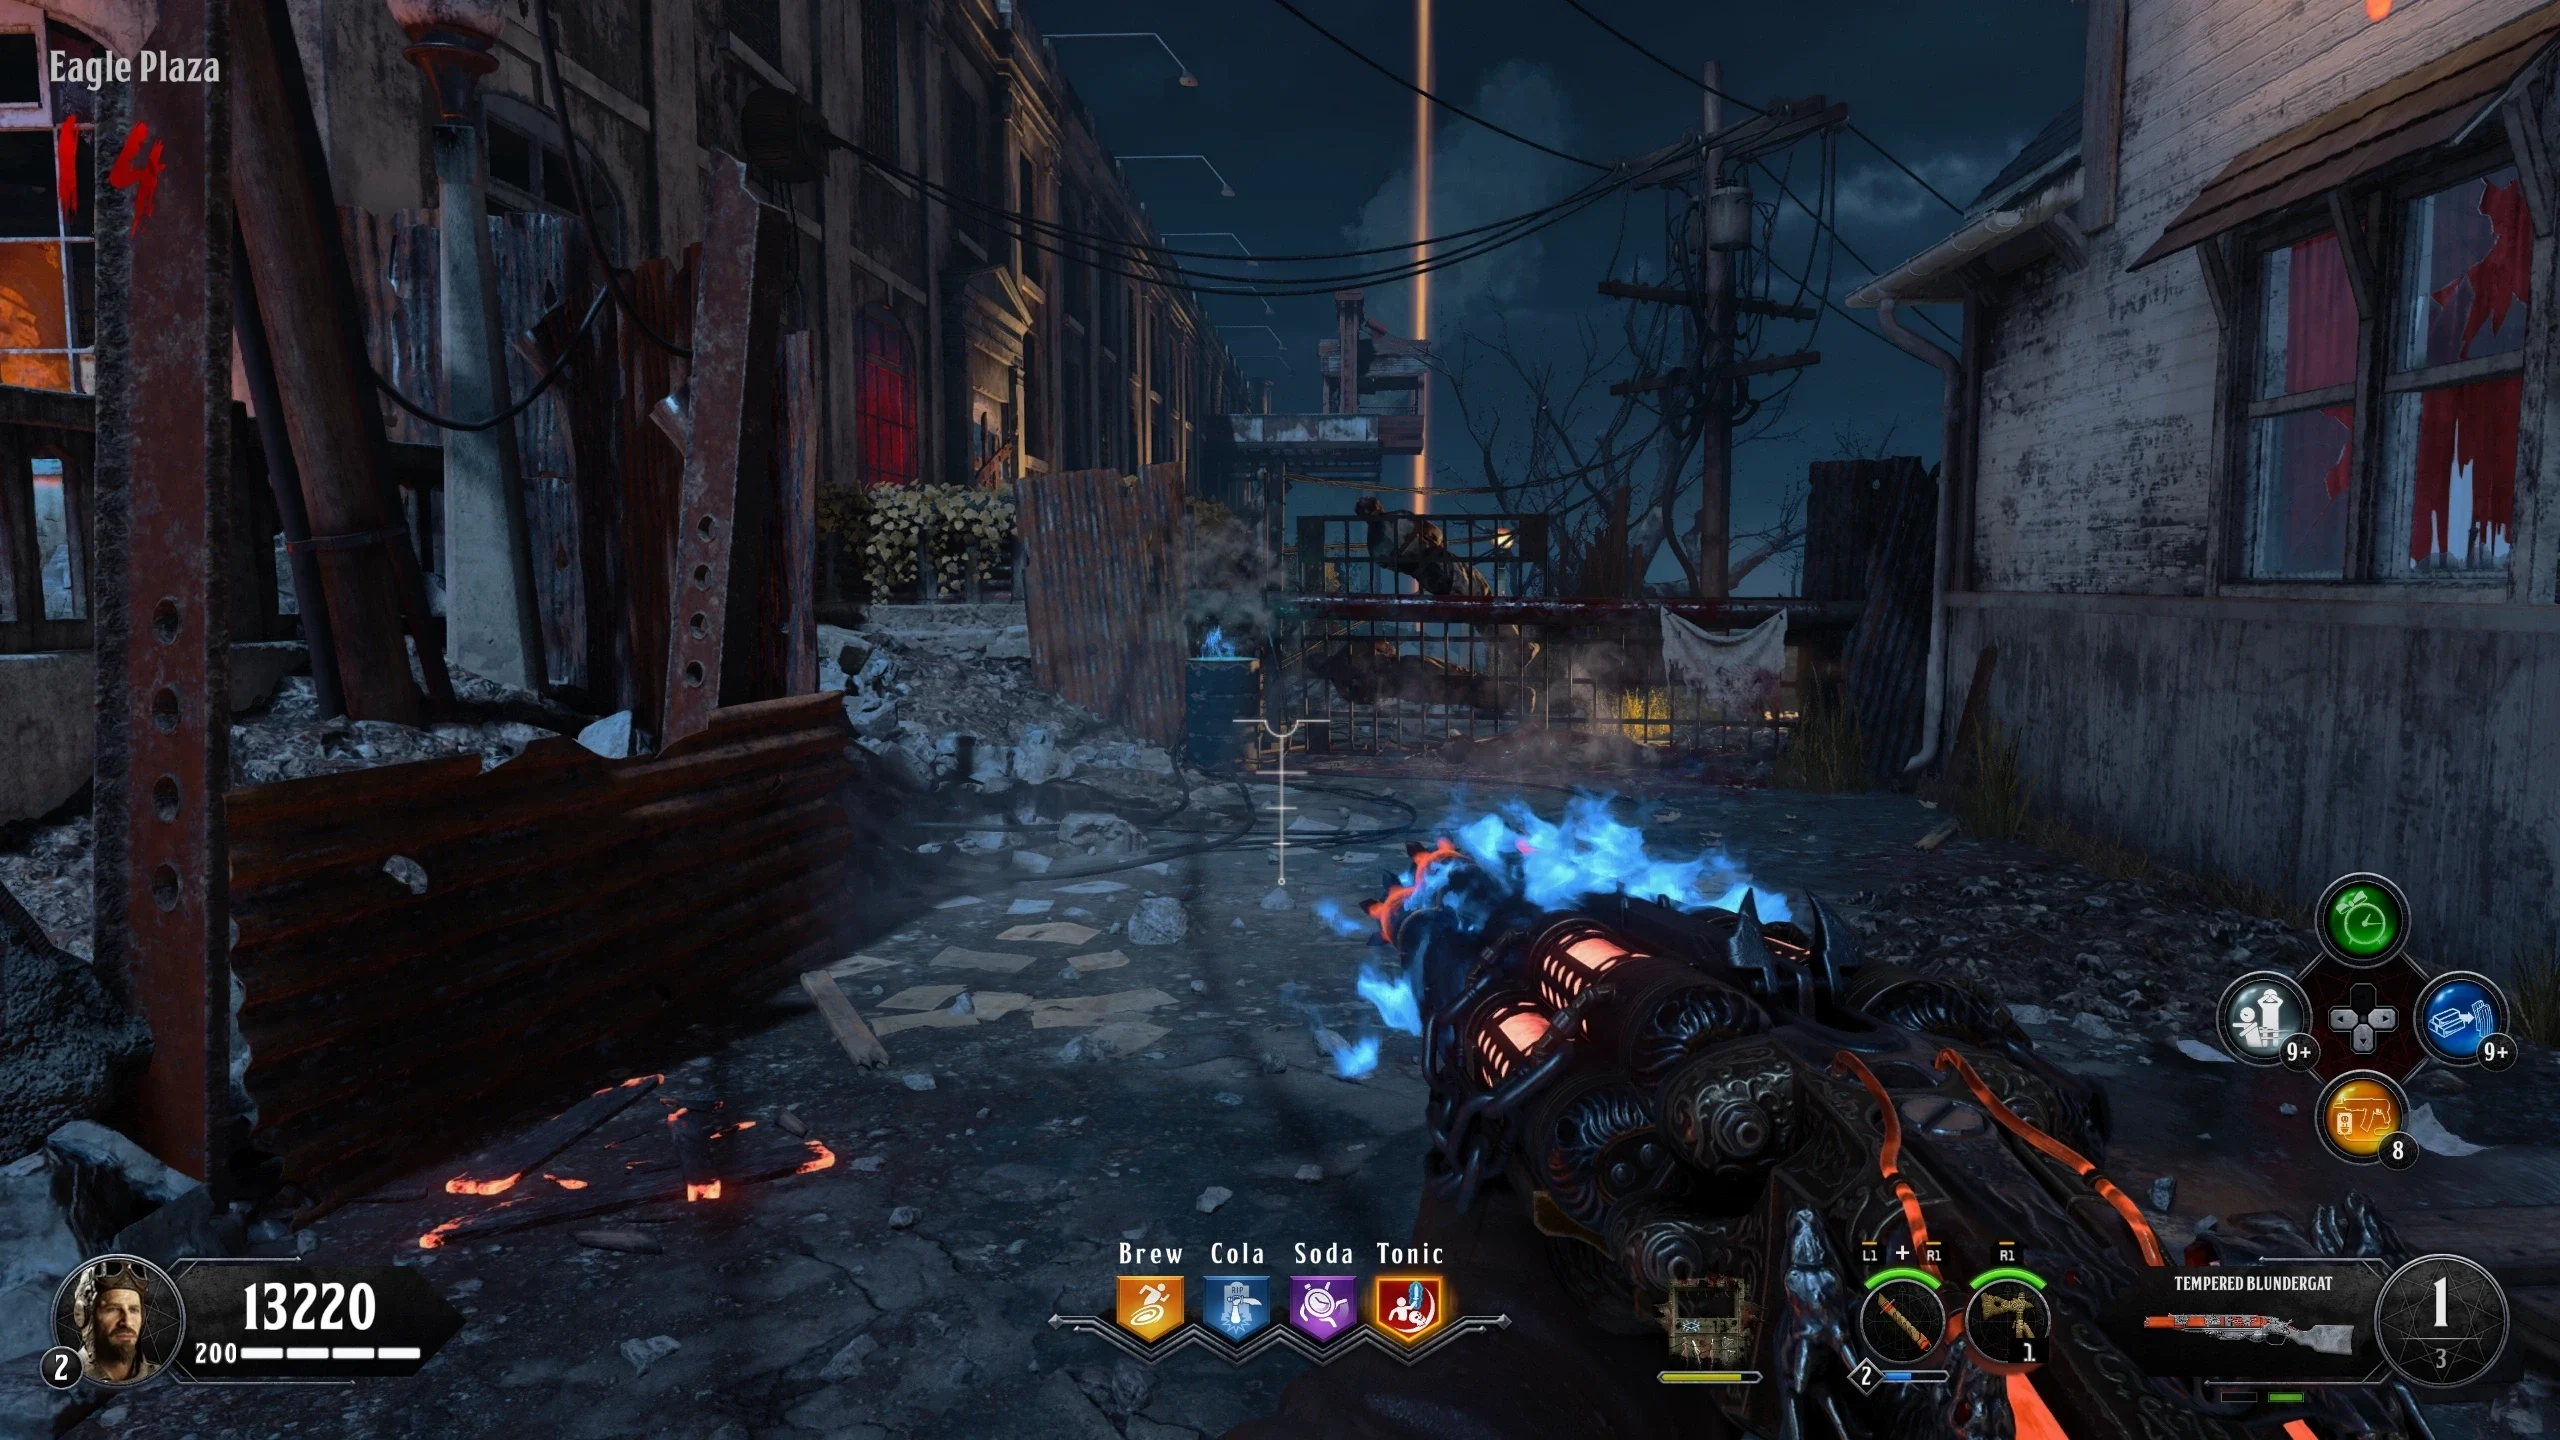
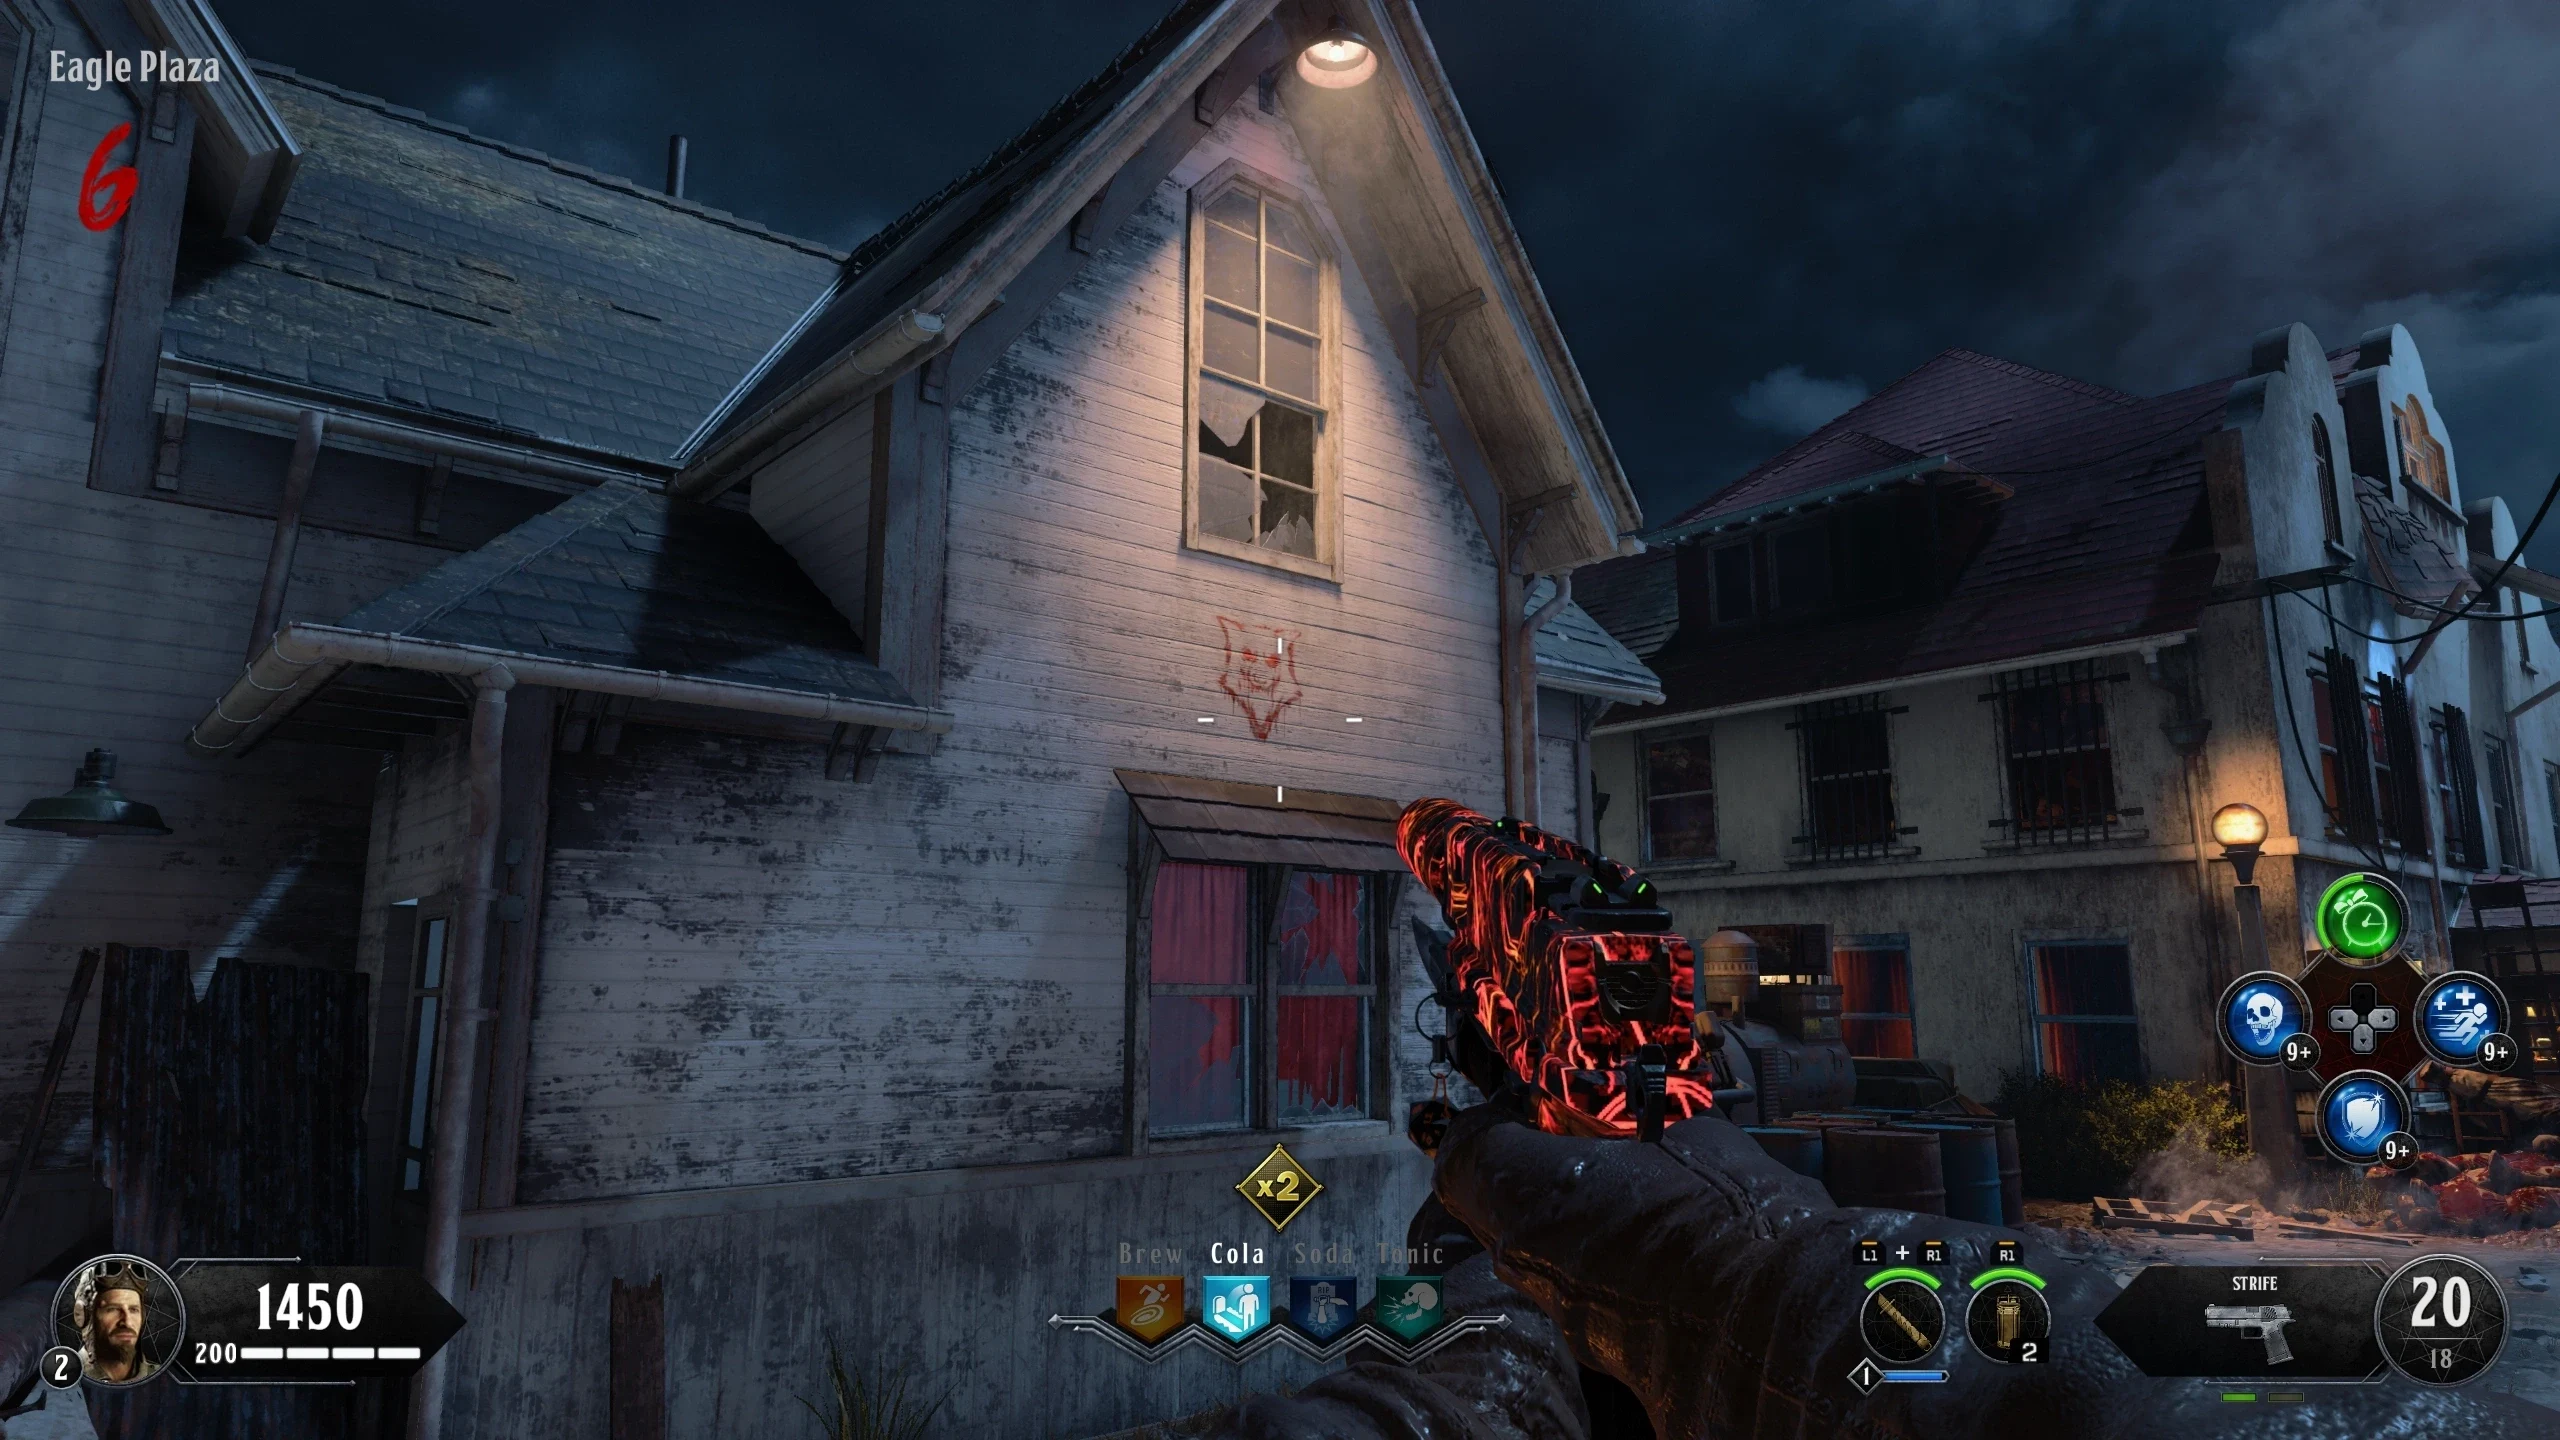
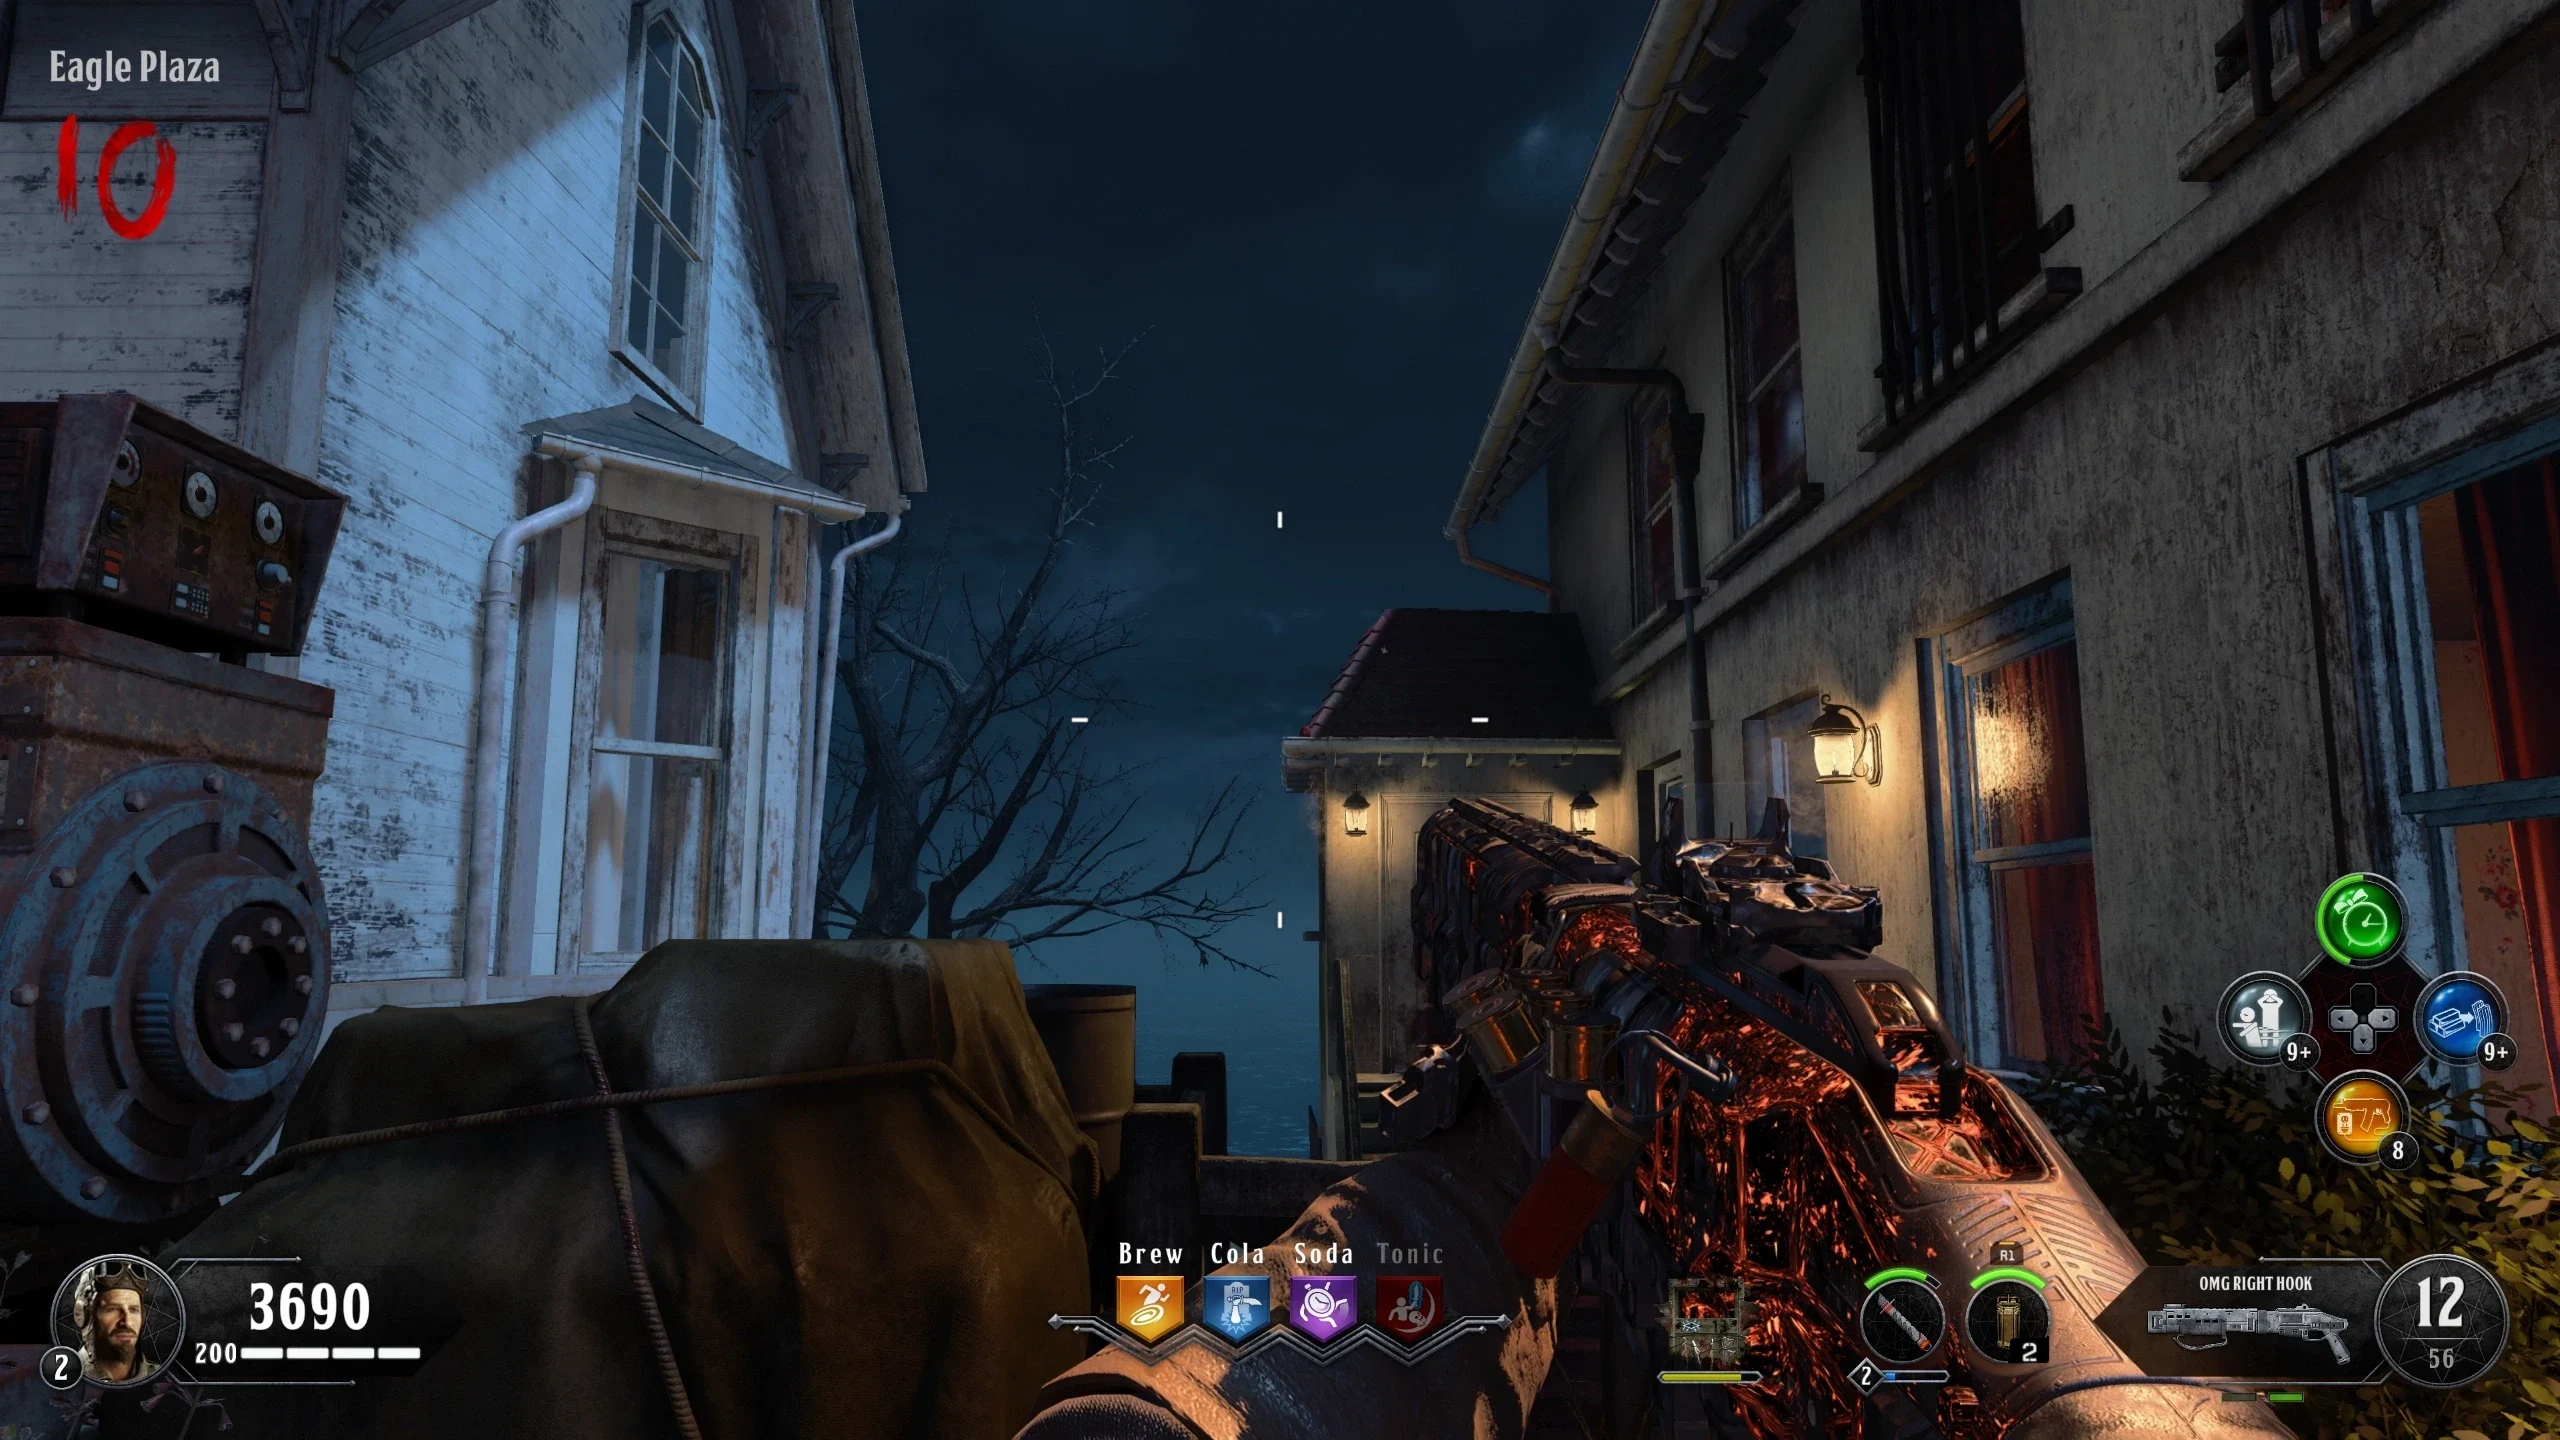
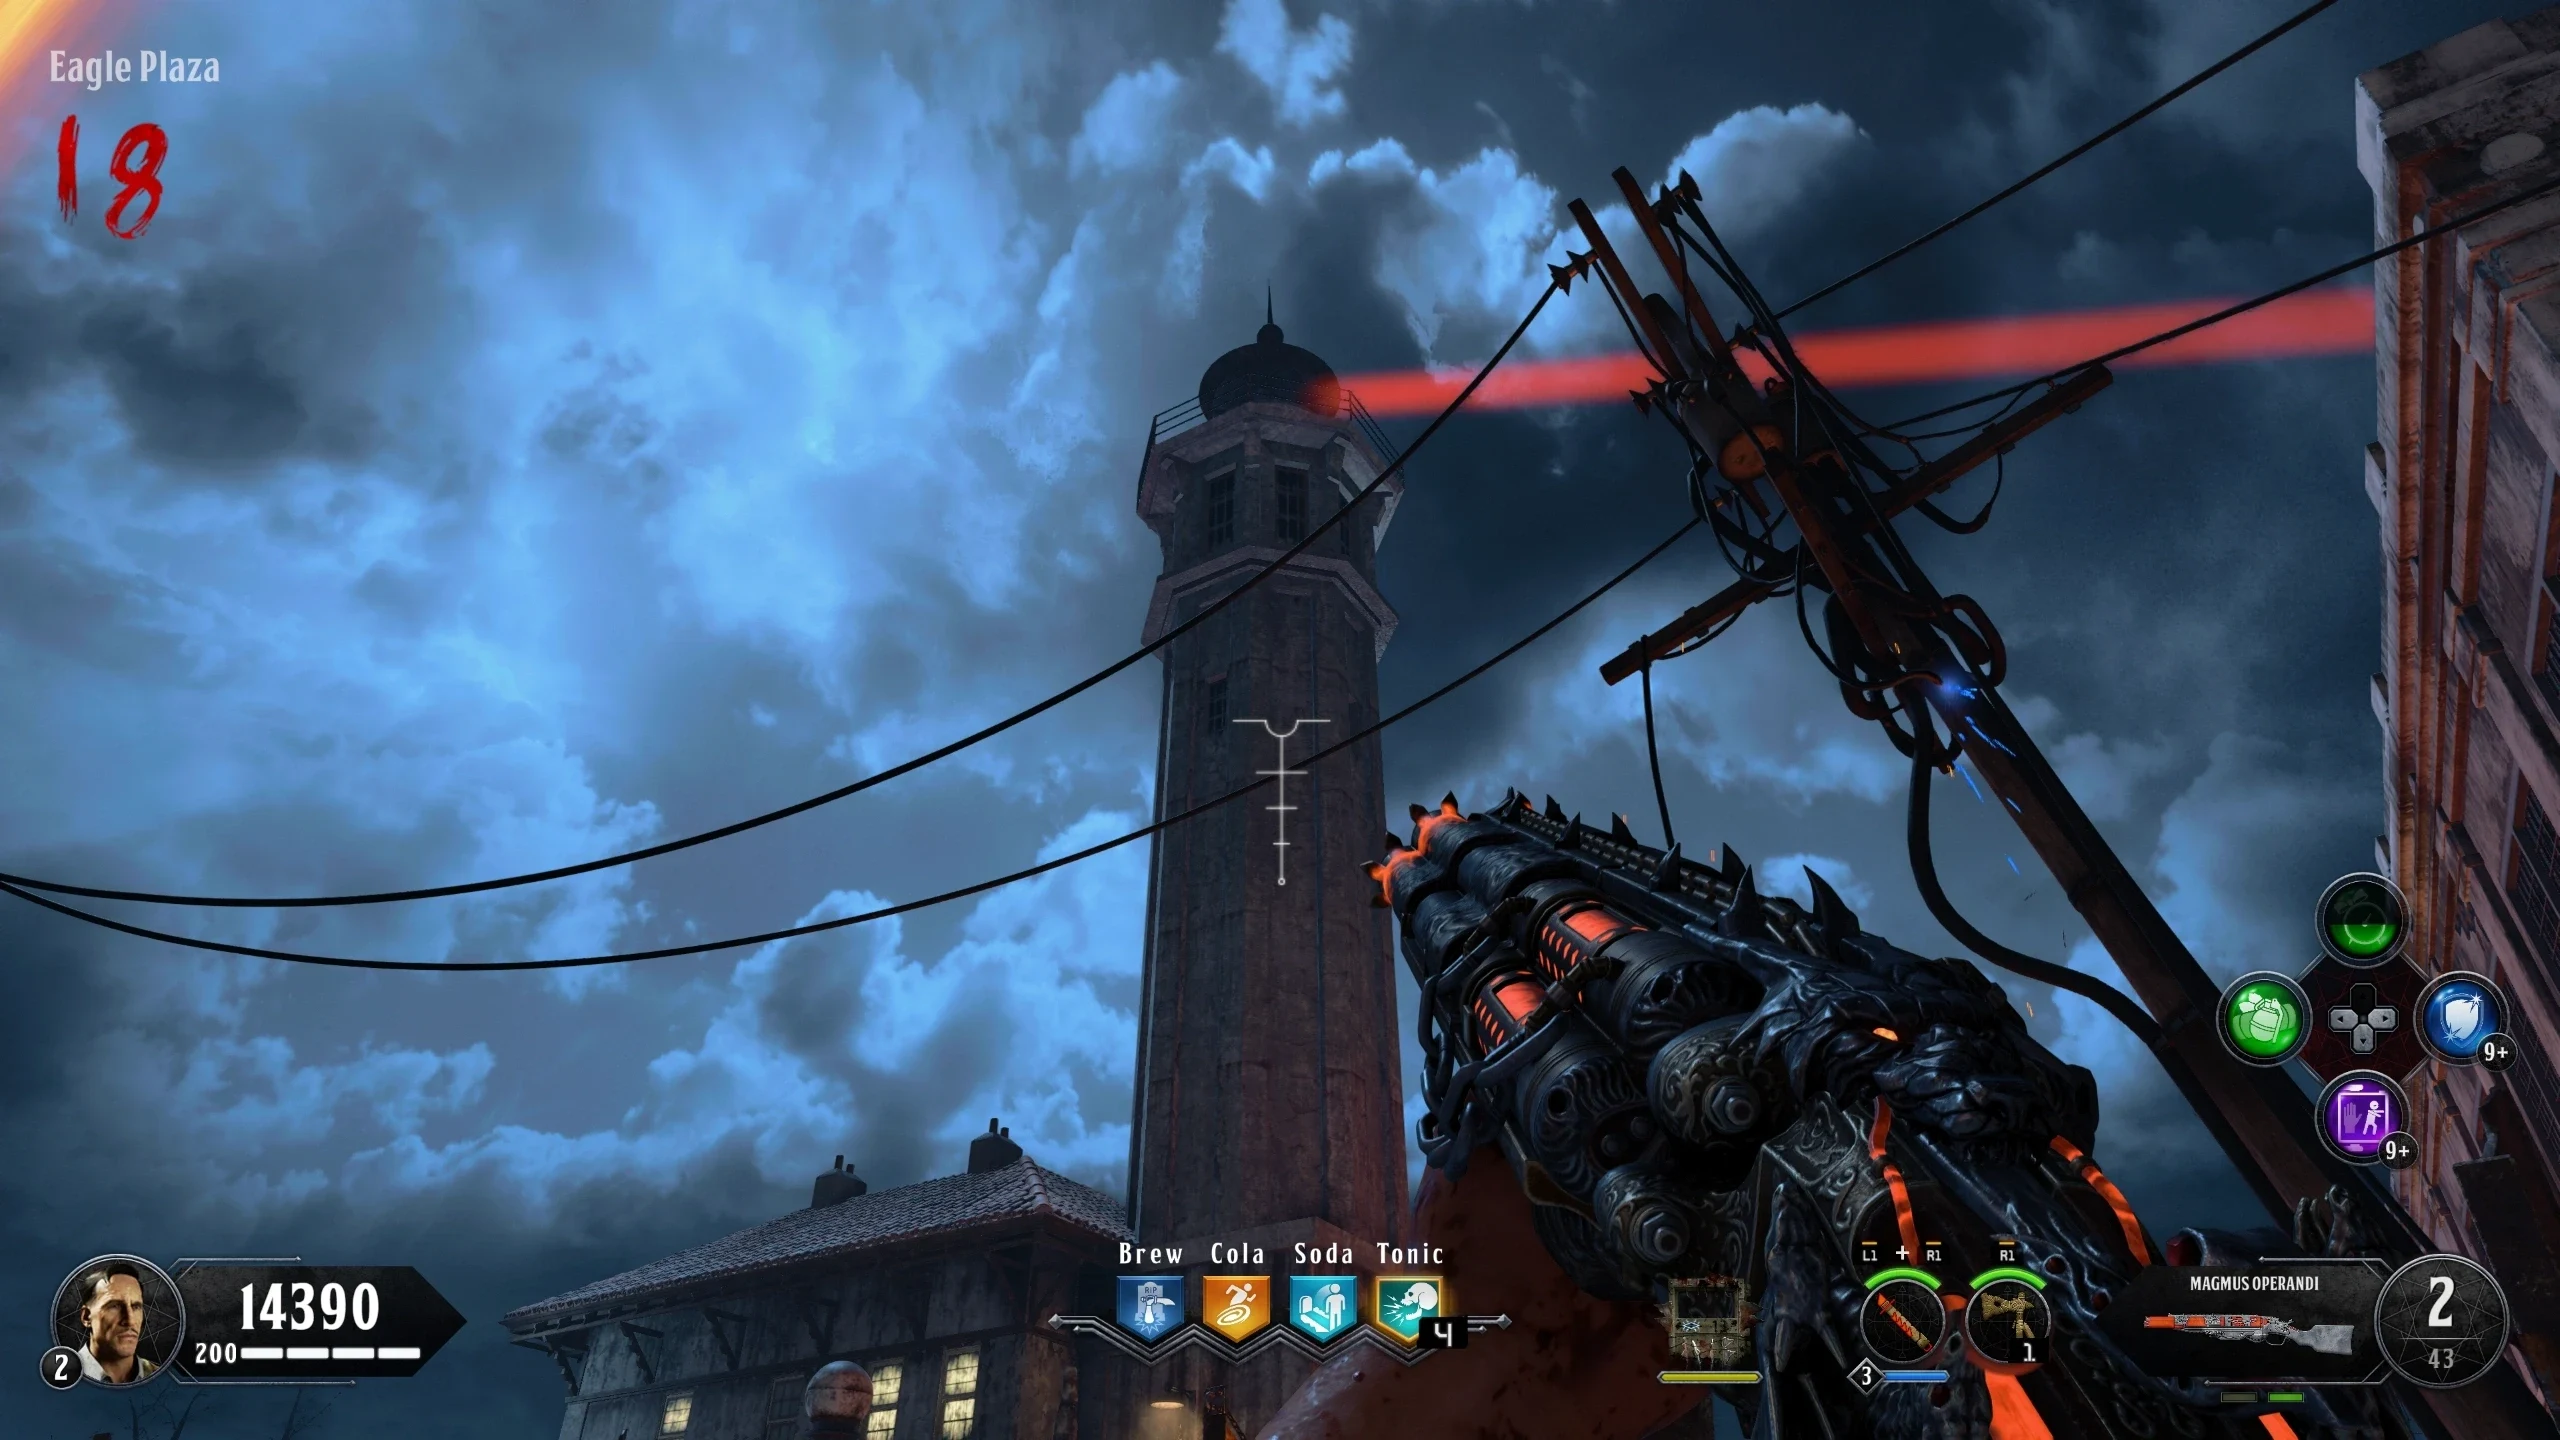
- Eagle Plaza - On a wooden pallet, left of the lava river
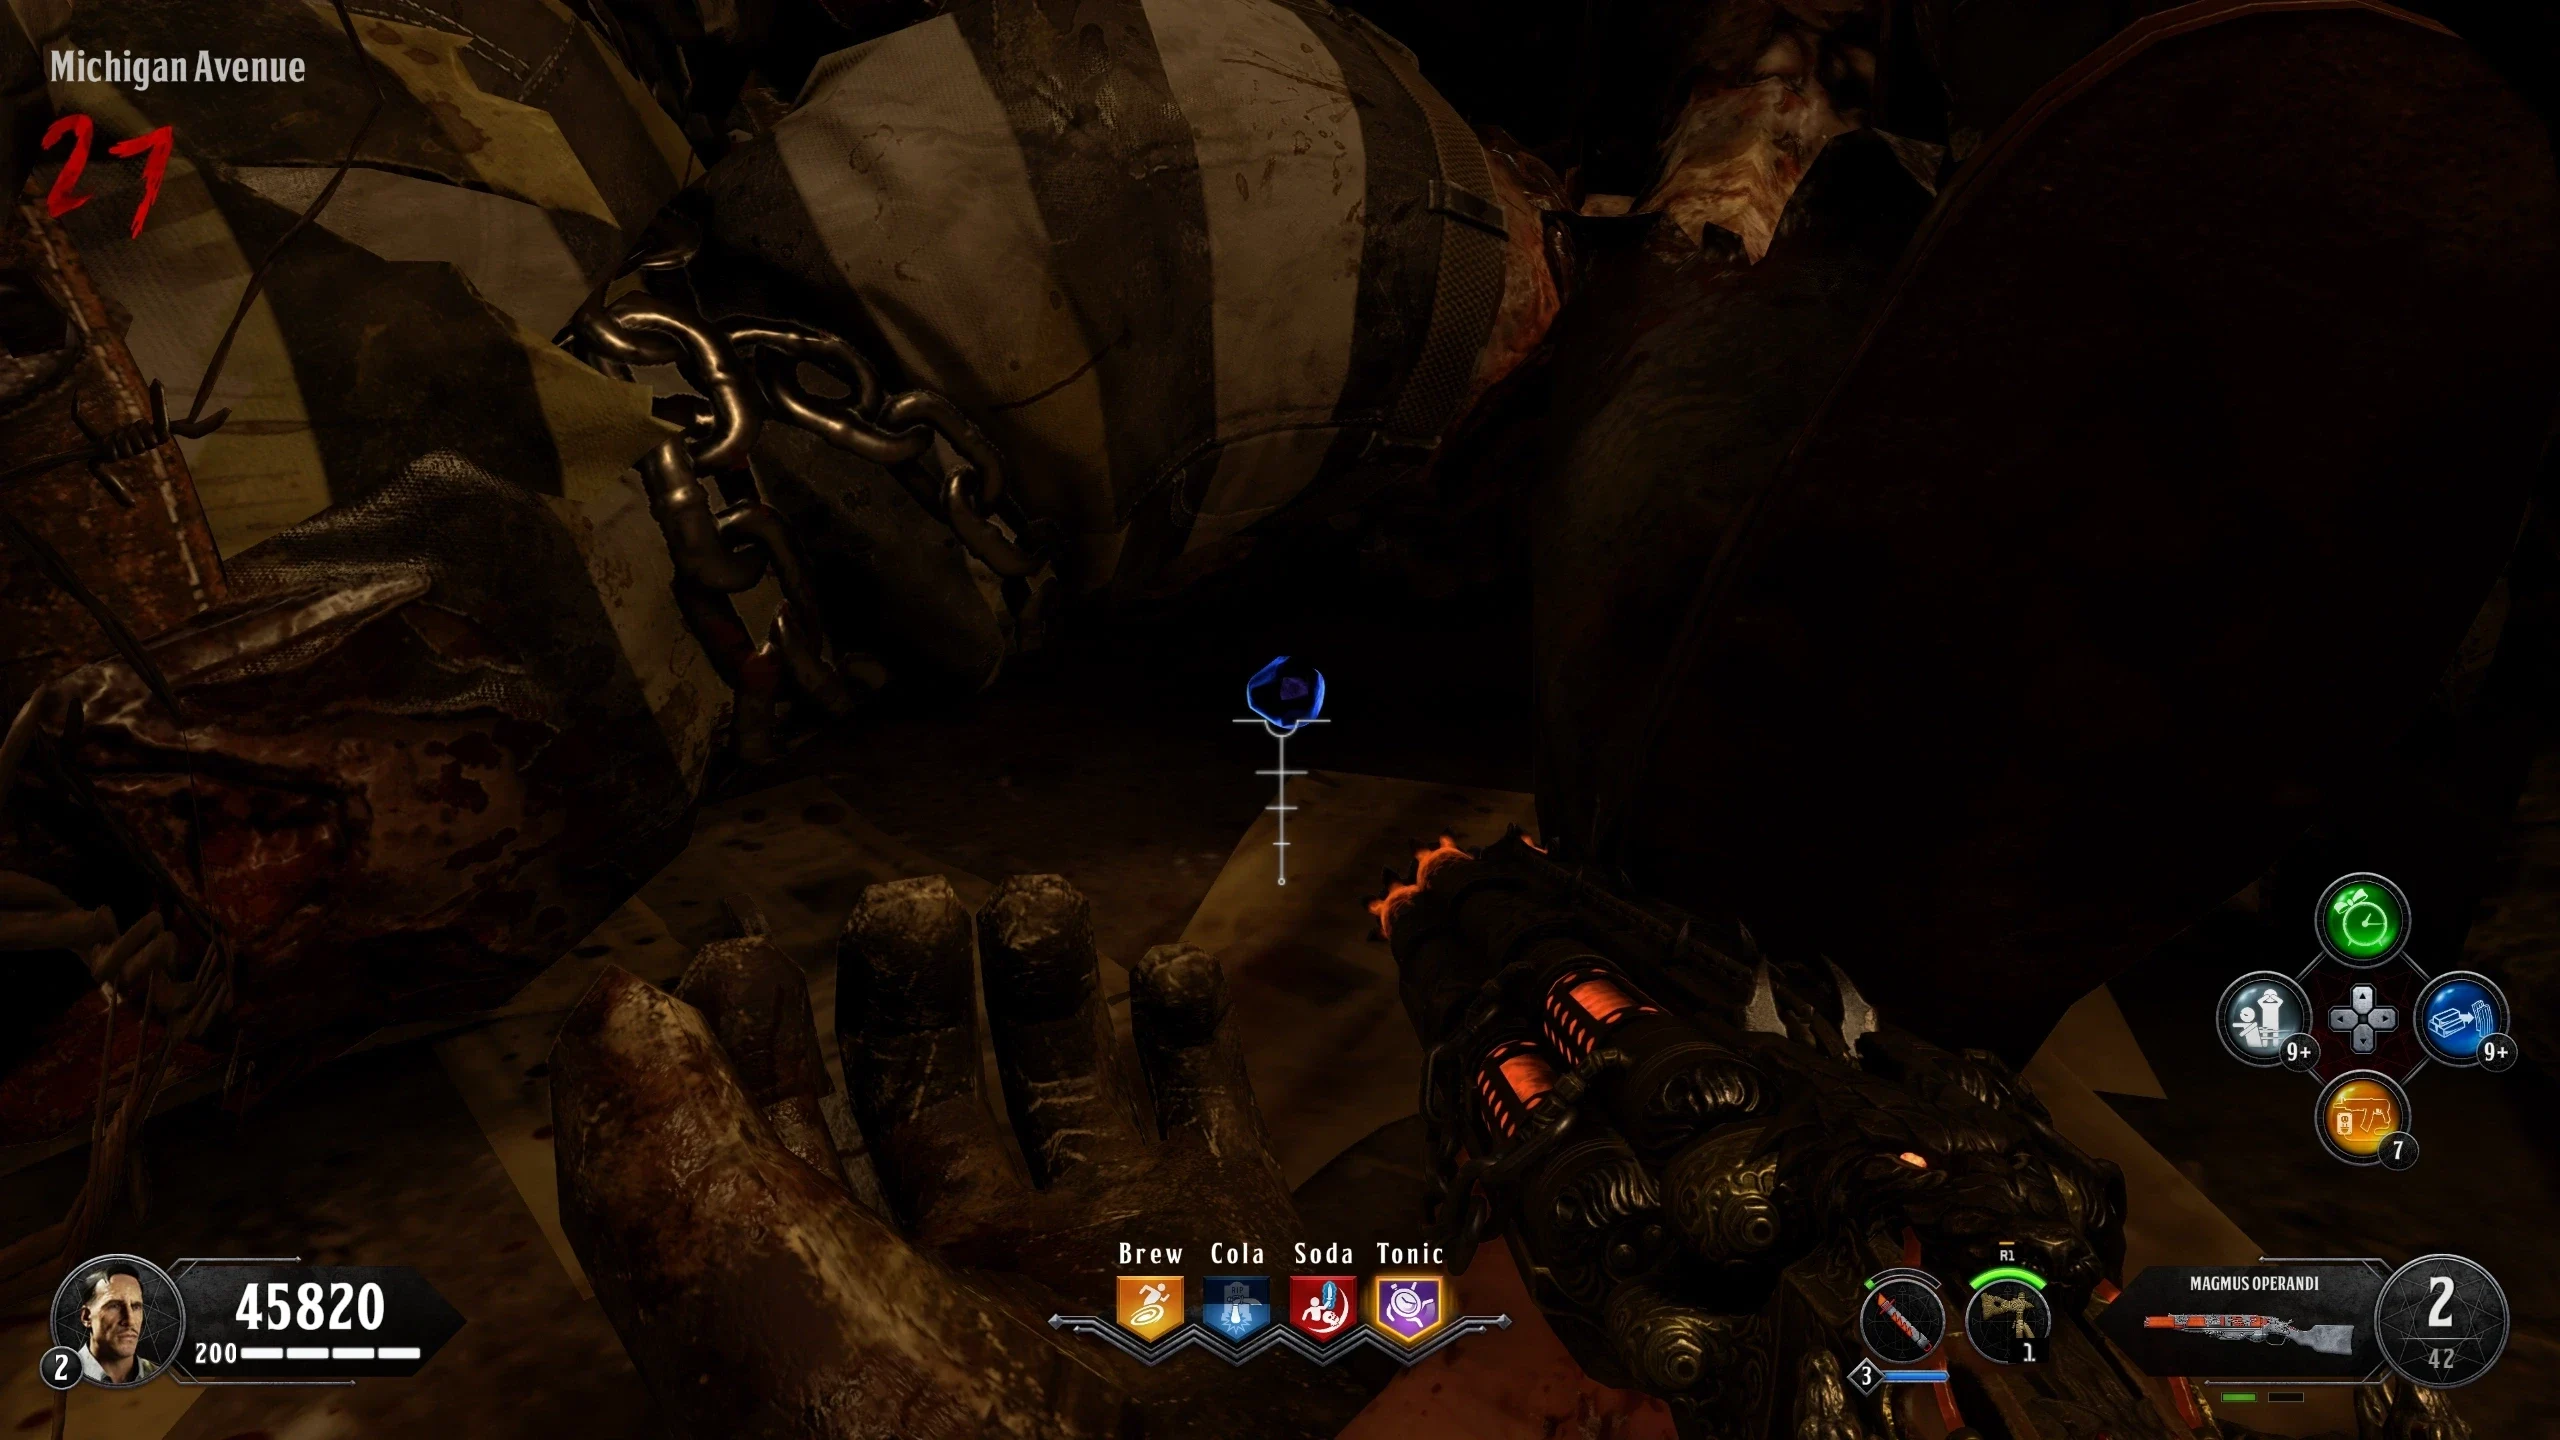
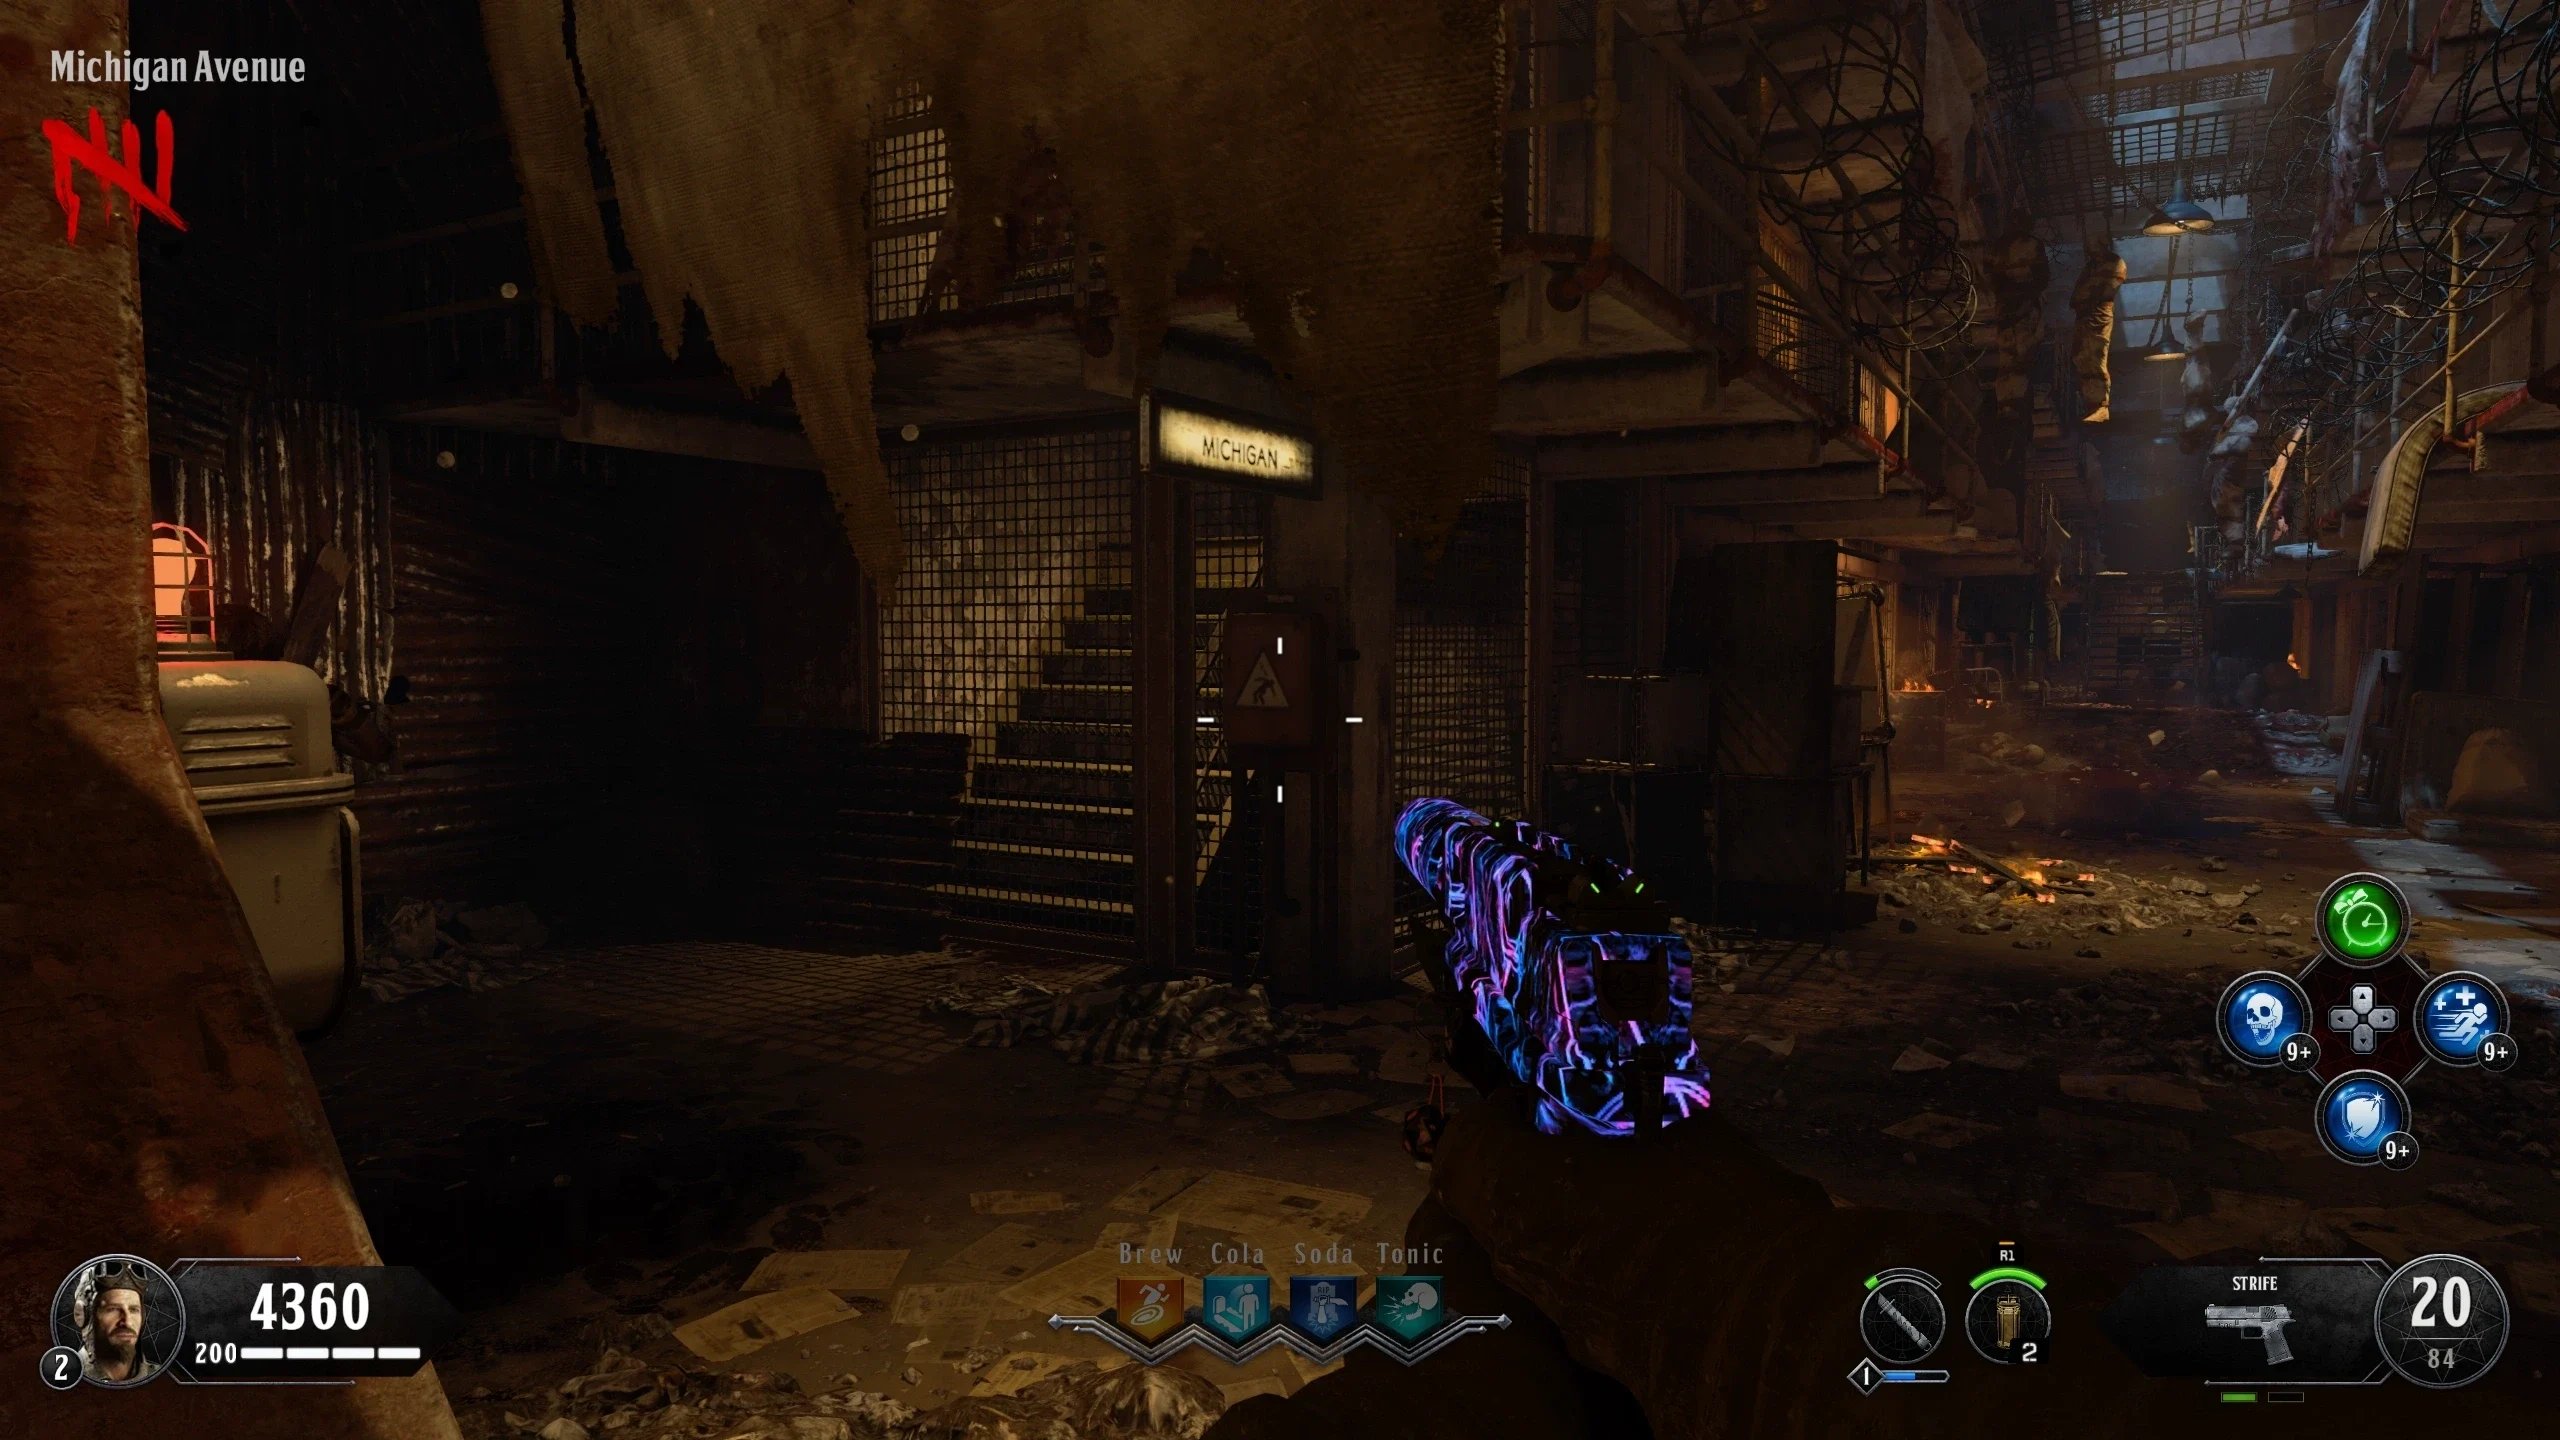
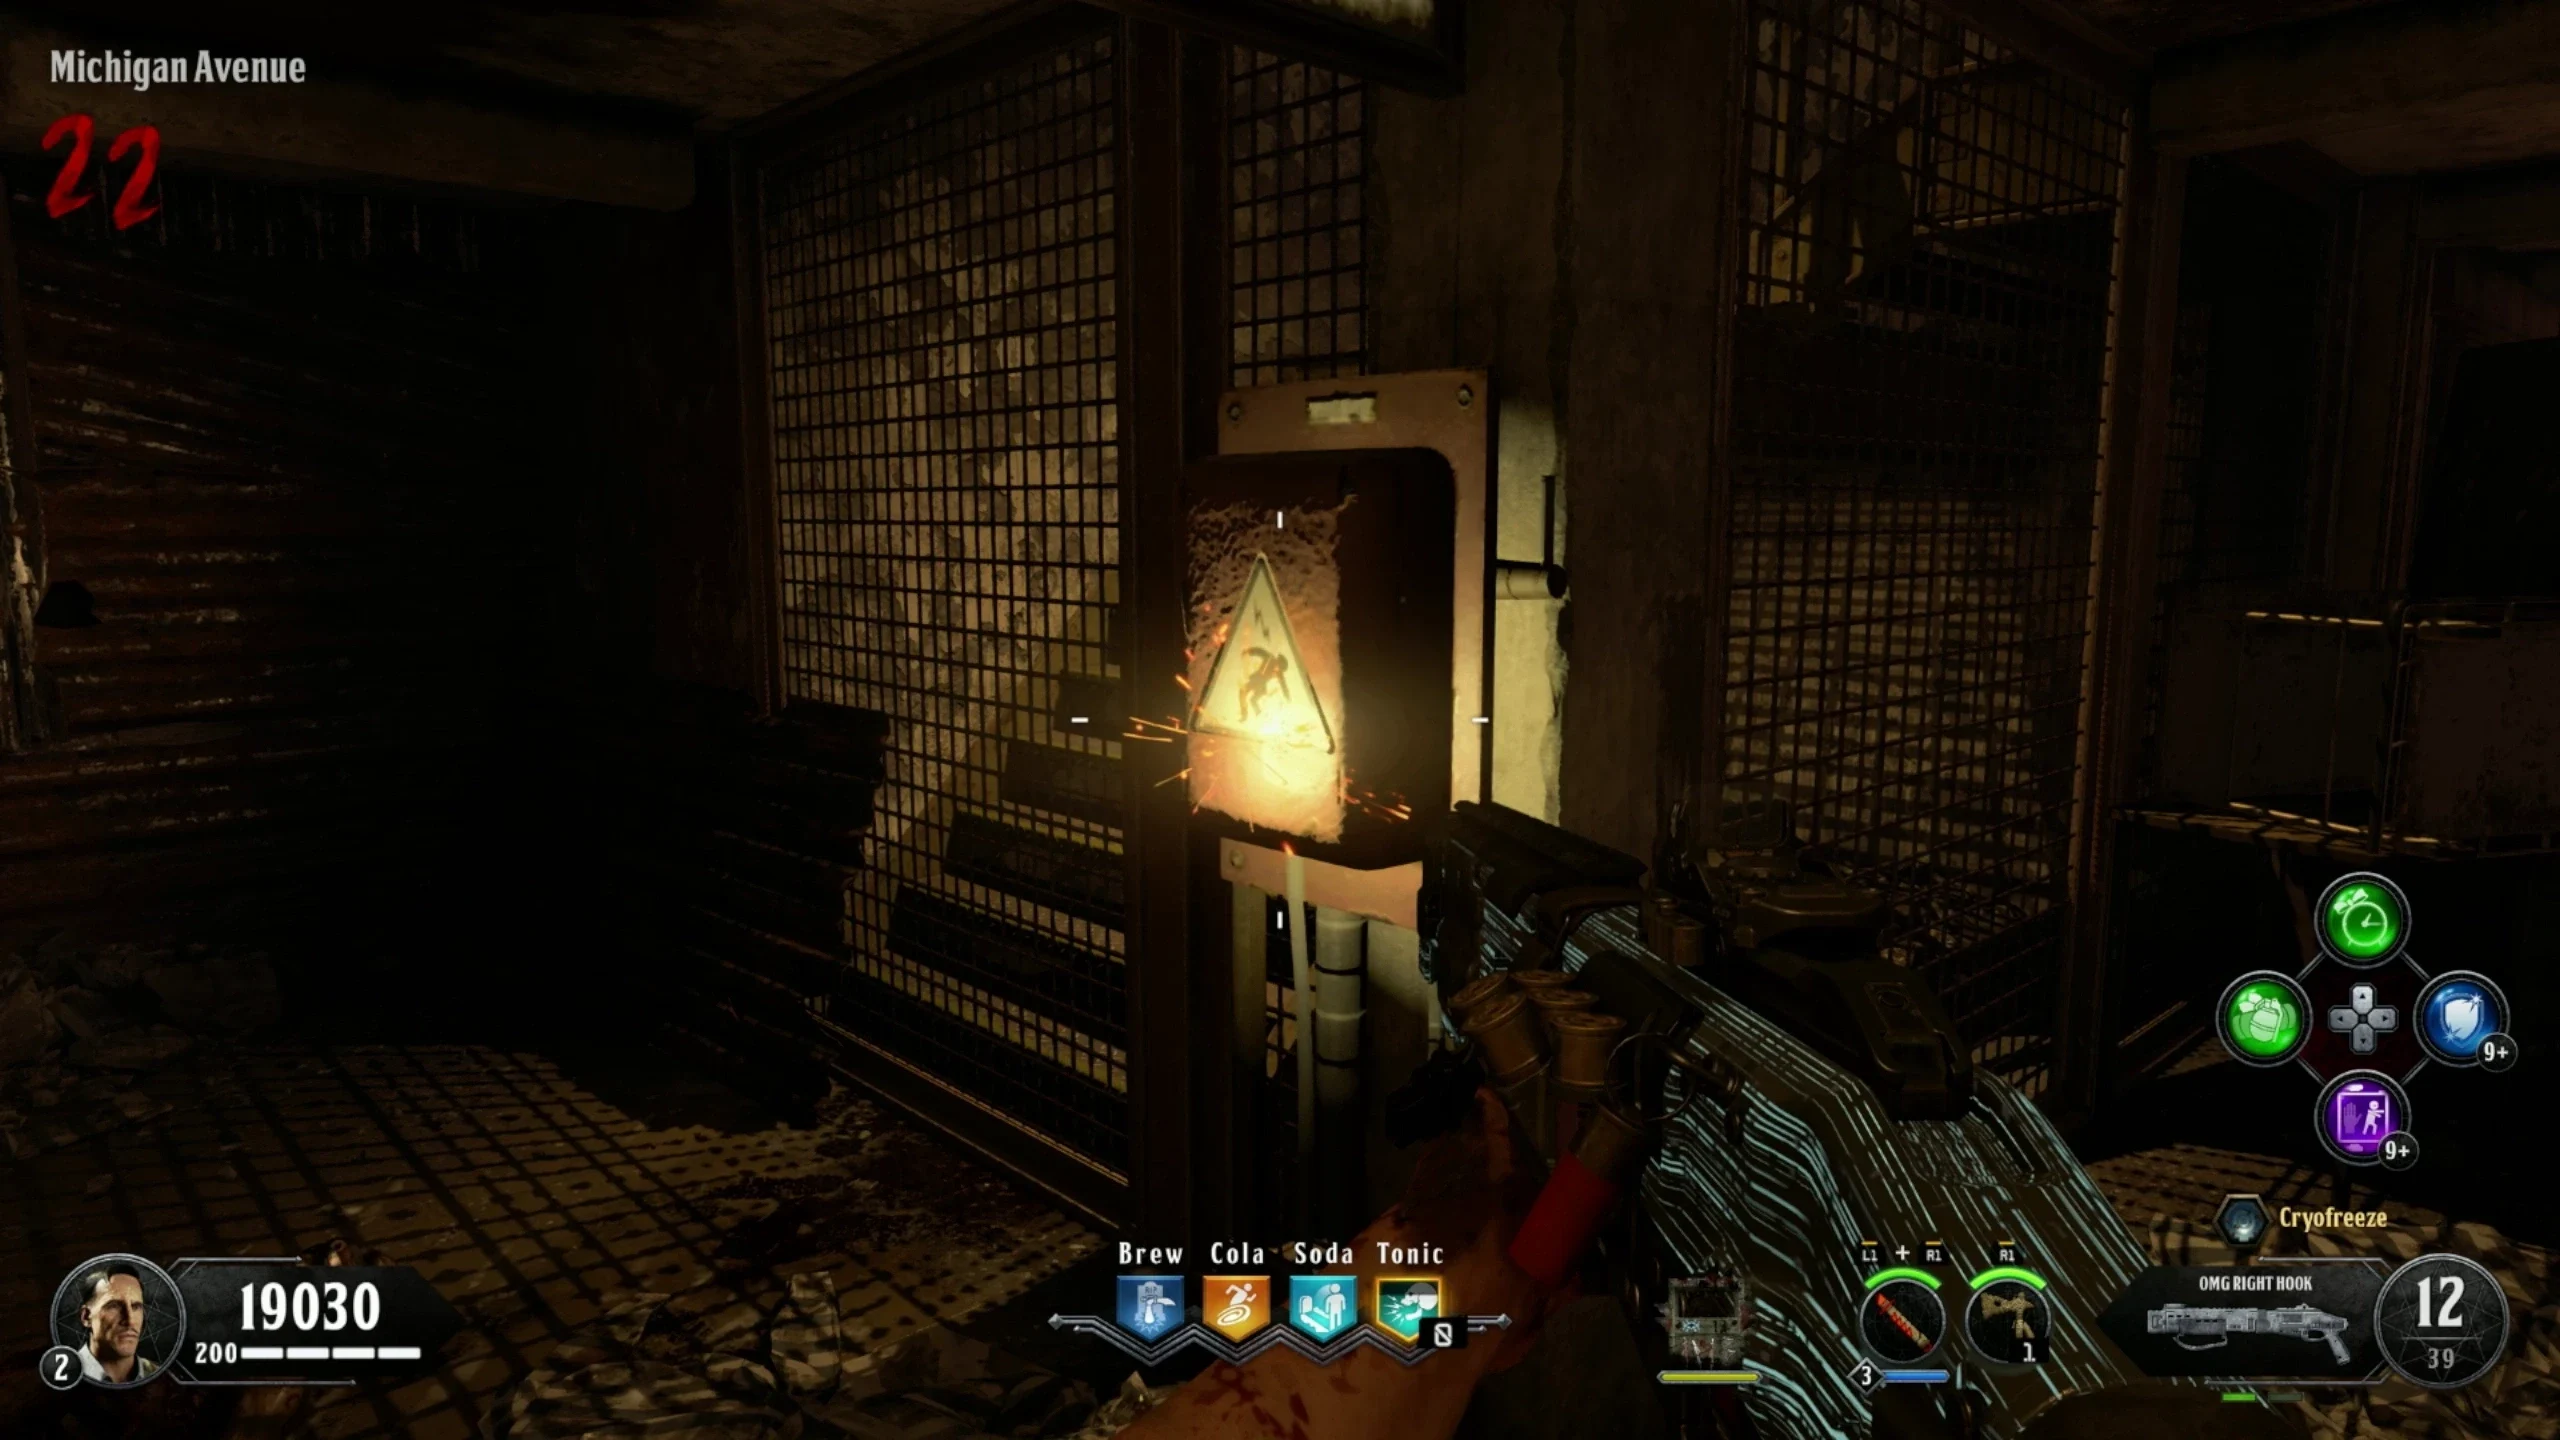
- Michigan Avenue - Above the power box just outside the 'Warden's Office'/'Sally Port'
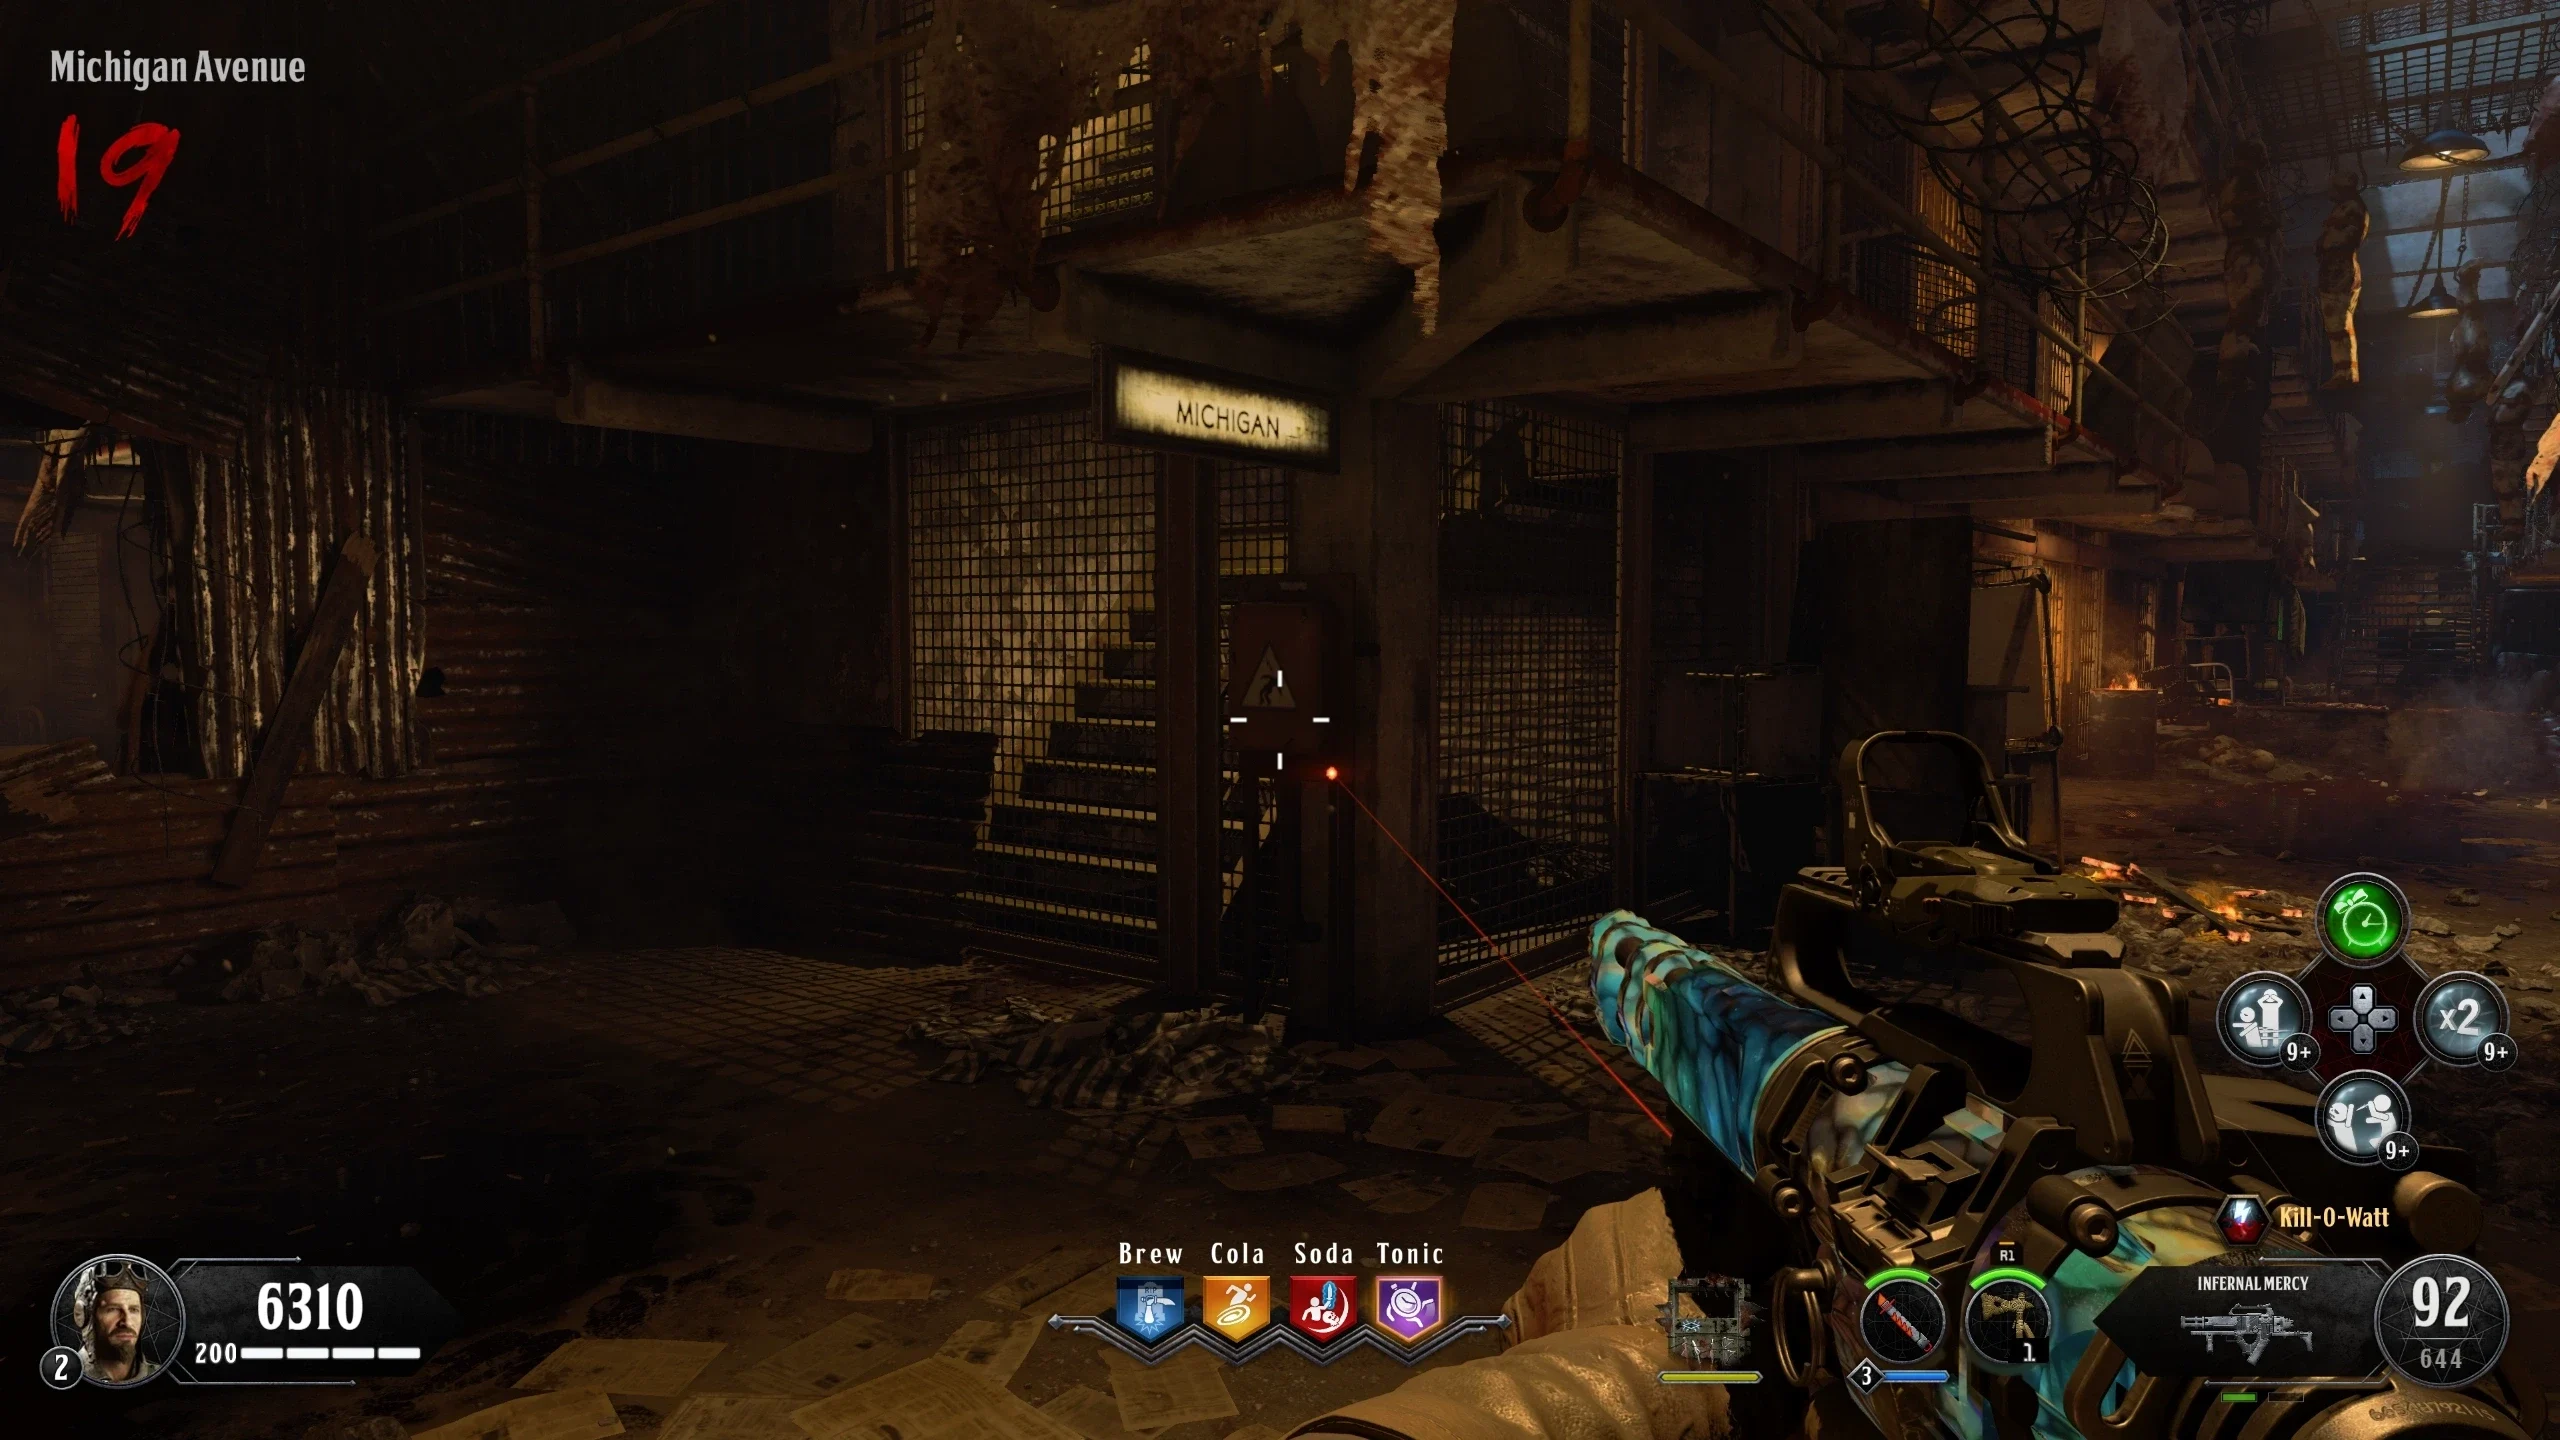
- Michigan Avenue - Near the cell with the power-up locked inside
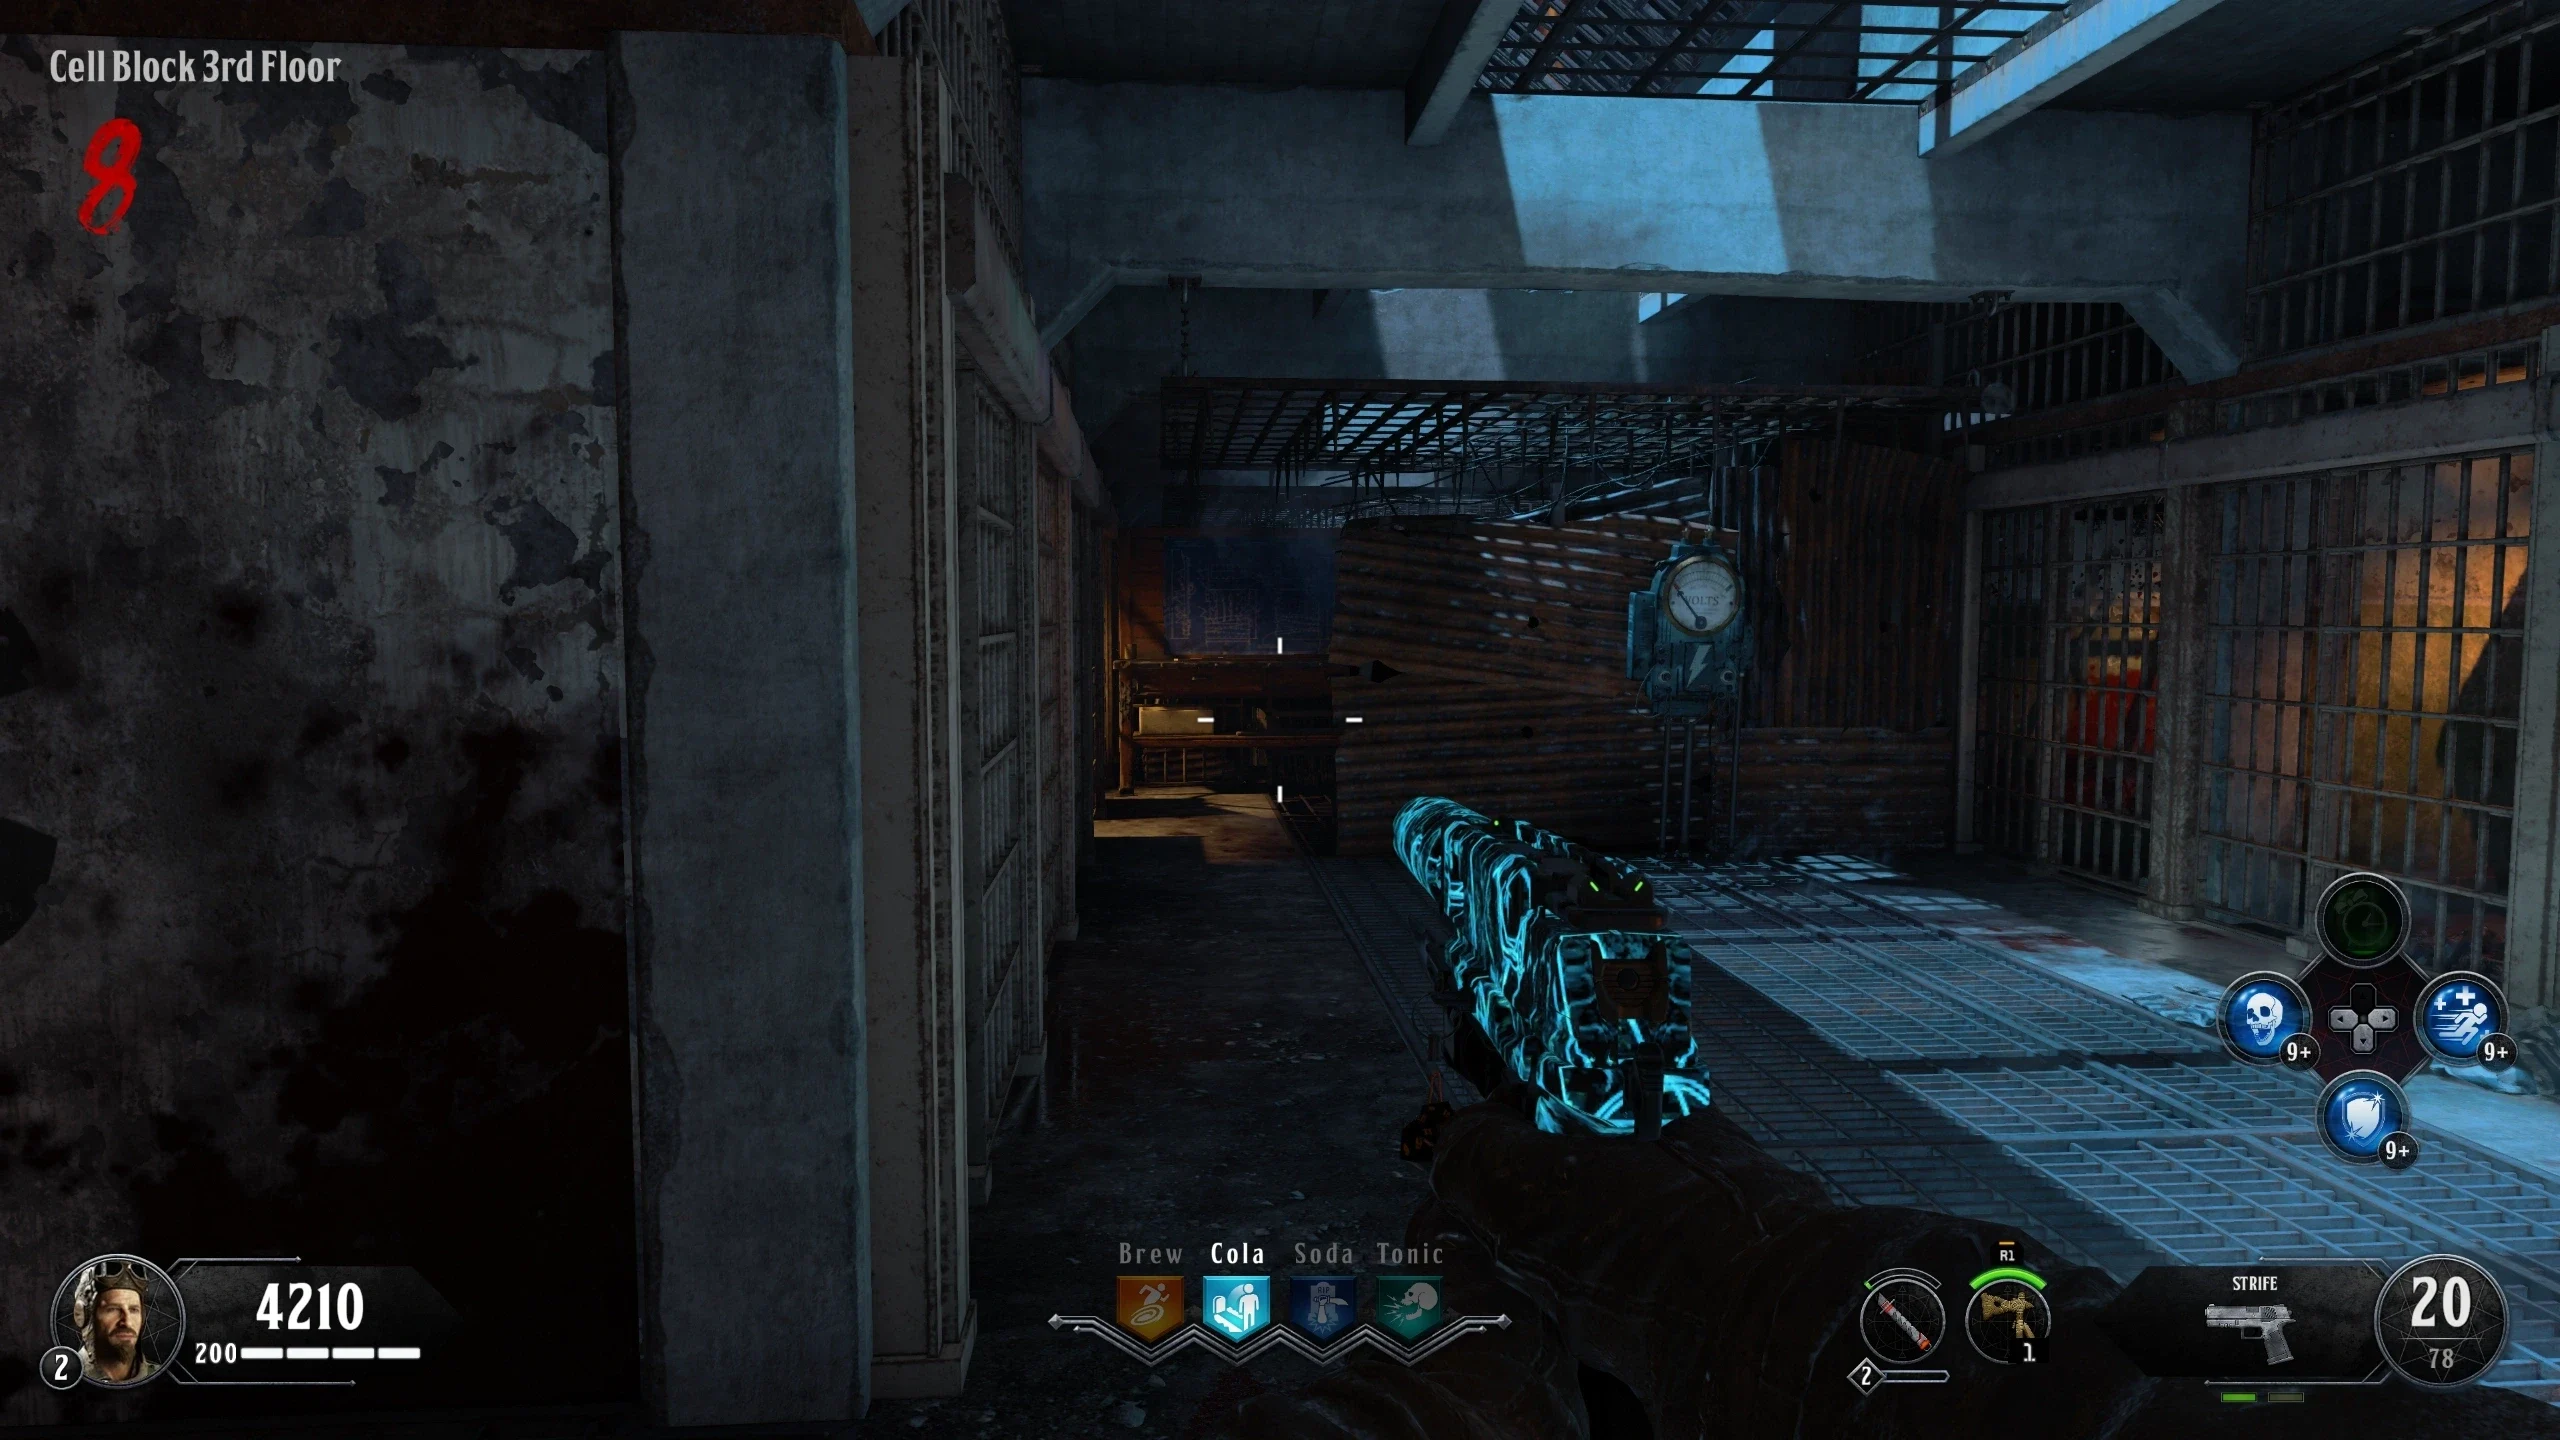
- Cell Block 3rd Floor - Beside the workbench
- Cell Block 3rd Floor - Above the Hellhound
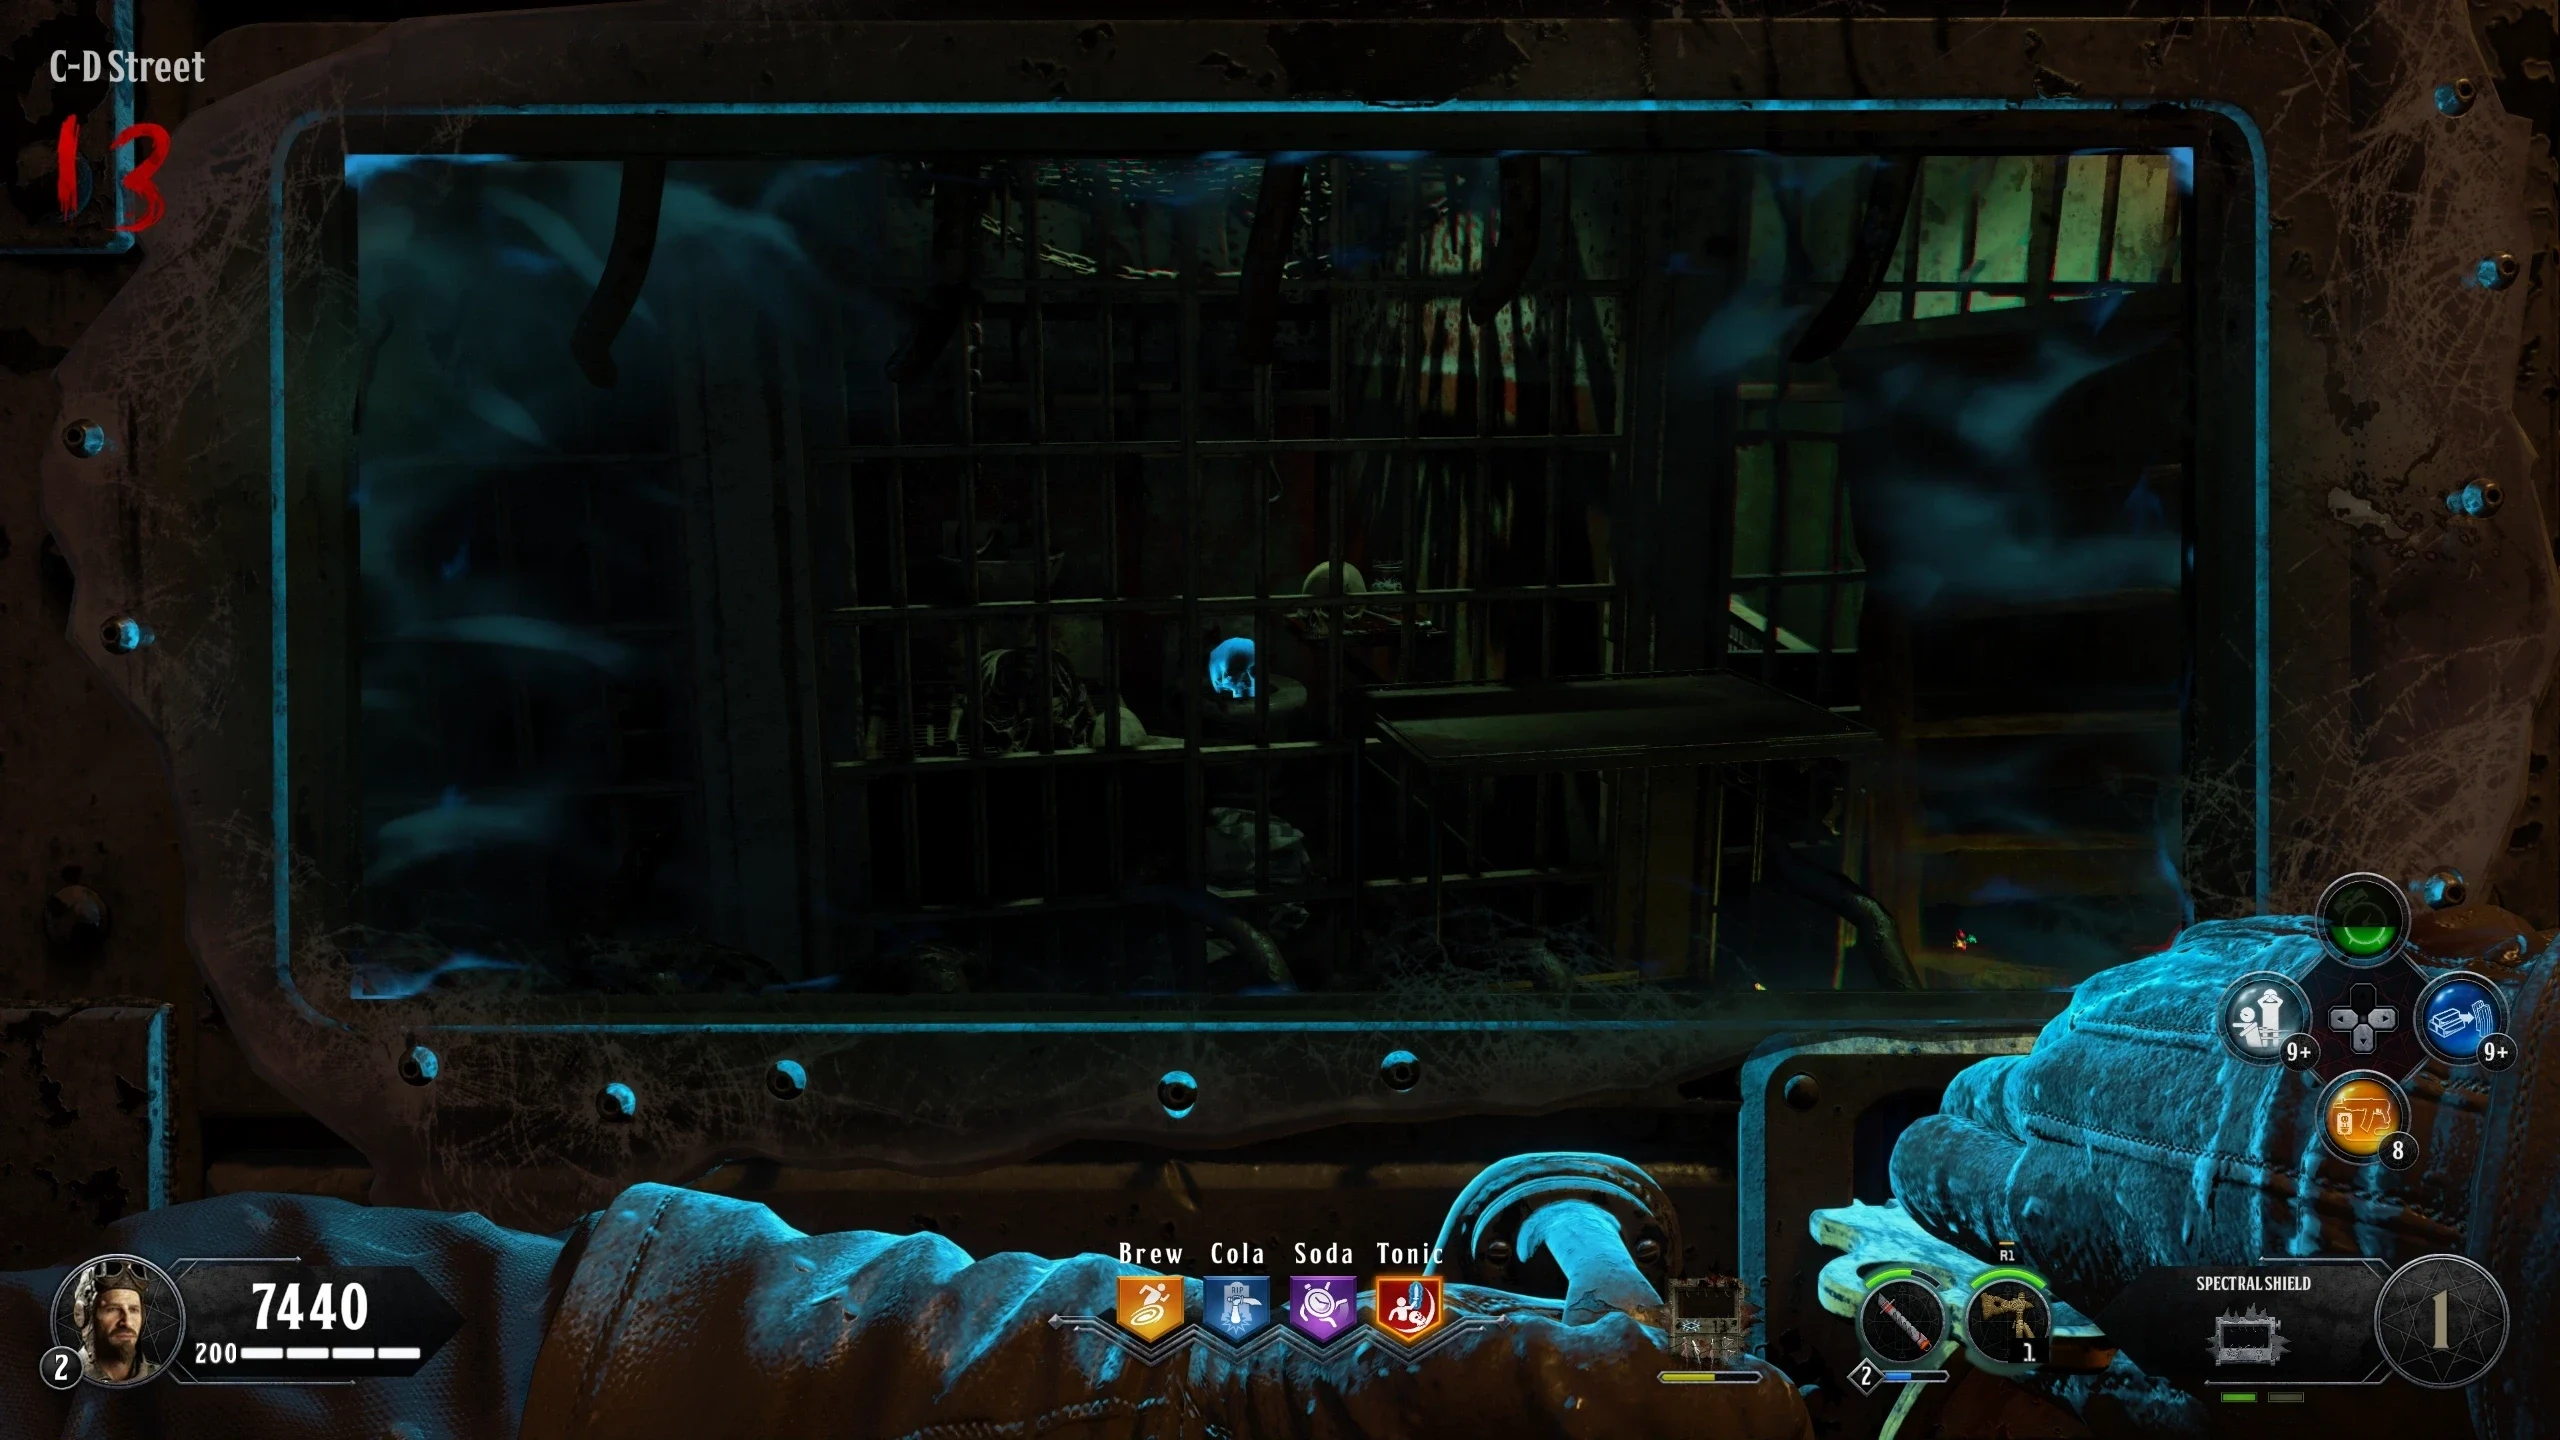
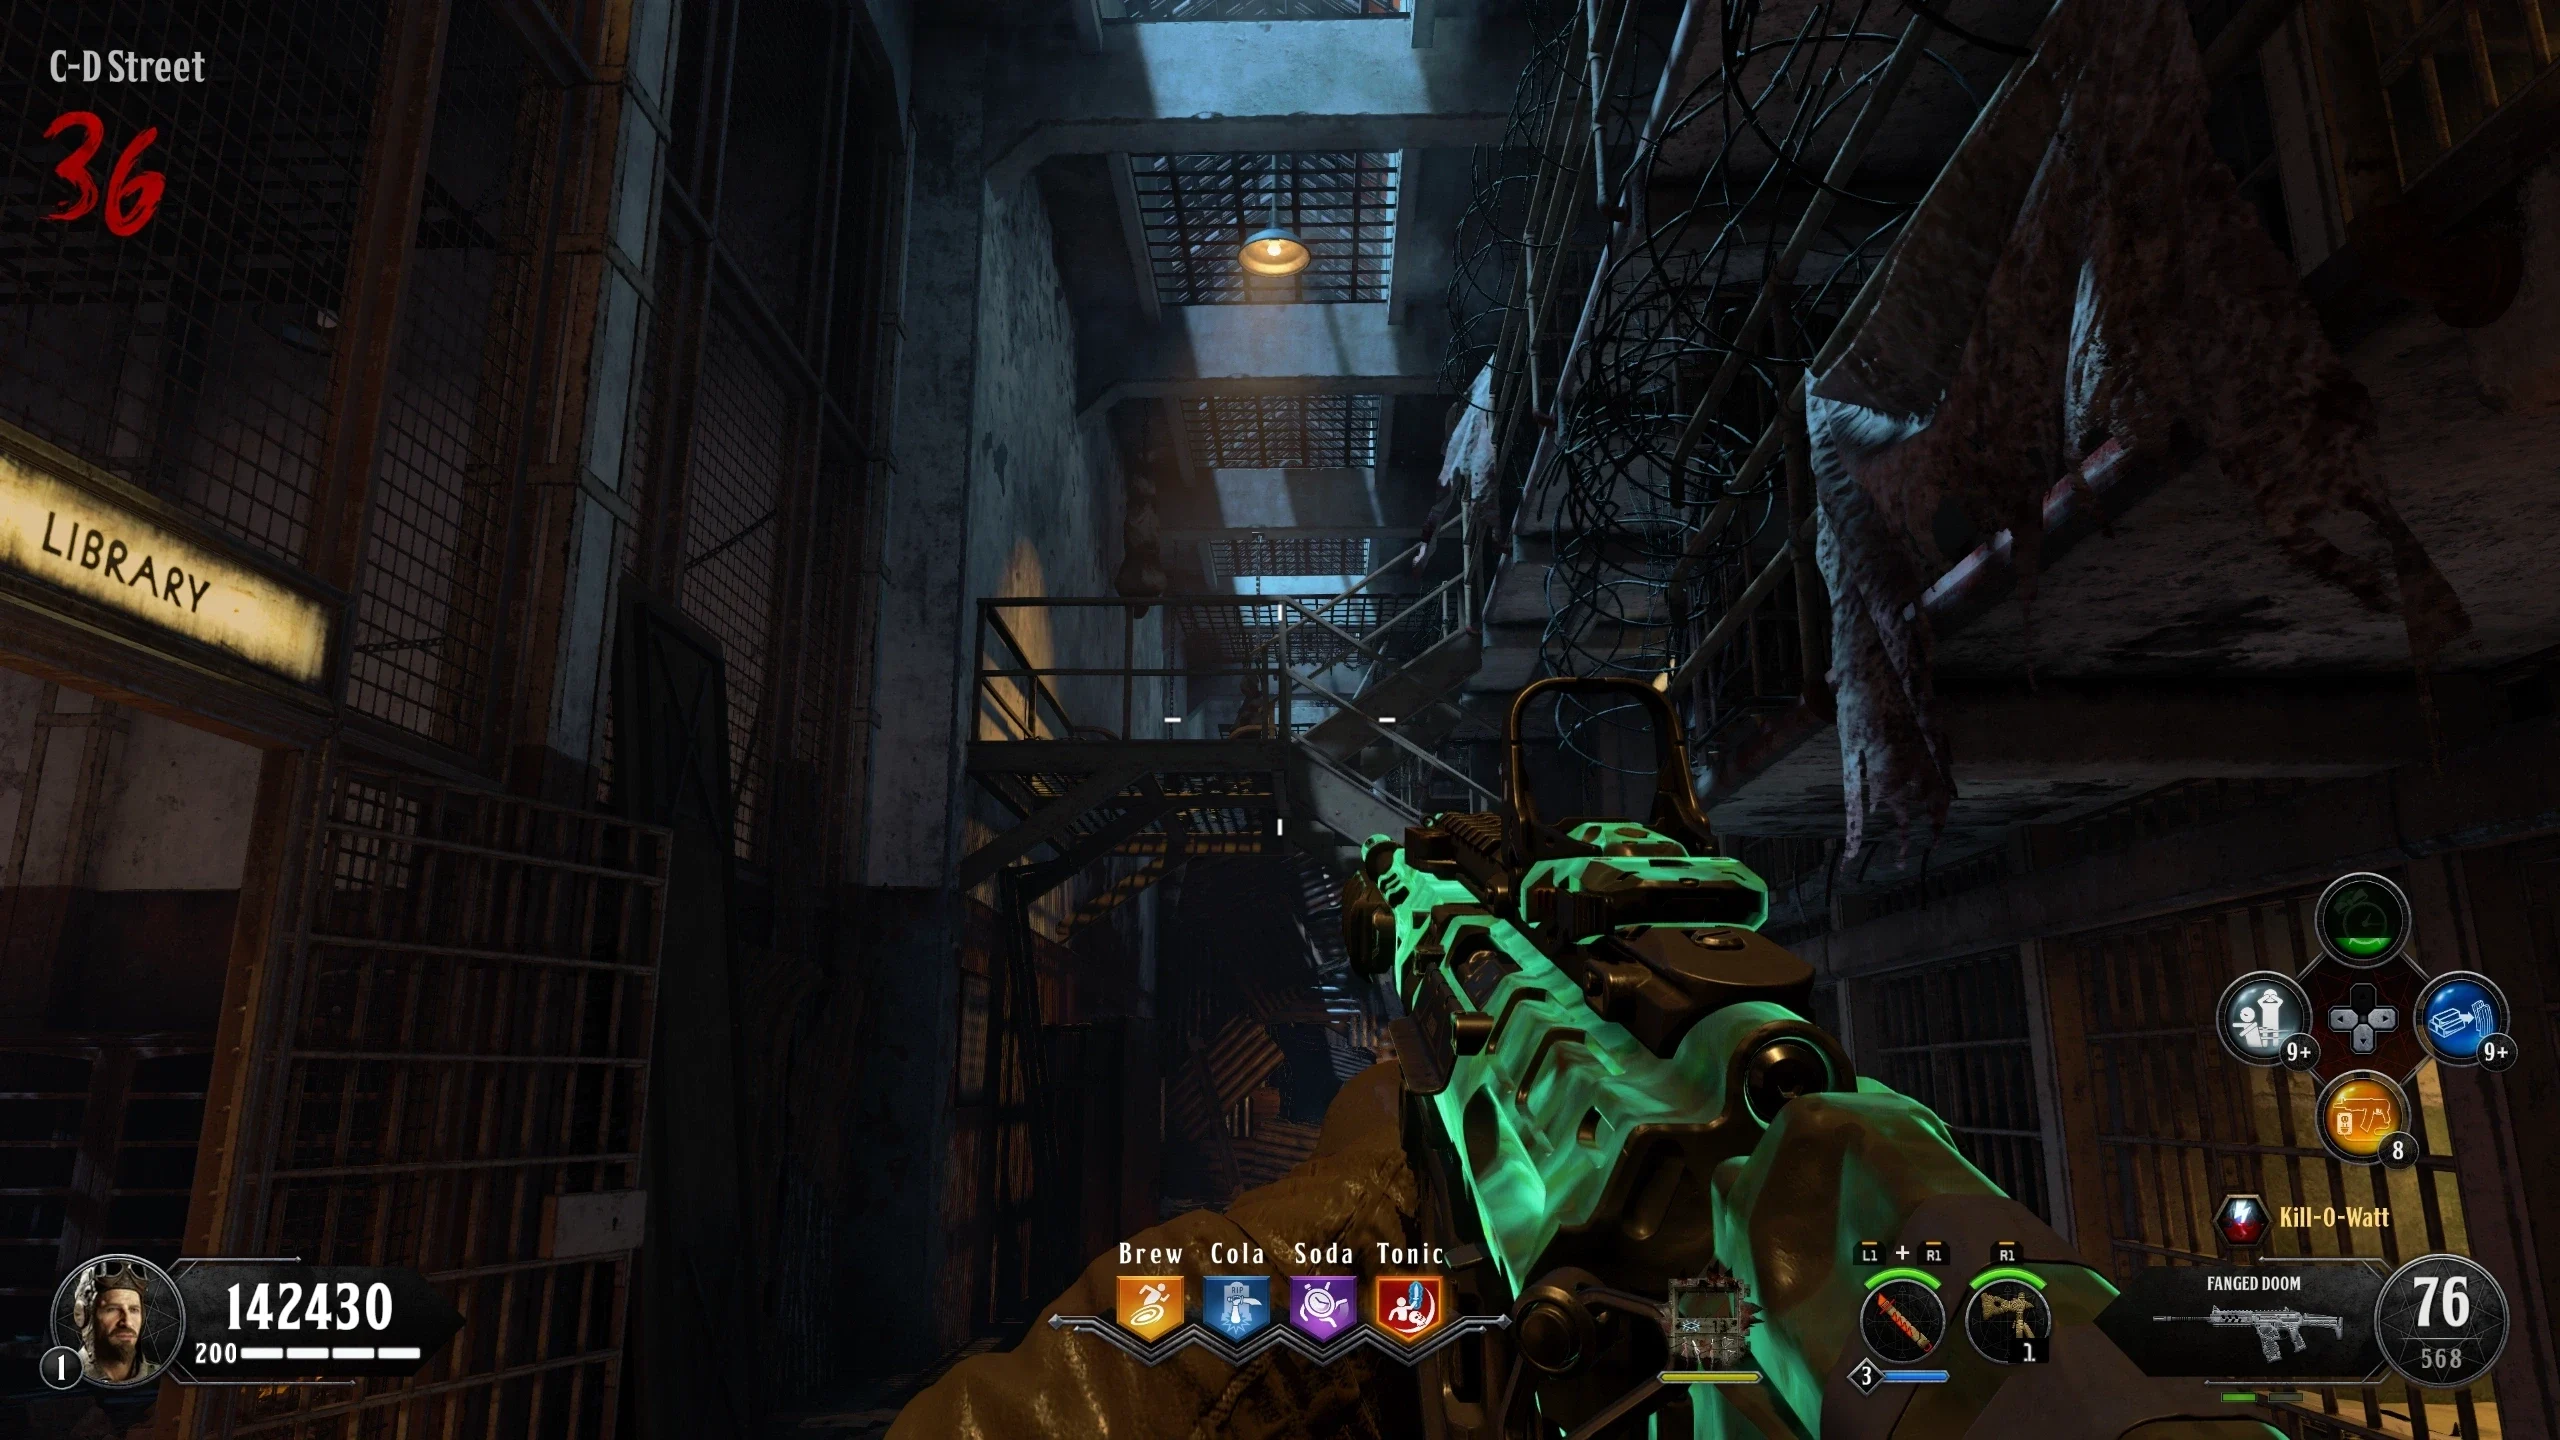
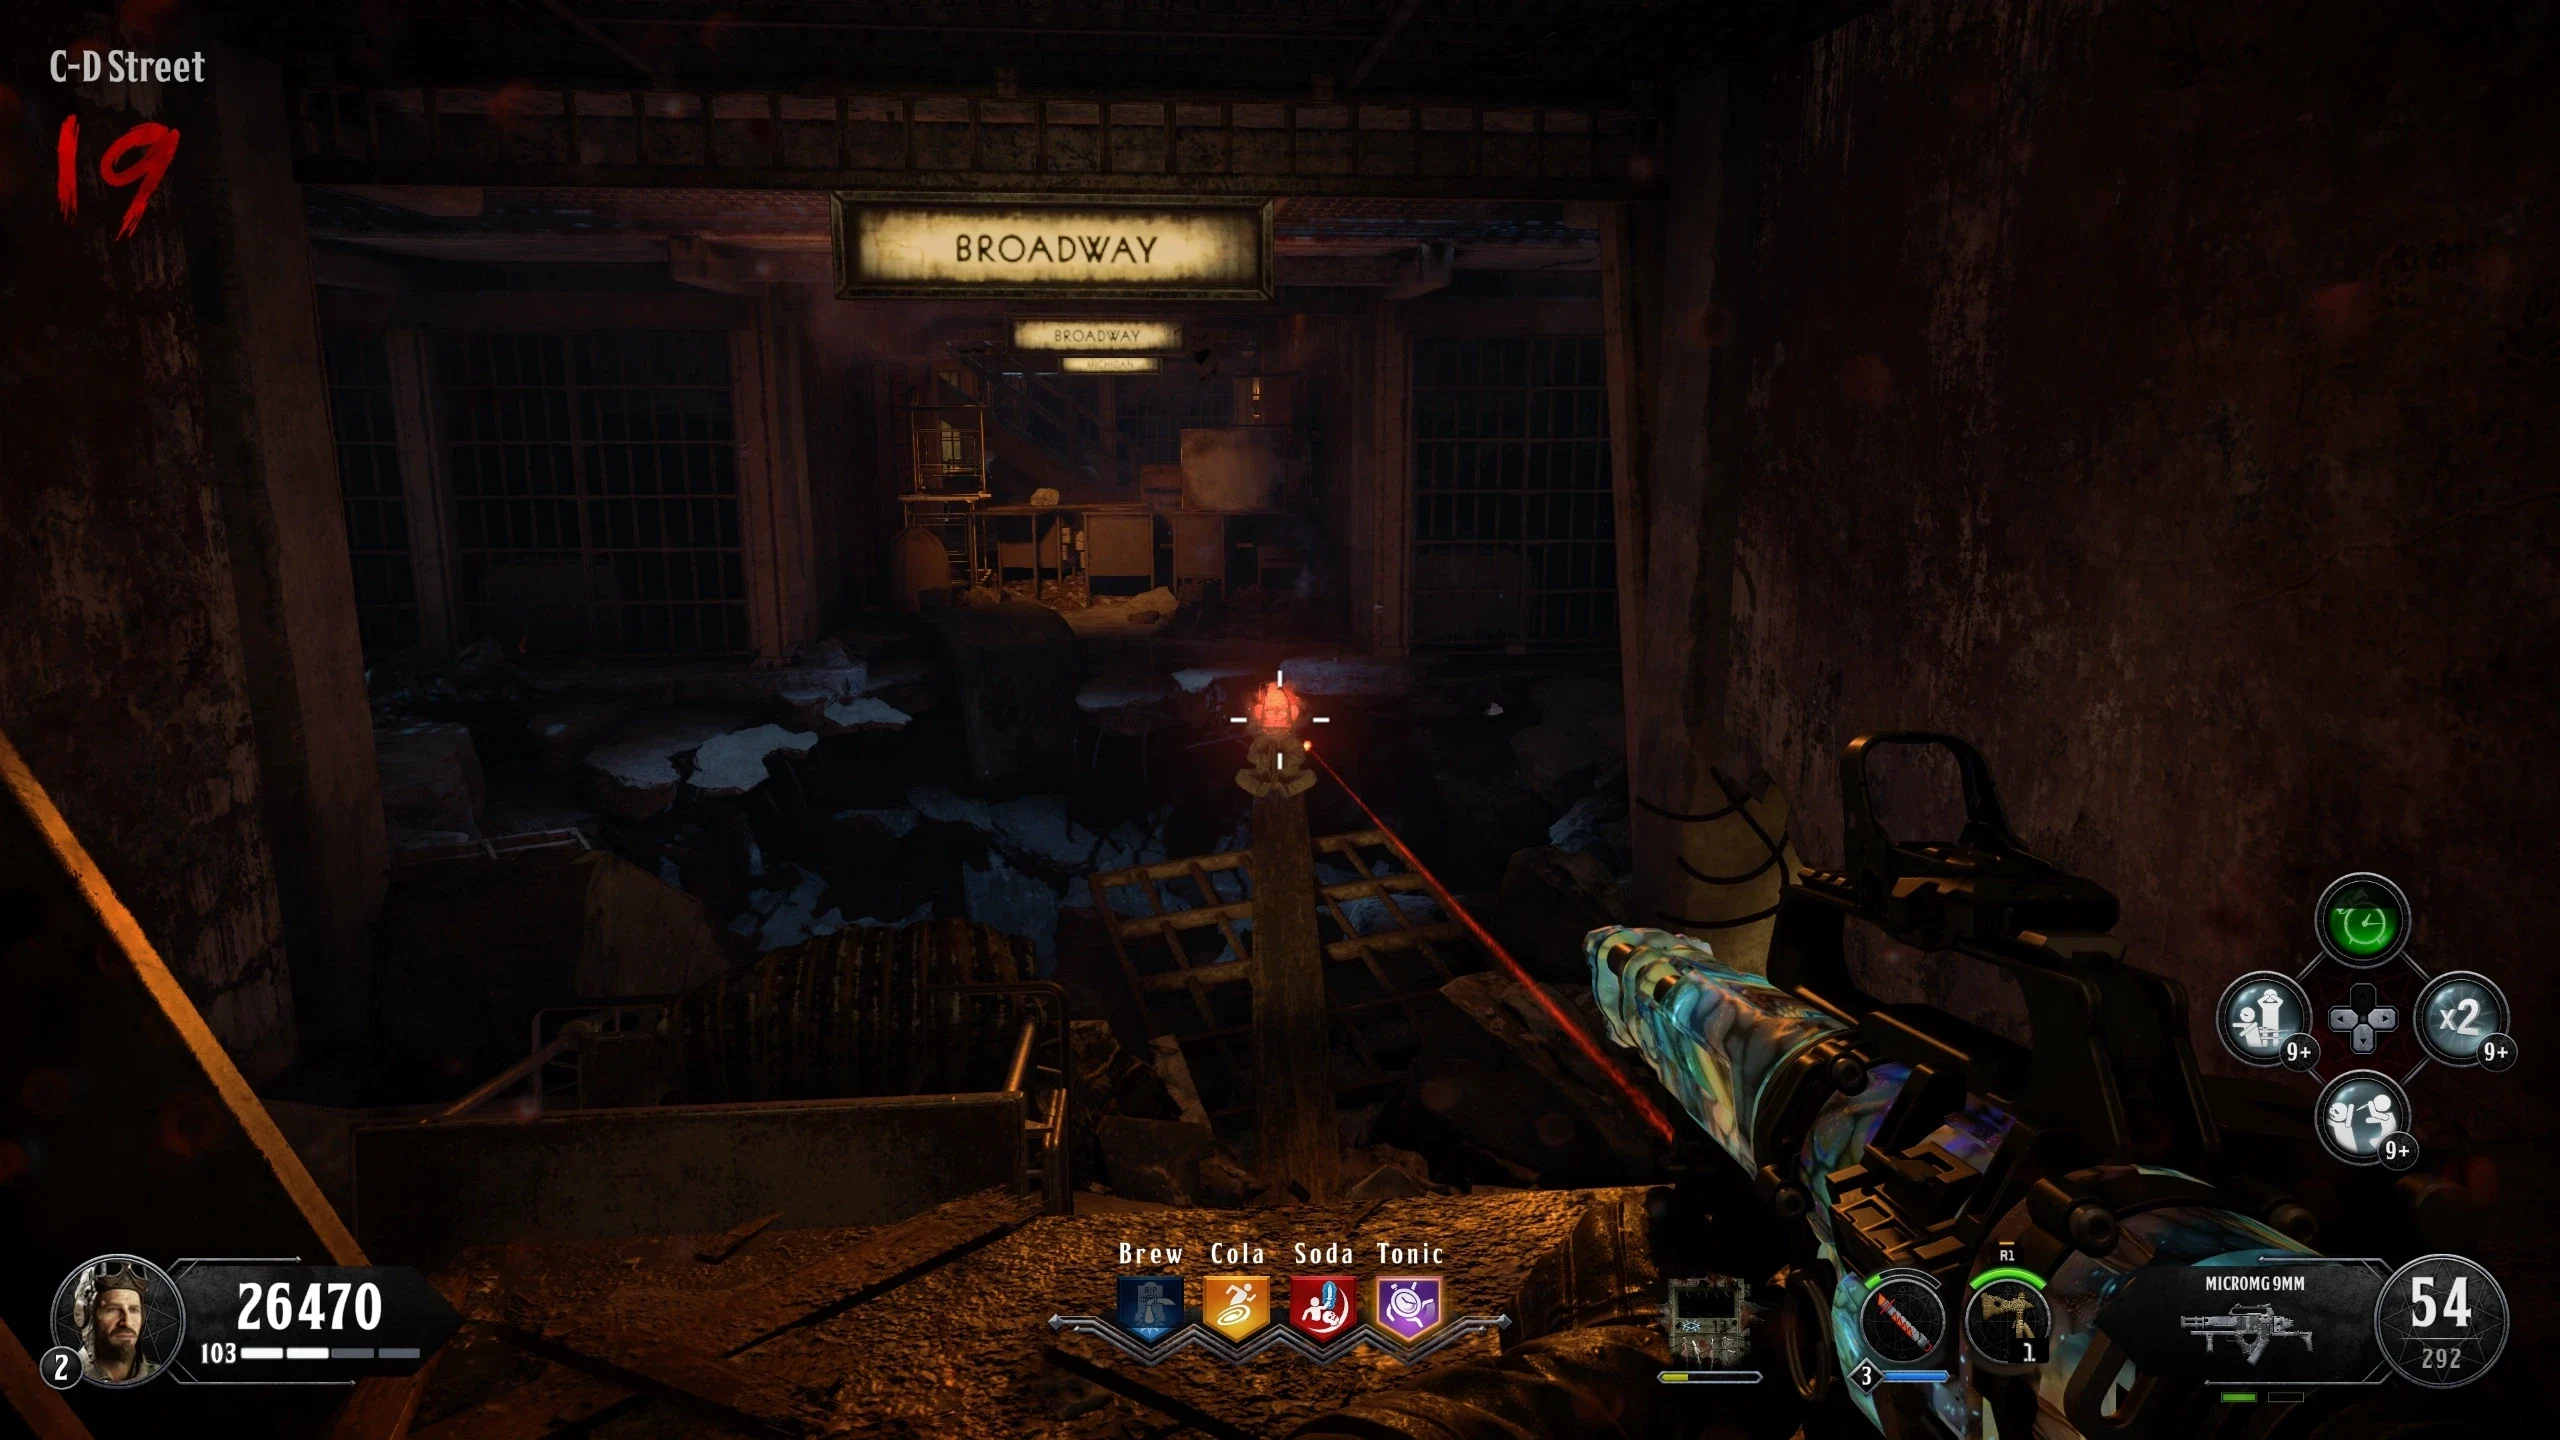
- C-D Street - Near/Below the Hellhound
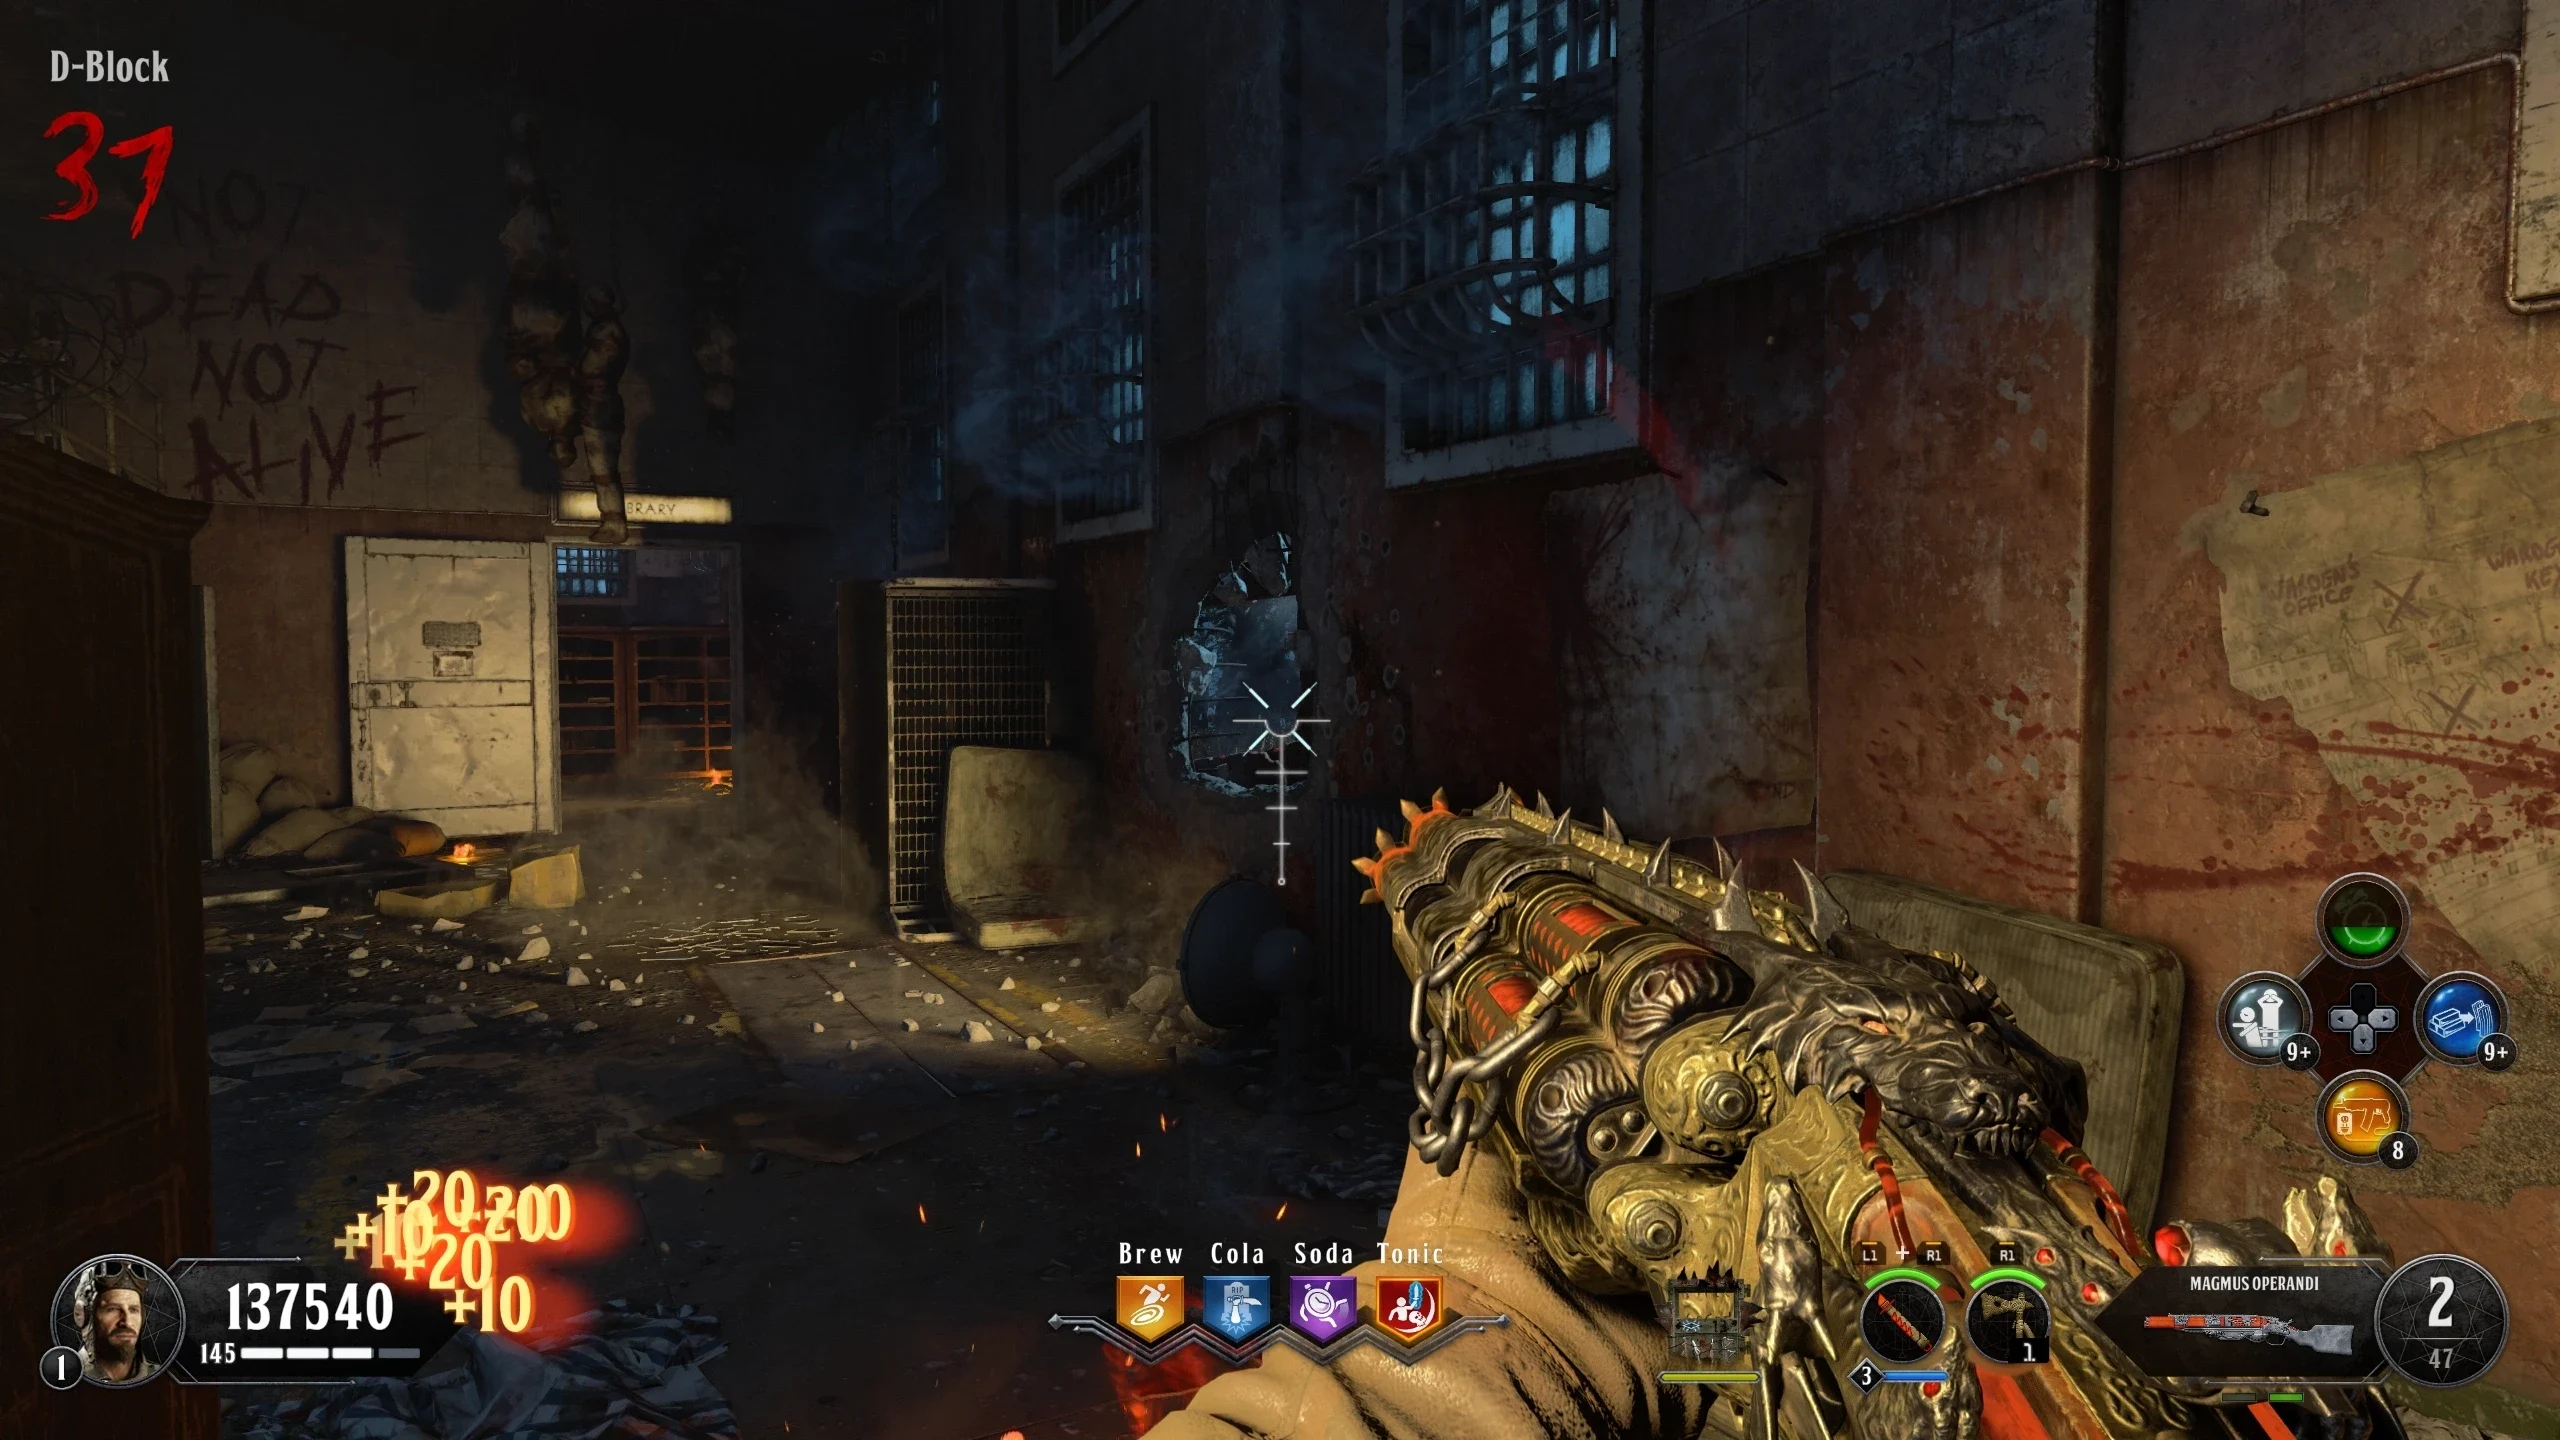
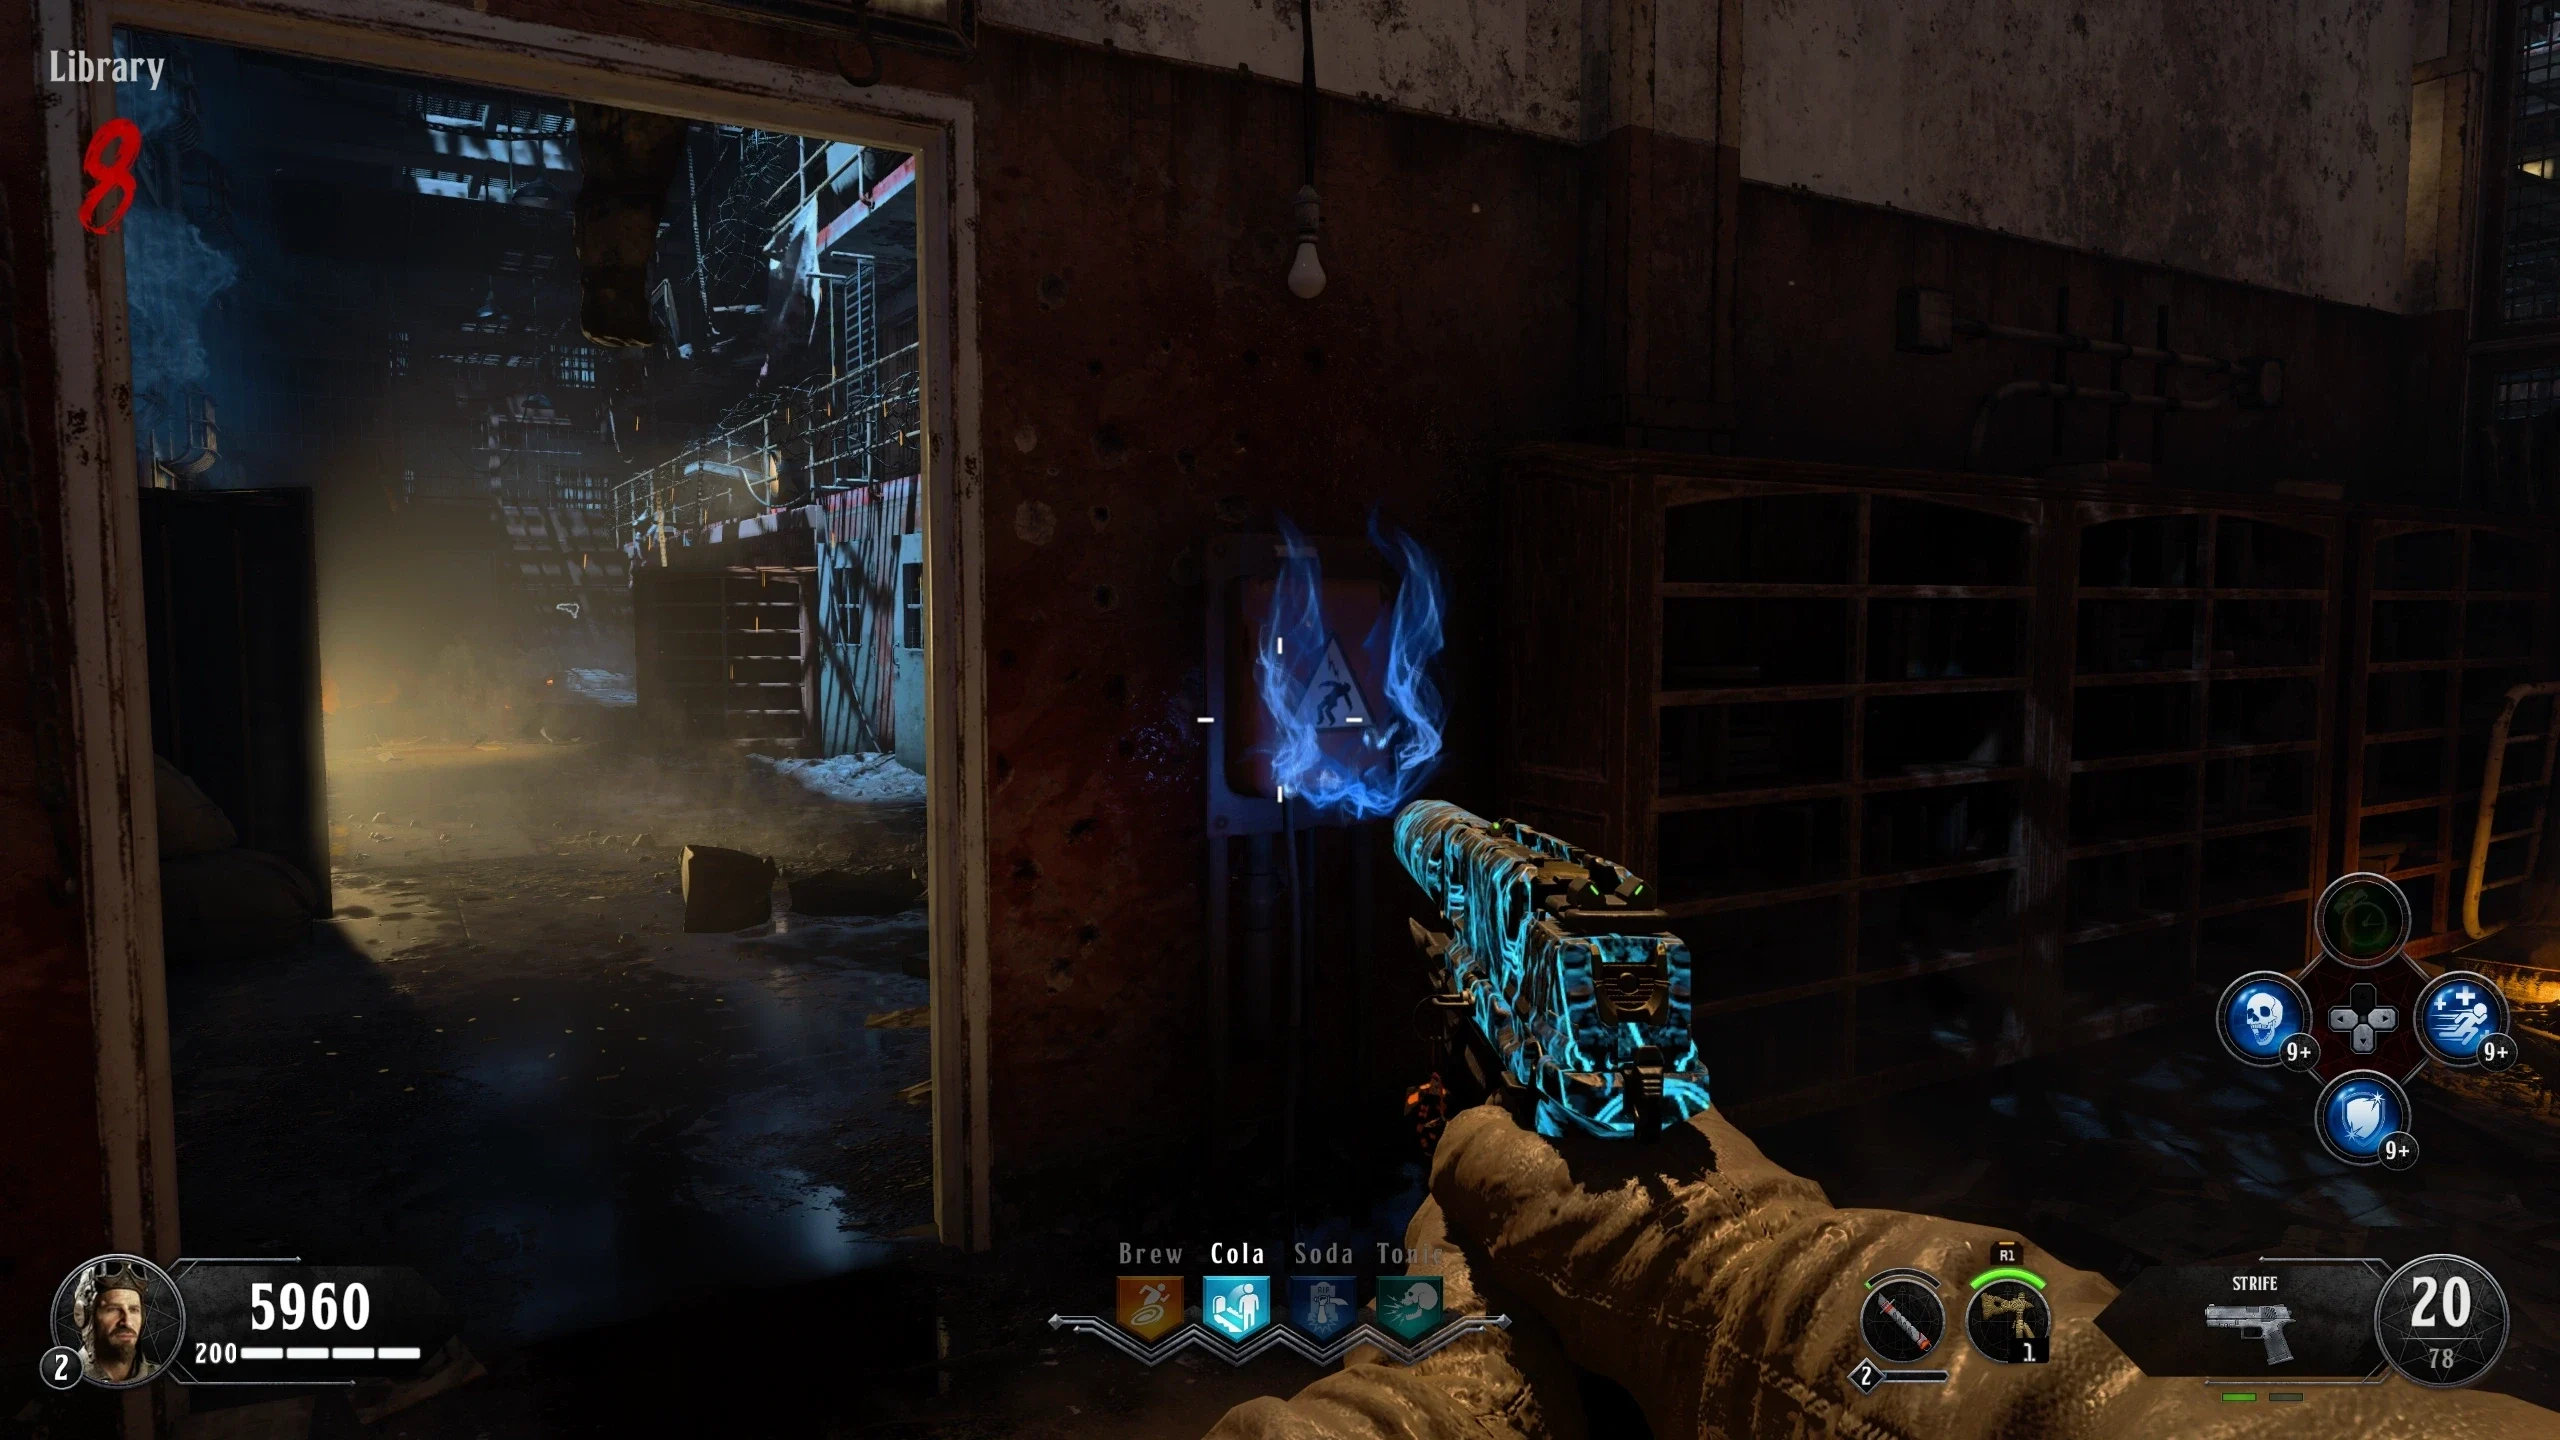
- Library - On a bookshelf
- D-Block - On a railing above some cells
- Cell Block Entrance - On the railing above the Zombie Barrier
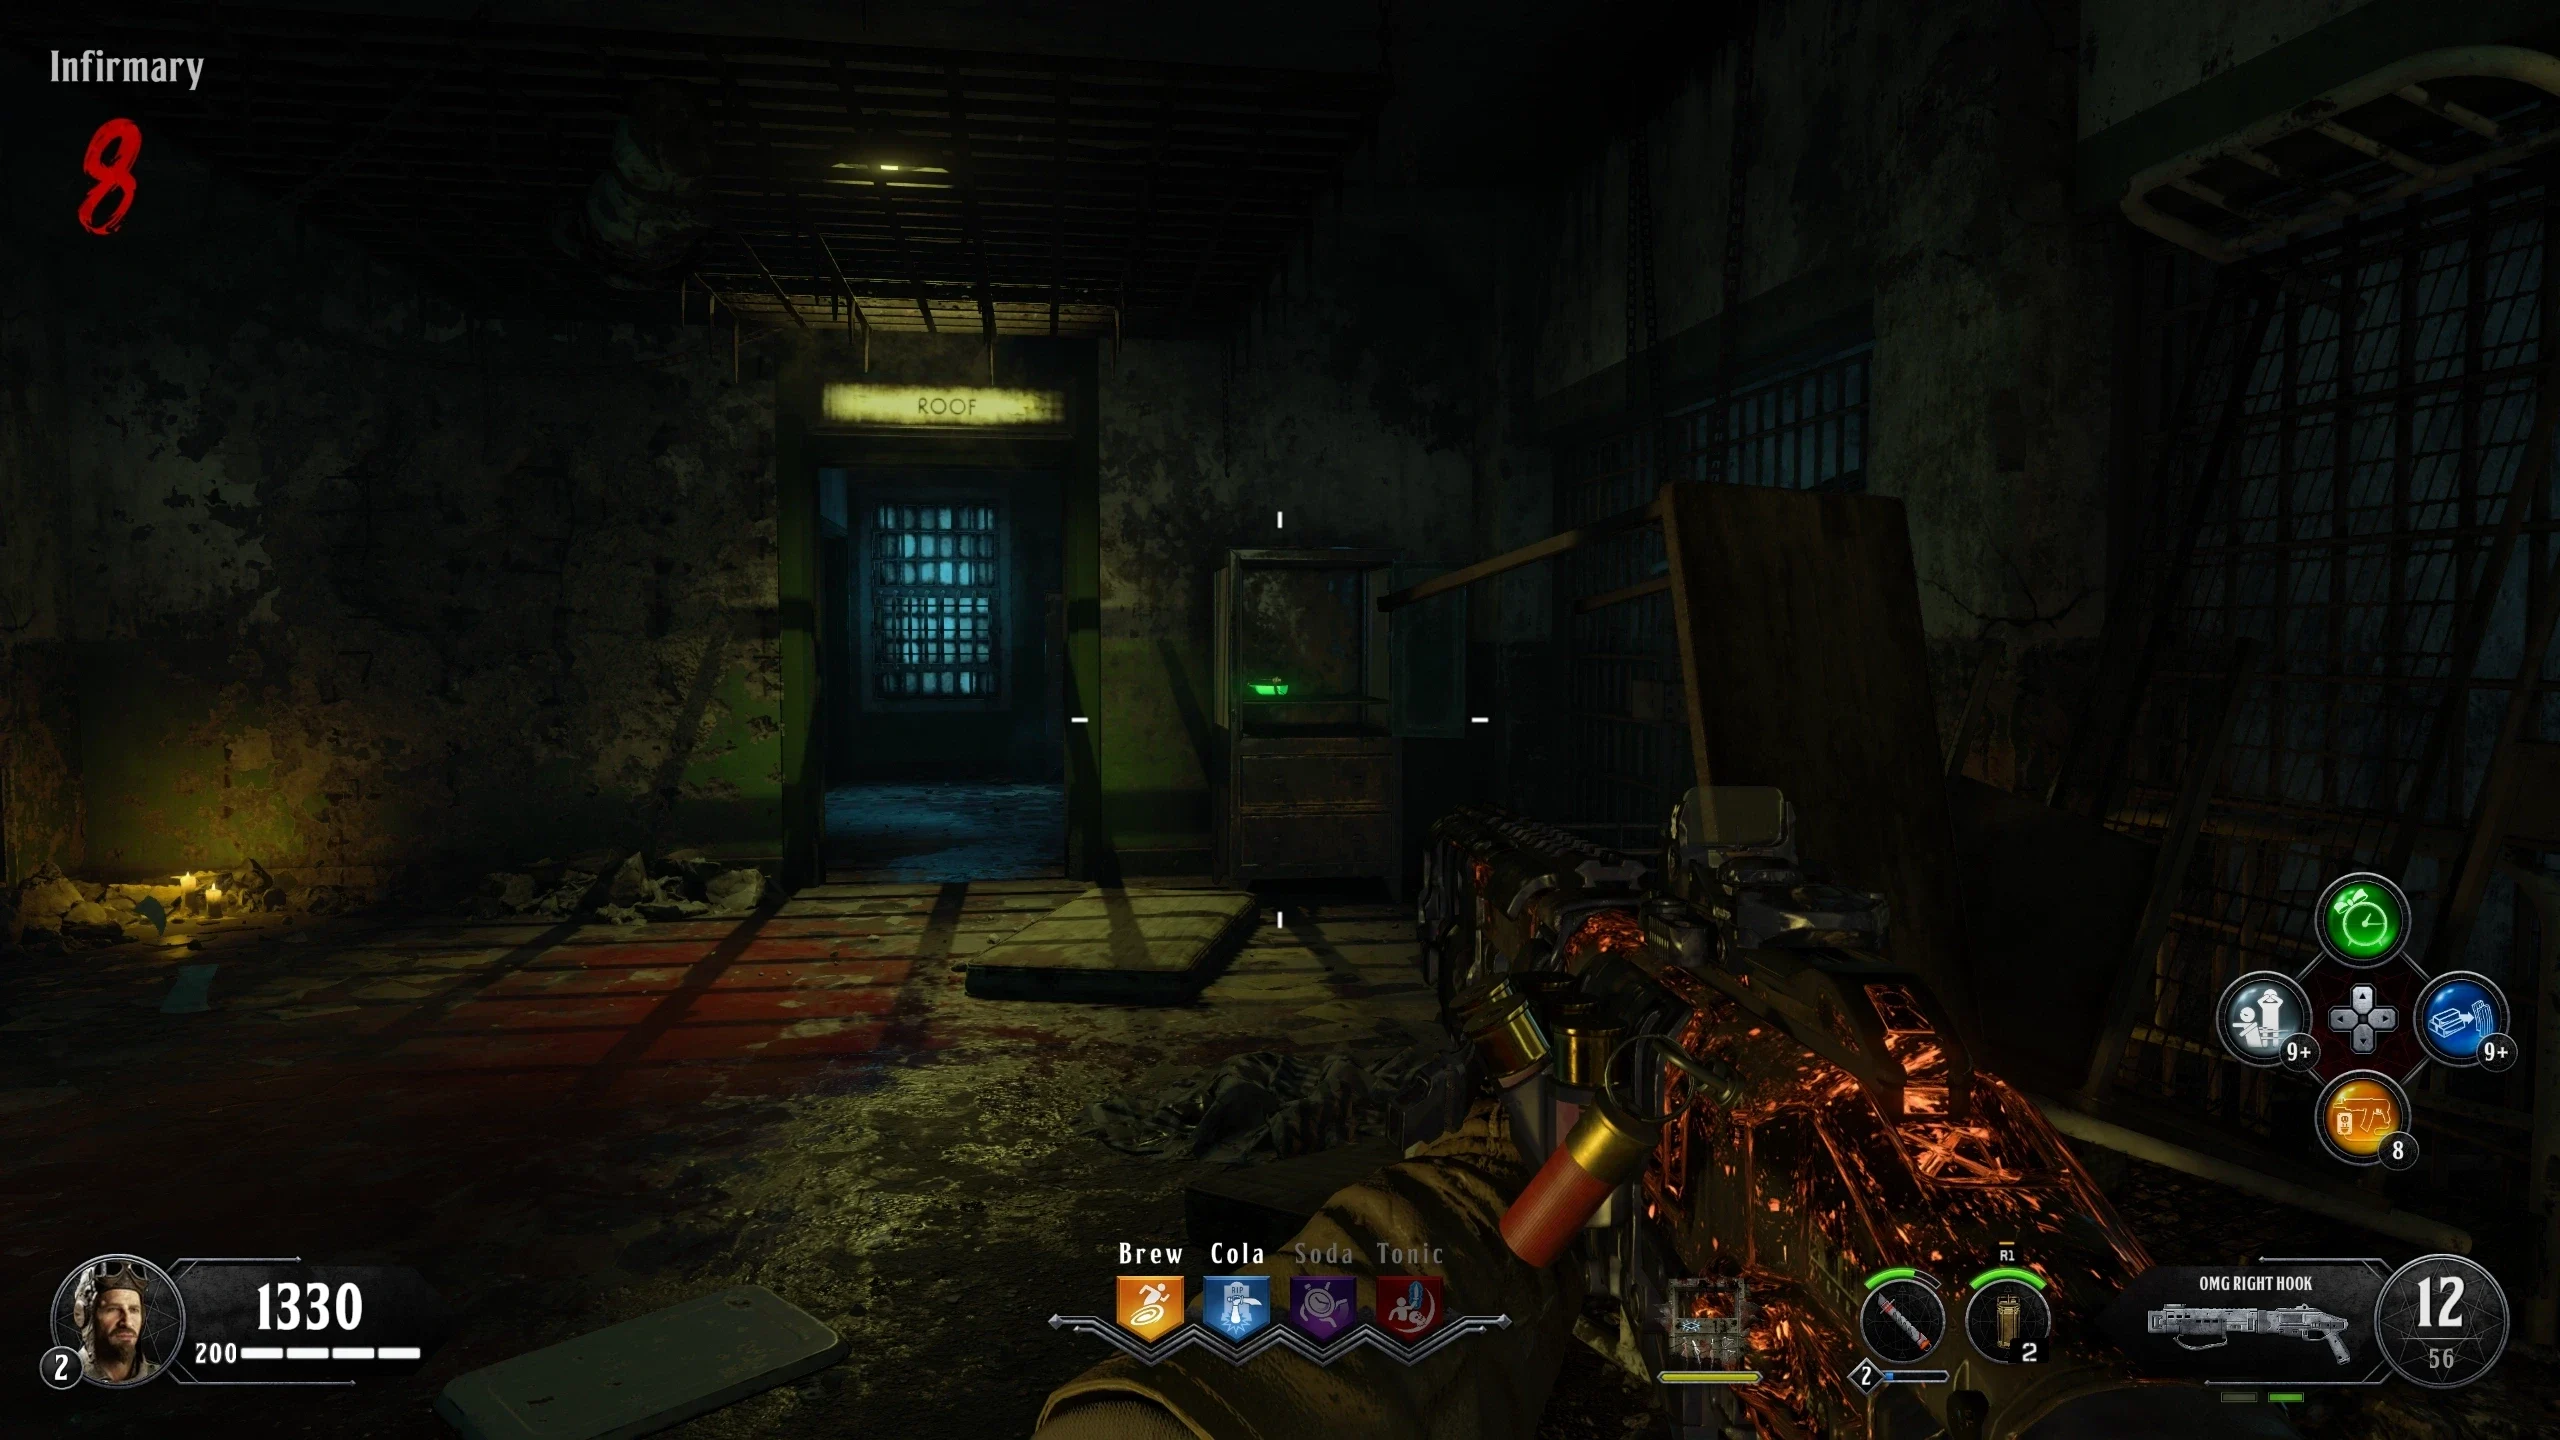
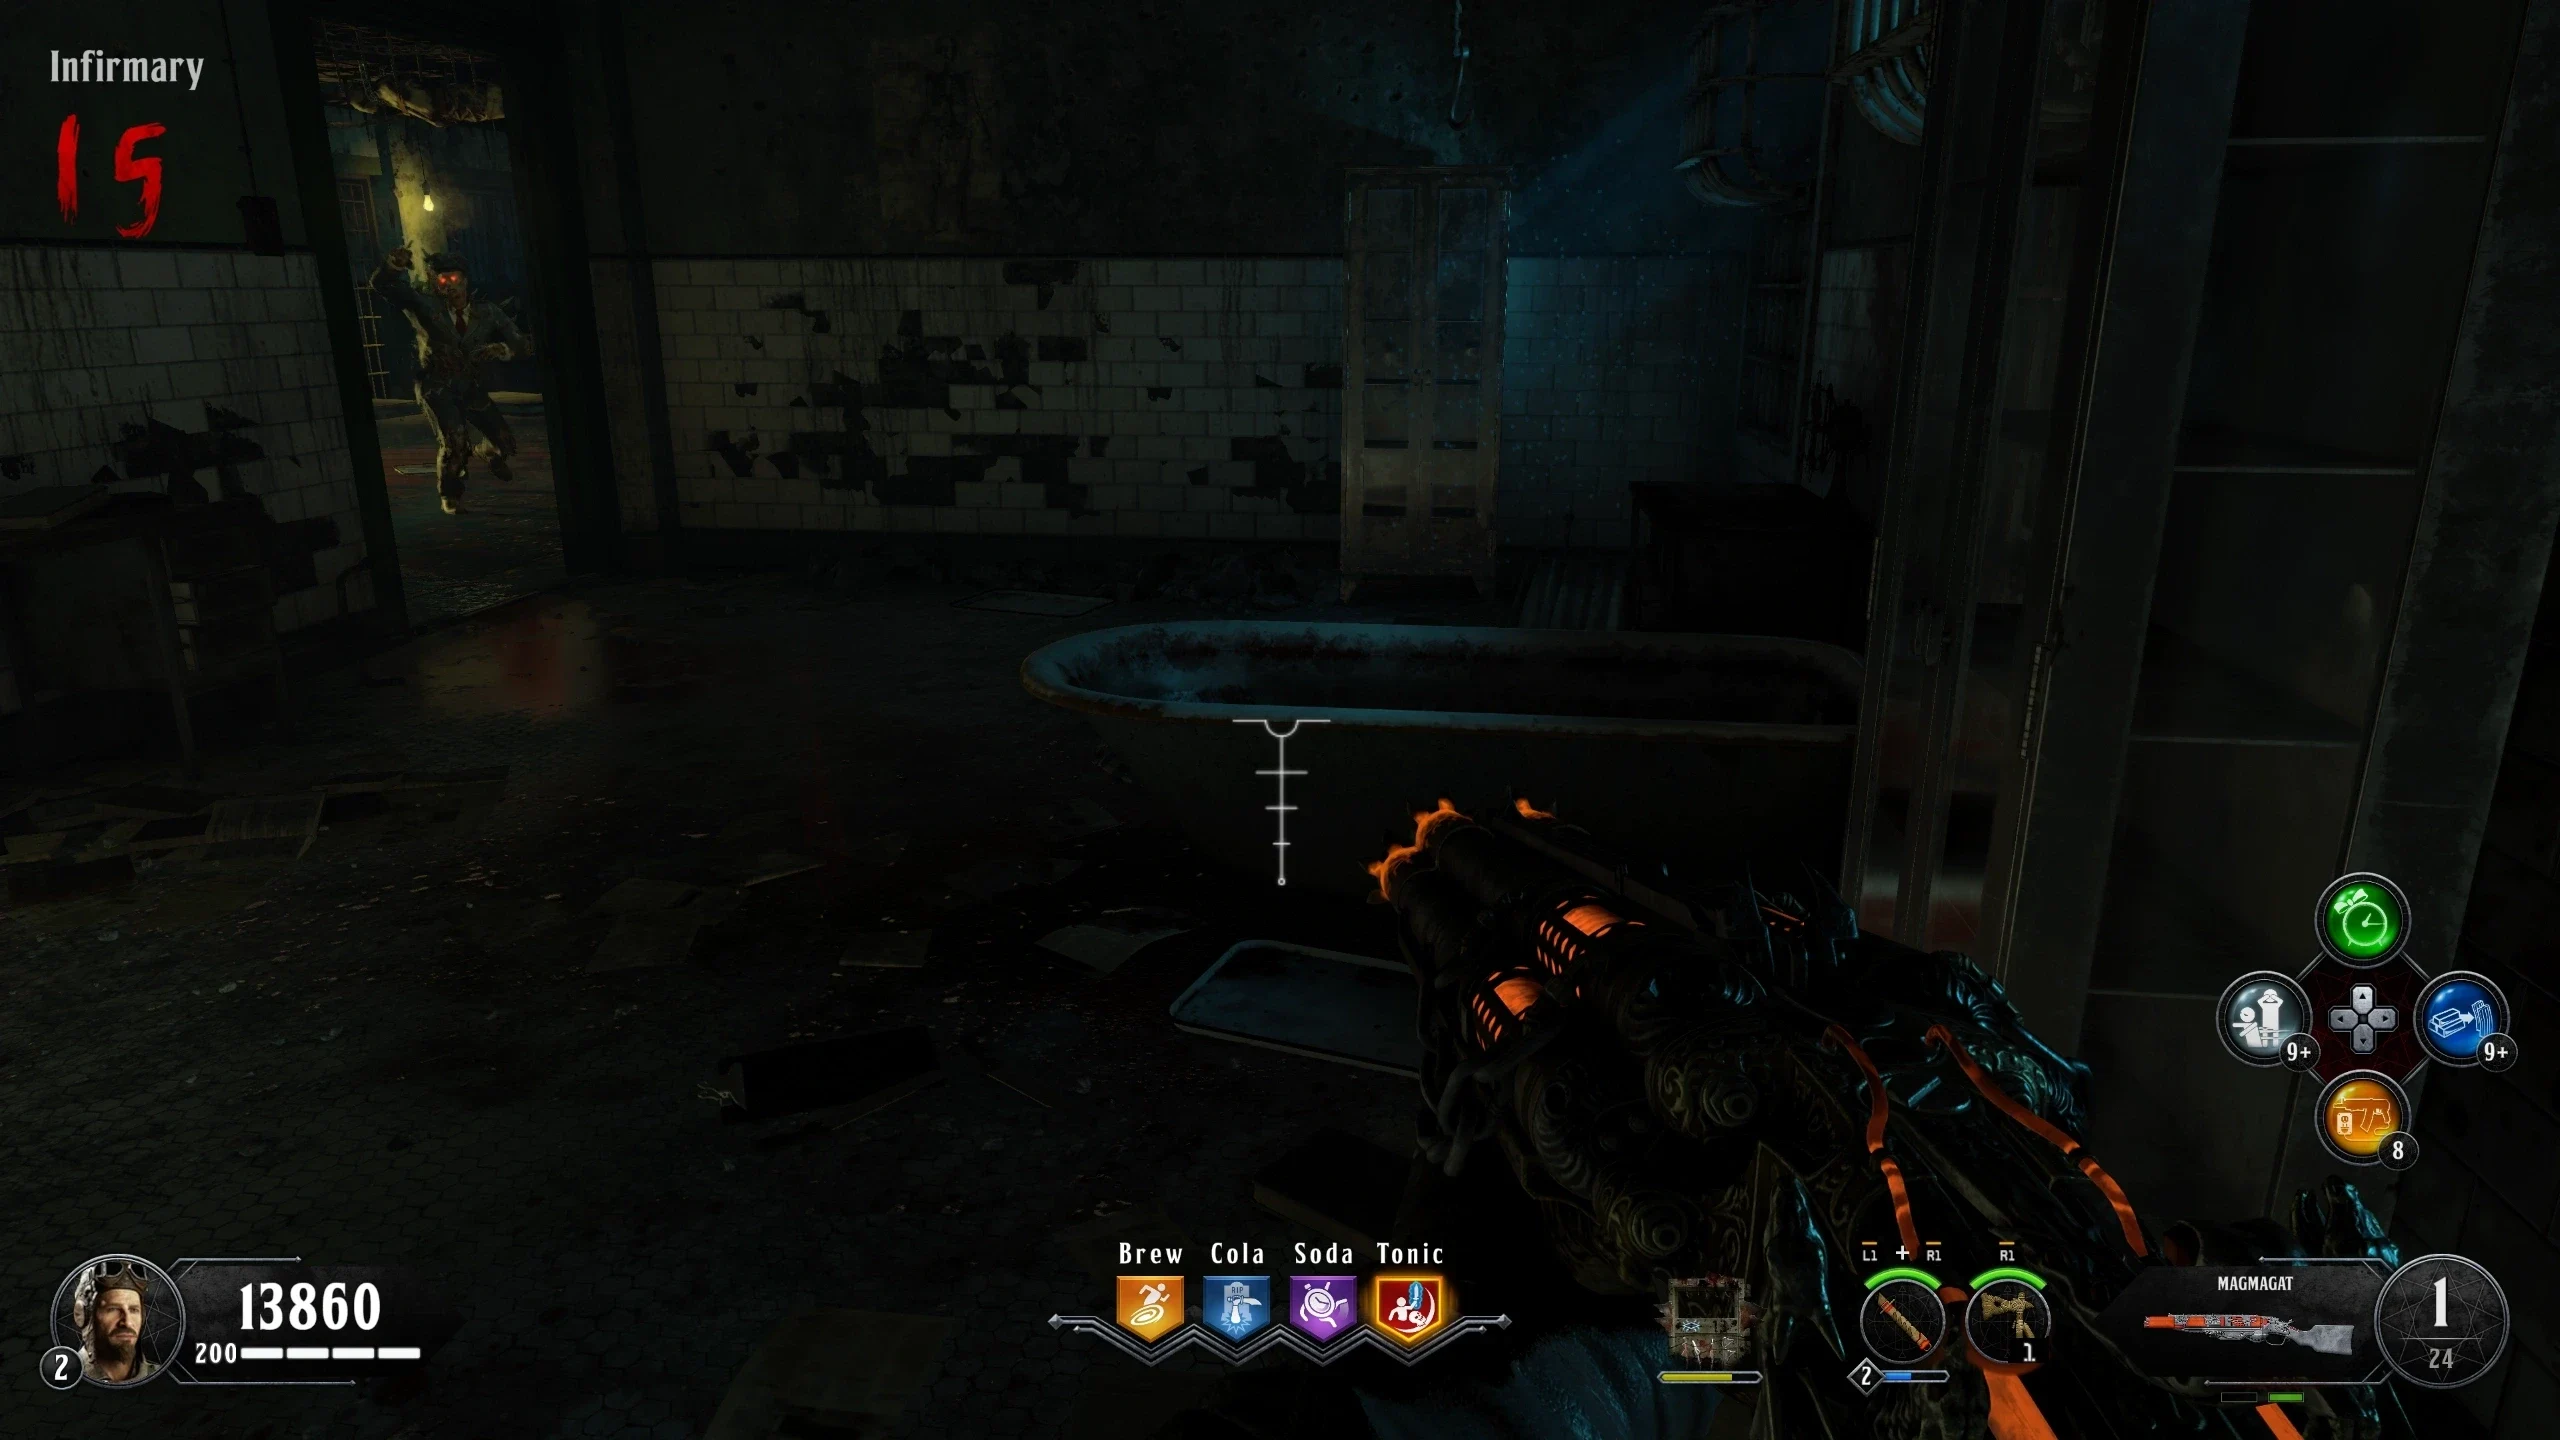
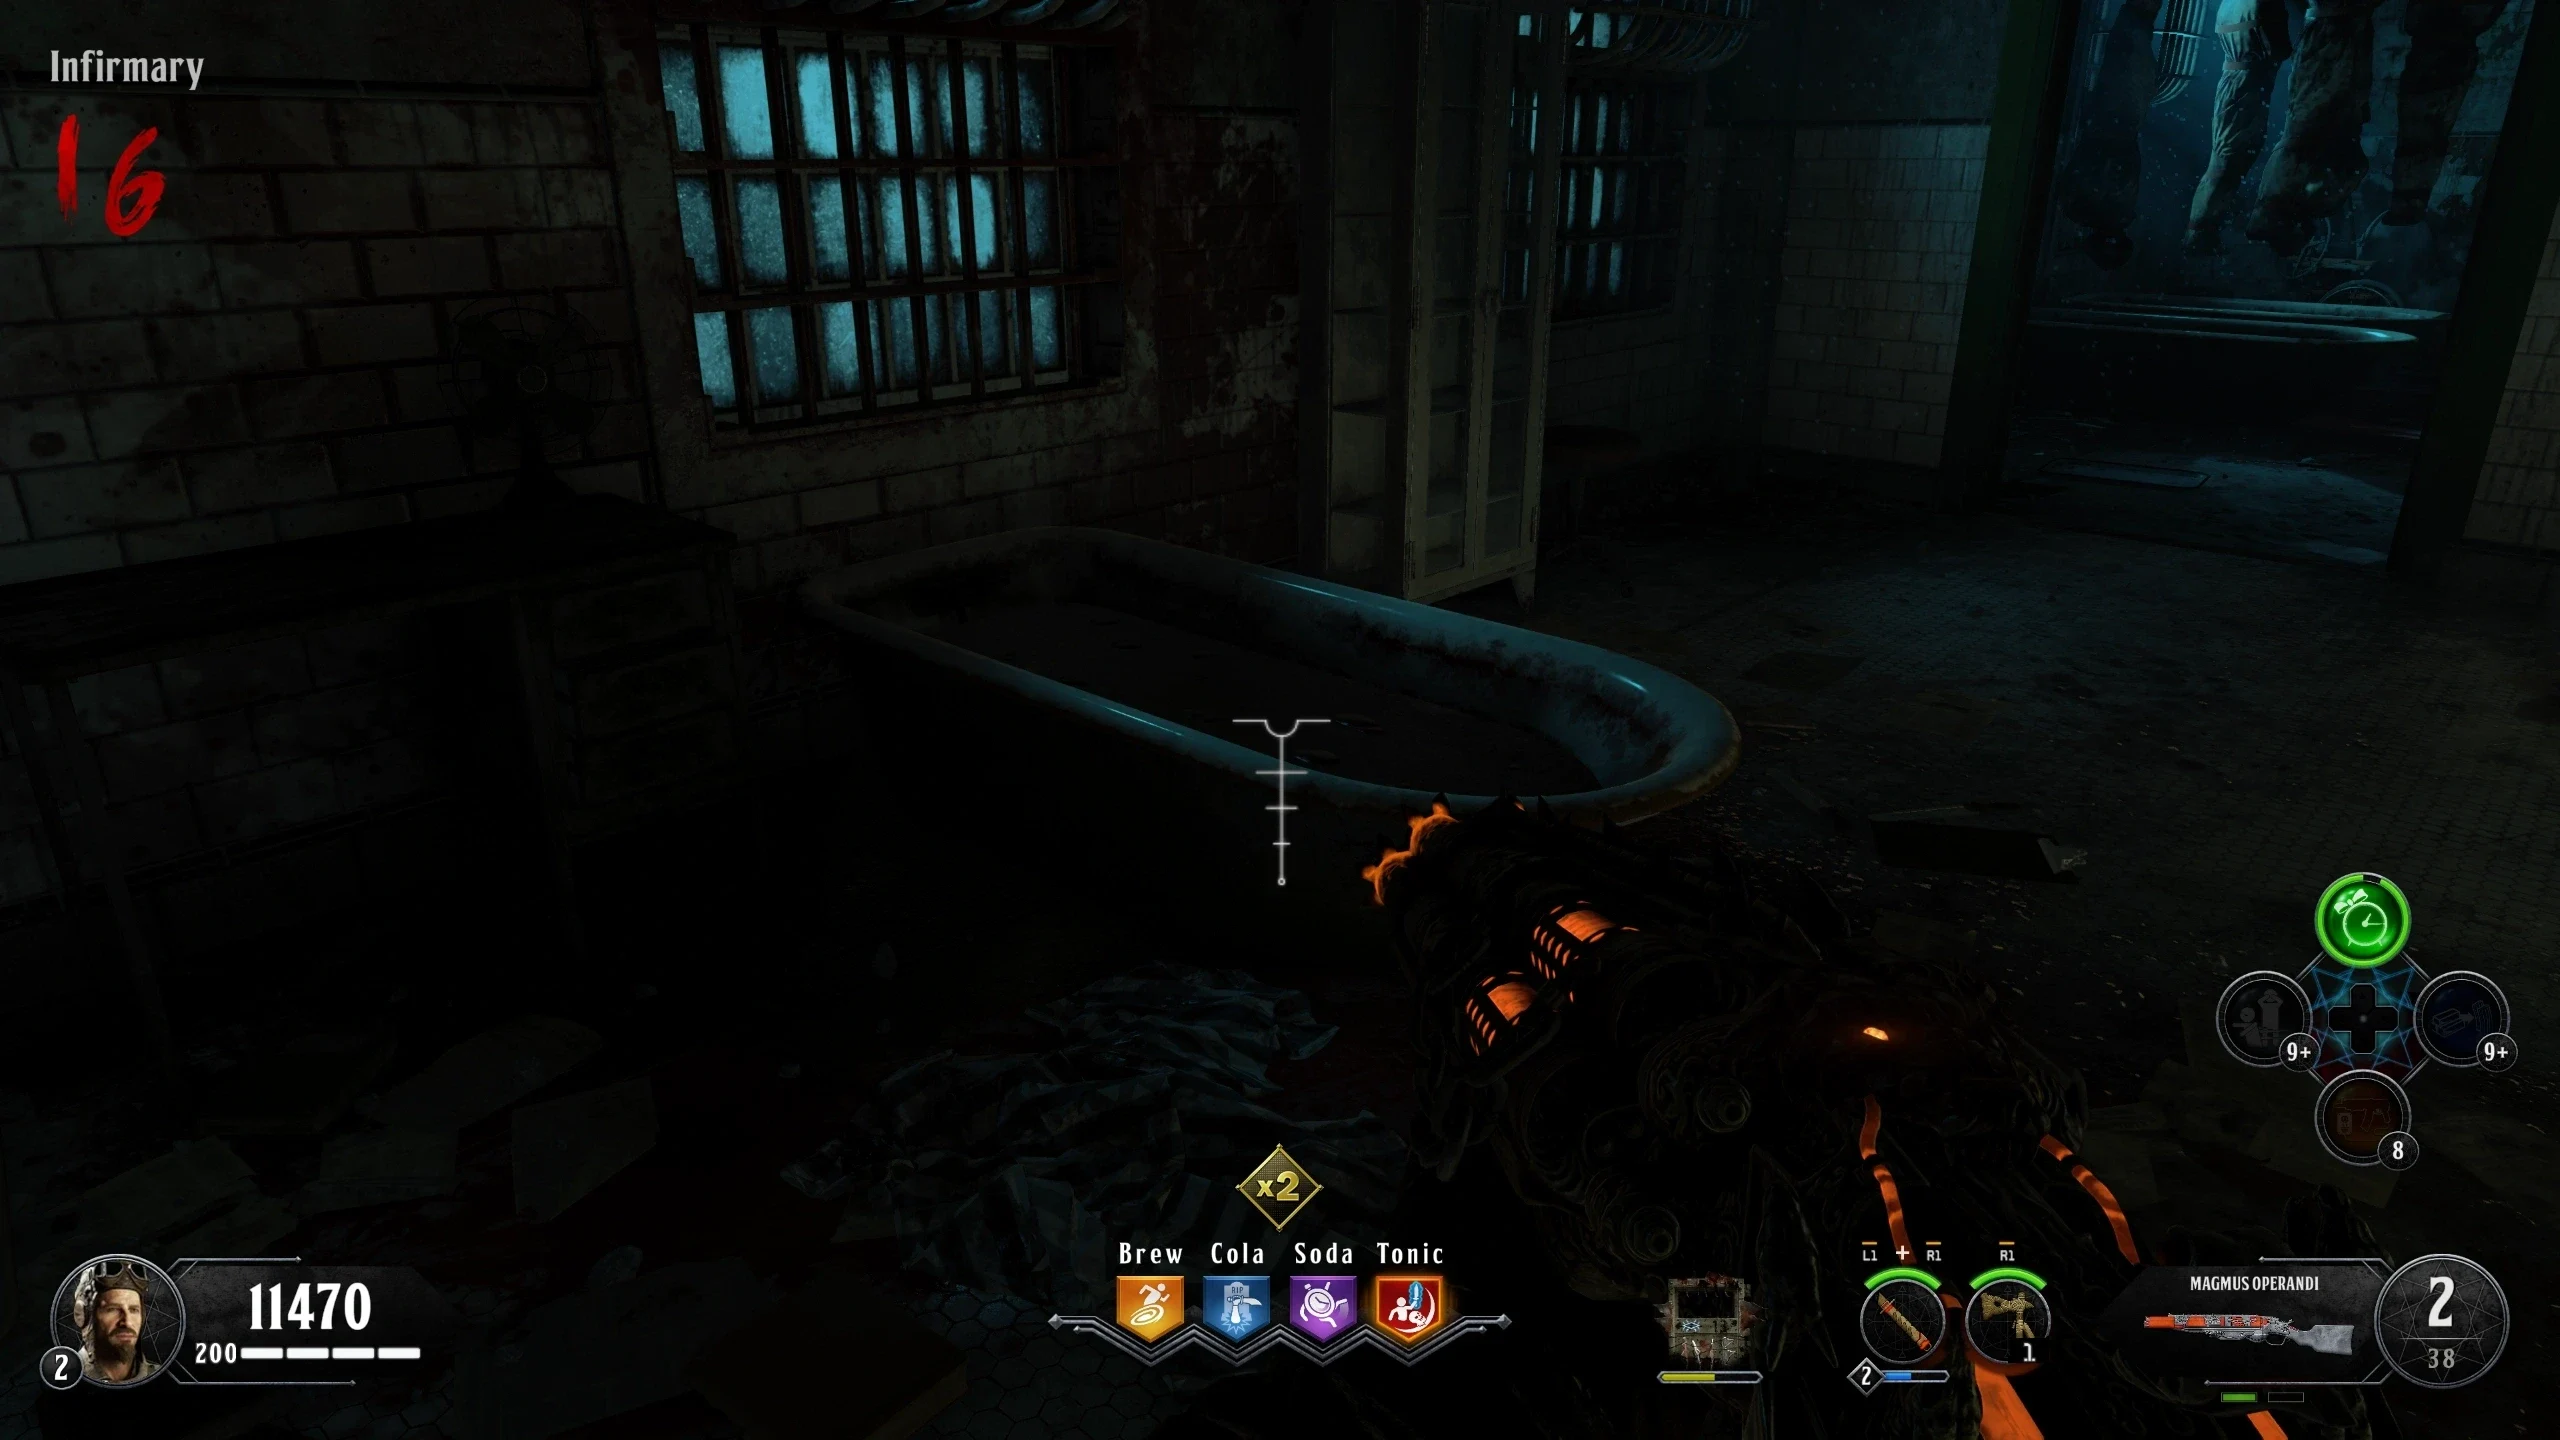
- Infirmary - On a cart behind the bars in the middle of the blocked-off hallway
- Infirmary - On a shelf, opposite the power box
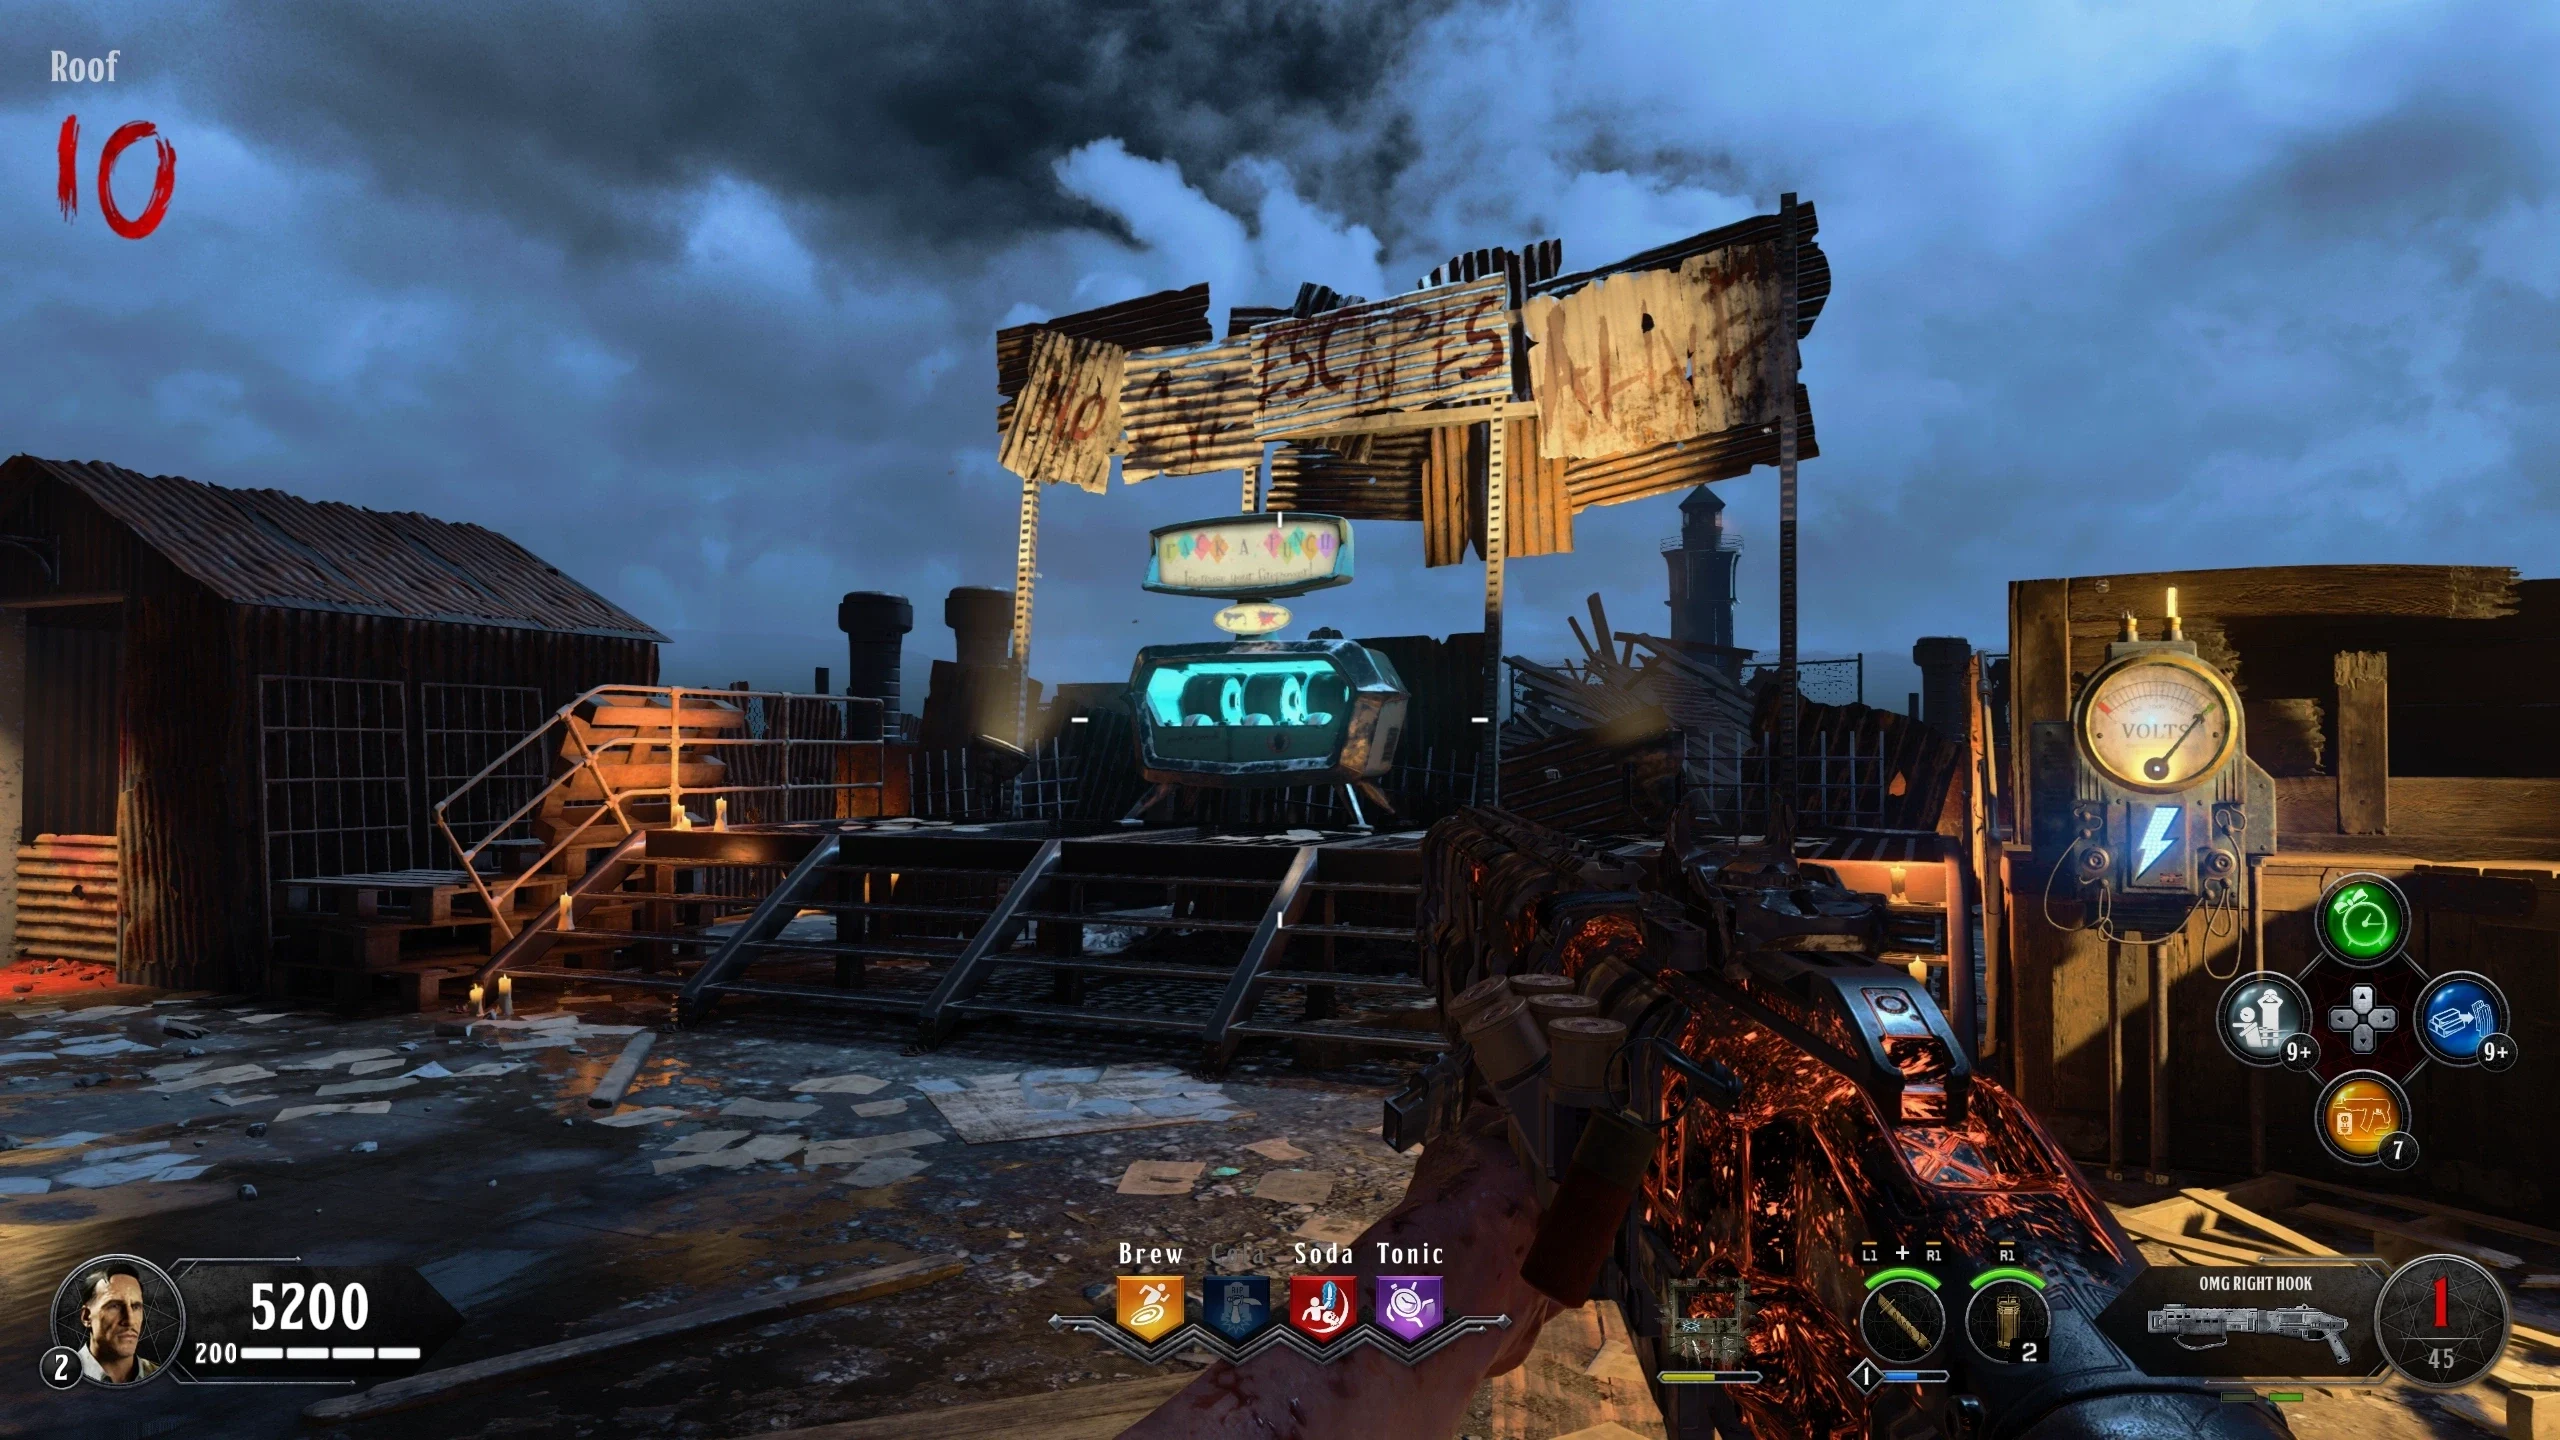
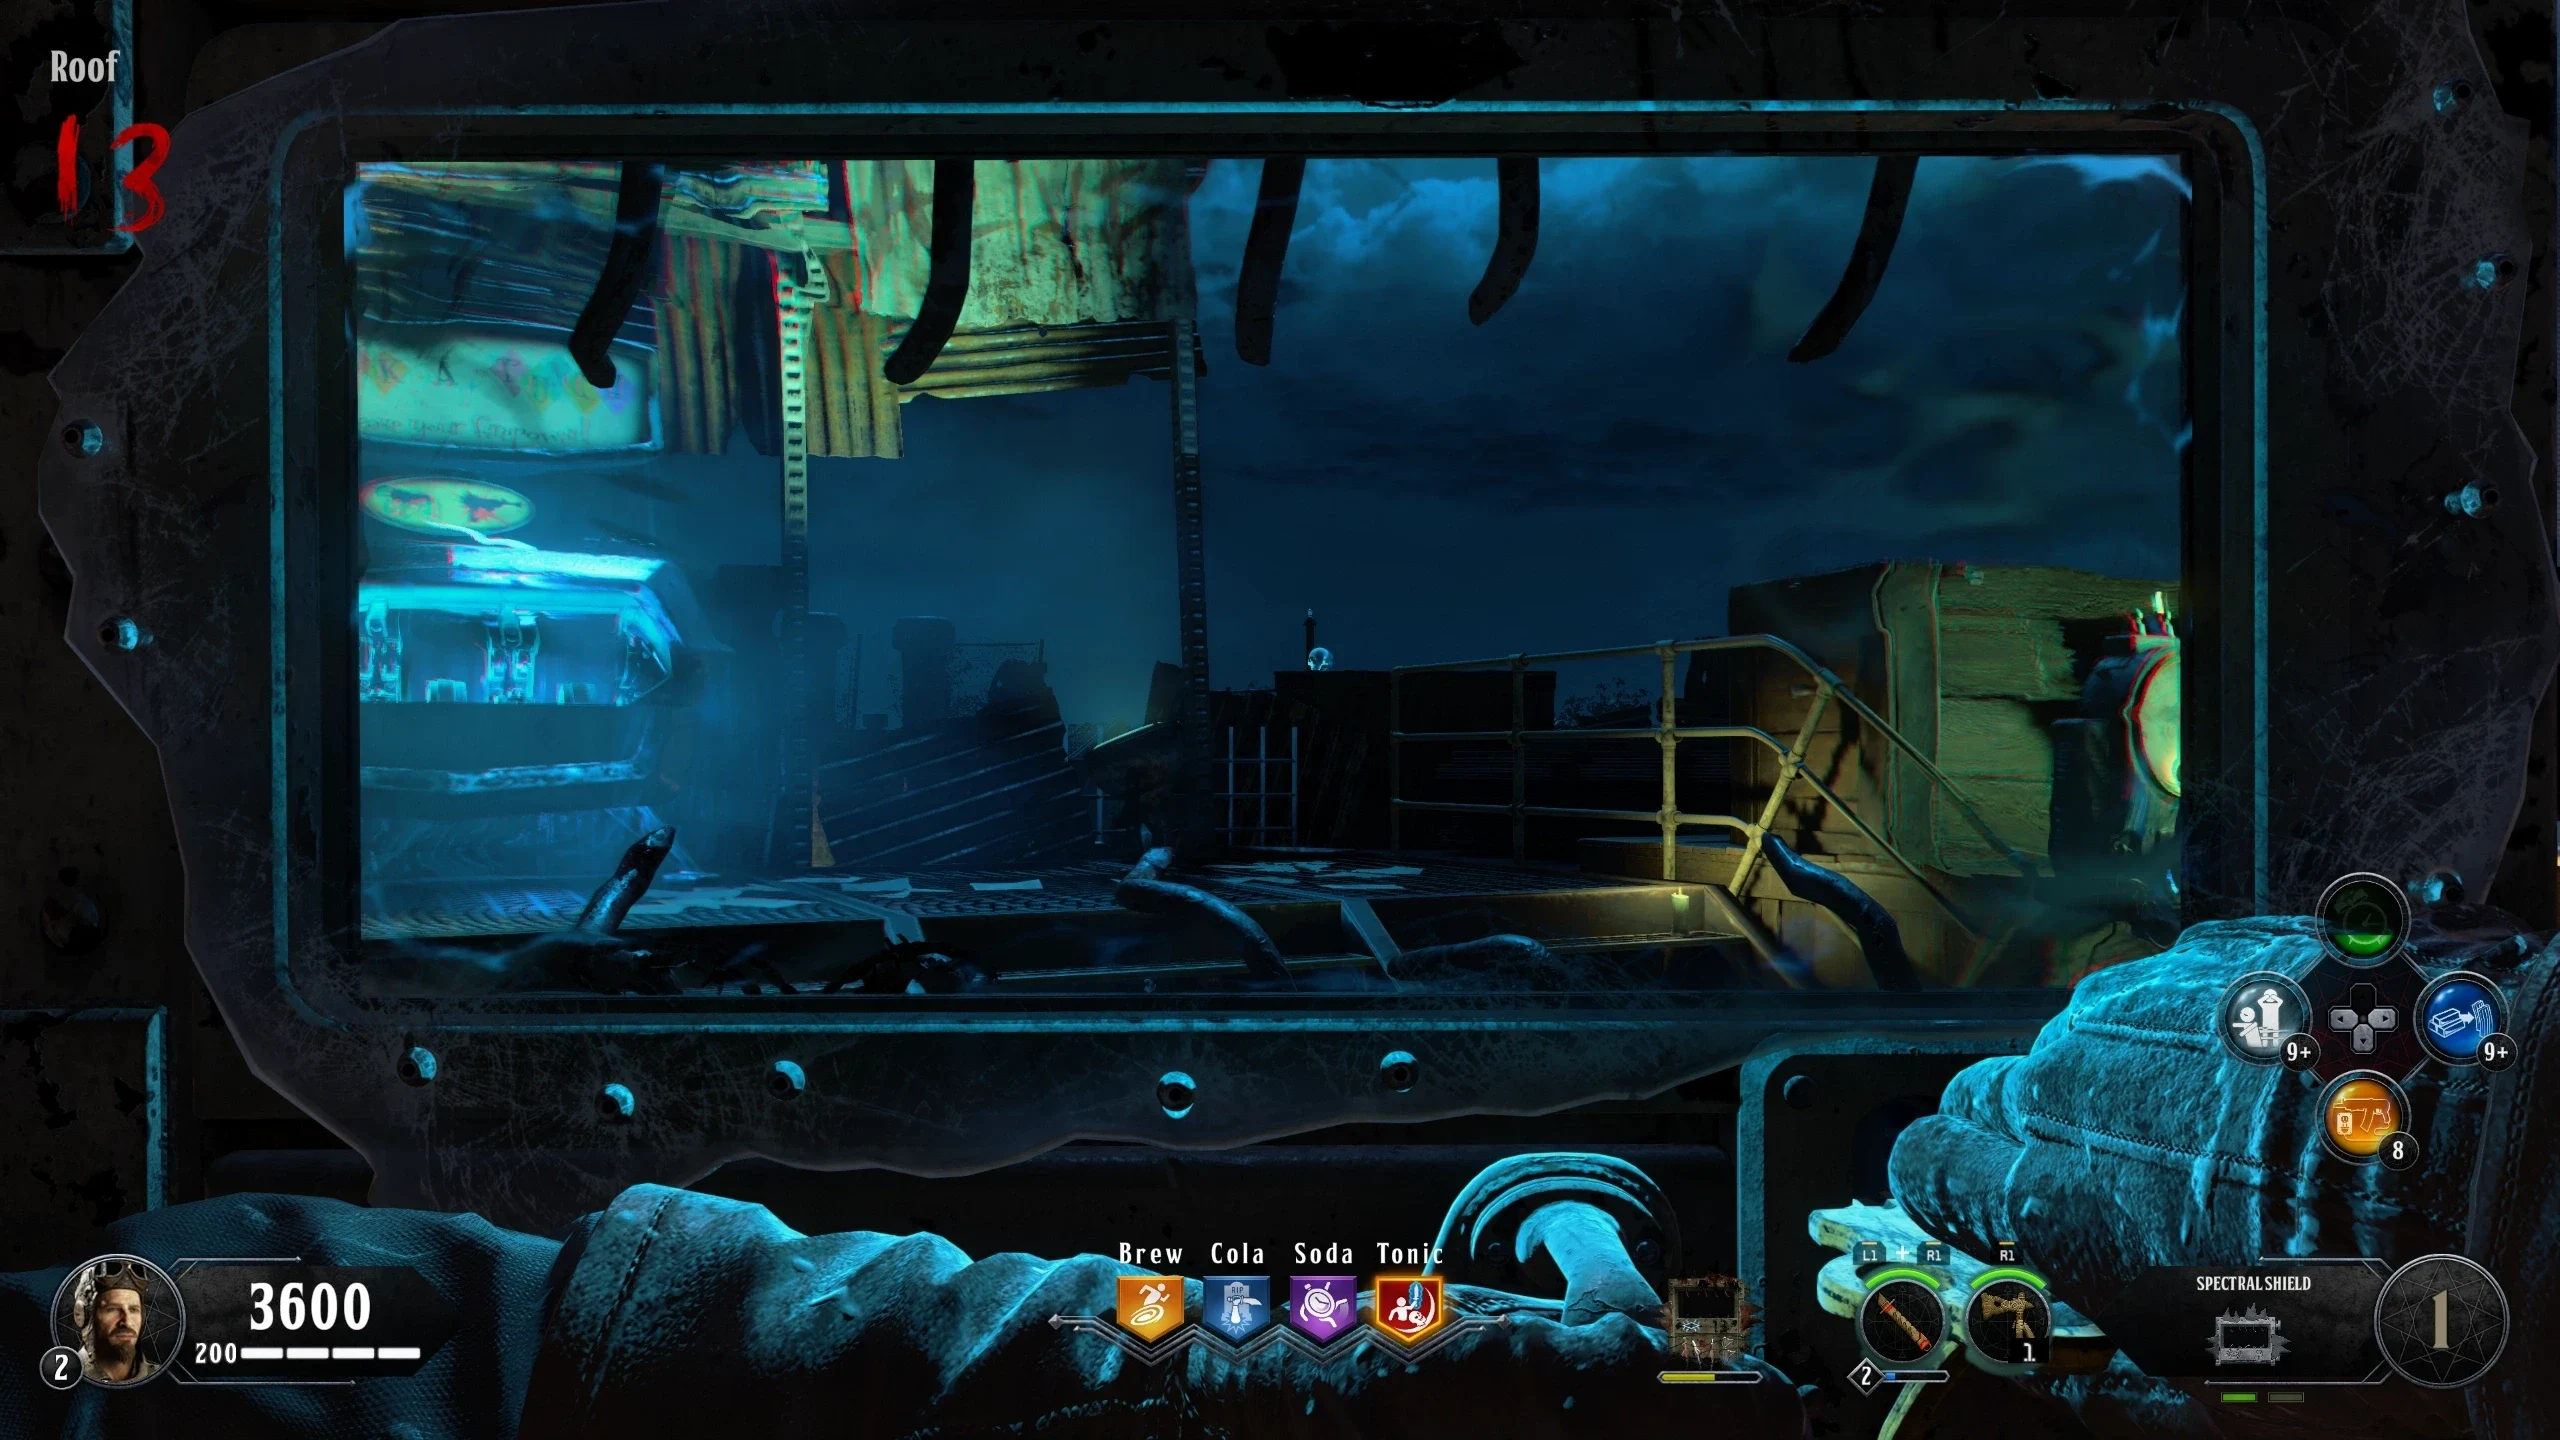
- Roof - Above the "No Way Out" Sign, left of the stairs to the 'Infirmary'
- Roof - Left of the Zombie spawn hut
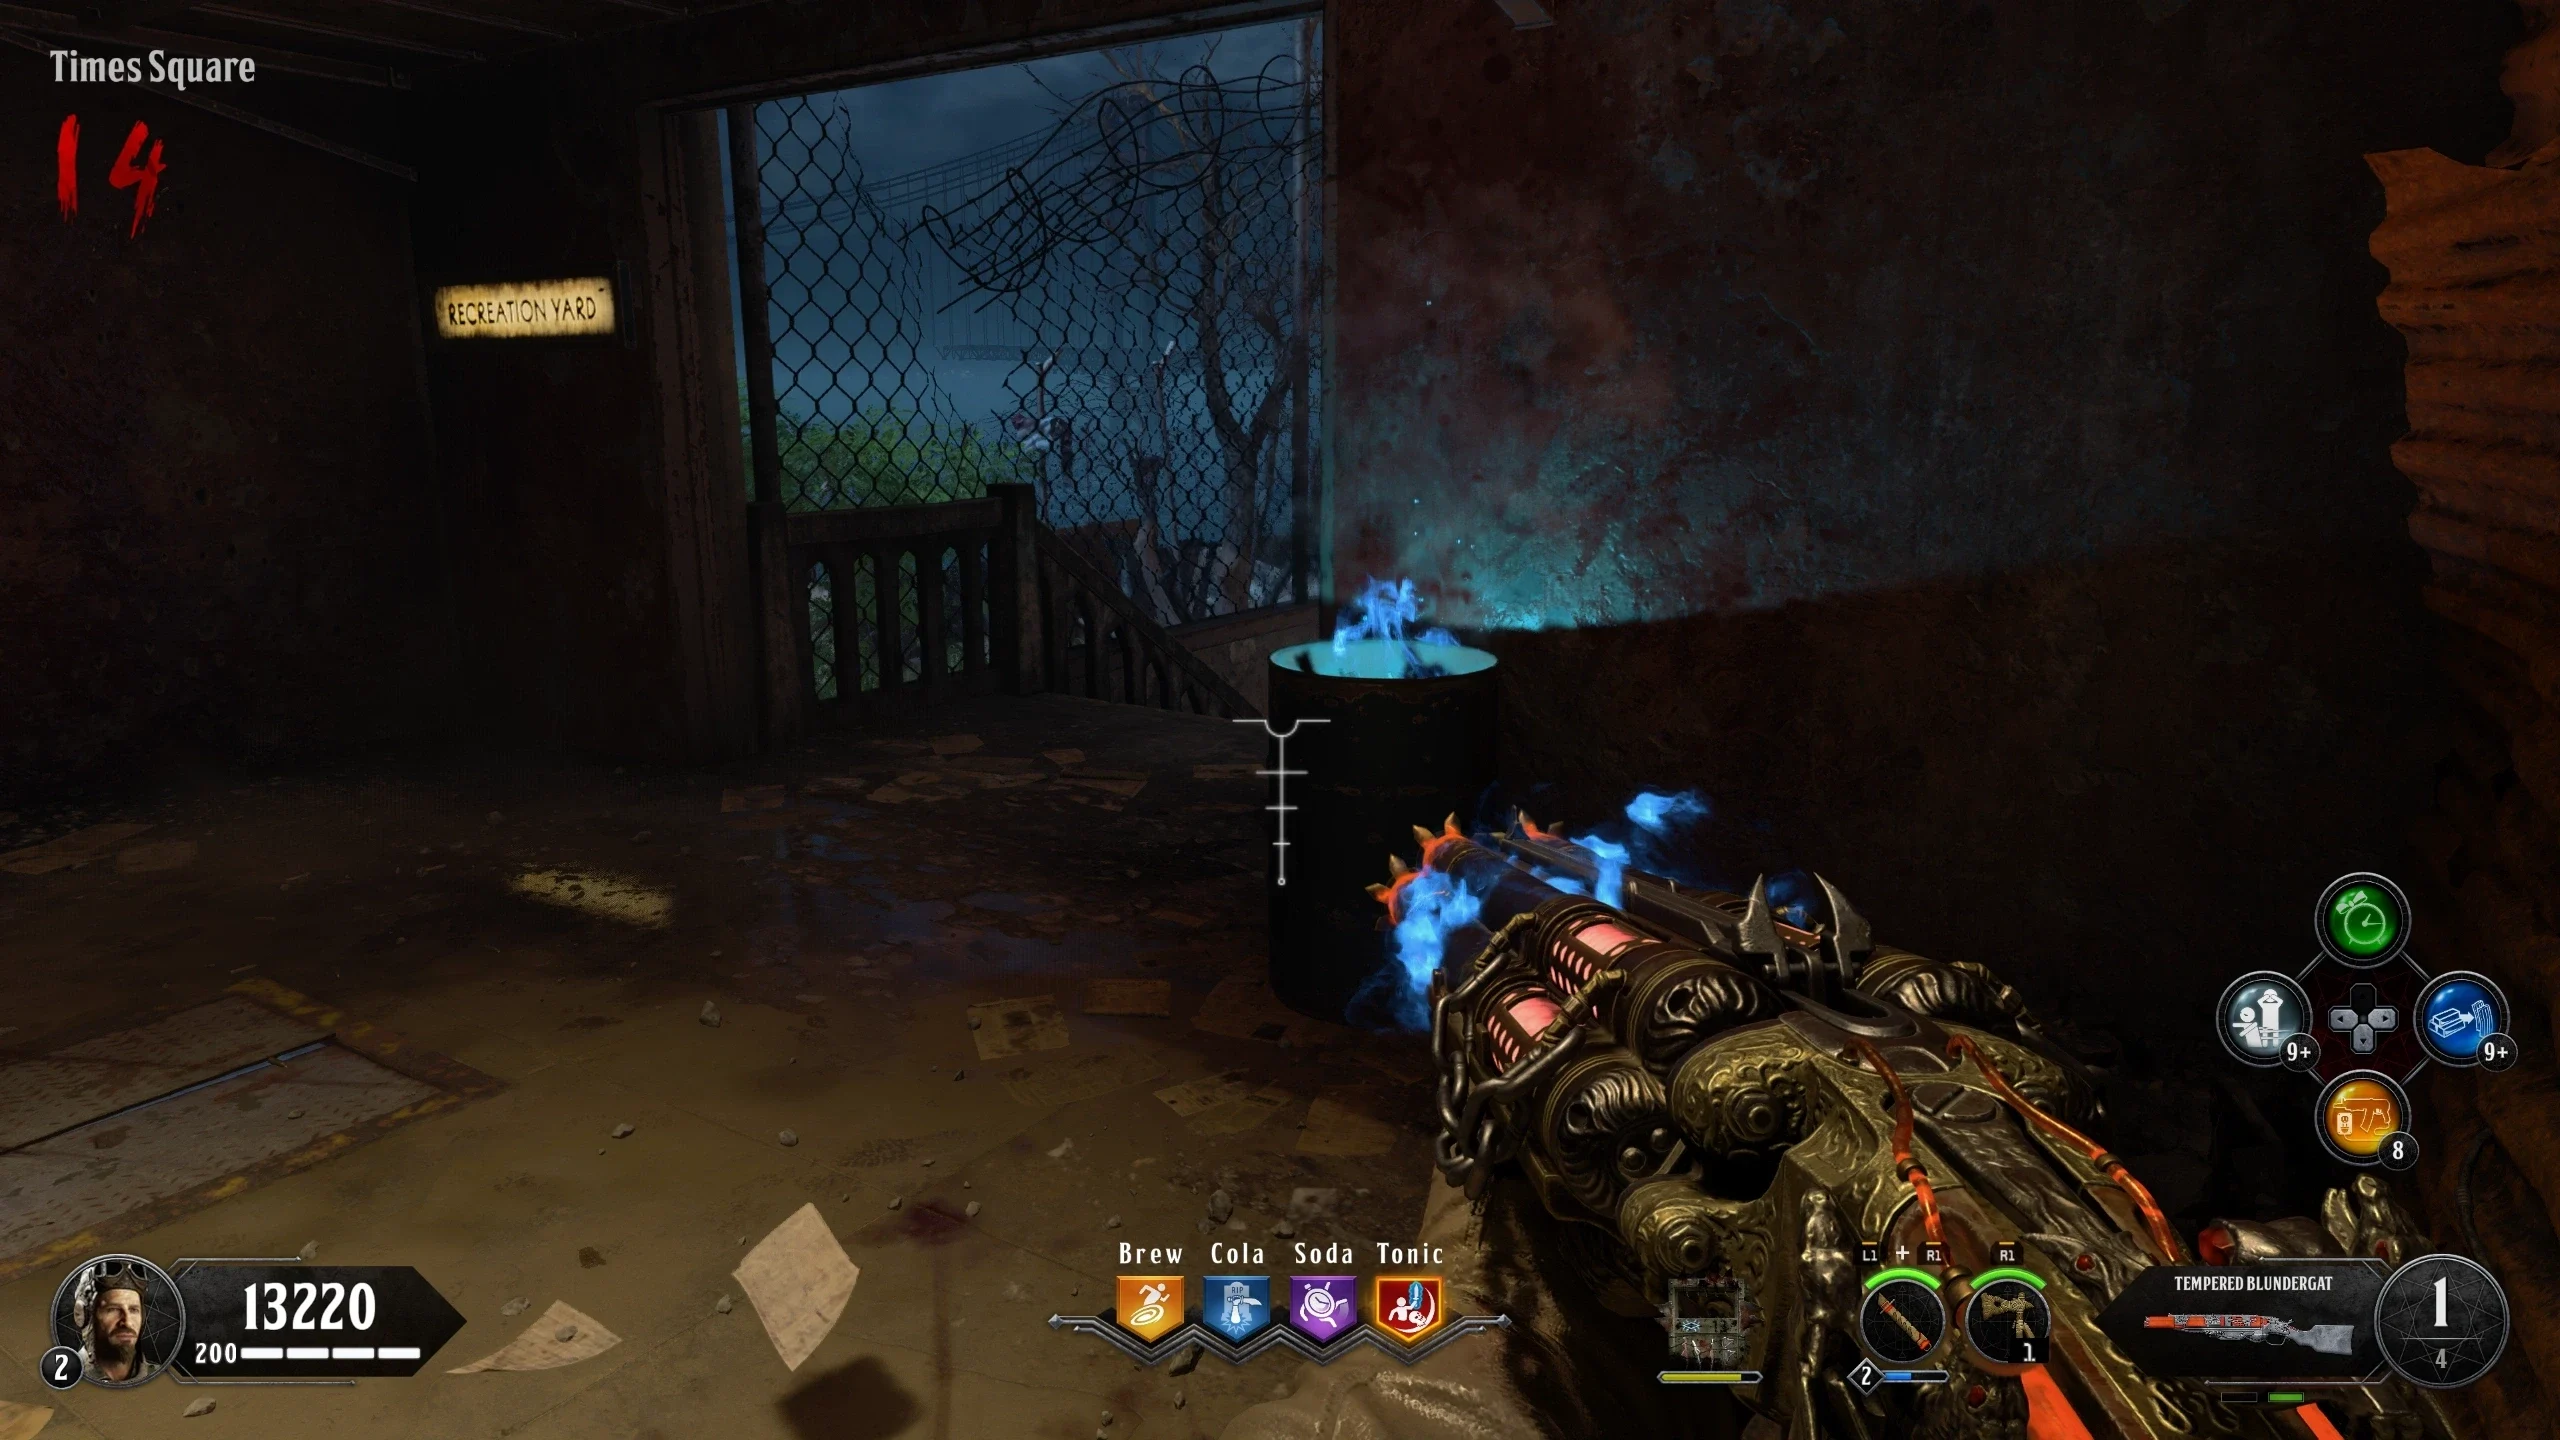
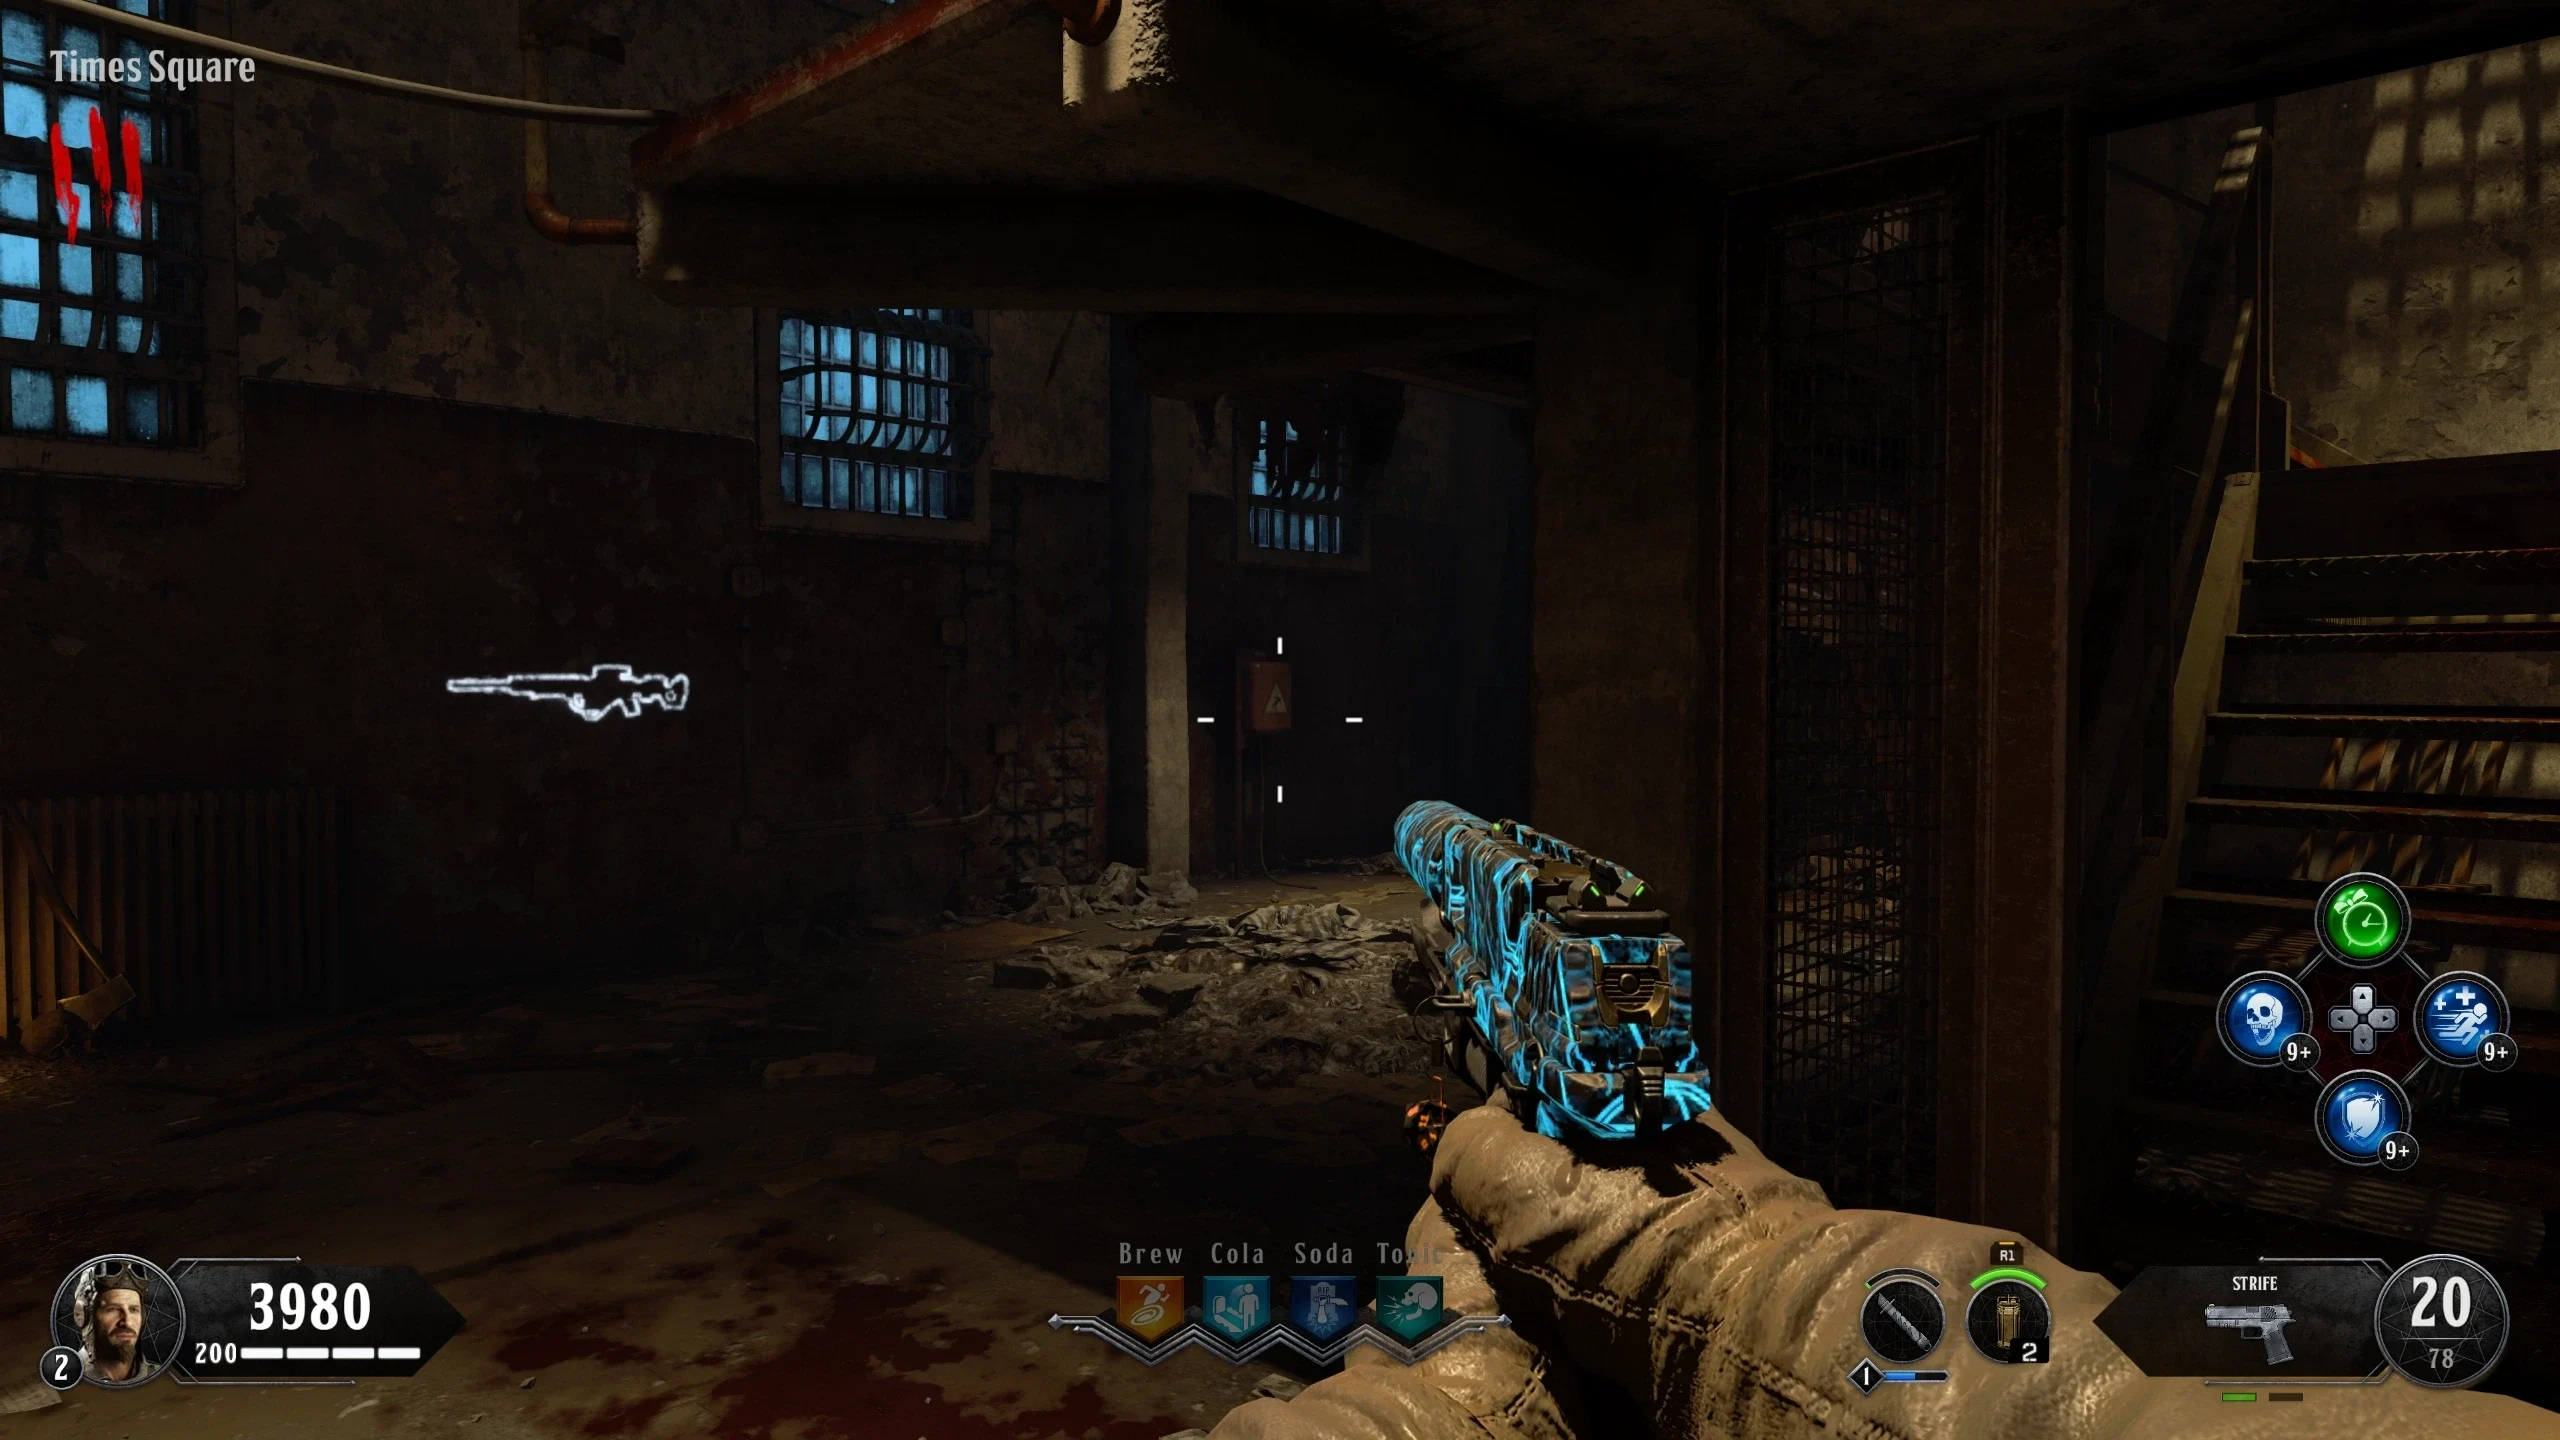
- Times Square - On a broken walkway above the entrance to the 'Cafeteria'
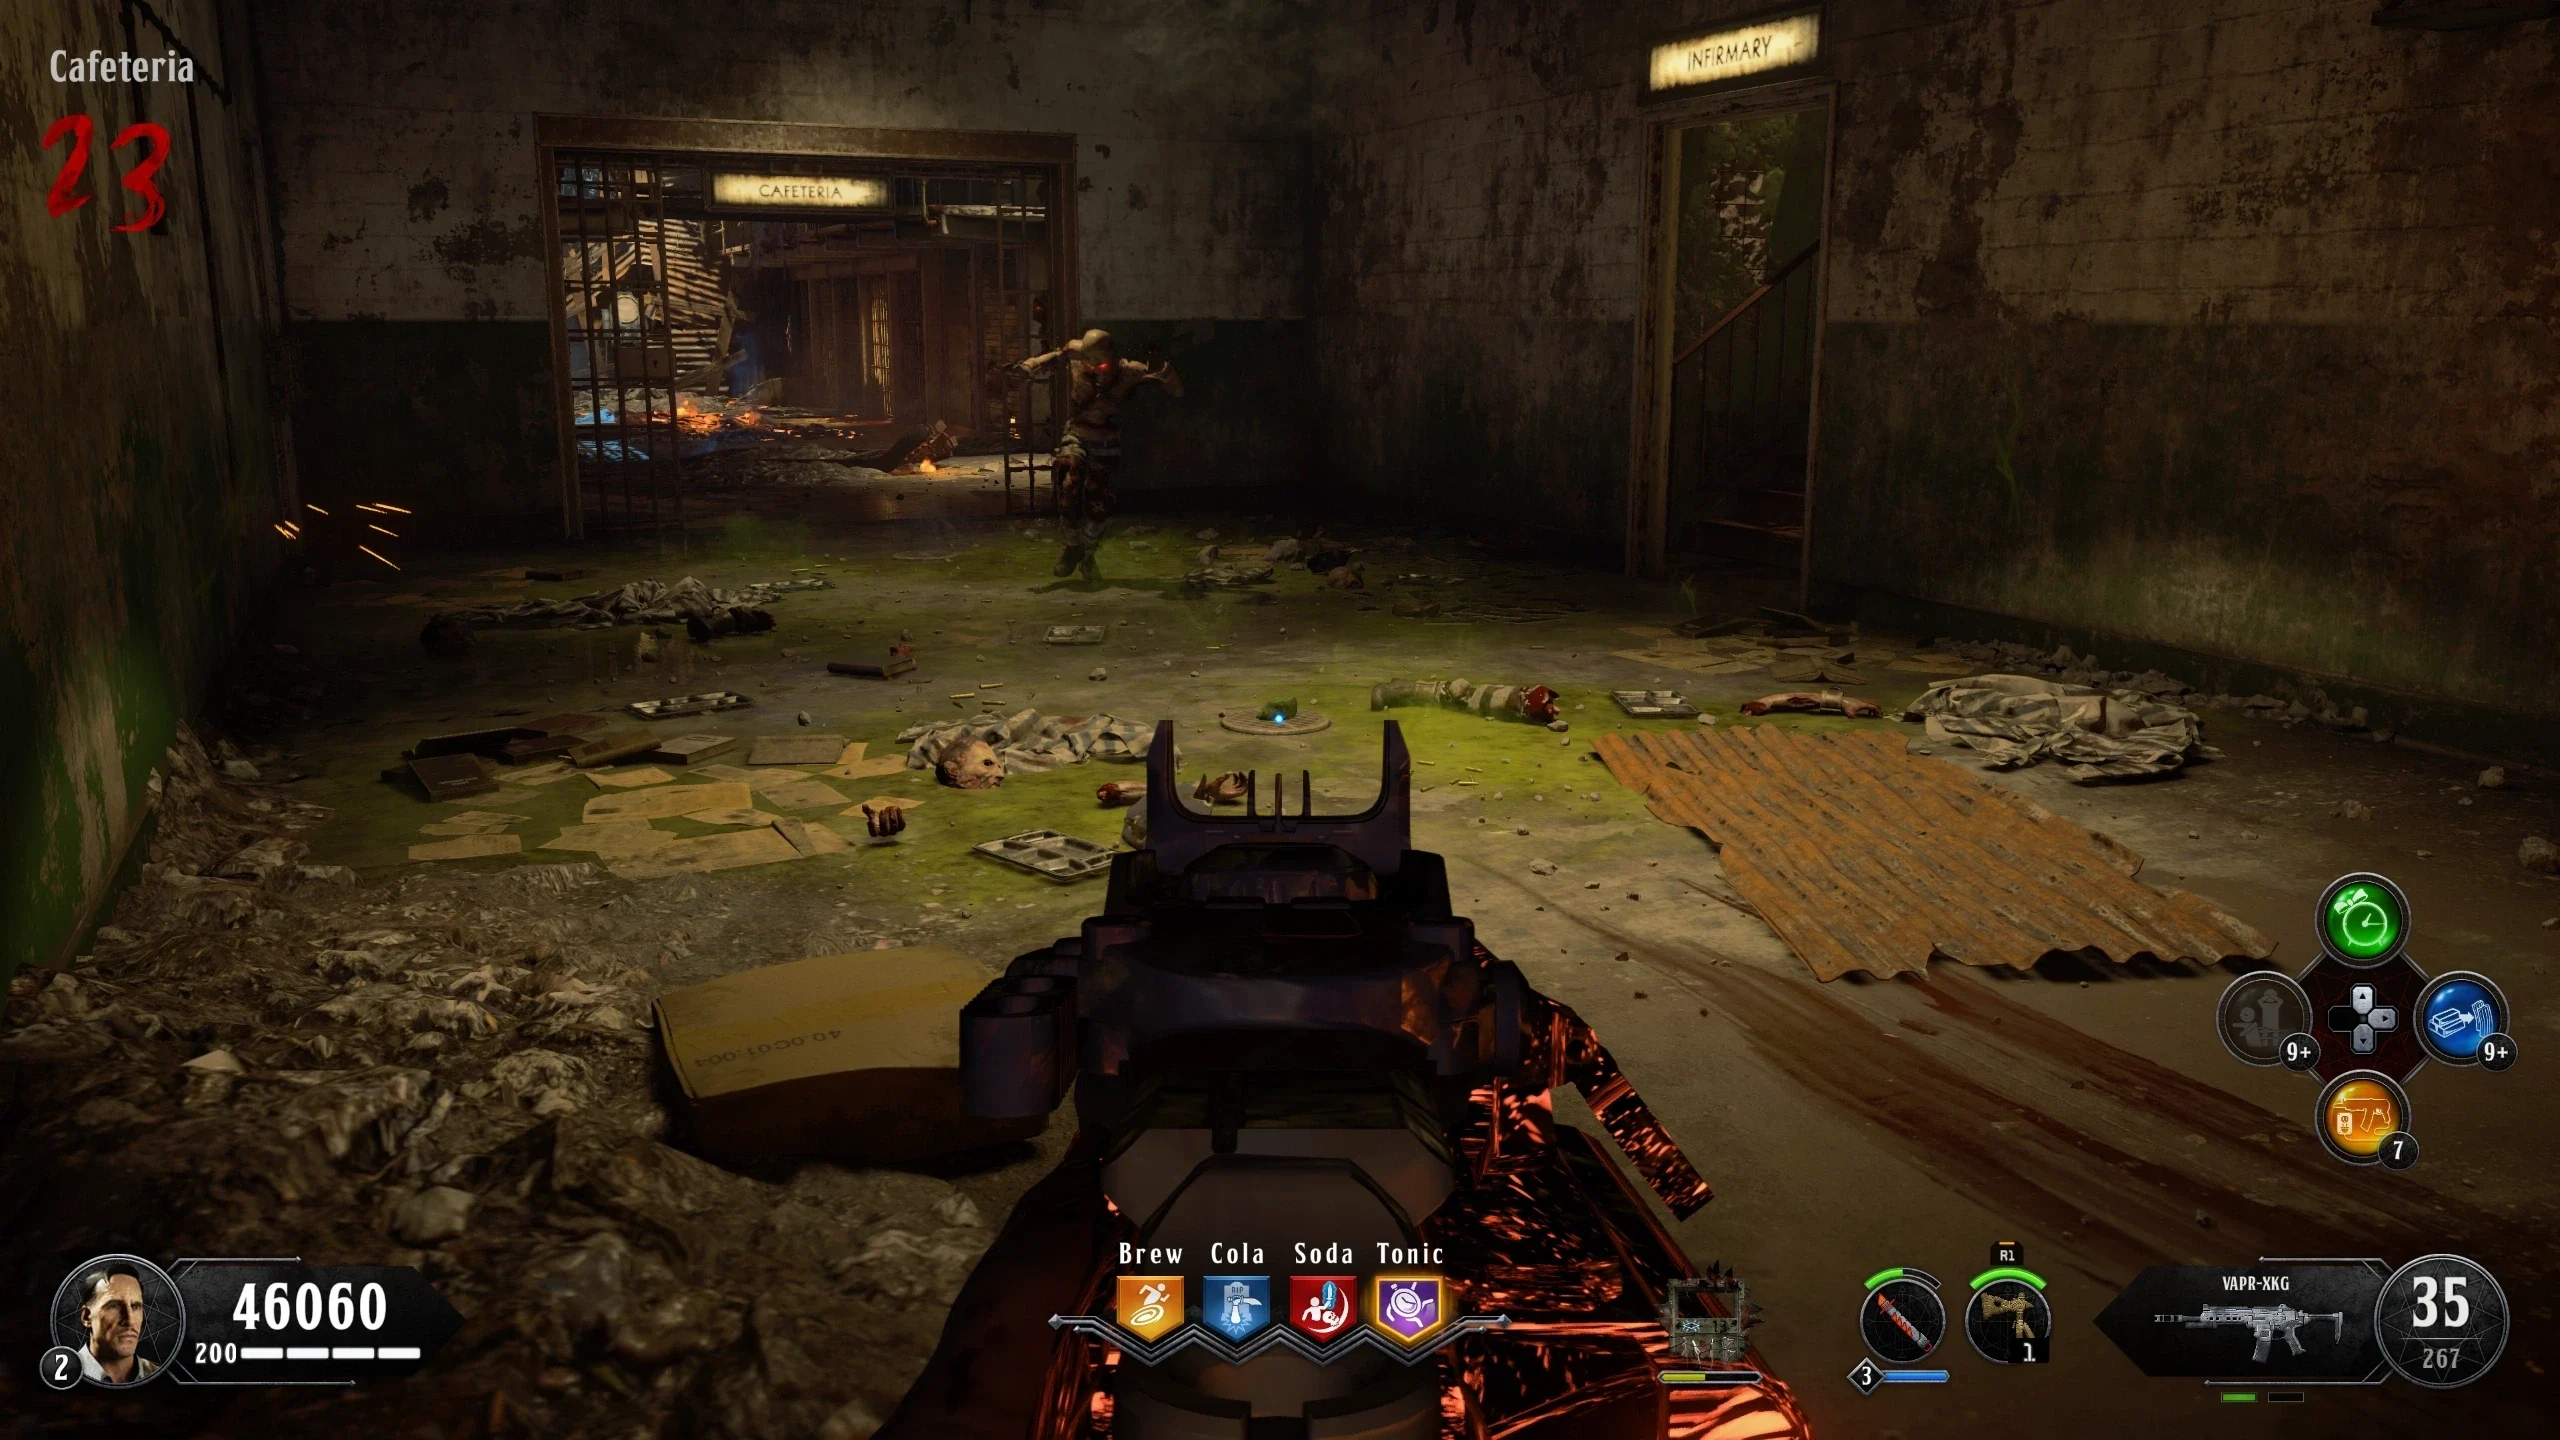
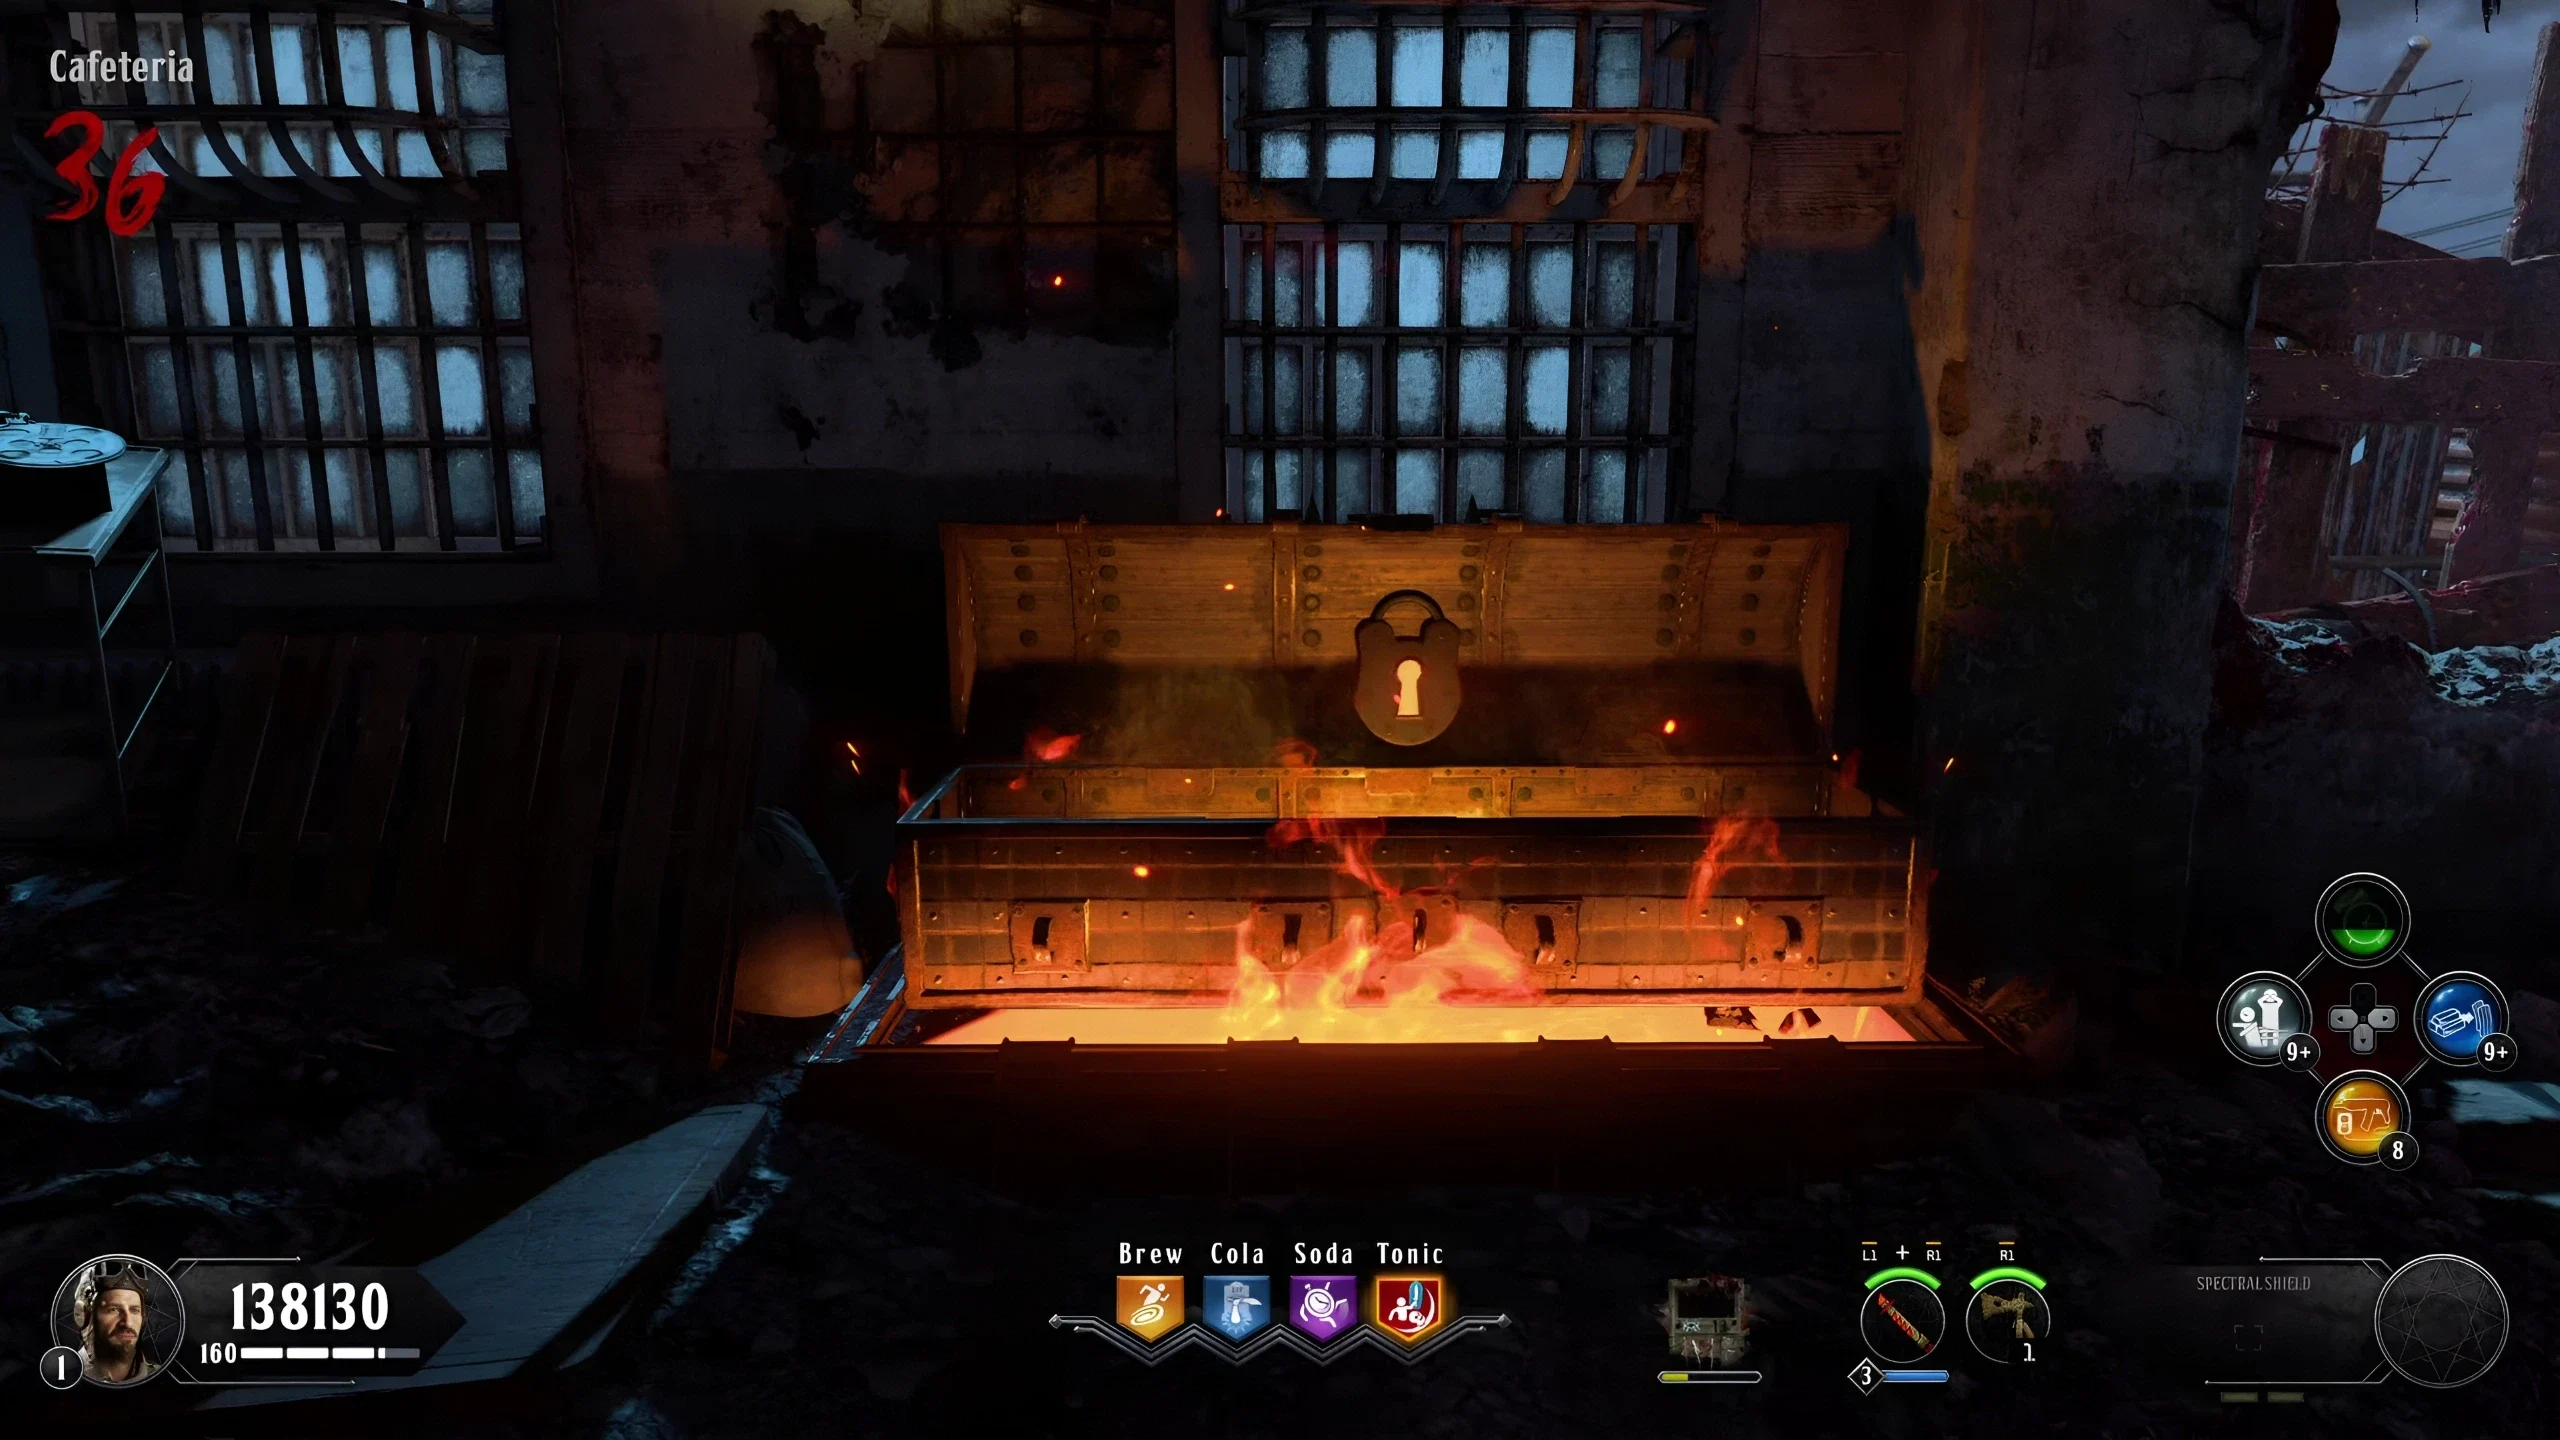
- Cafeteria - On the pile of debris in the middle of the room (stand near the fast travel)
- Cafeteria - On the table with the wrapped body, outside a barrier
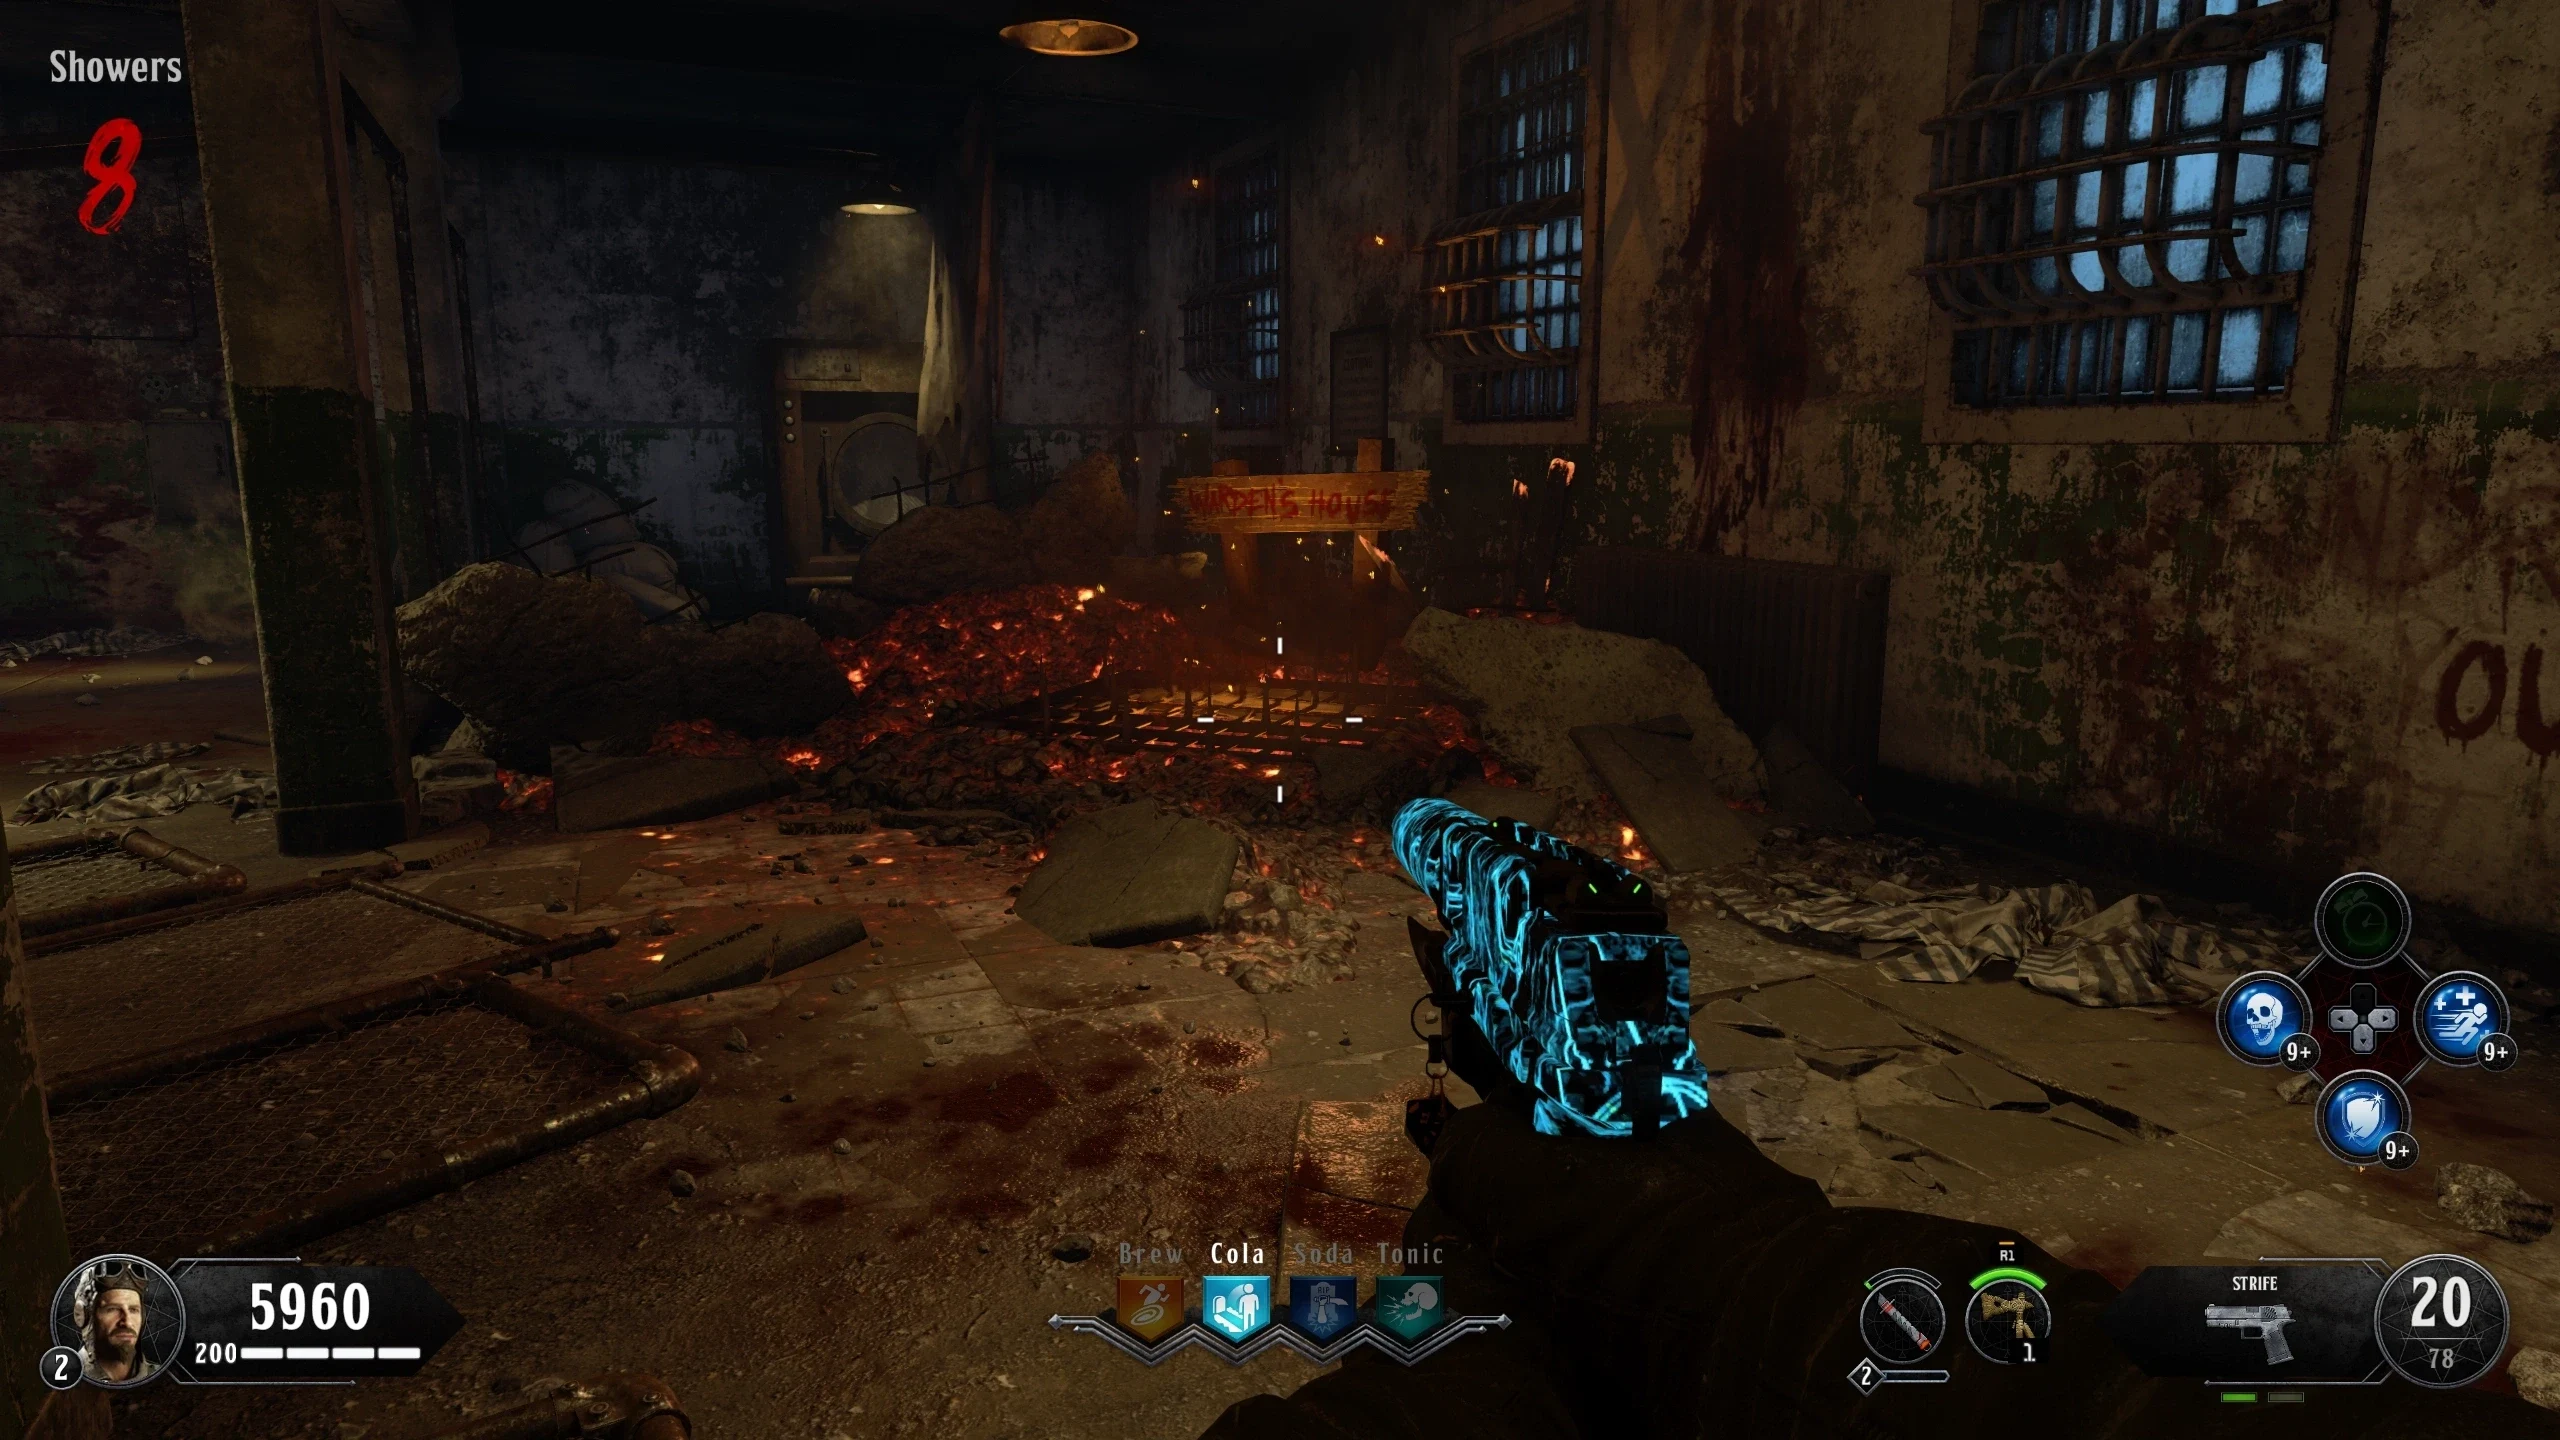
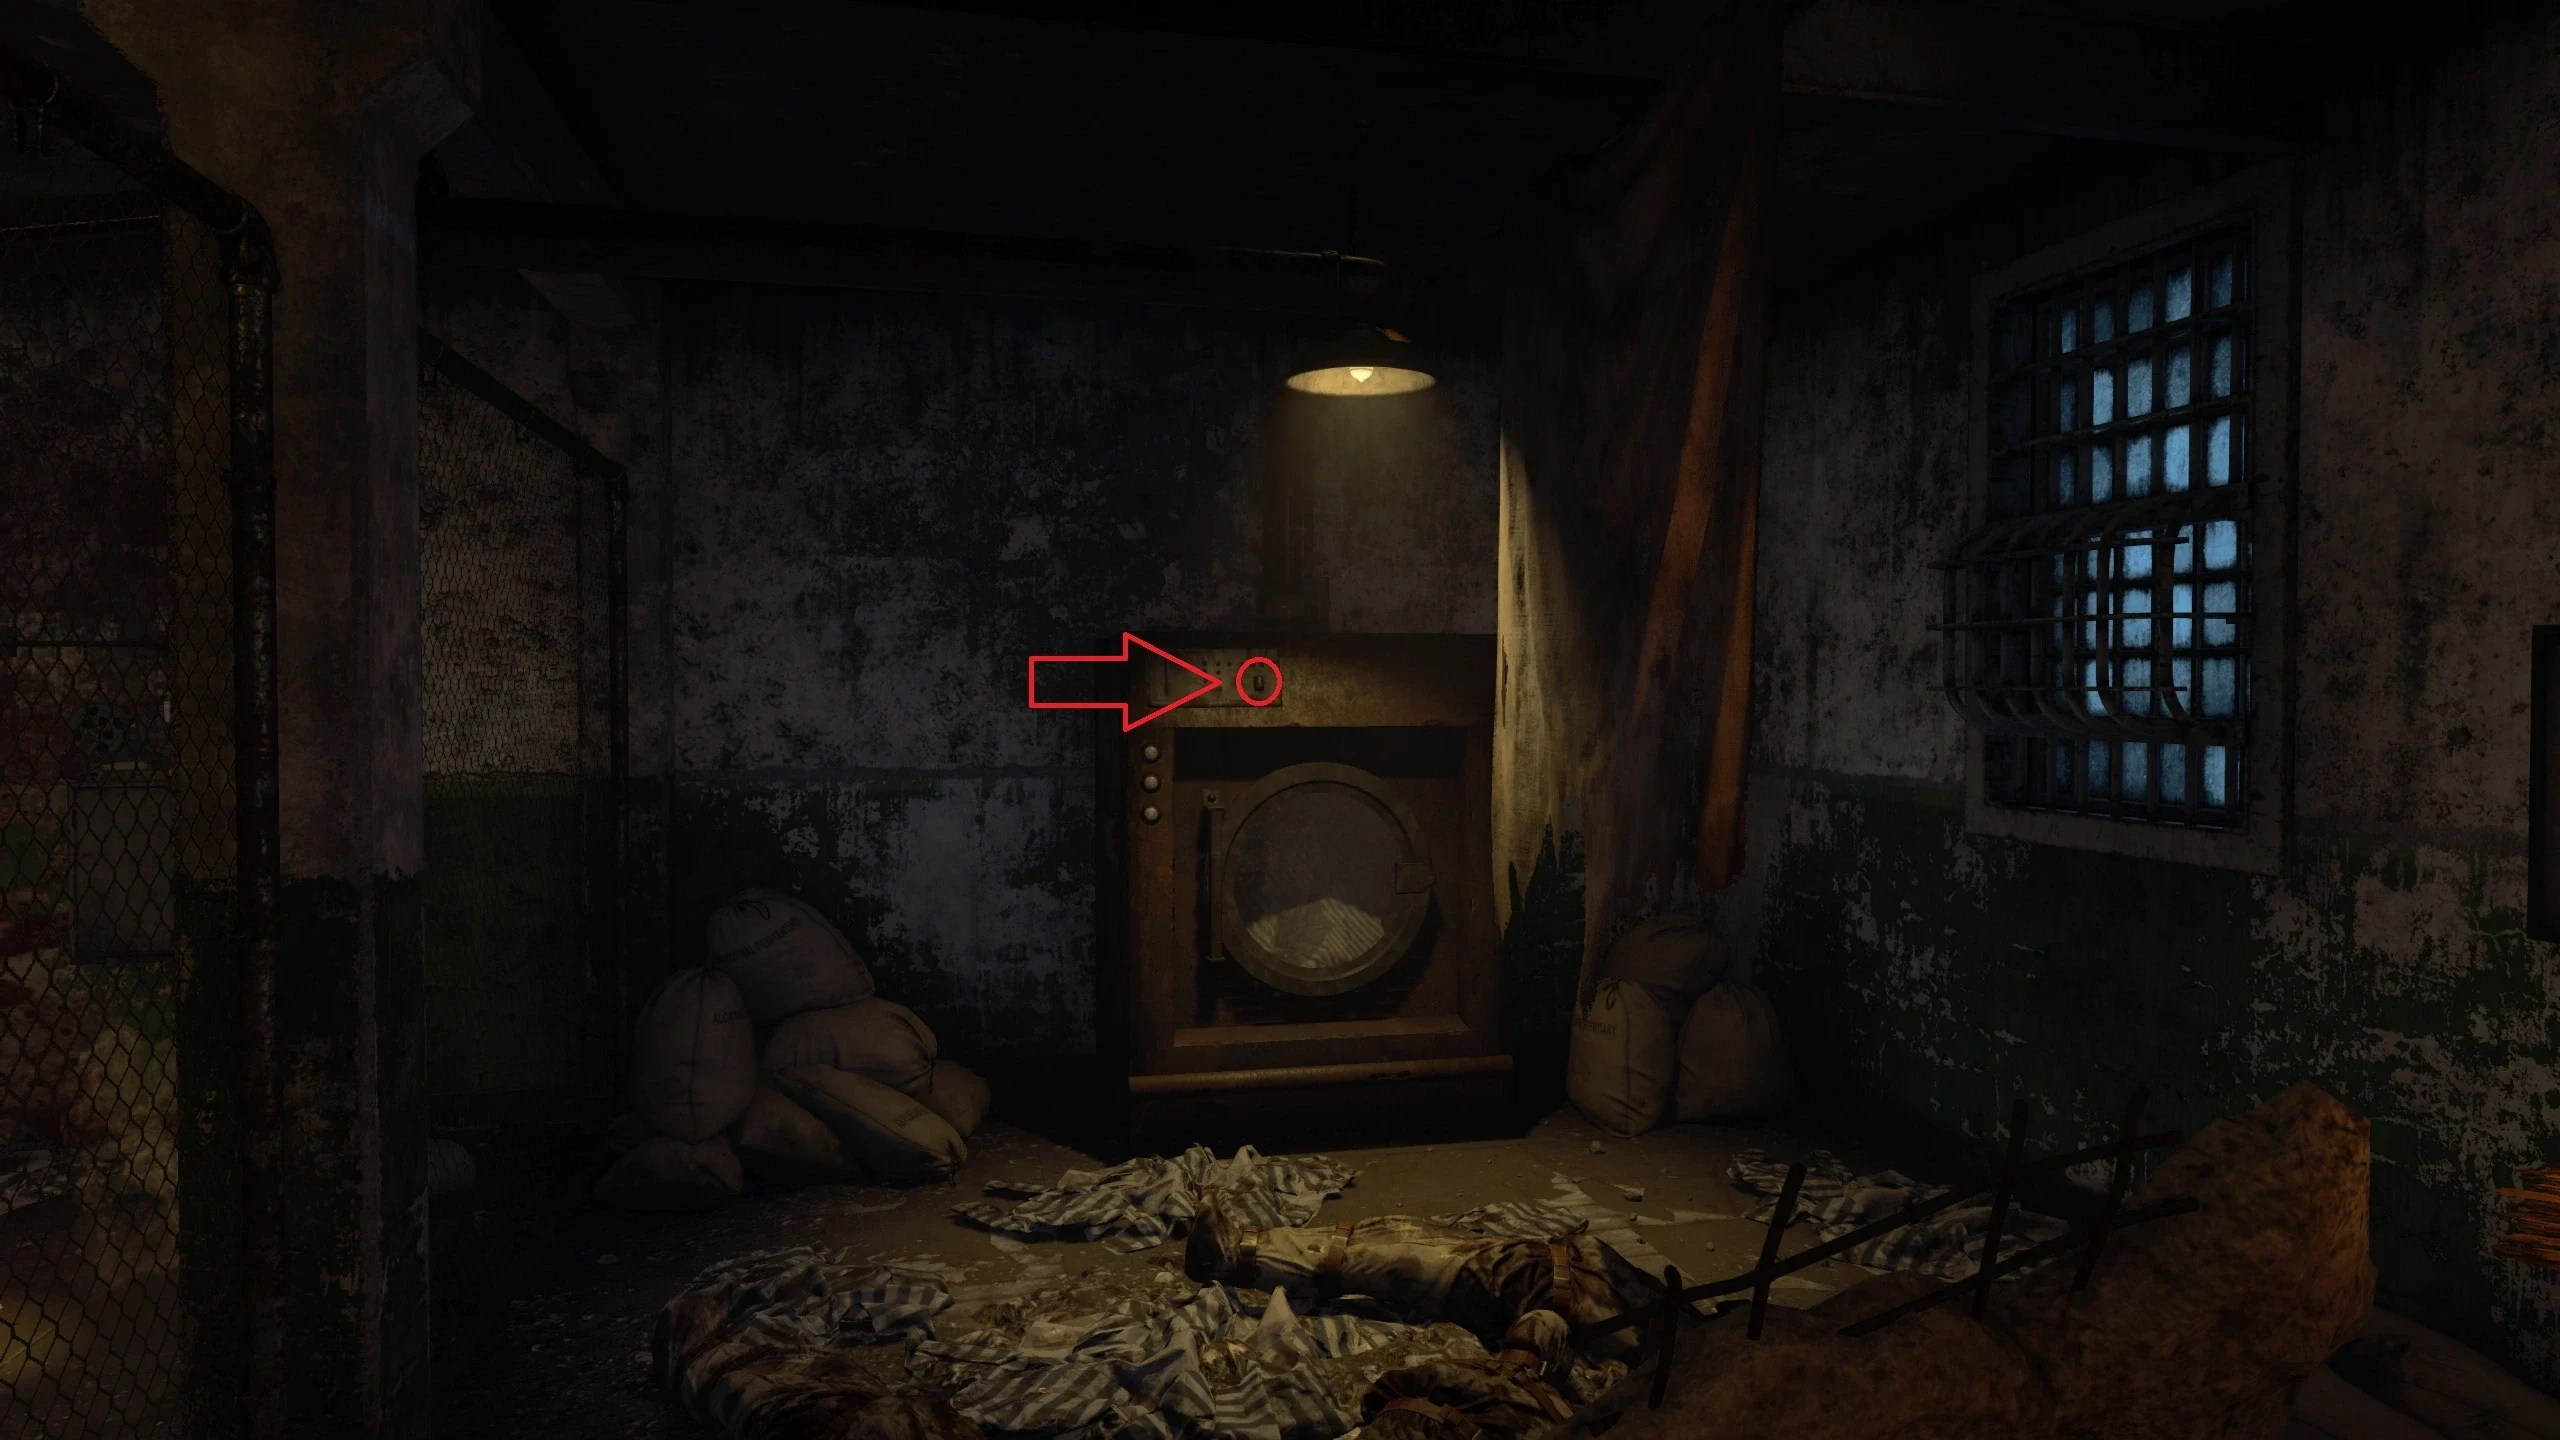
- Showers - On the dryer, near the fast travel
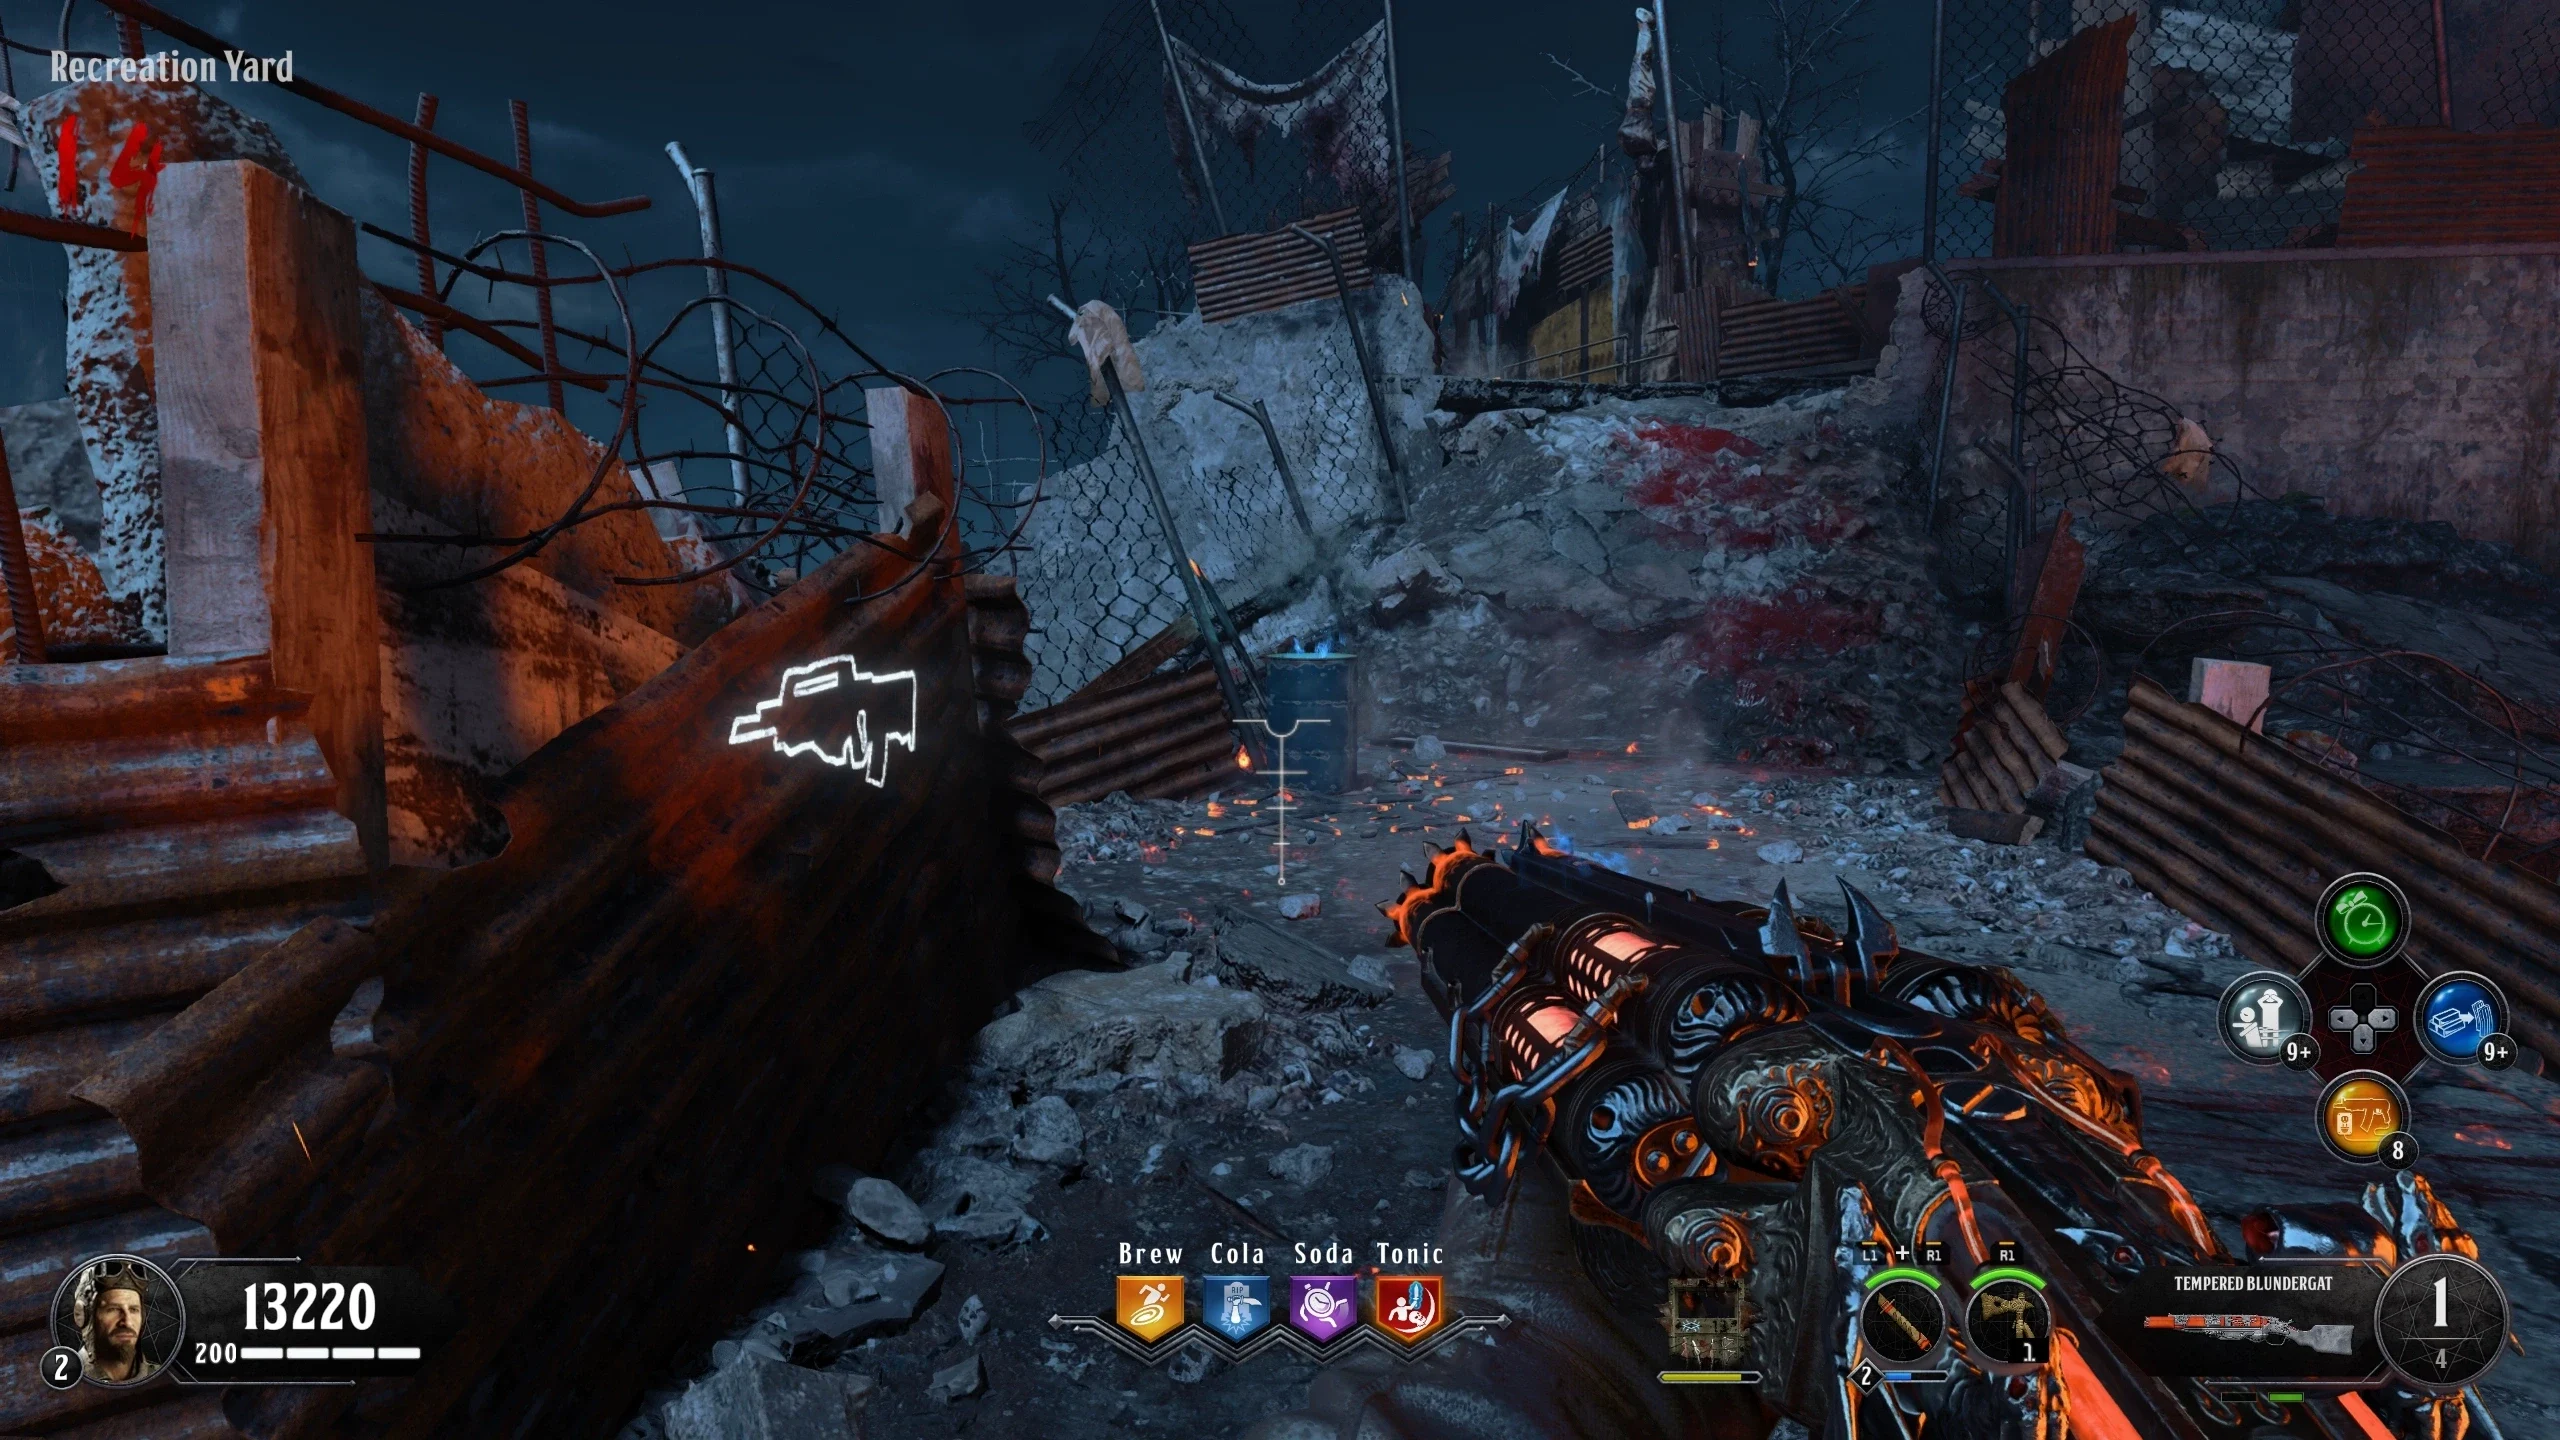
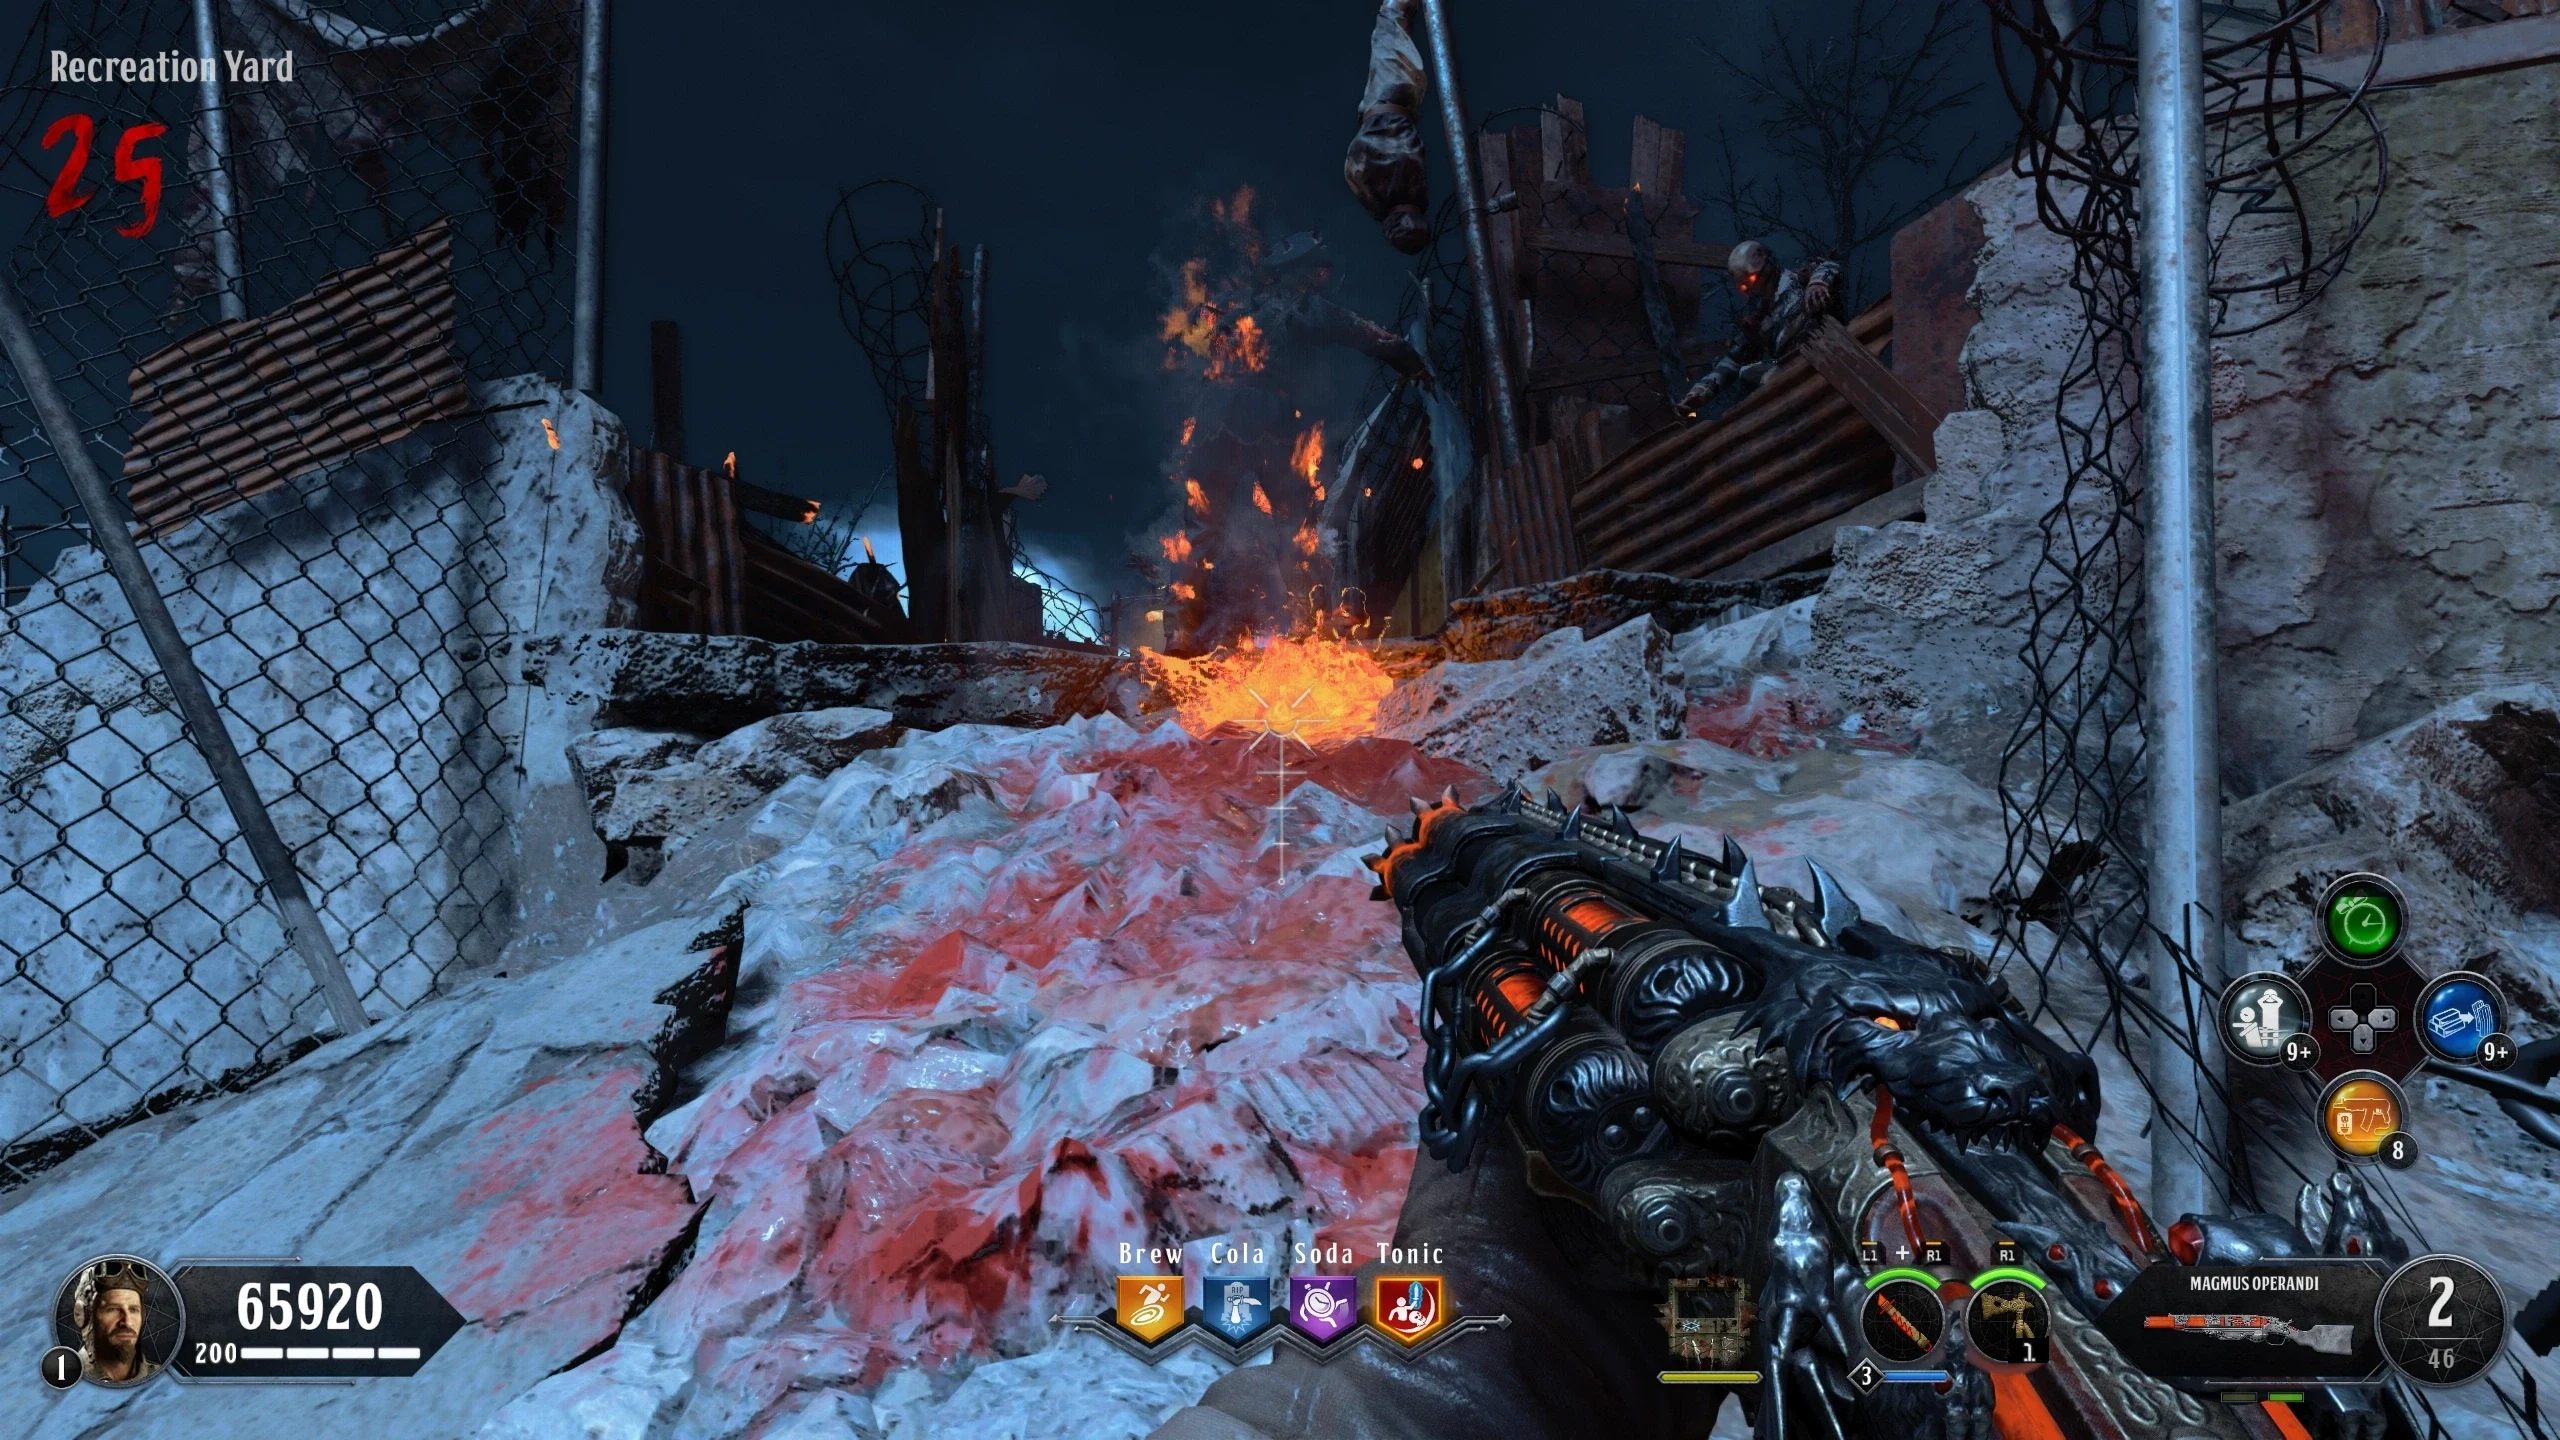
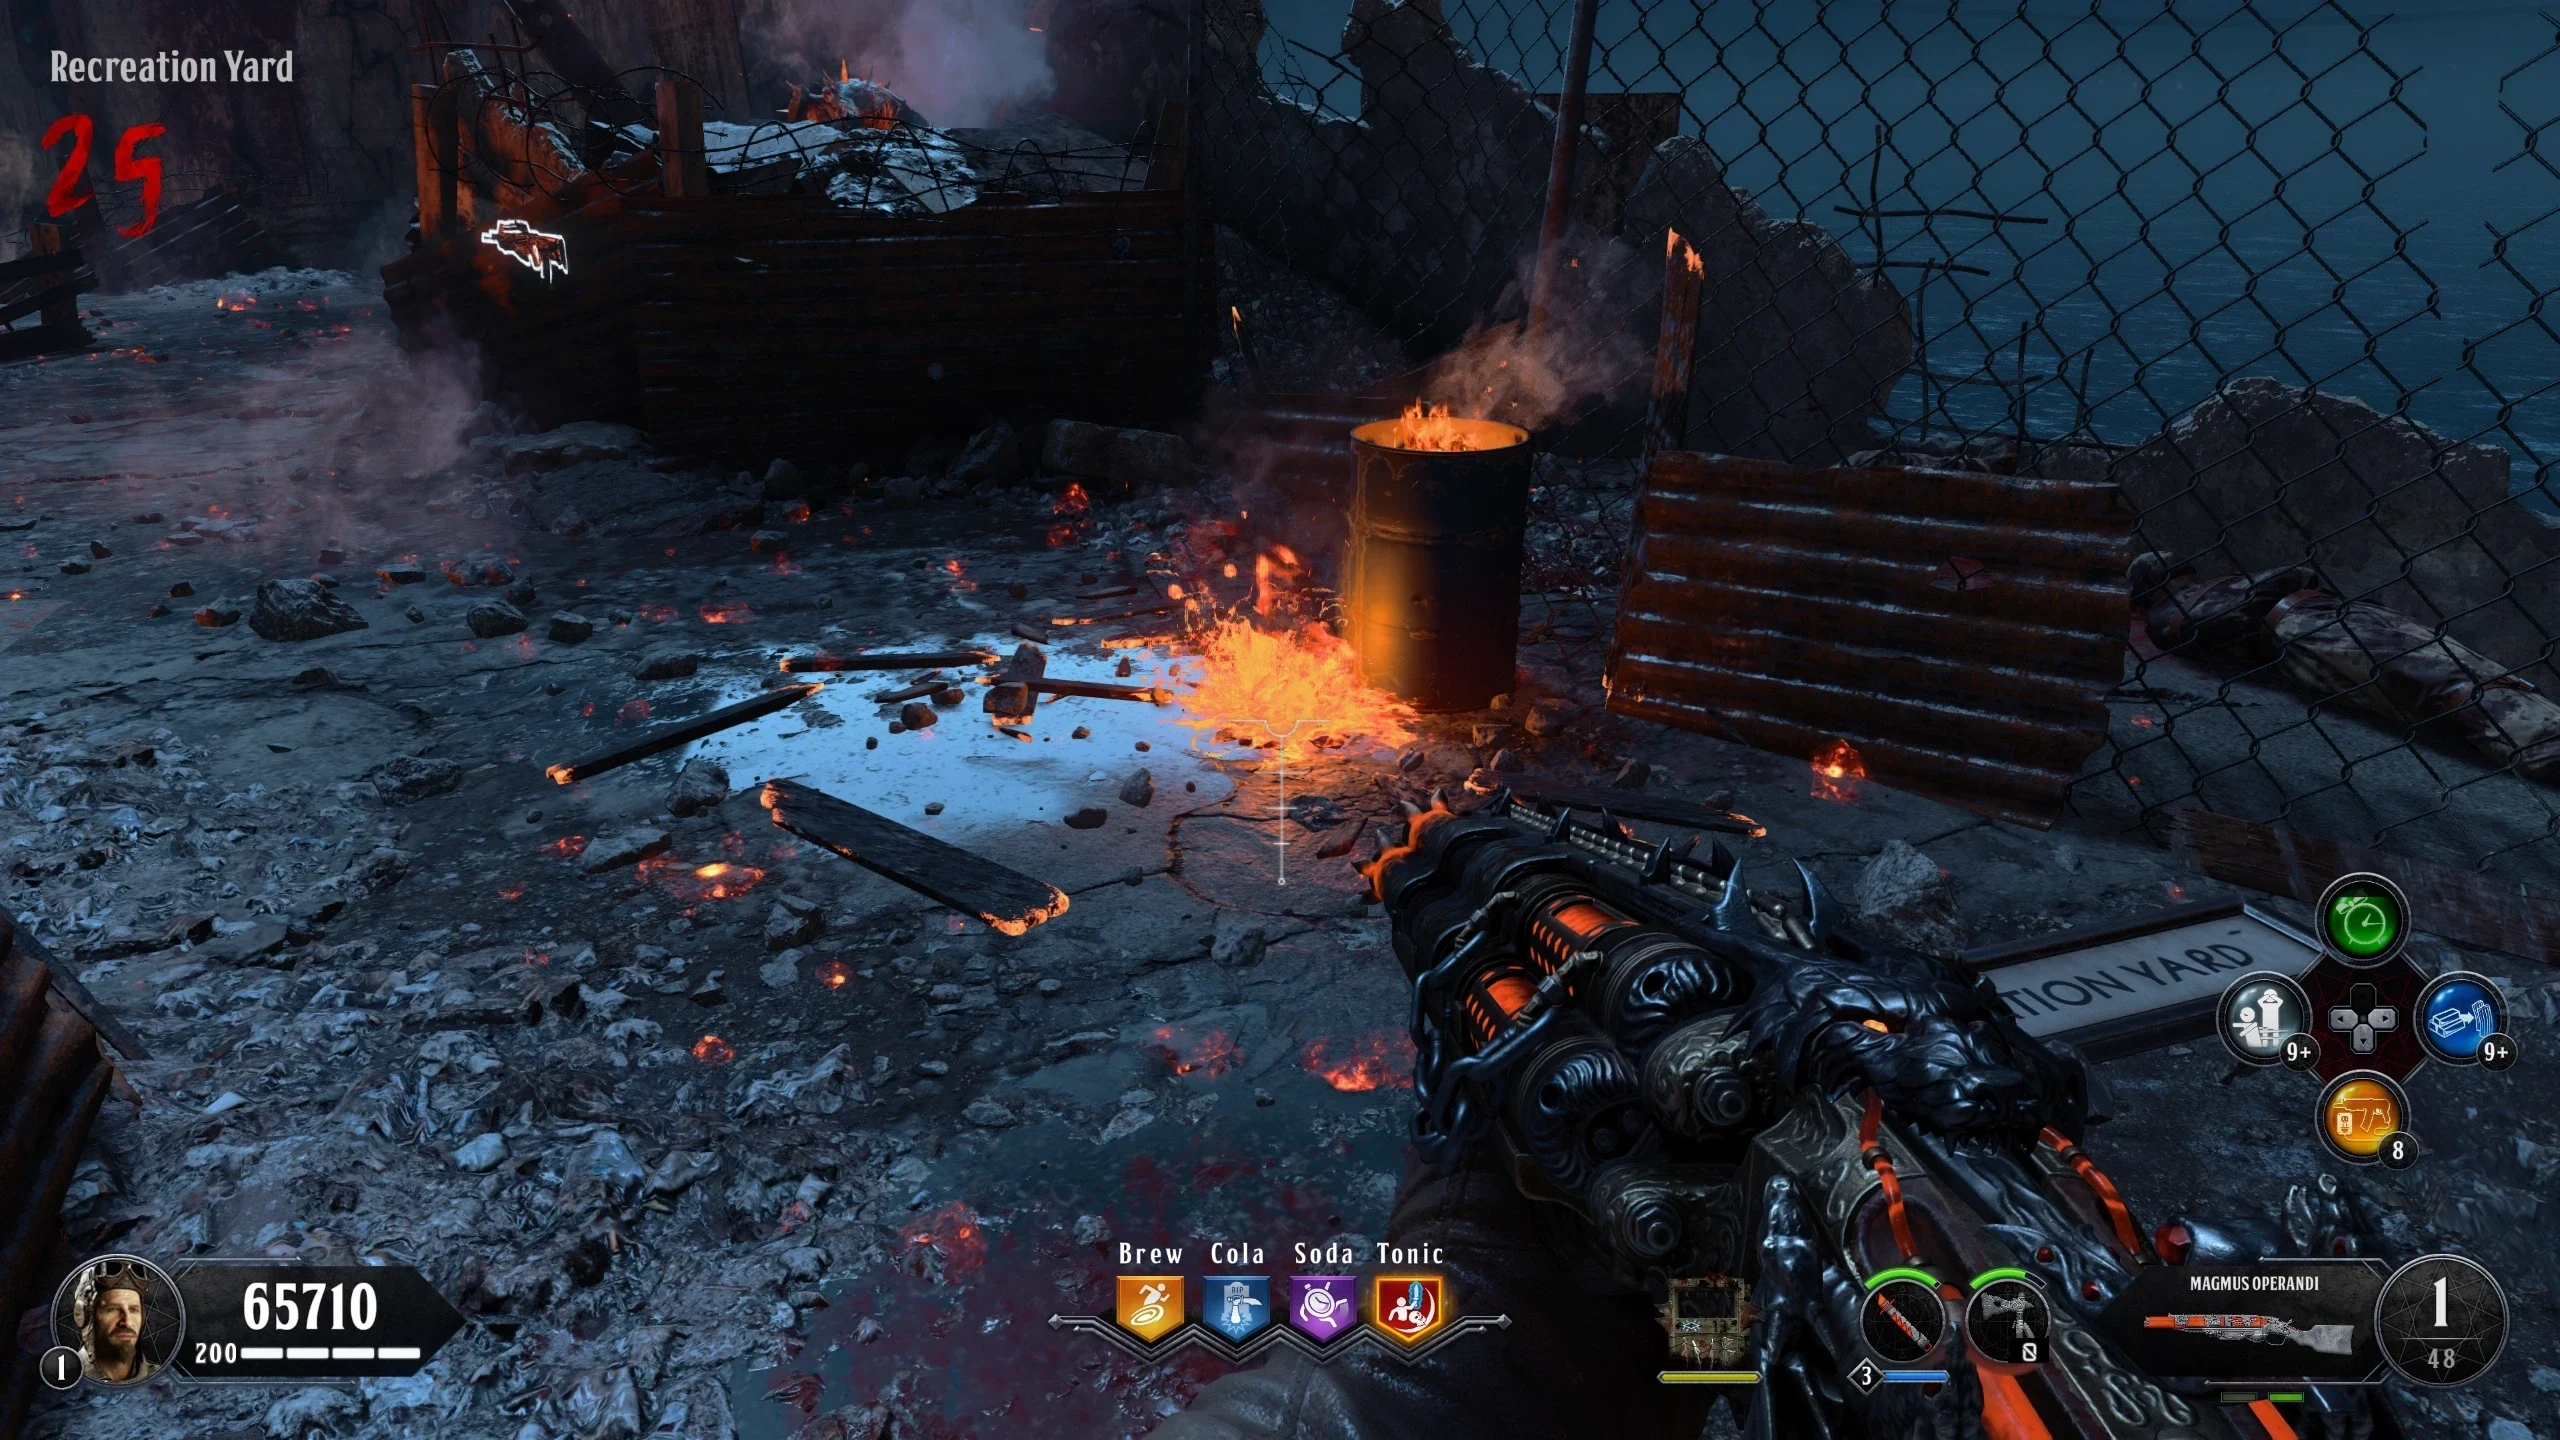
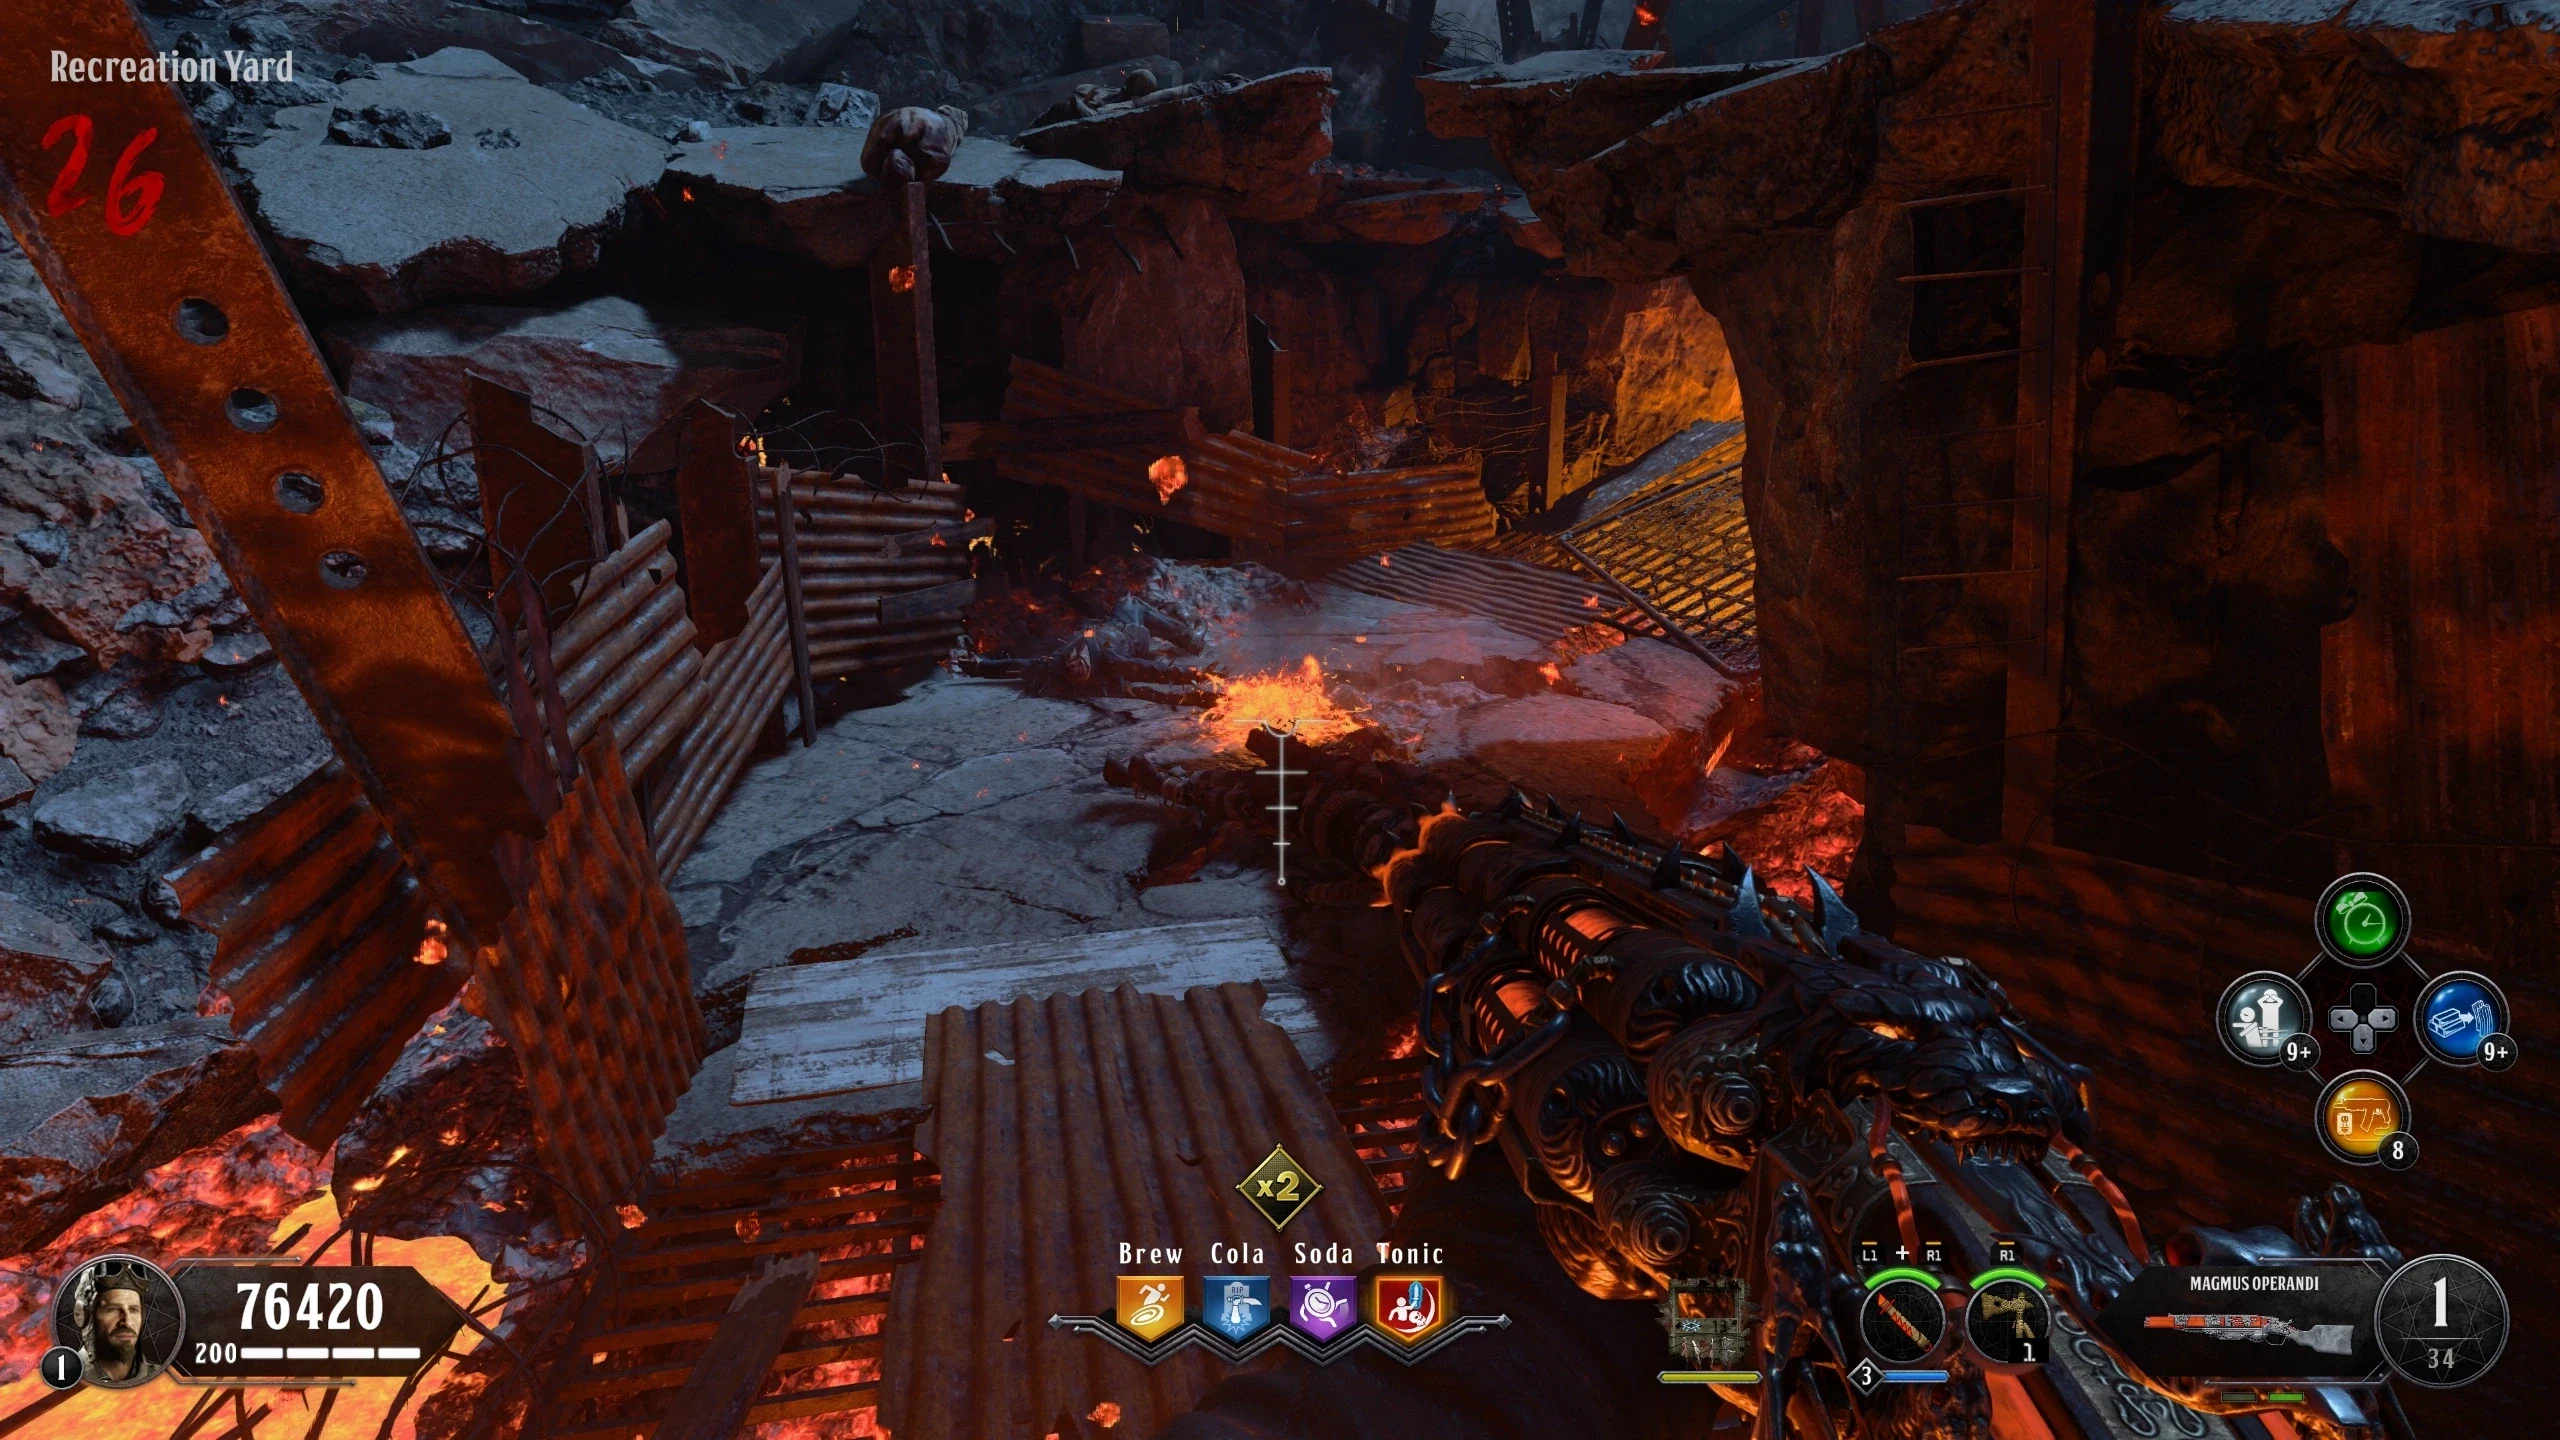
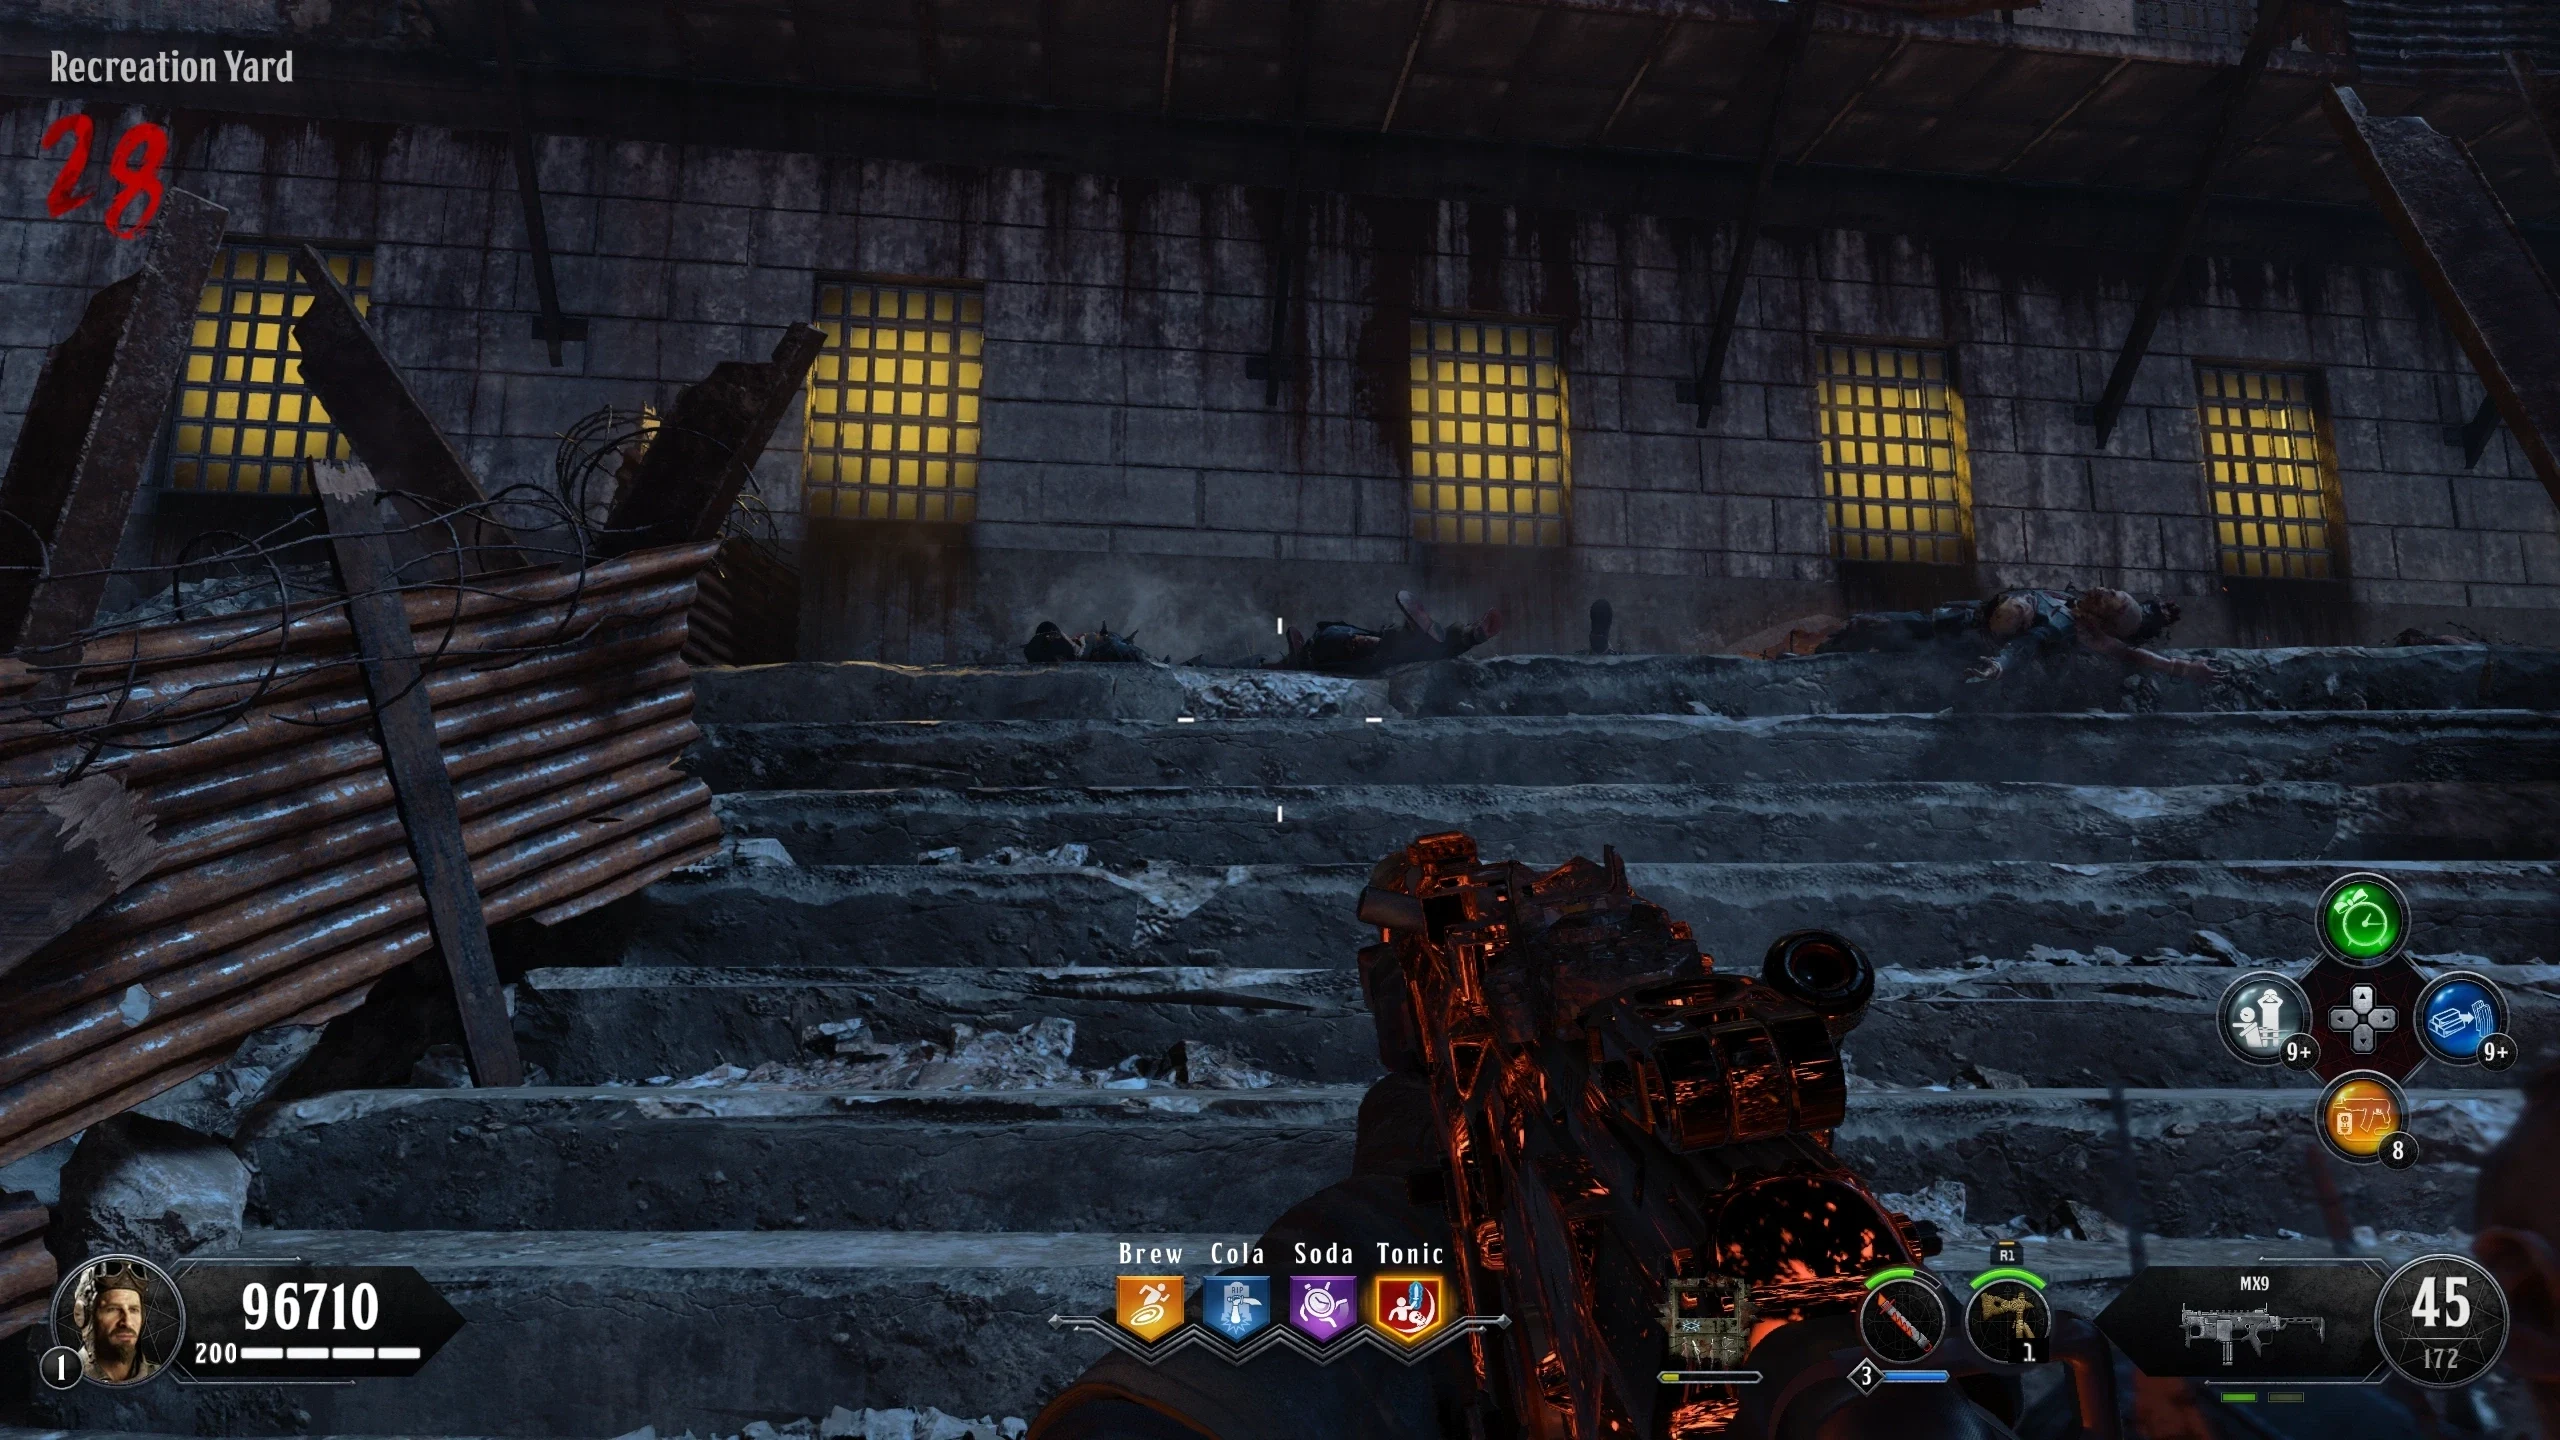
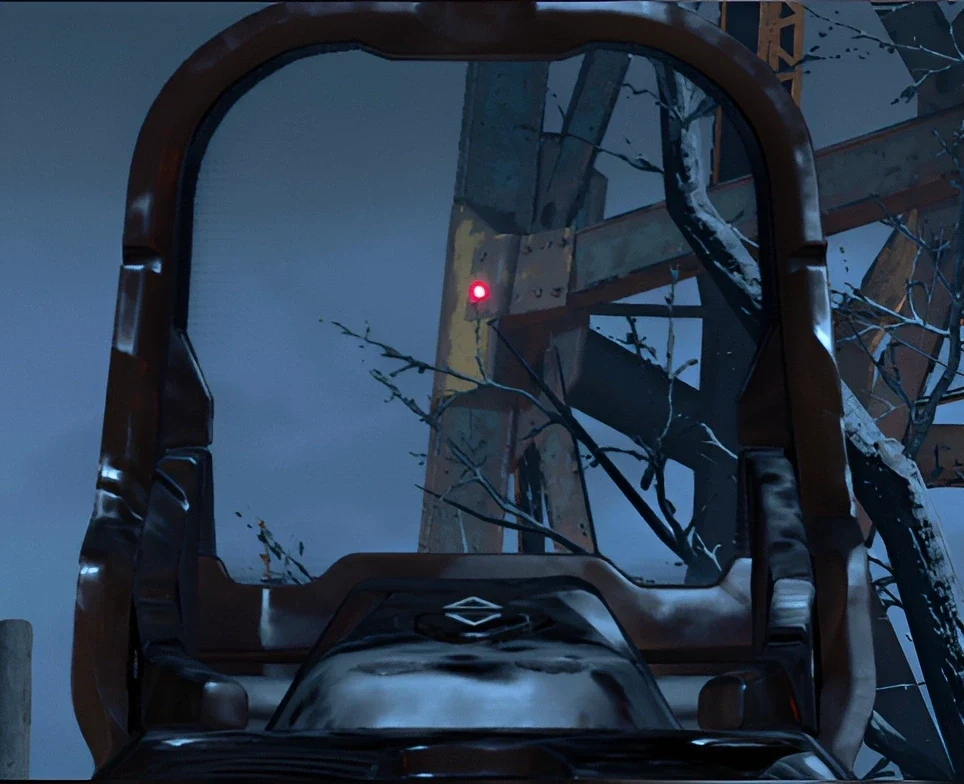
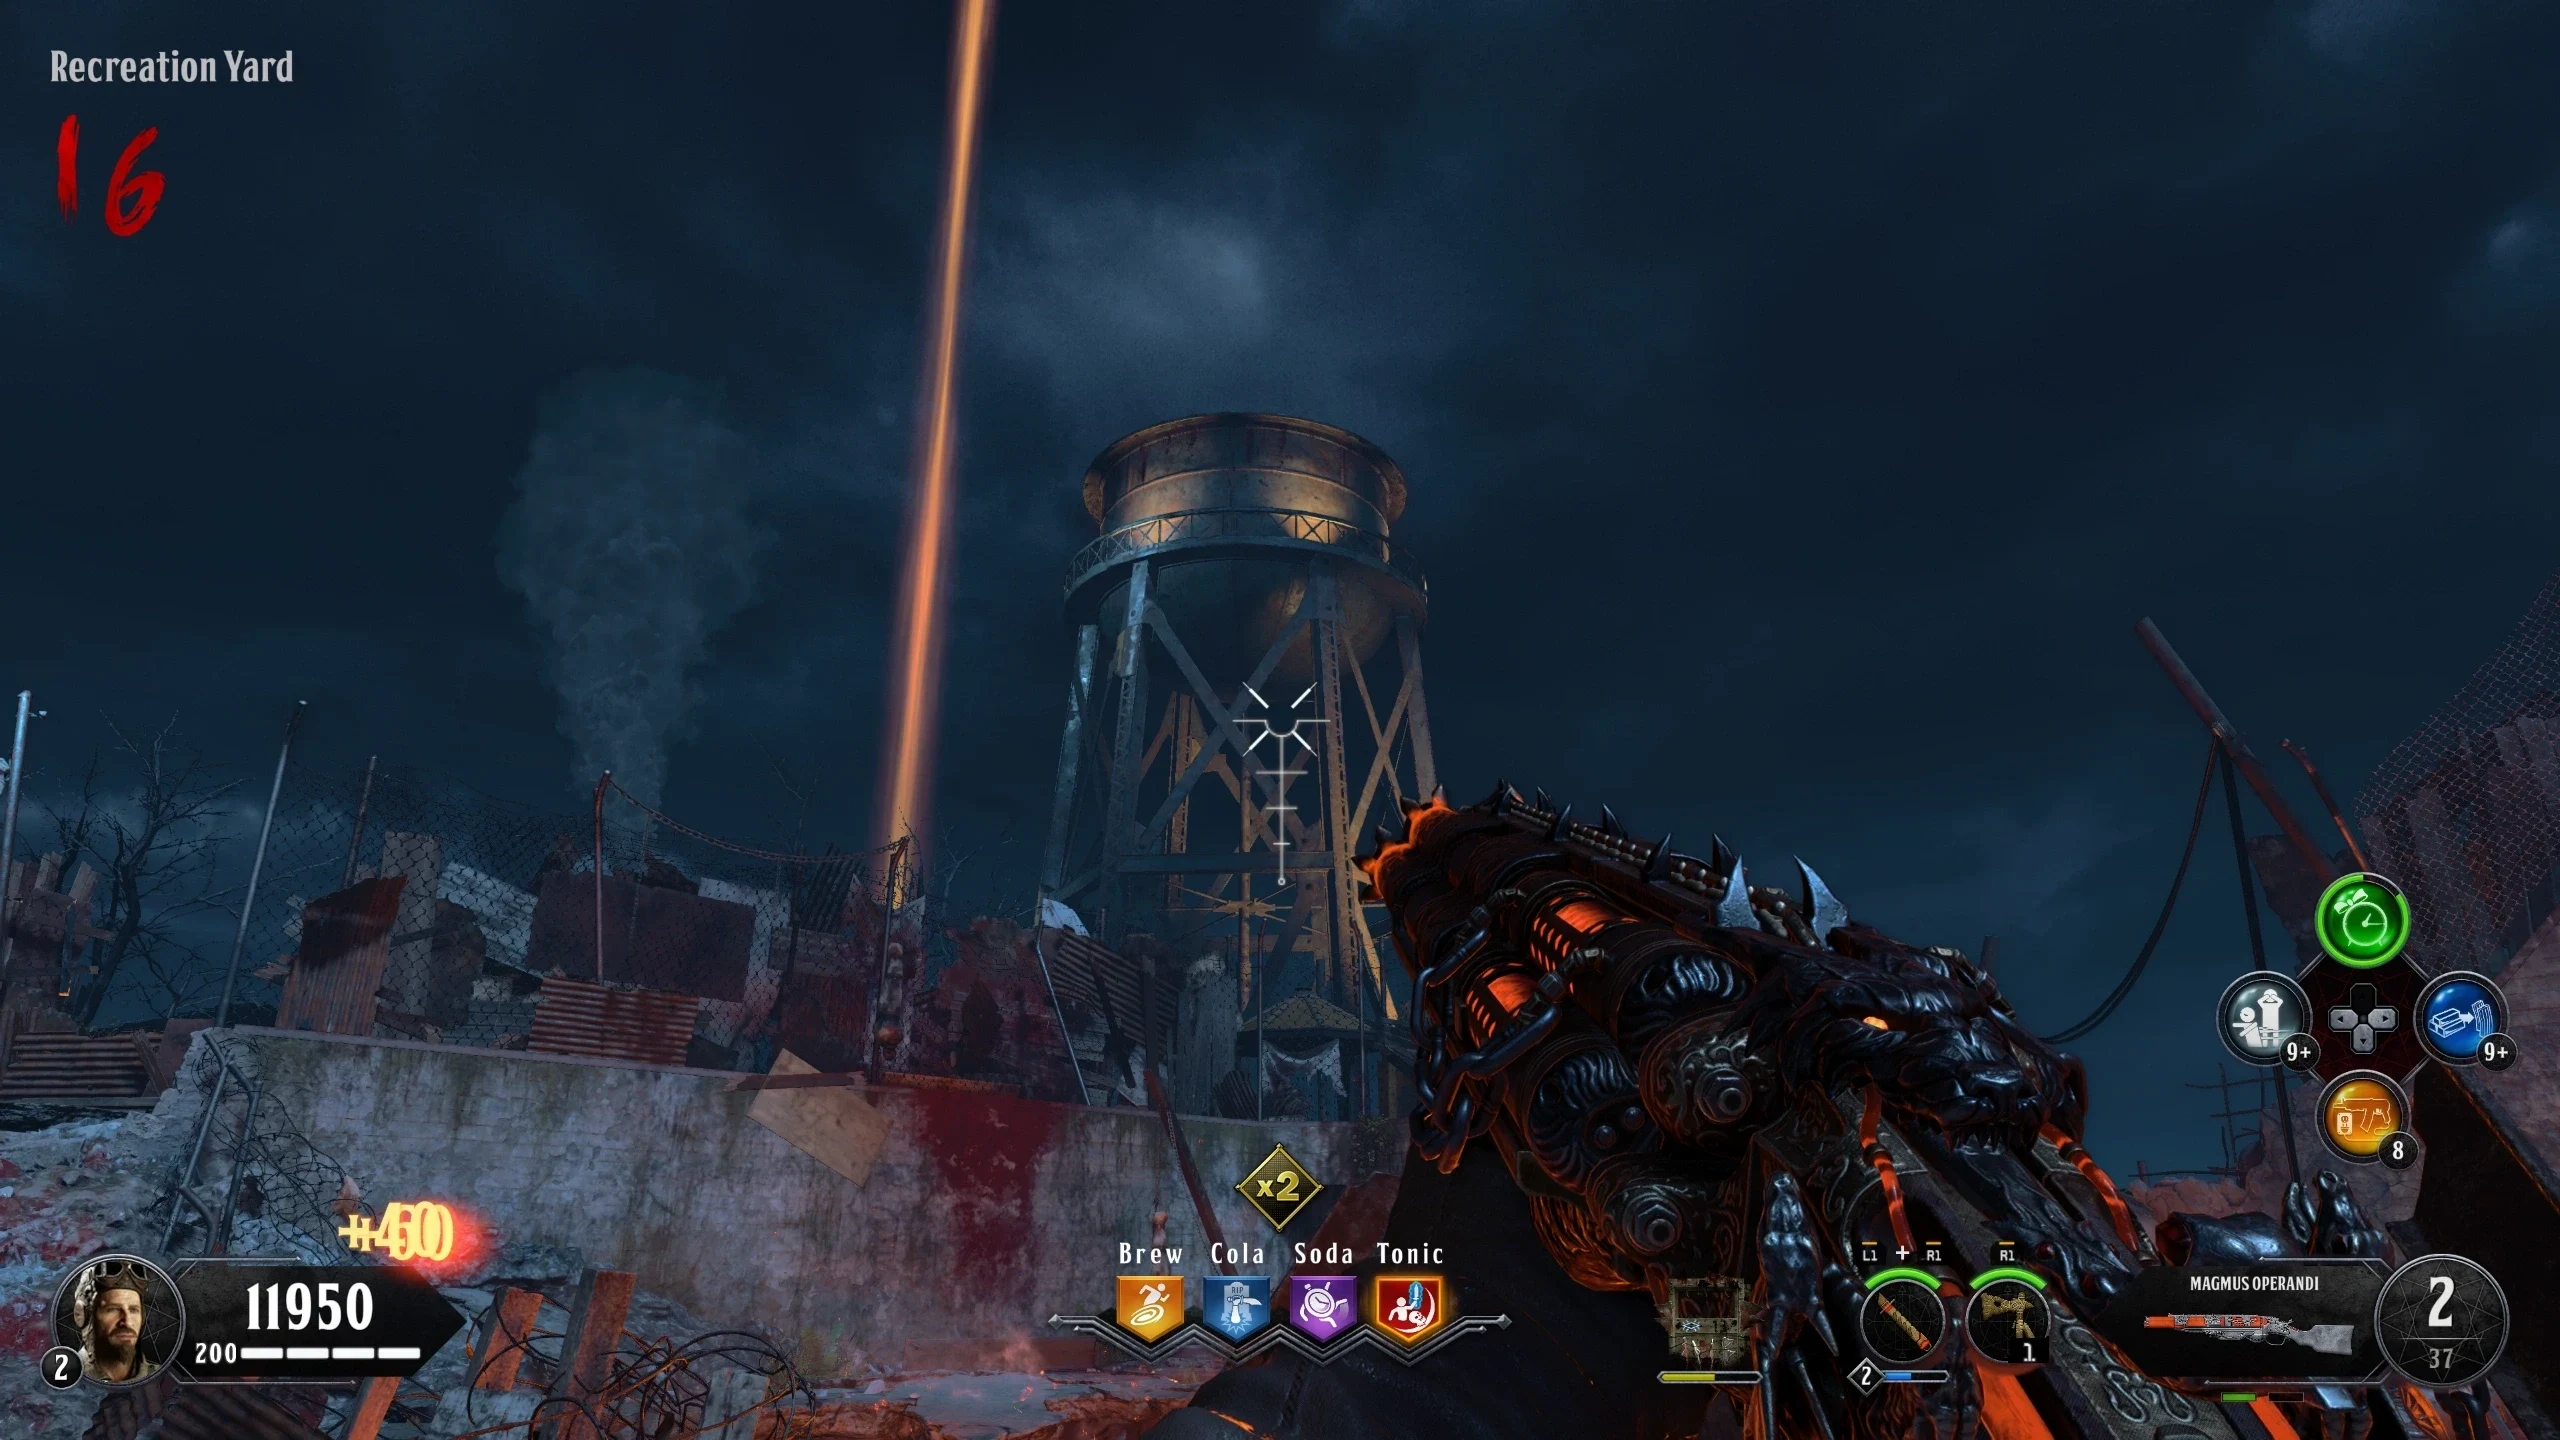
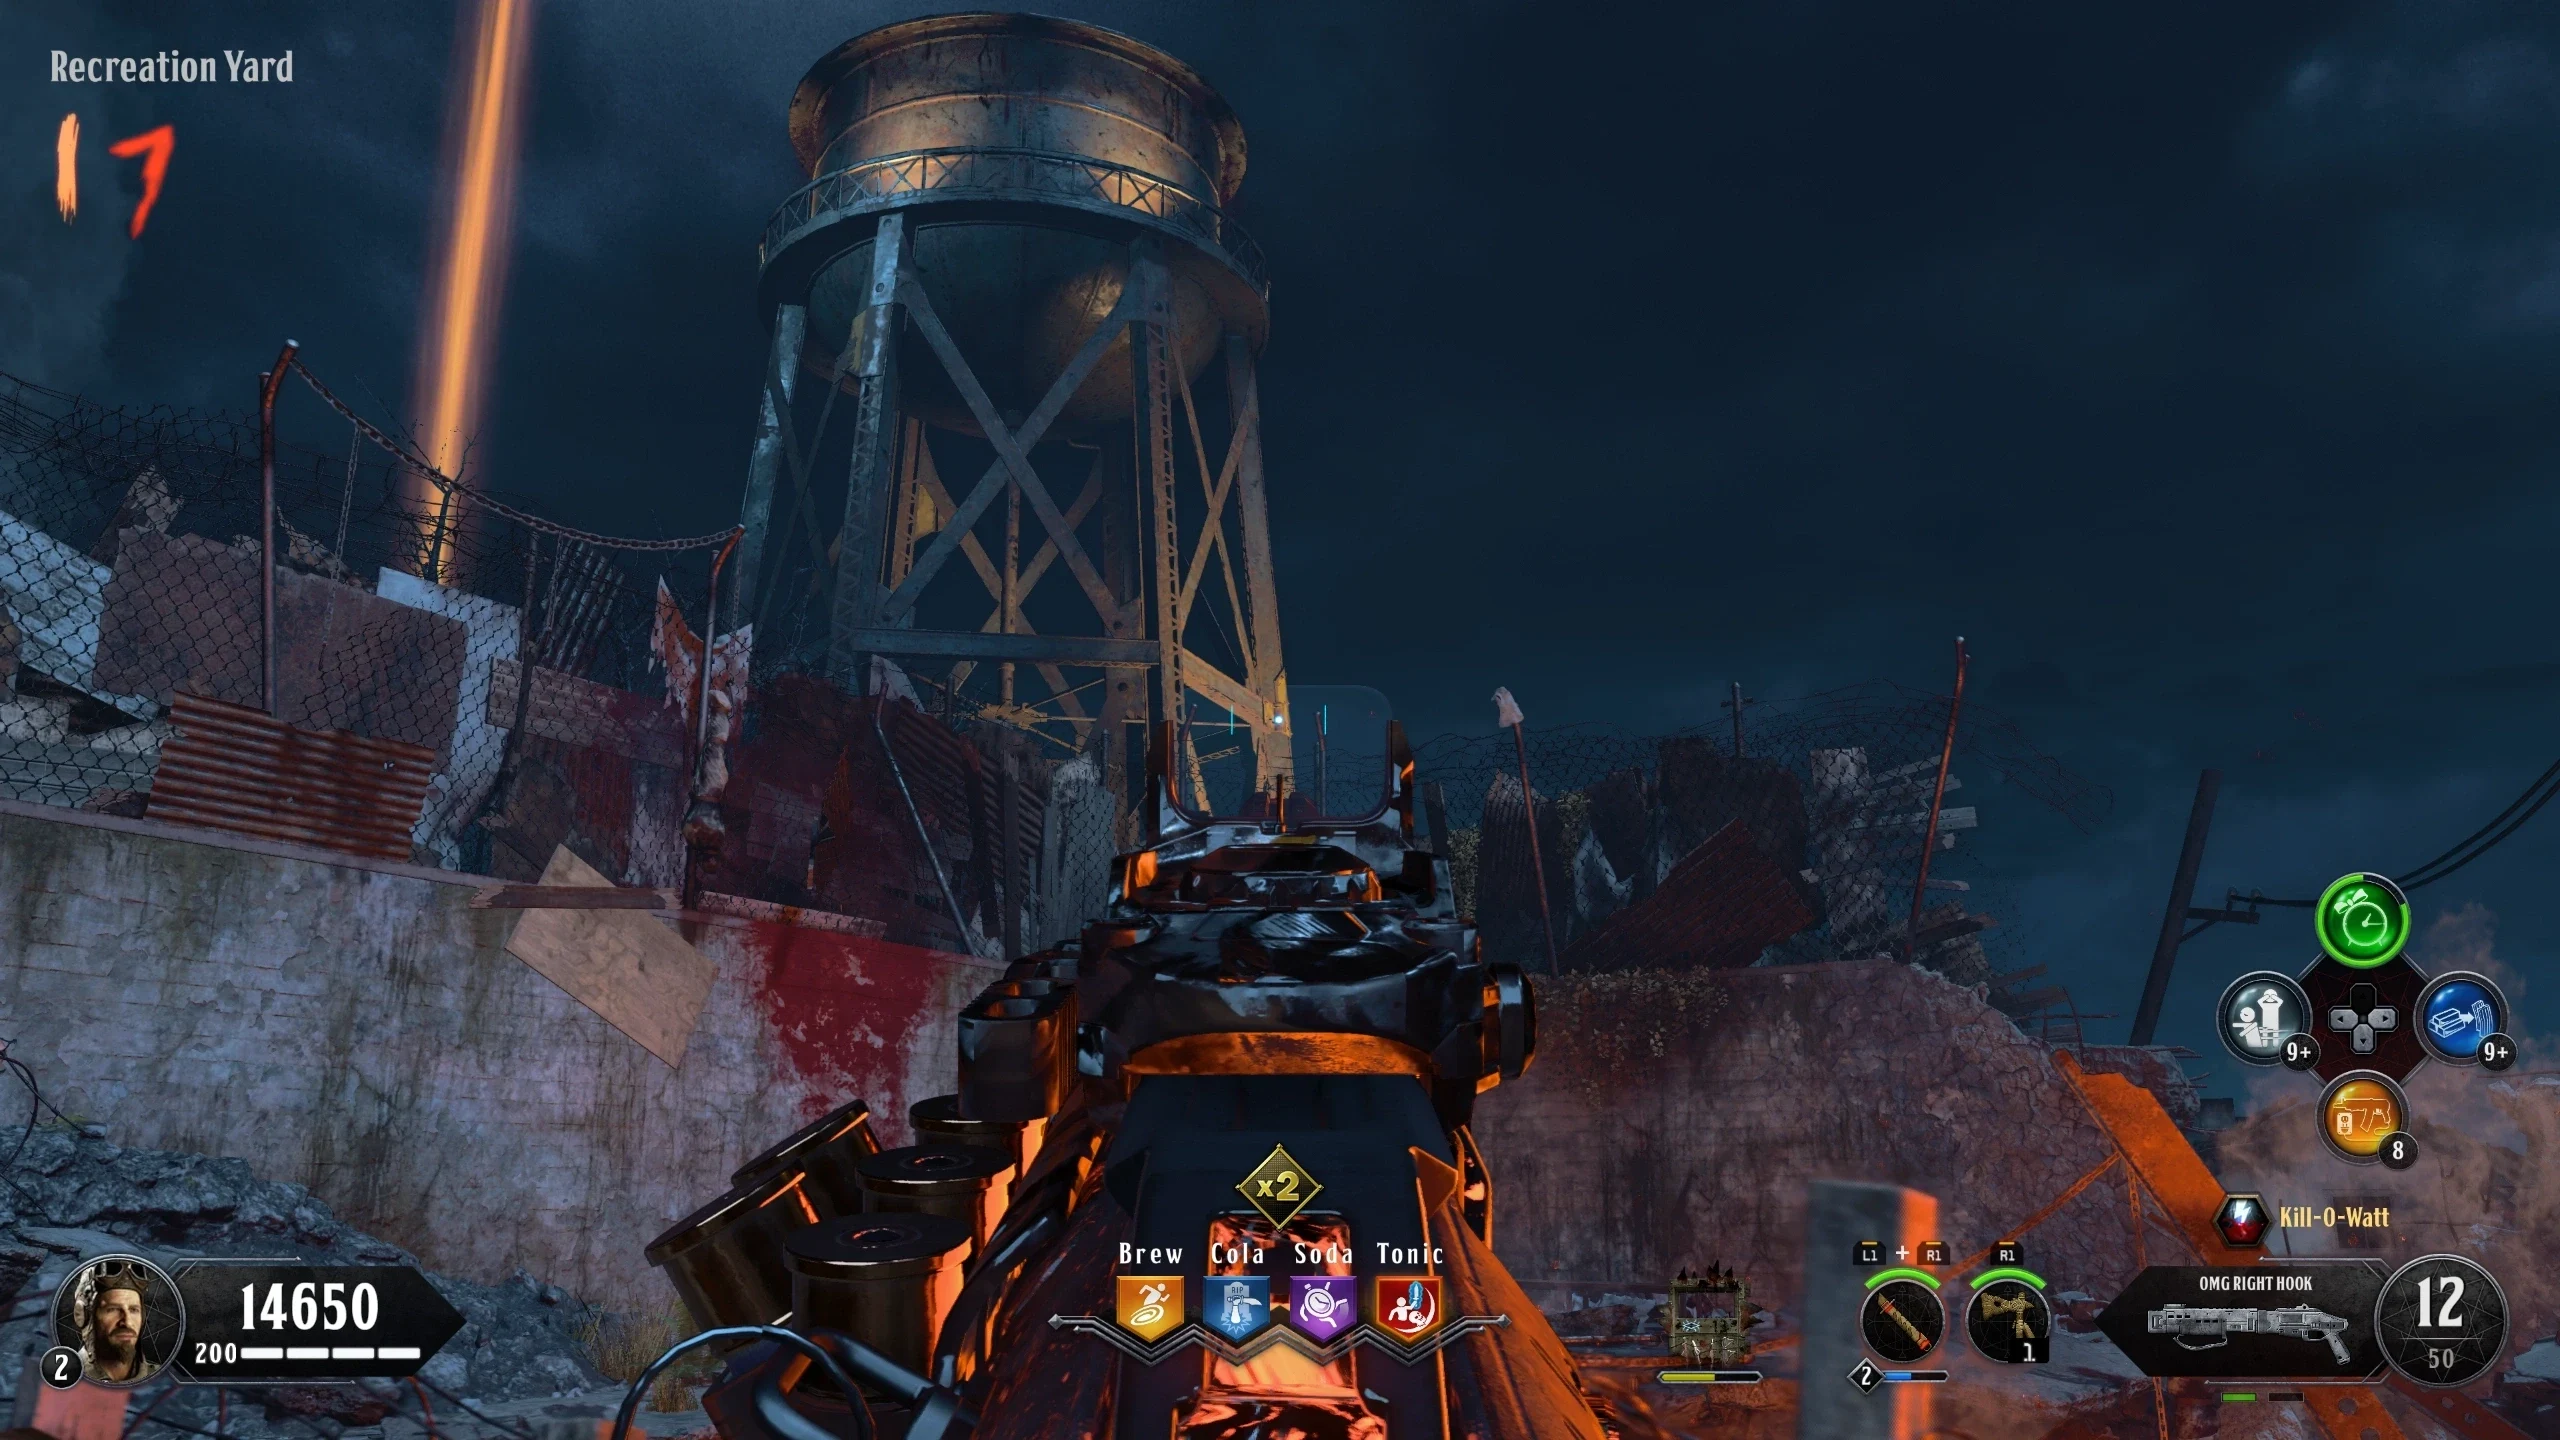
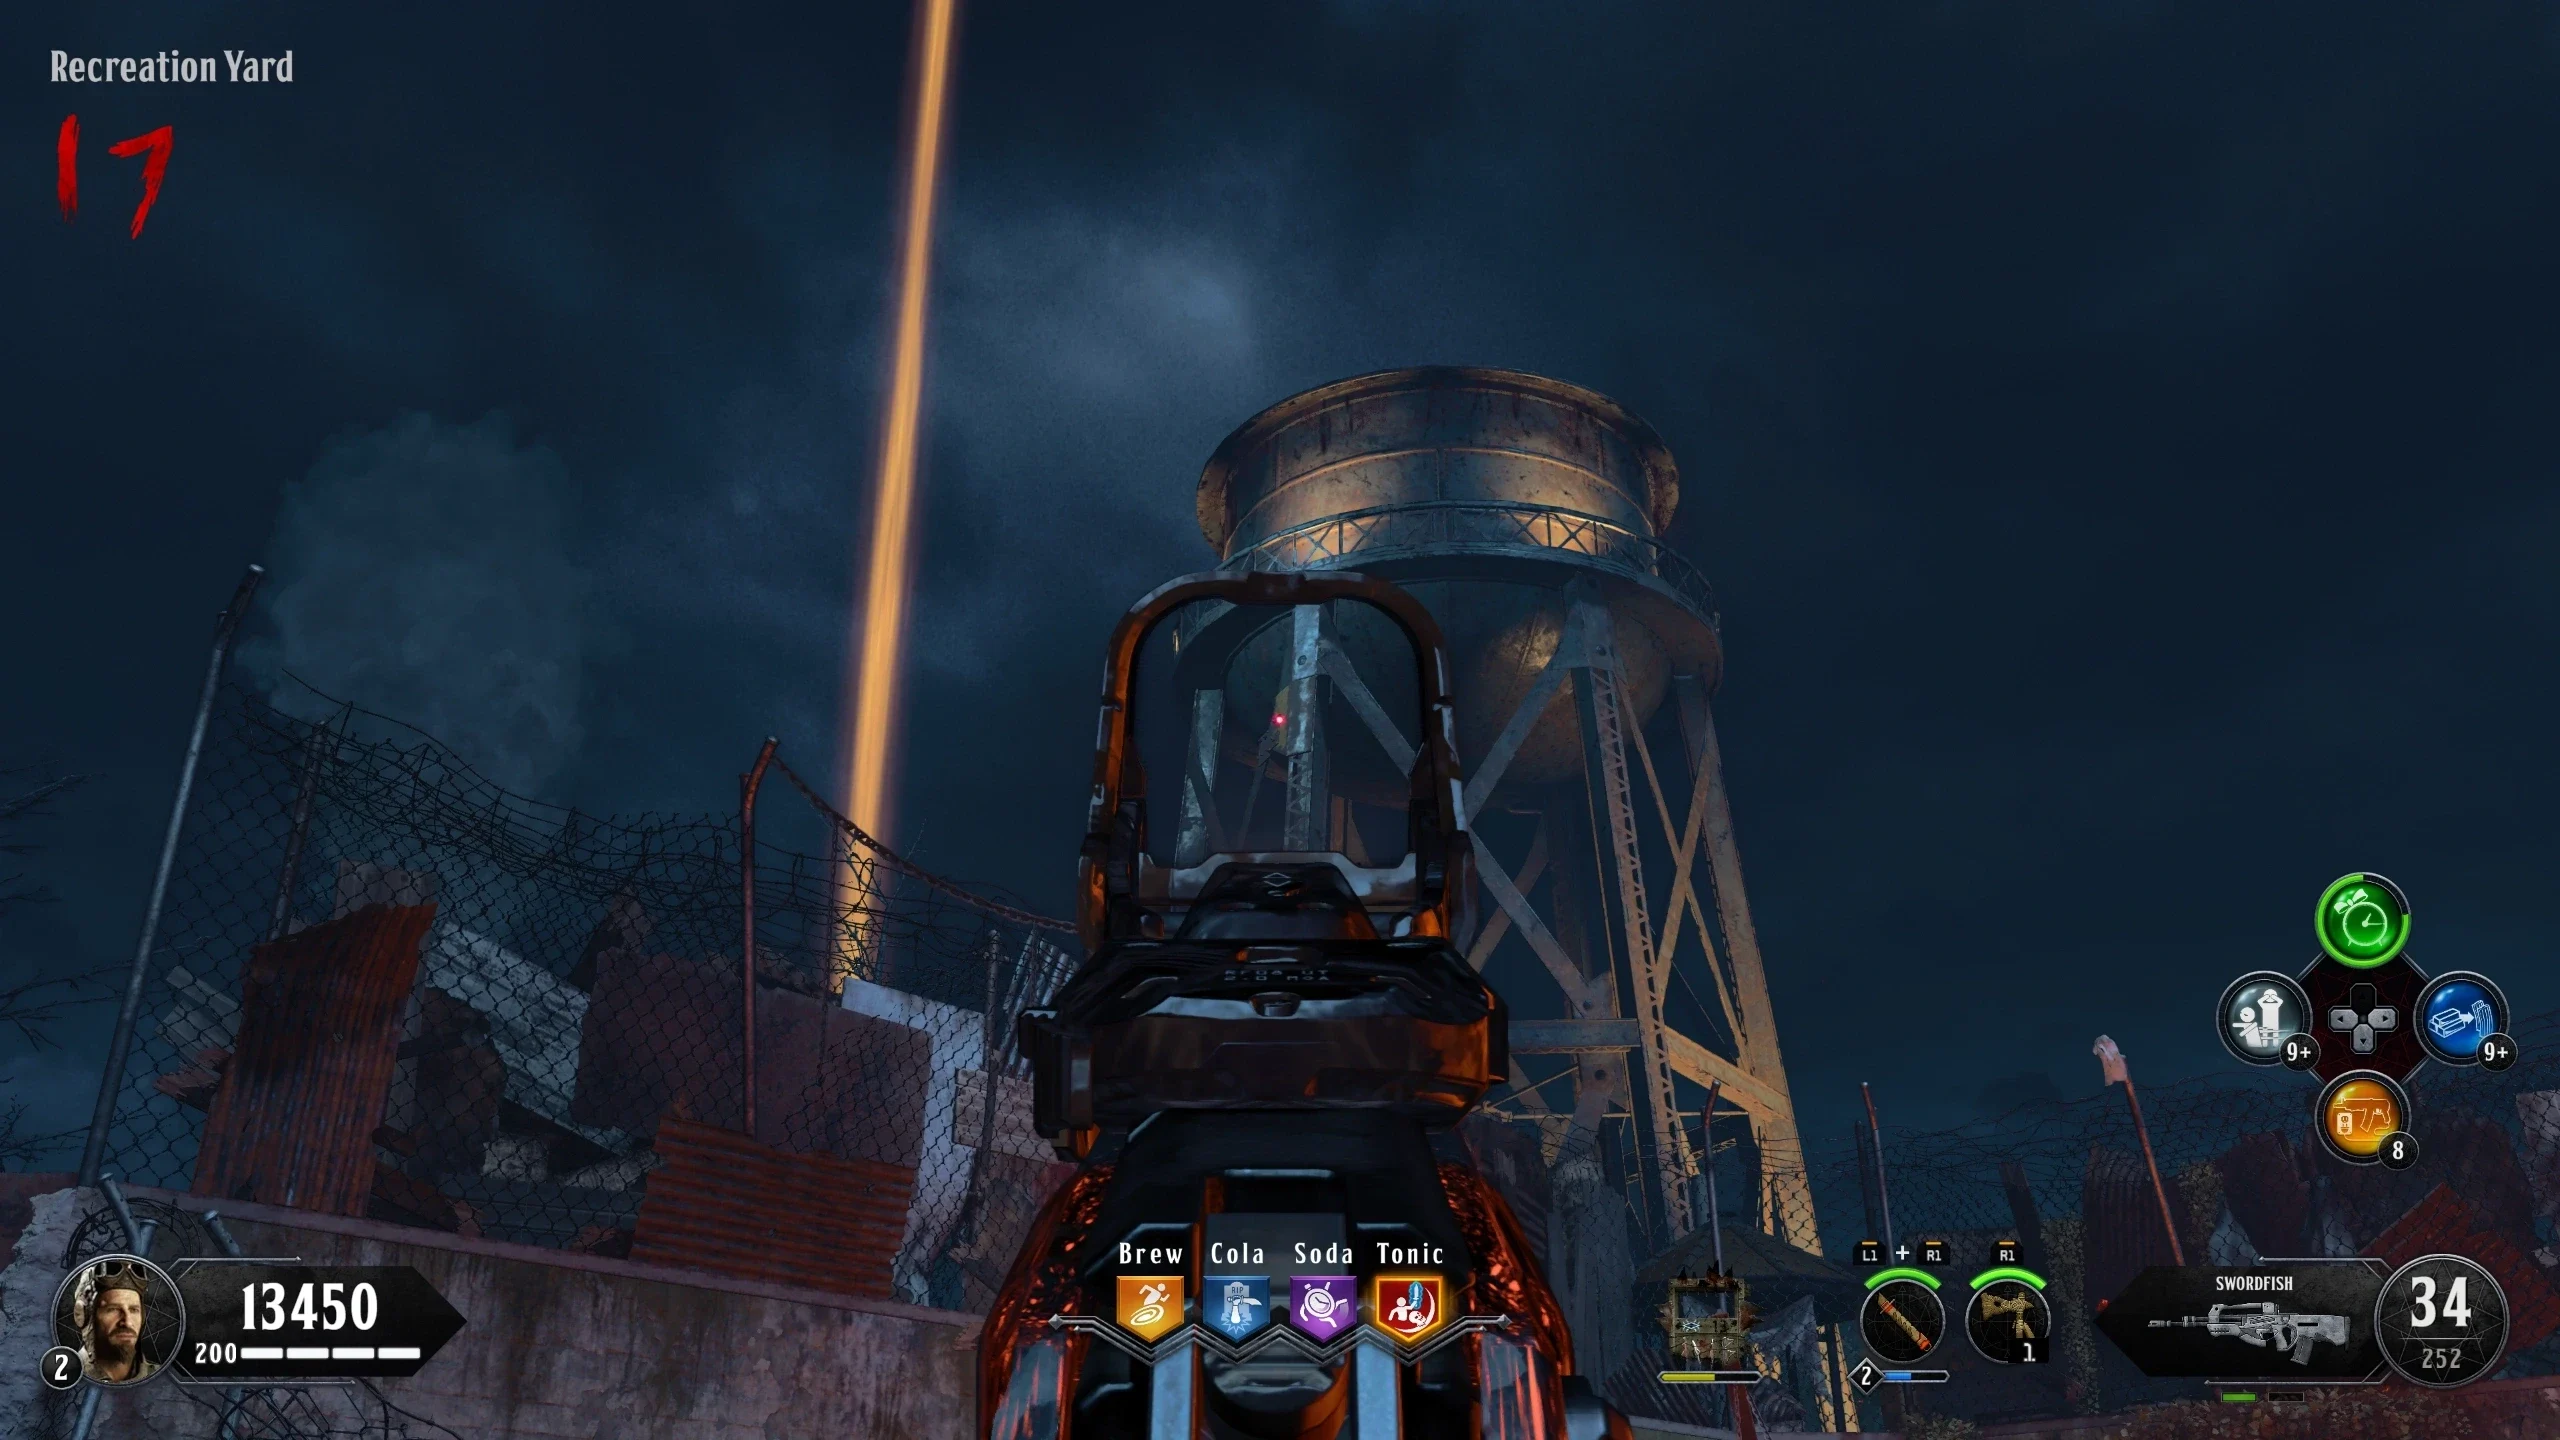
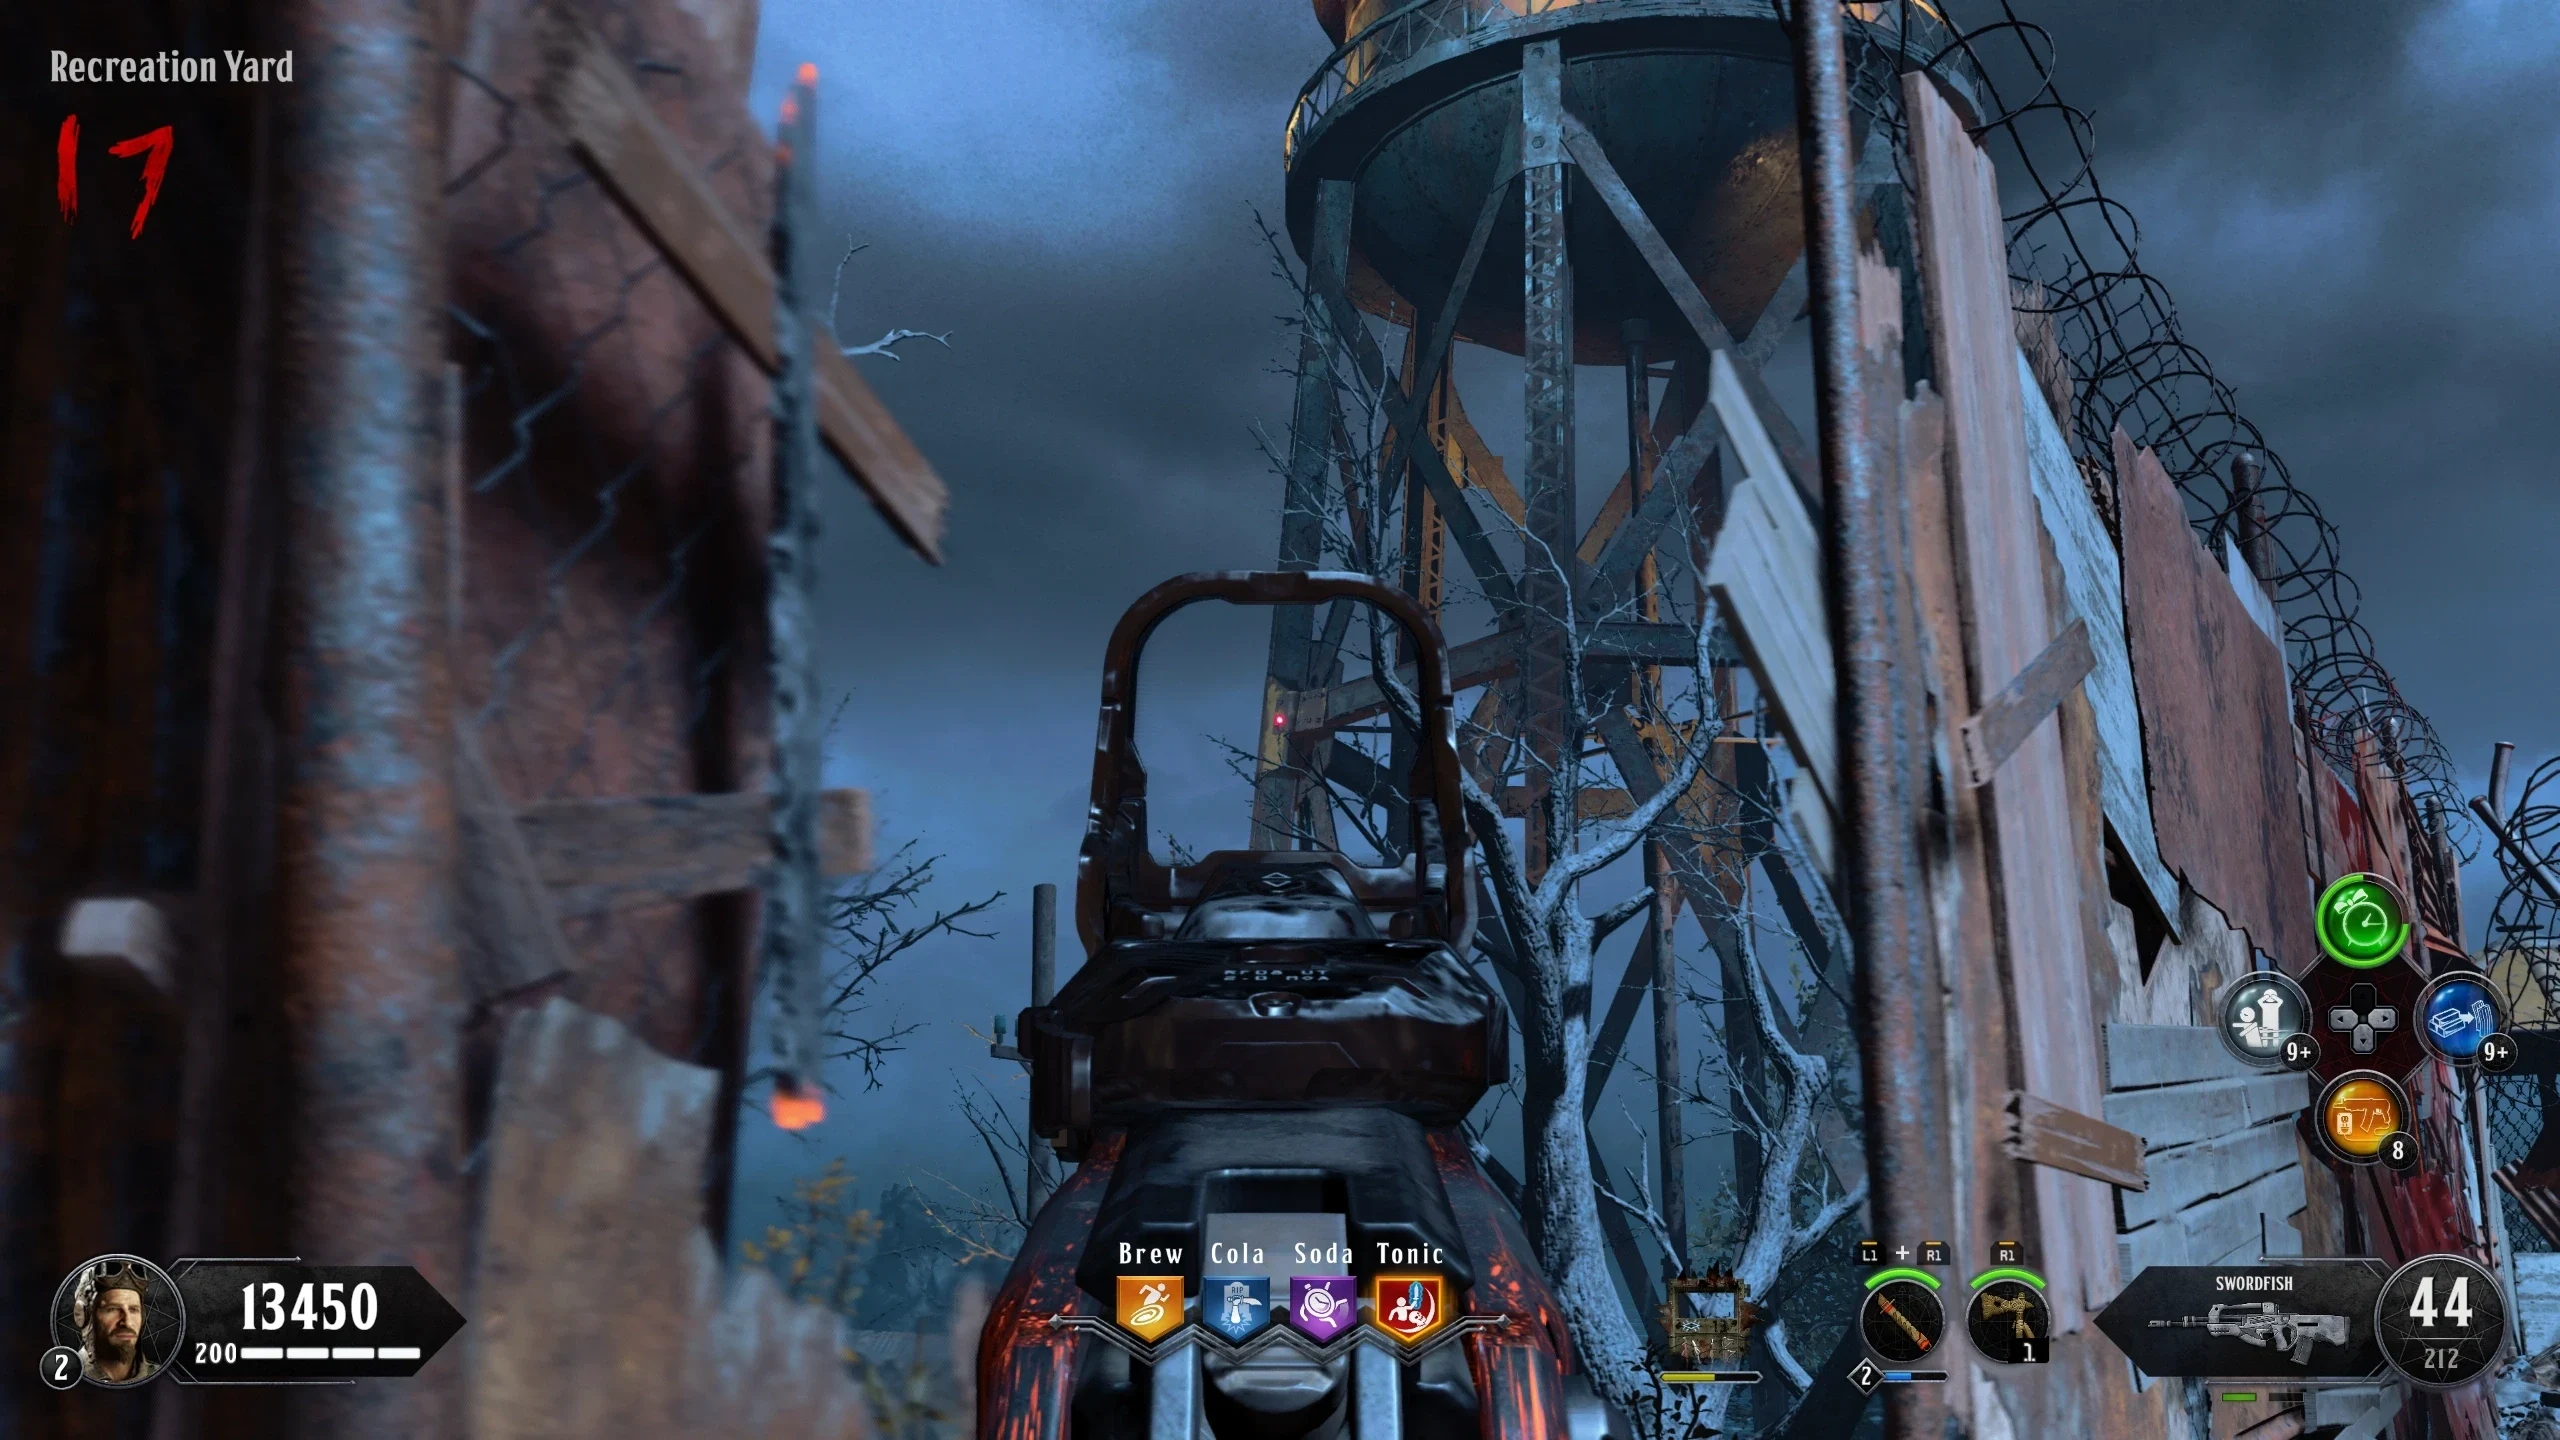
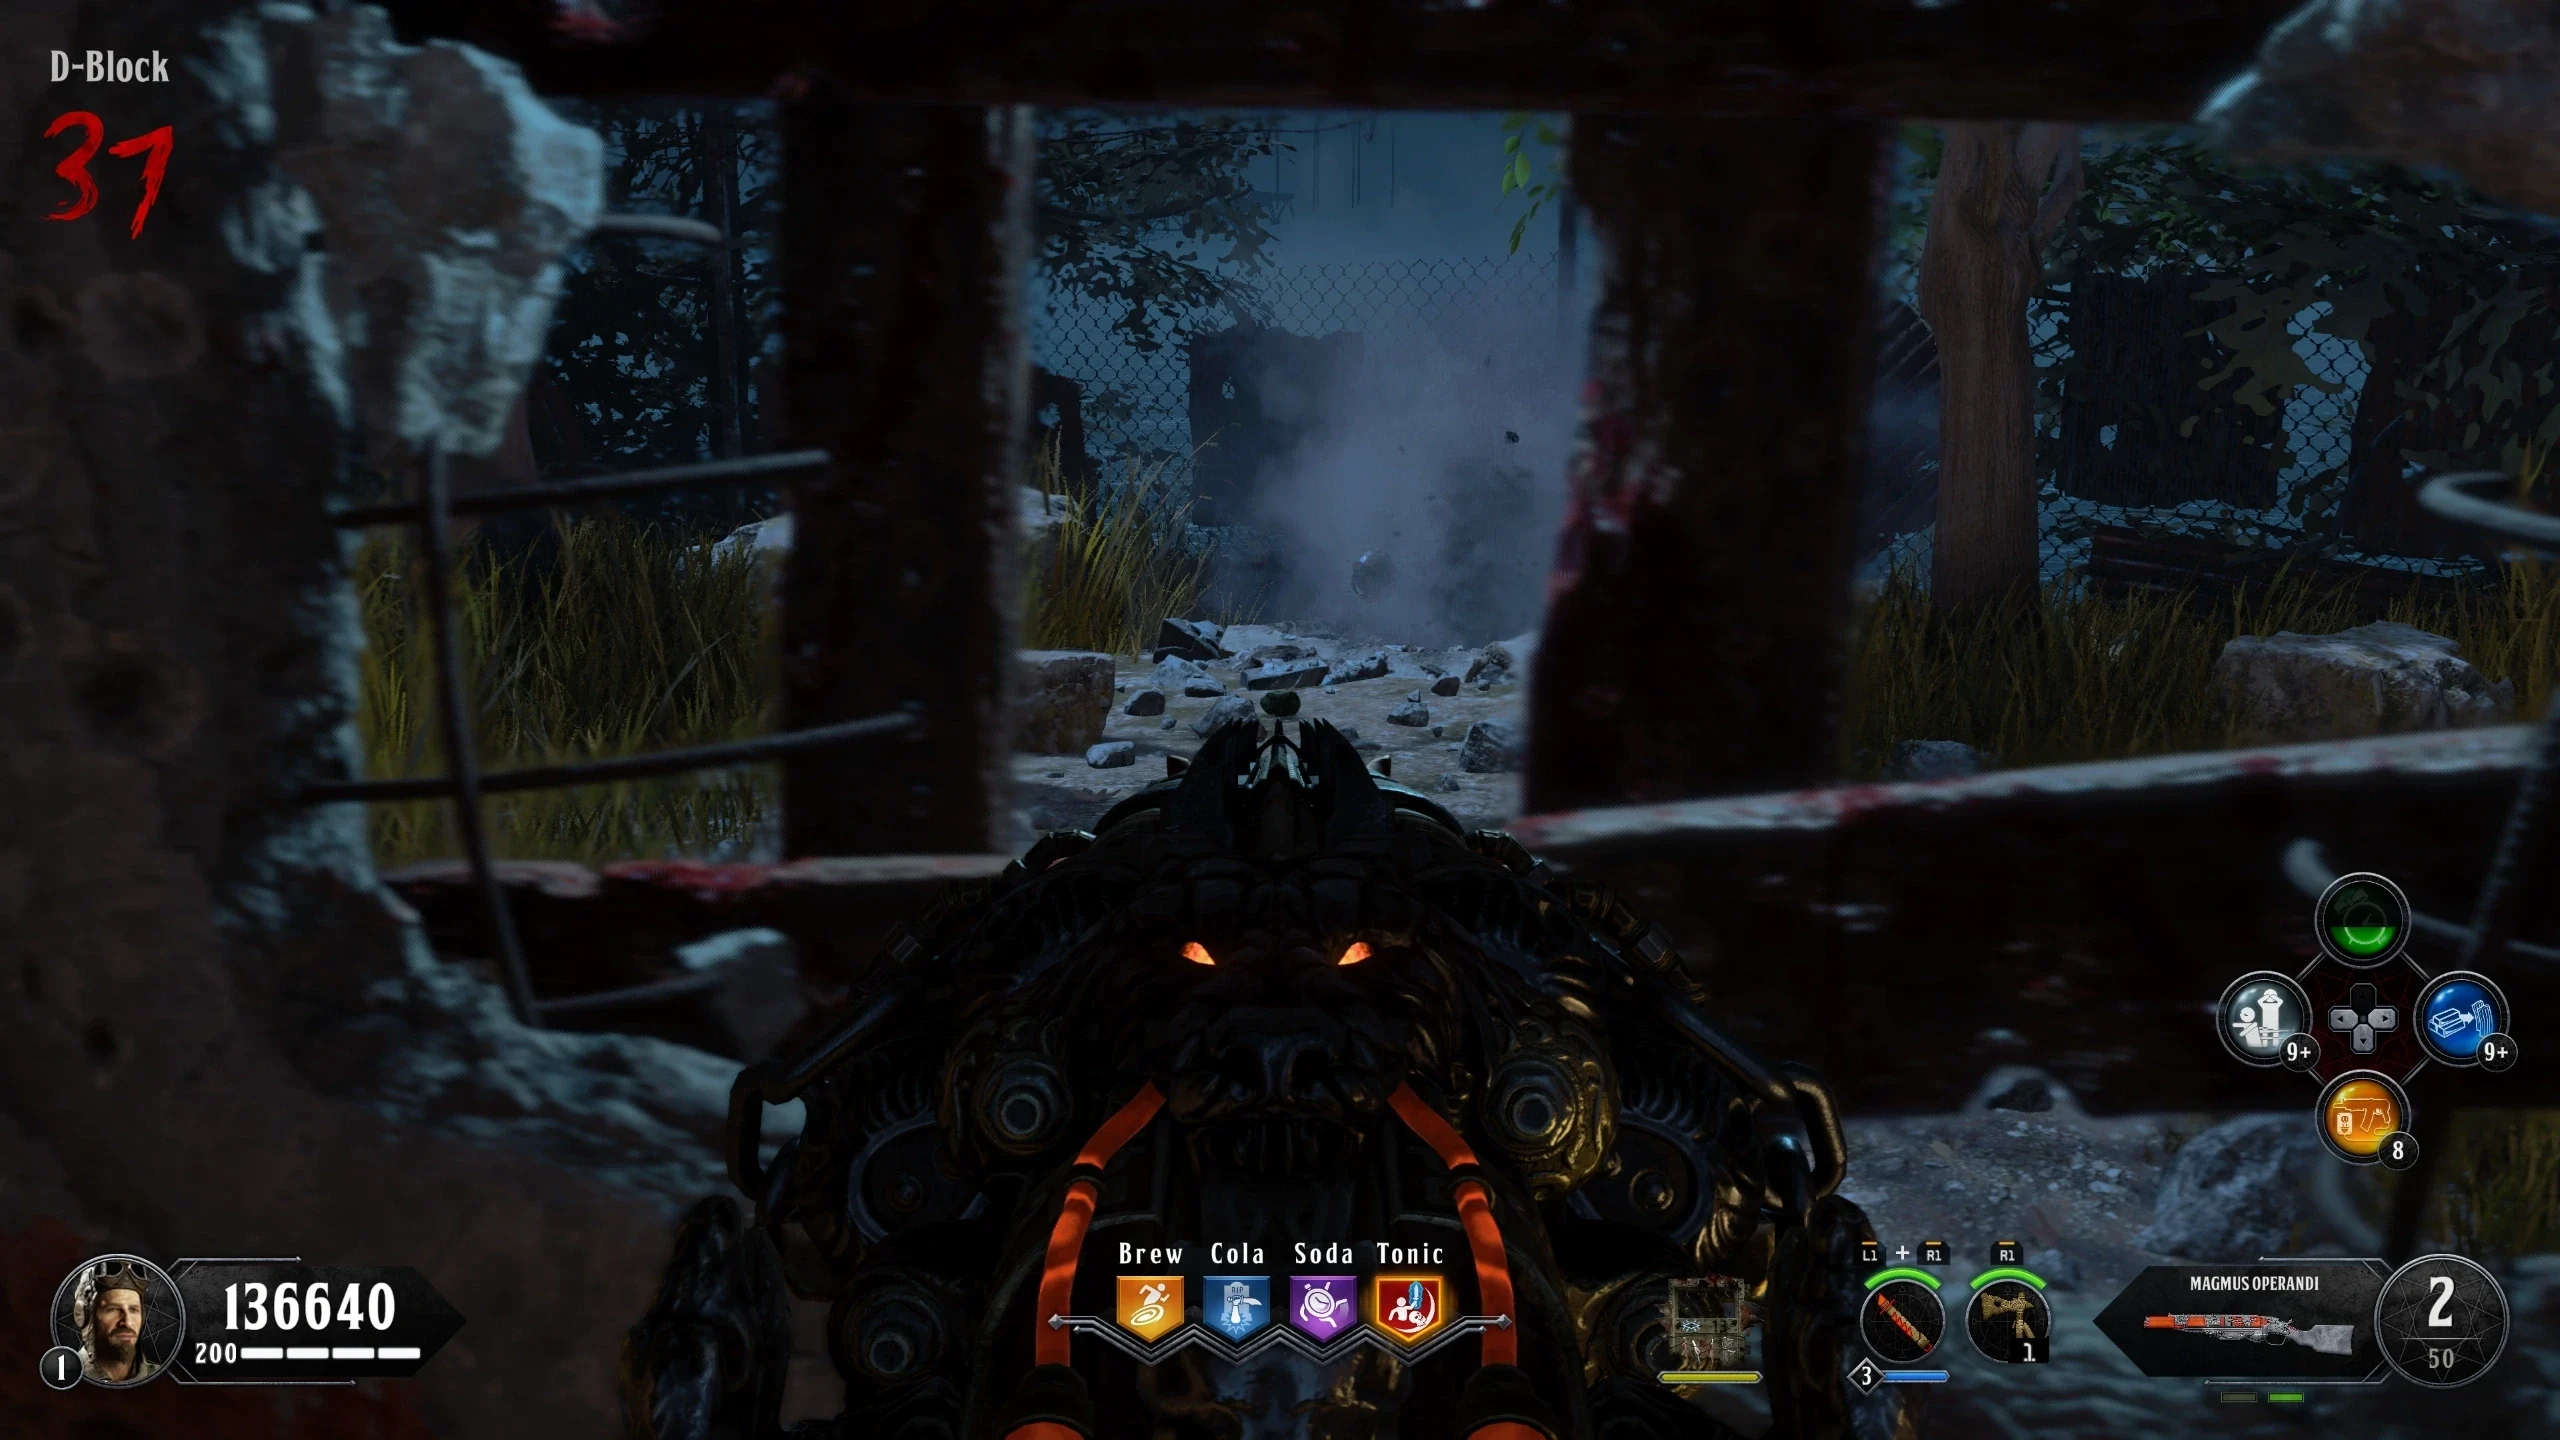
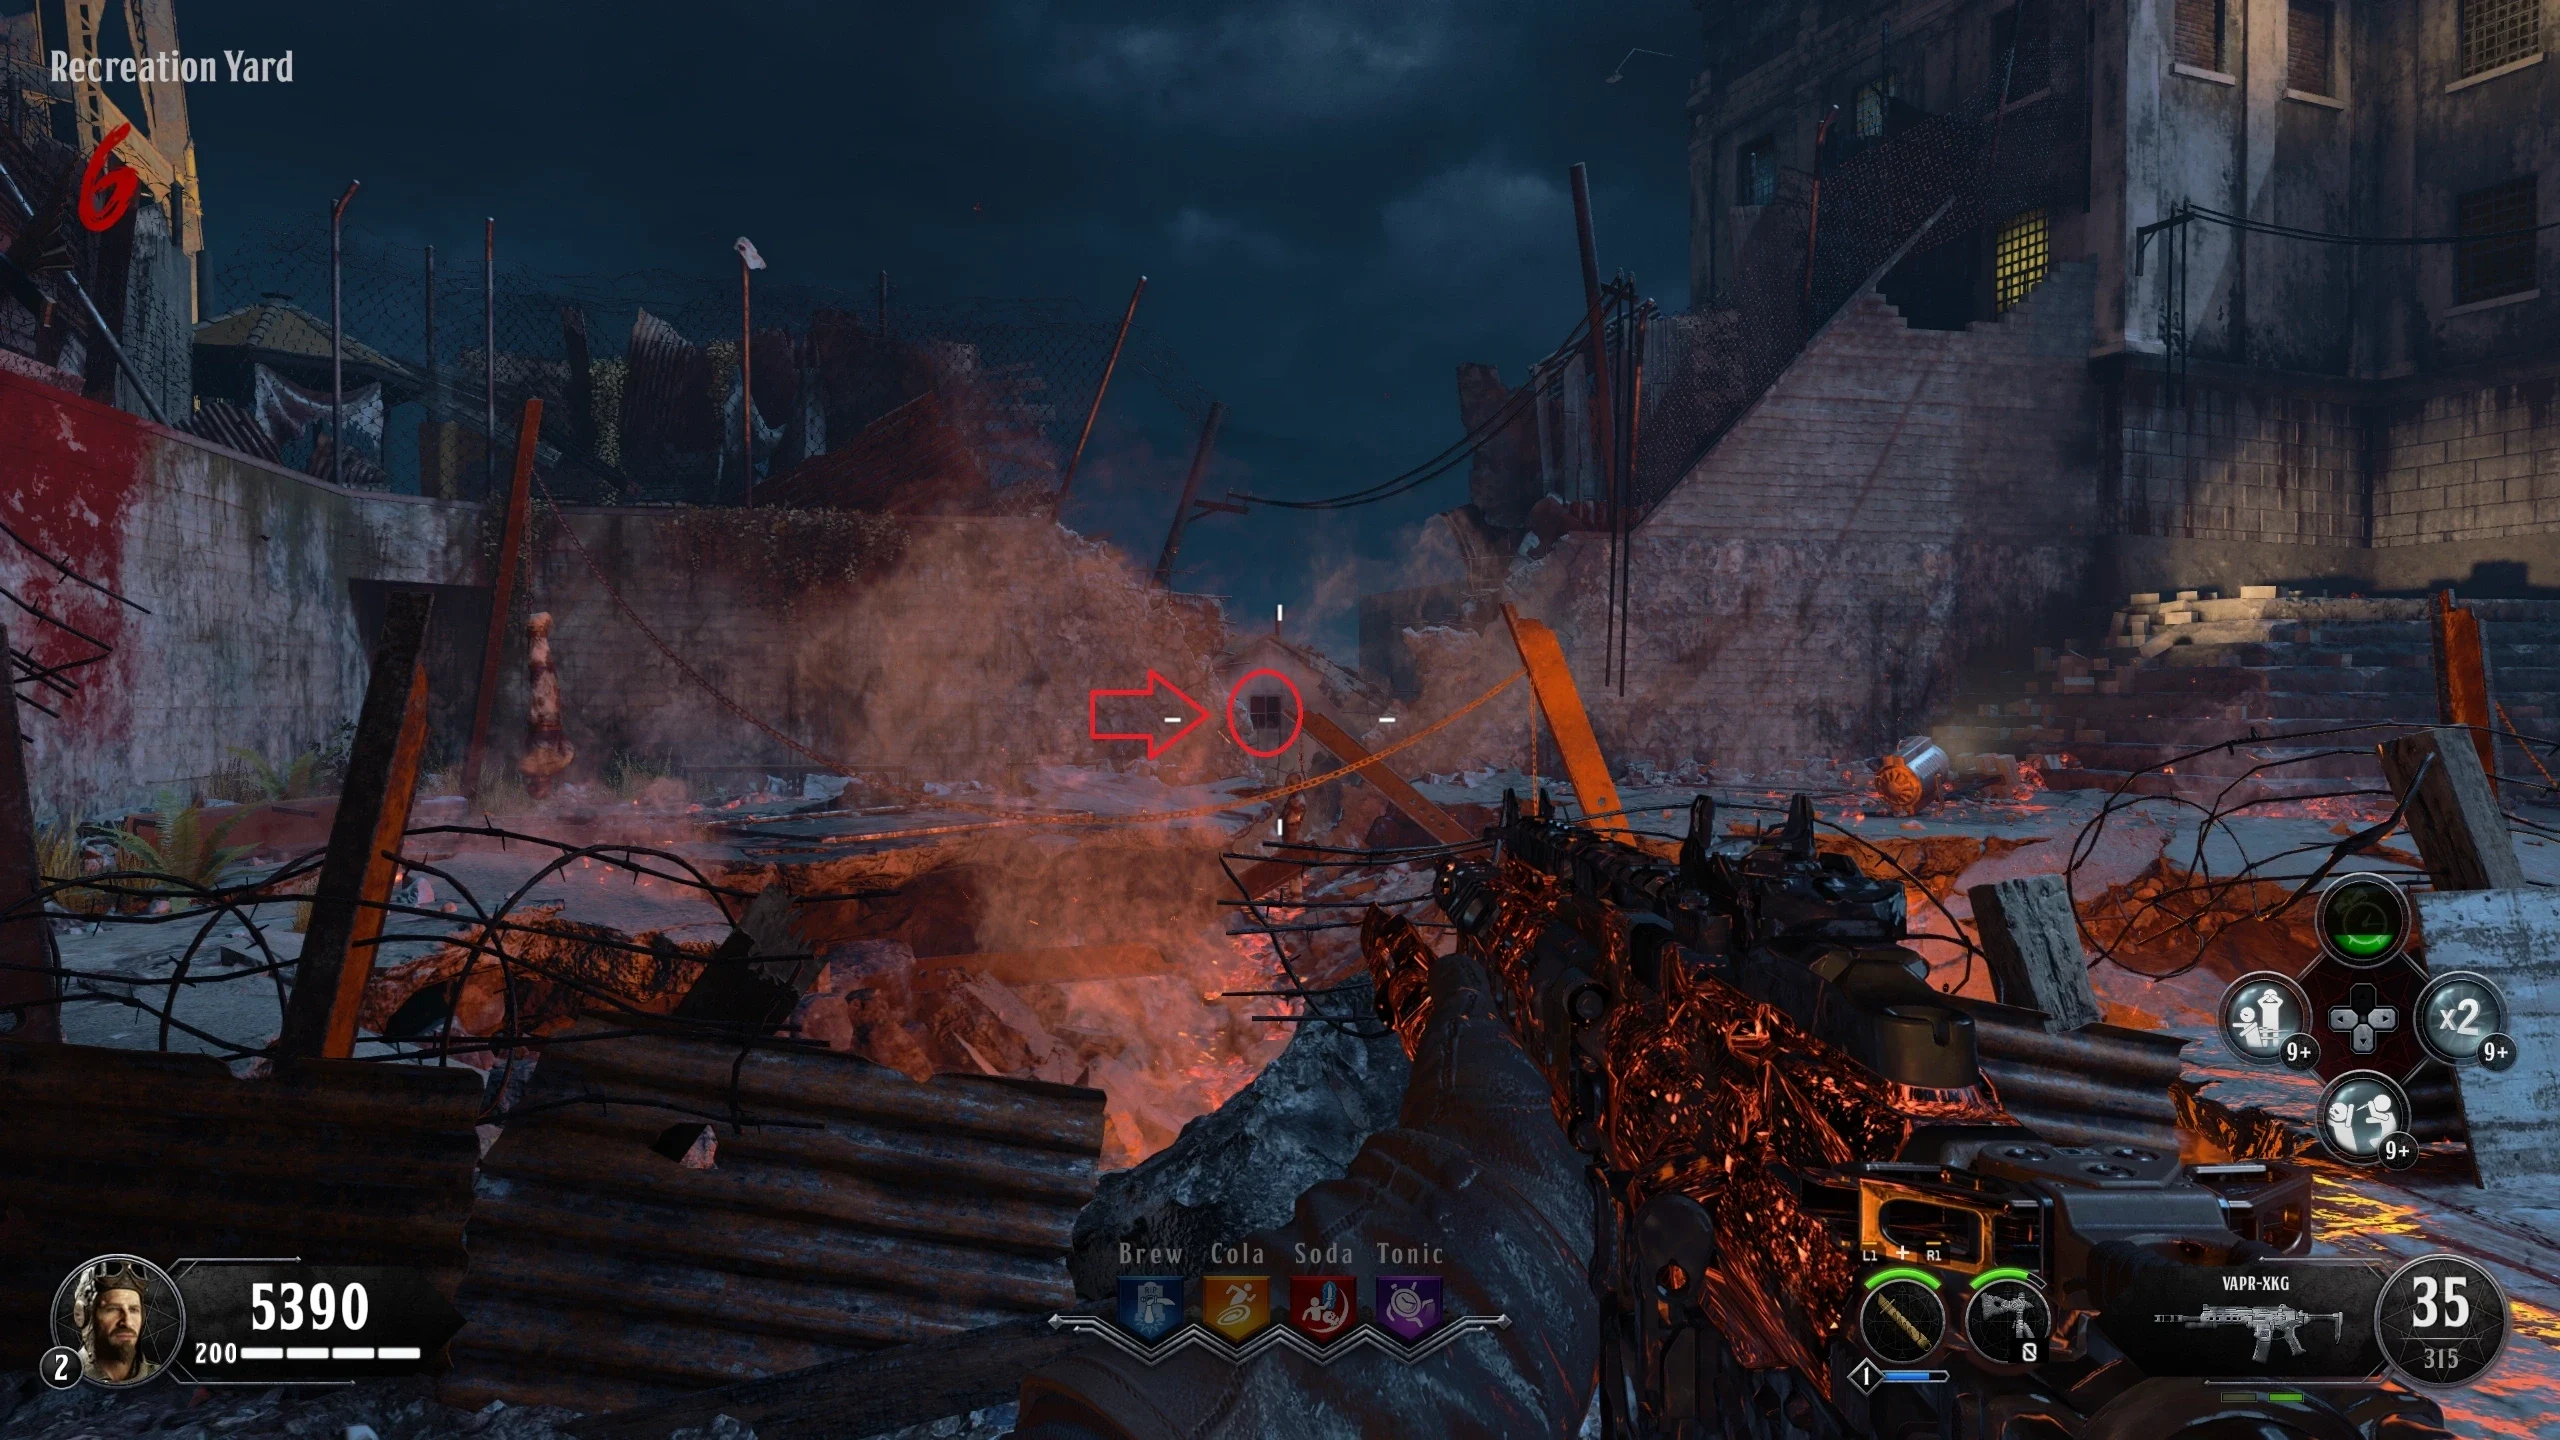
- Recreation Yard - On one of the beams to the left after leaving the Prison
- Recreation Yard - On a wooden post, left of the Mystery Box
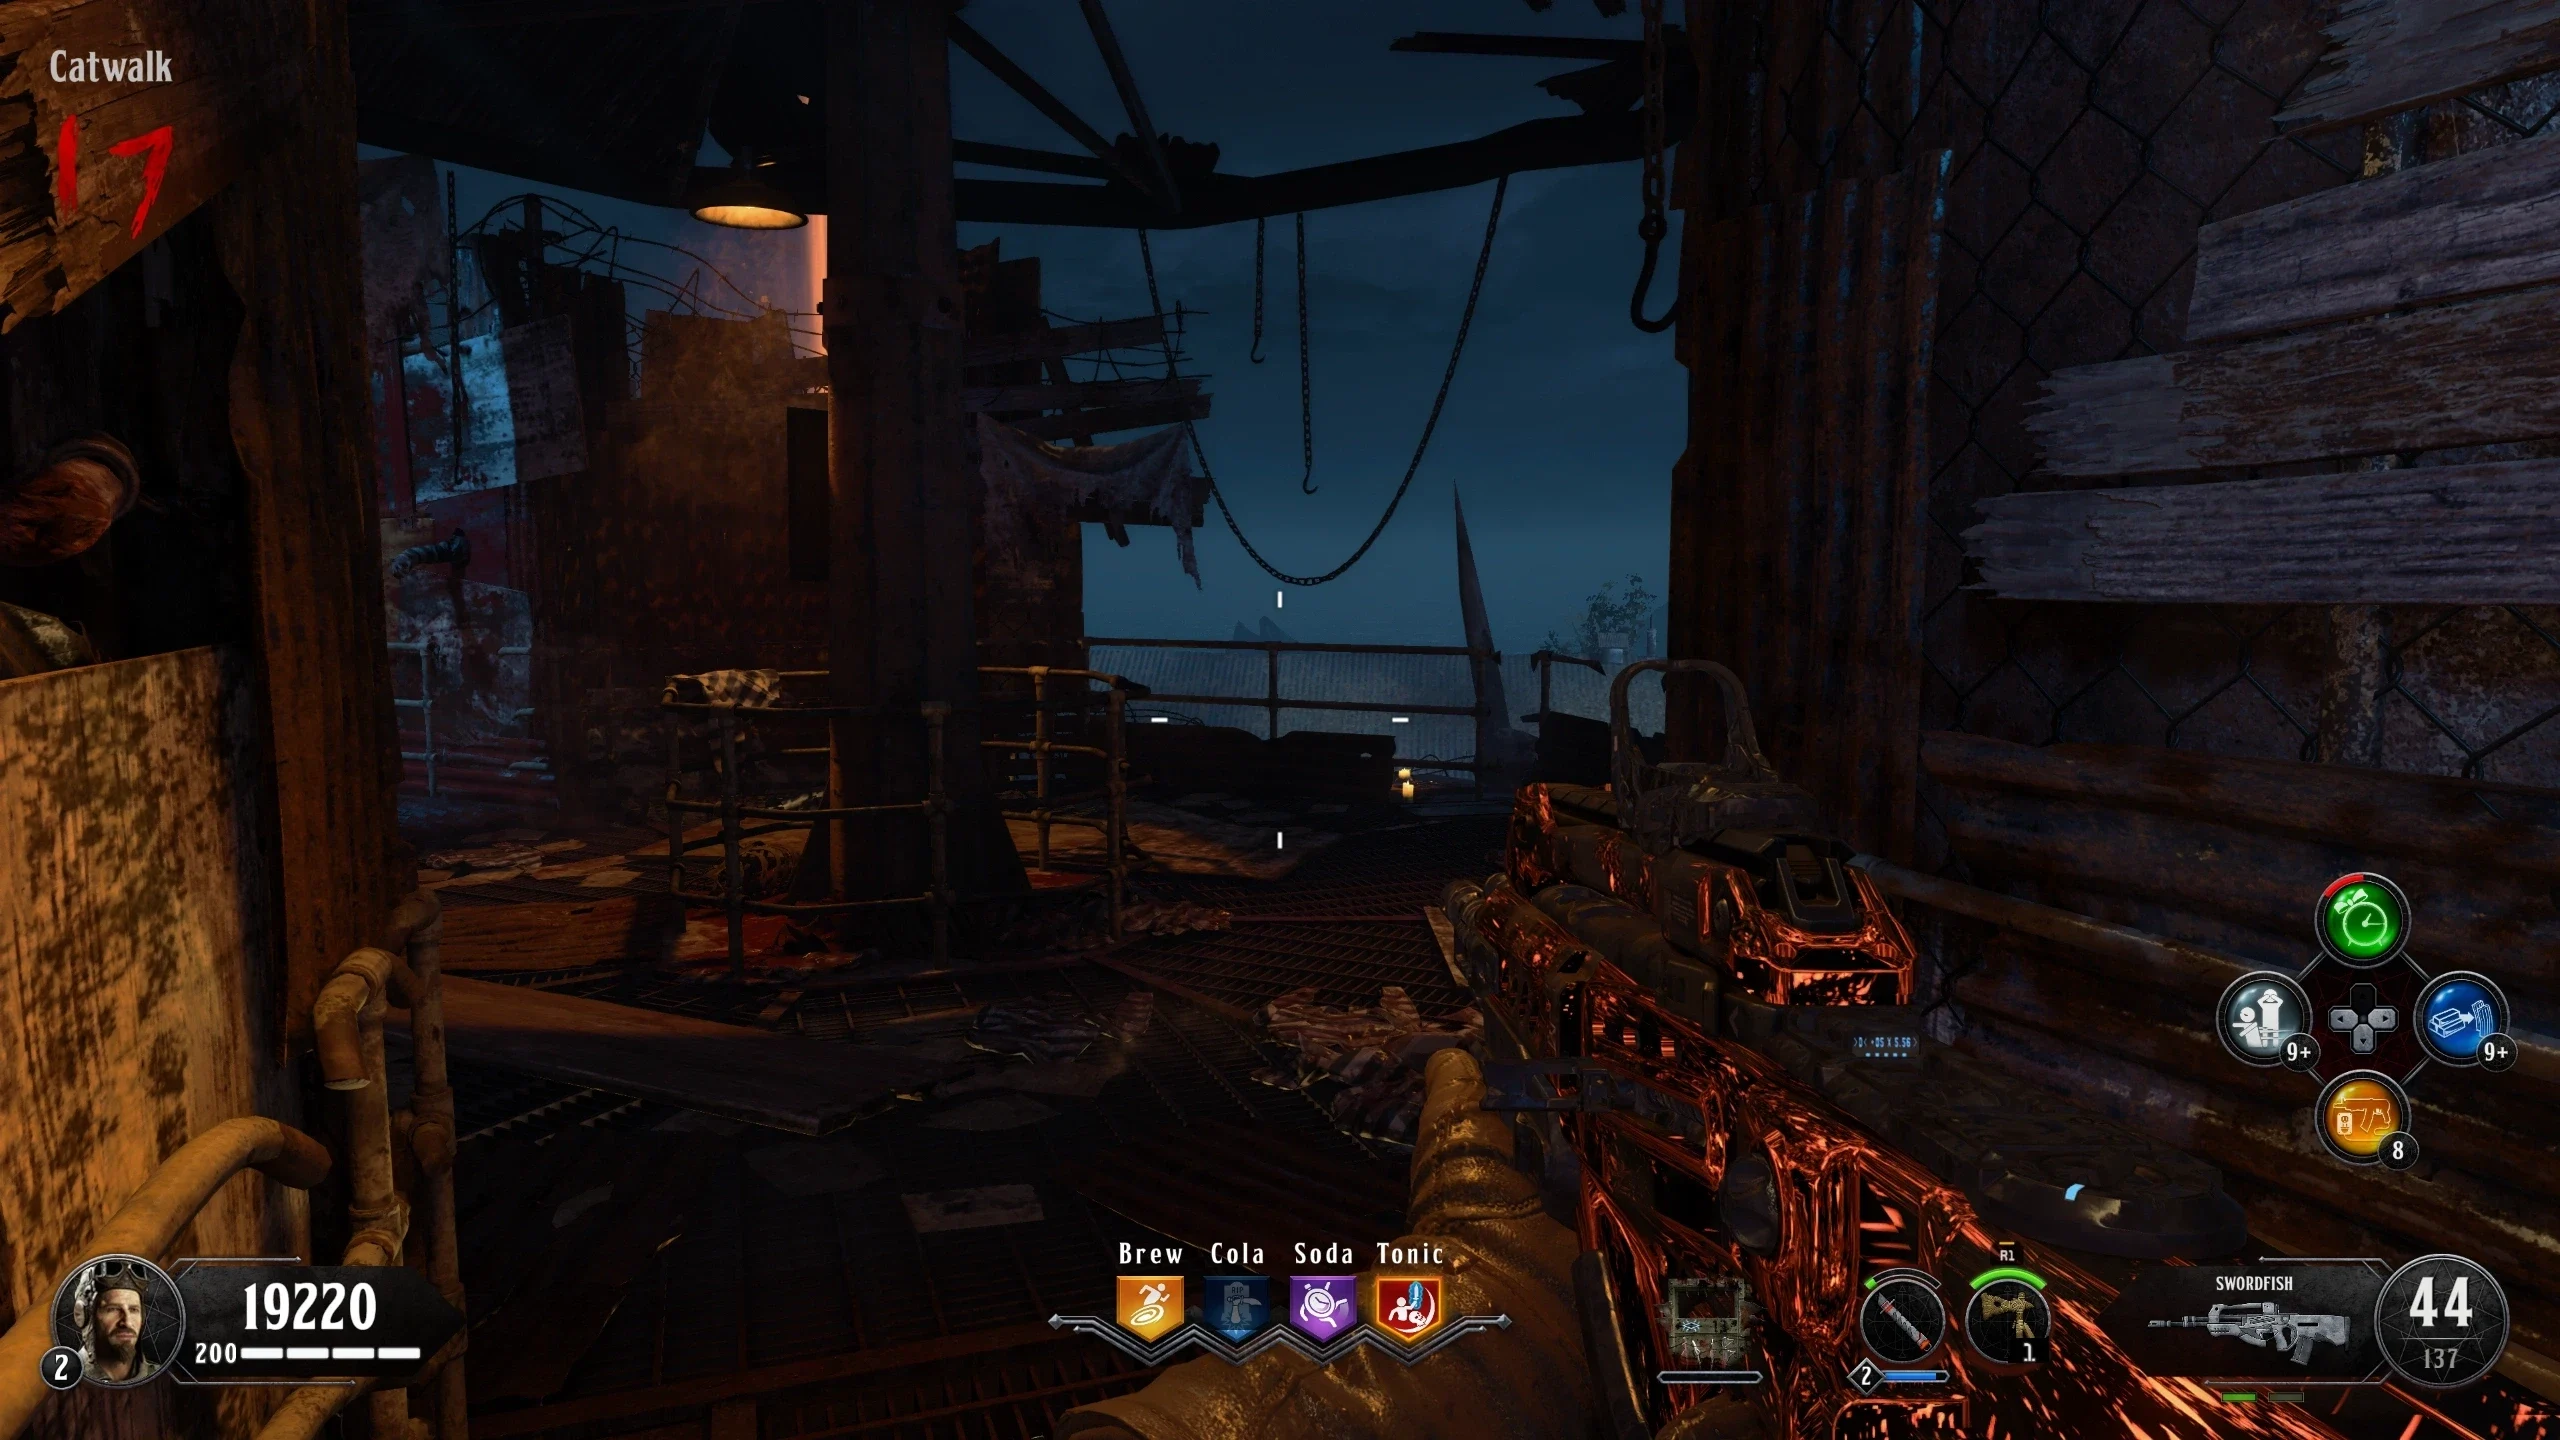
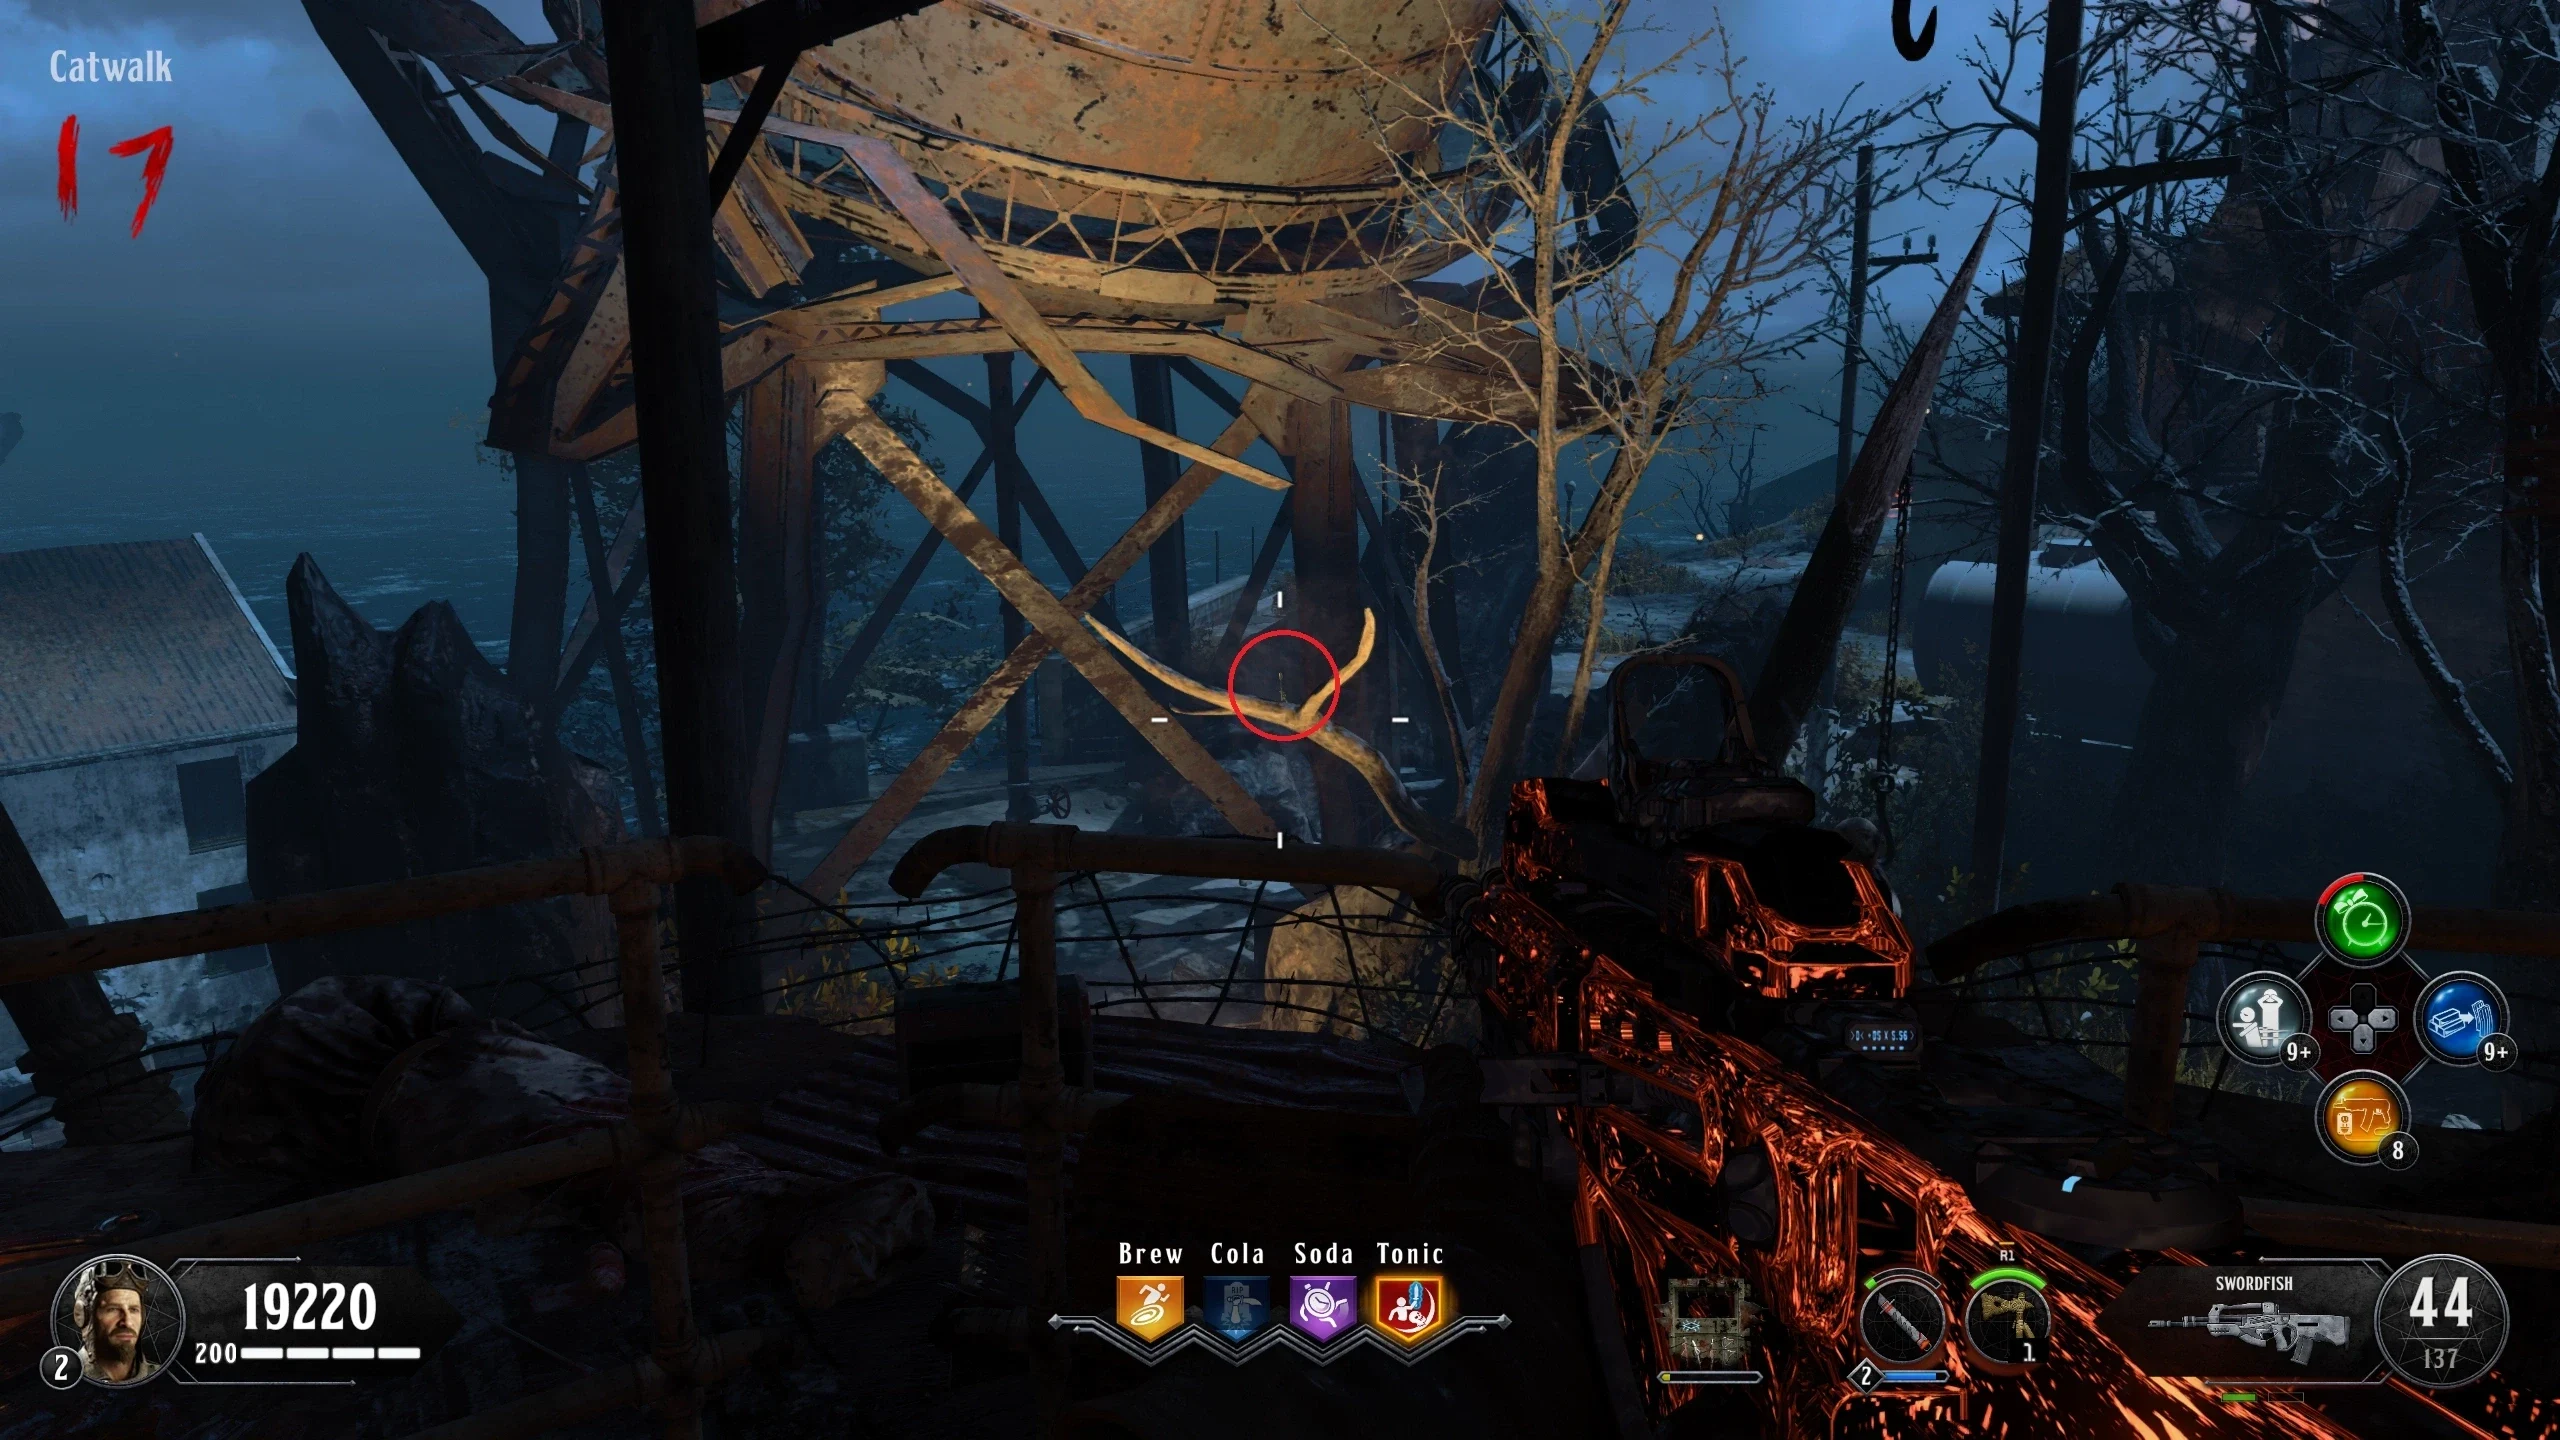
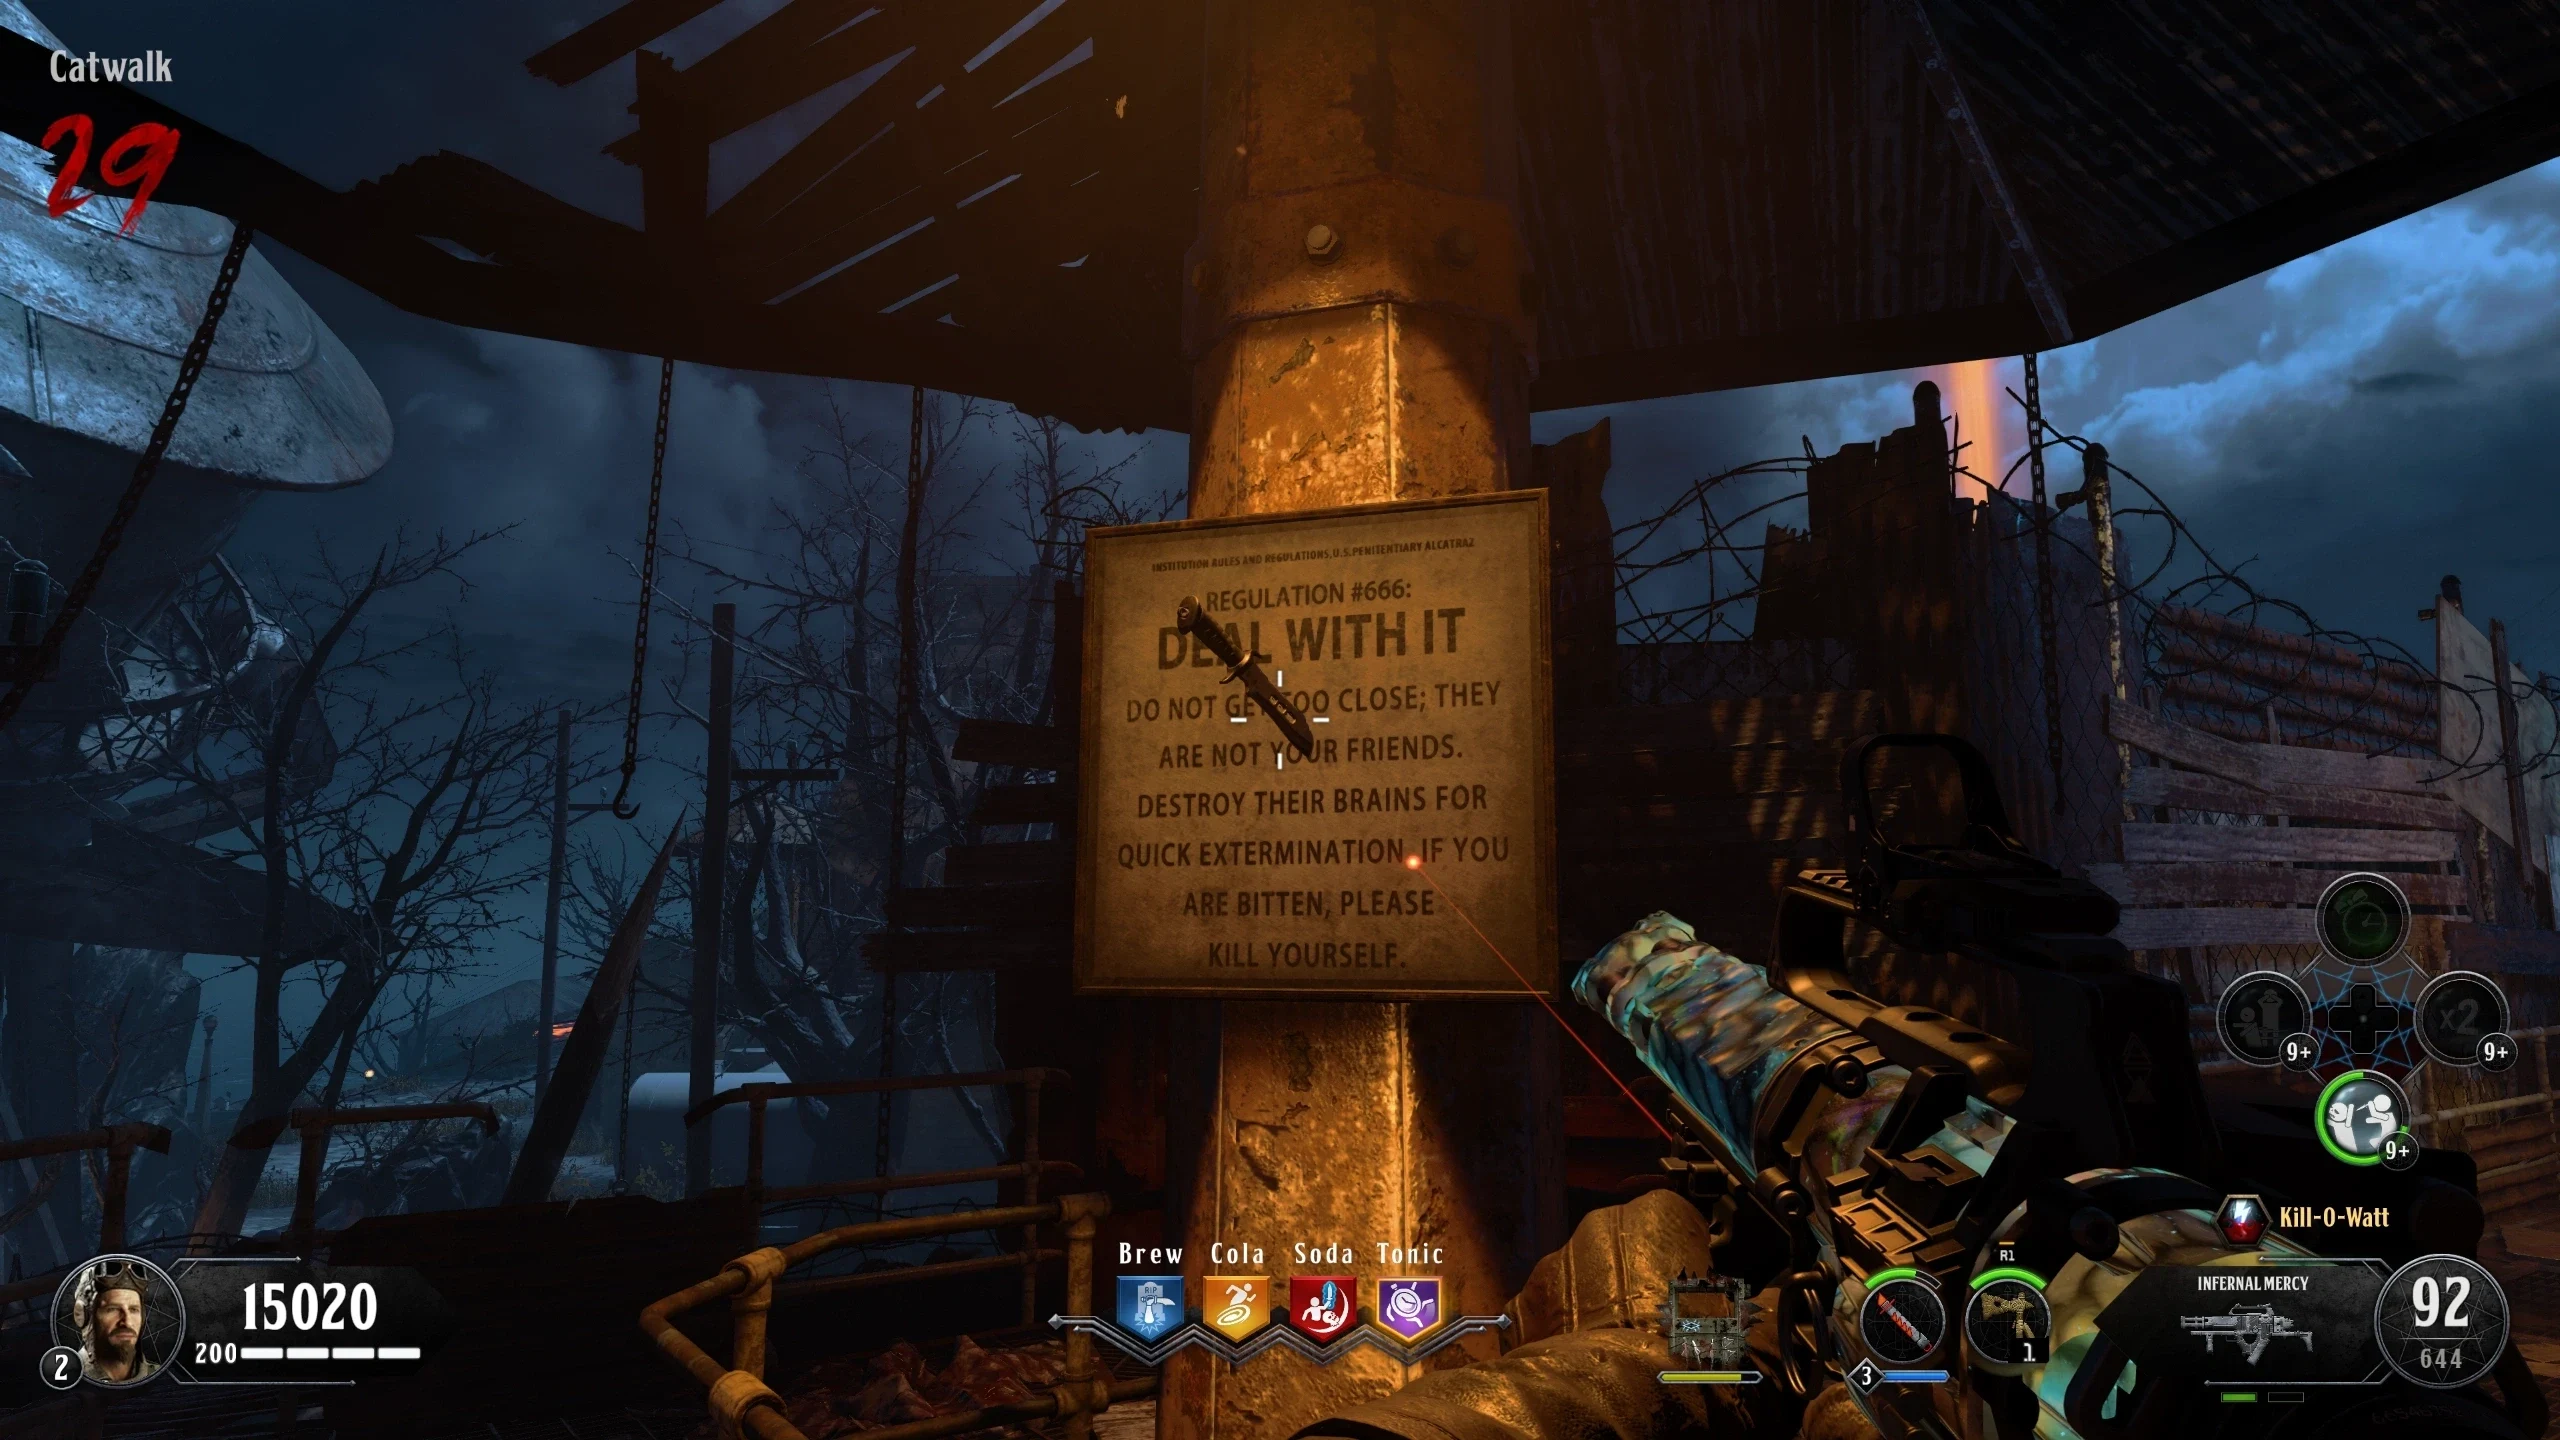
- Catwalk - On the roof of the open part
- Catwalk - On the other side of the roof
- Catwalk - On a post, close to the exit of the 'Catwalk'
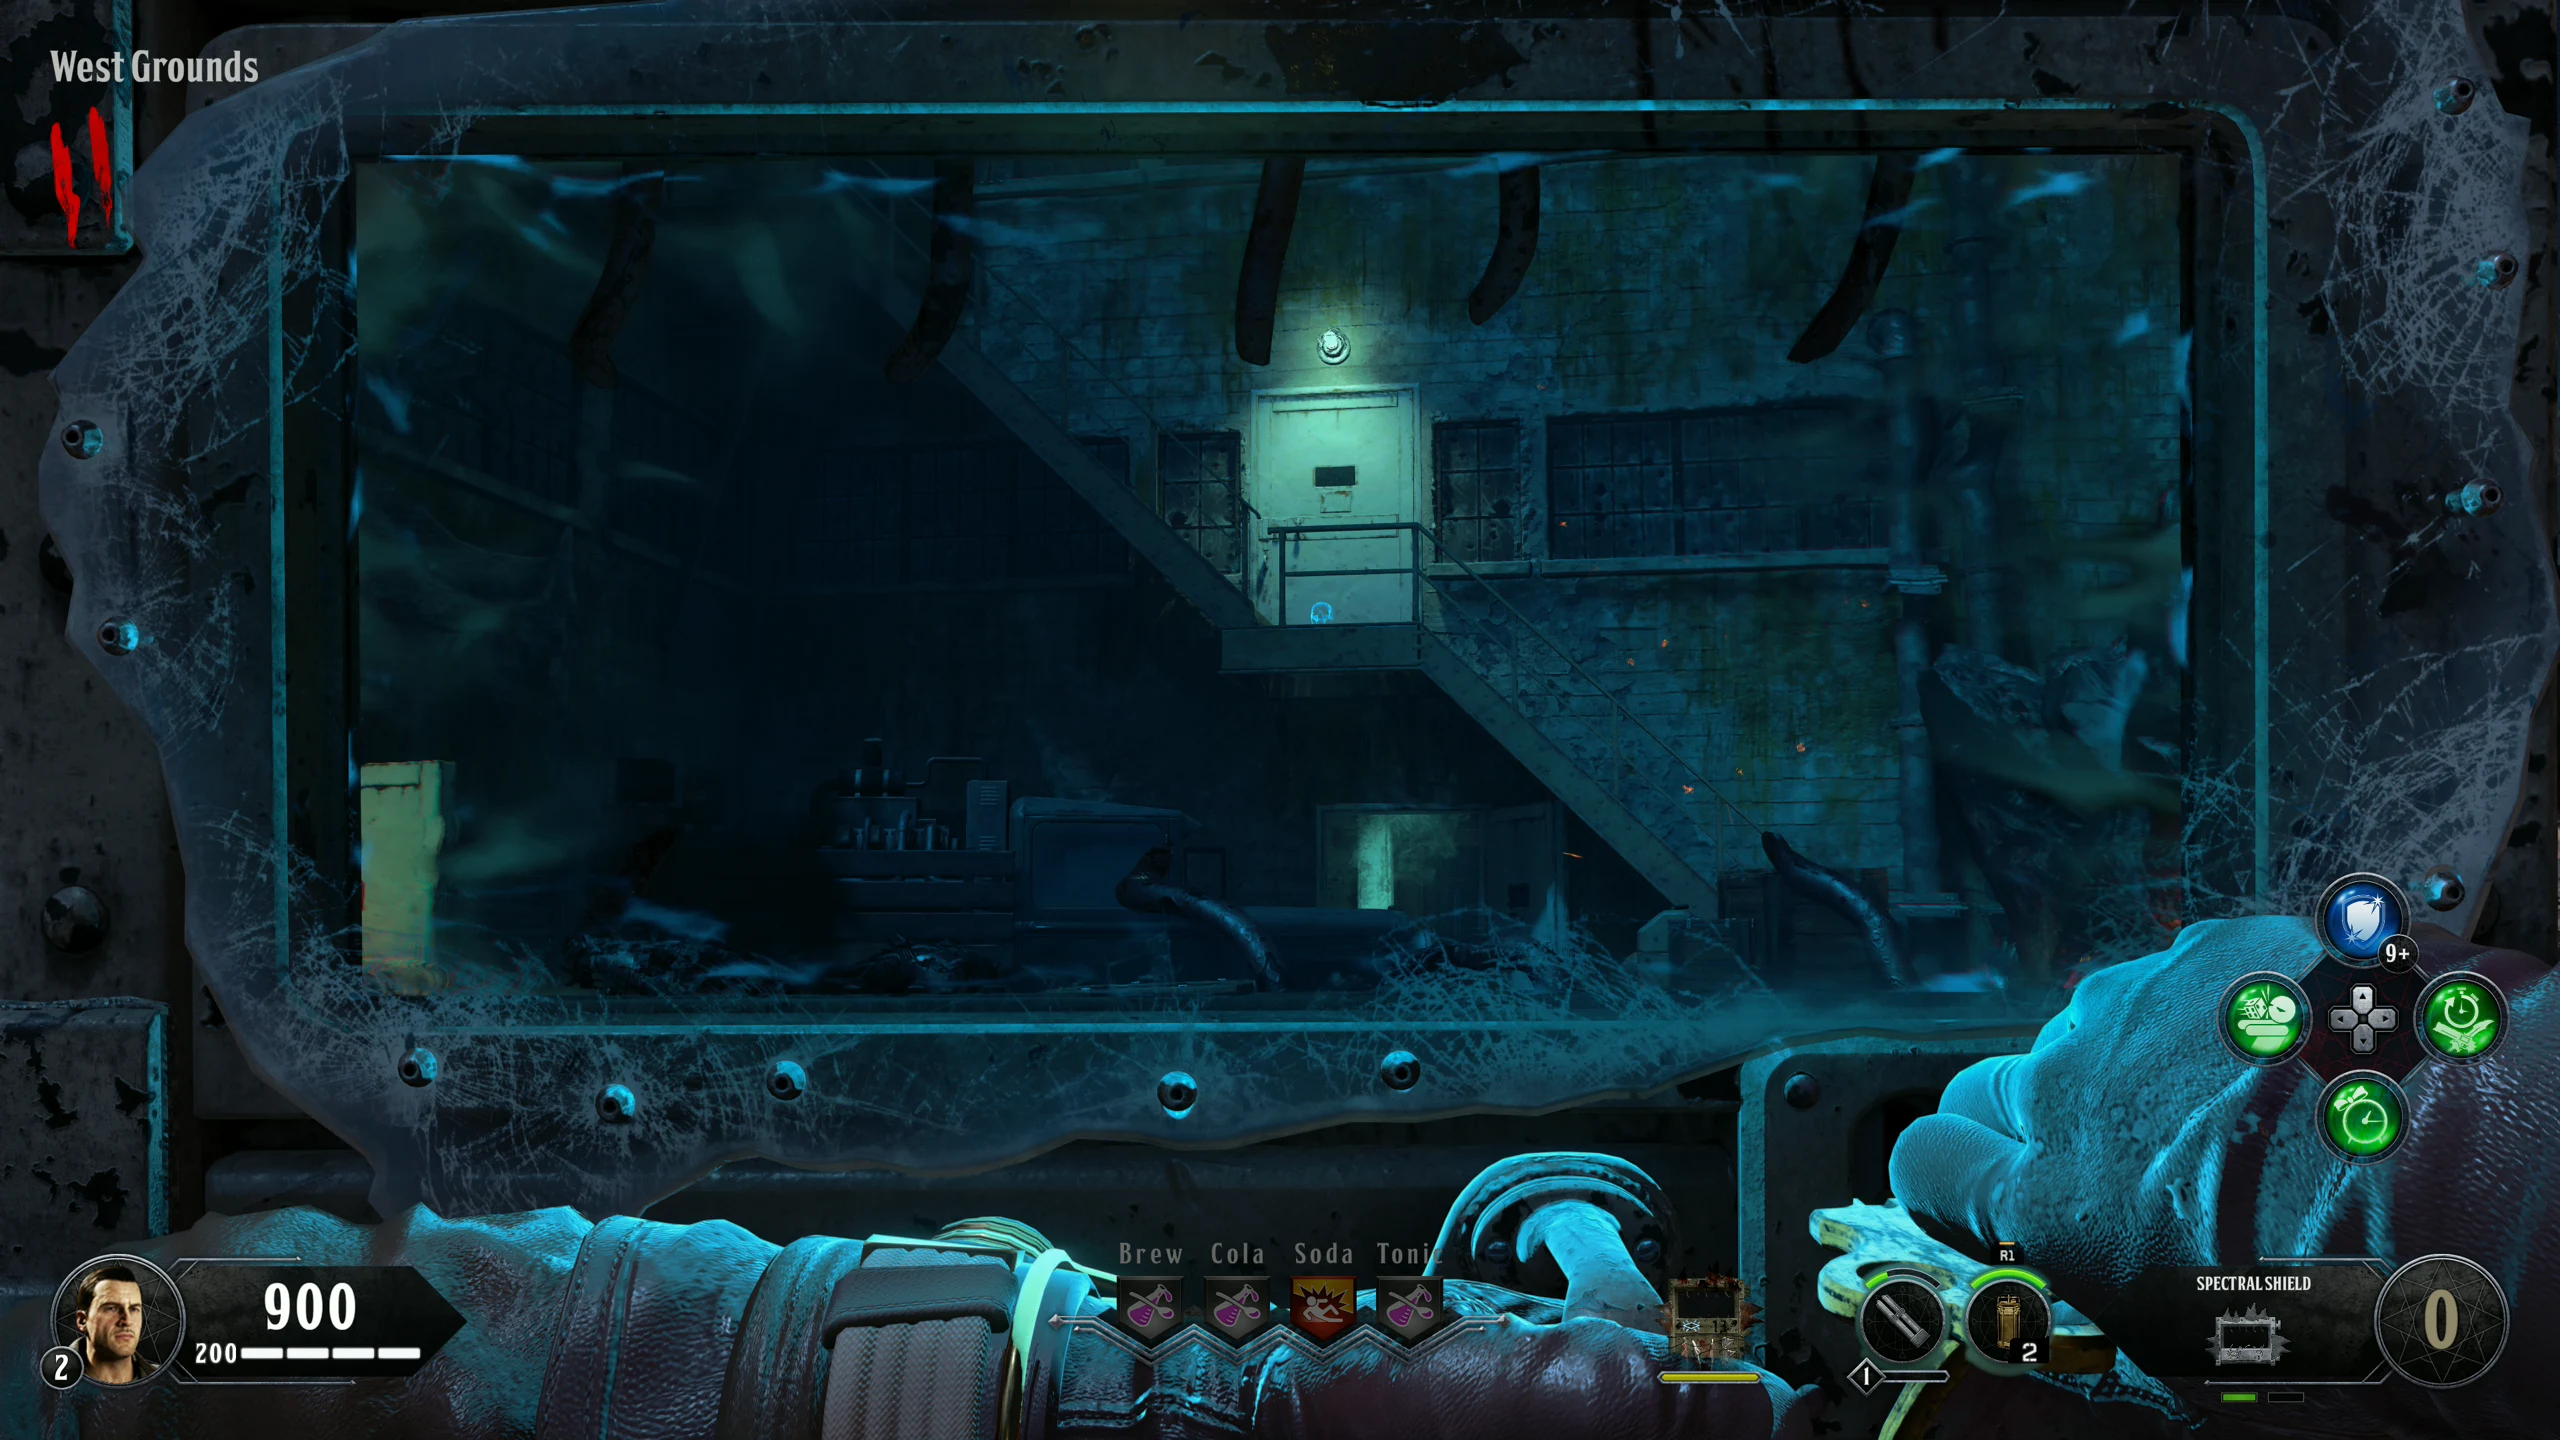
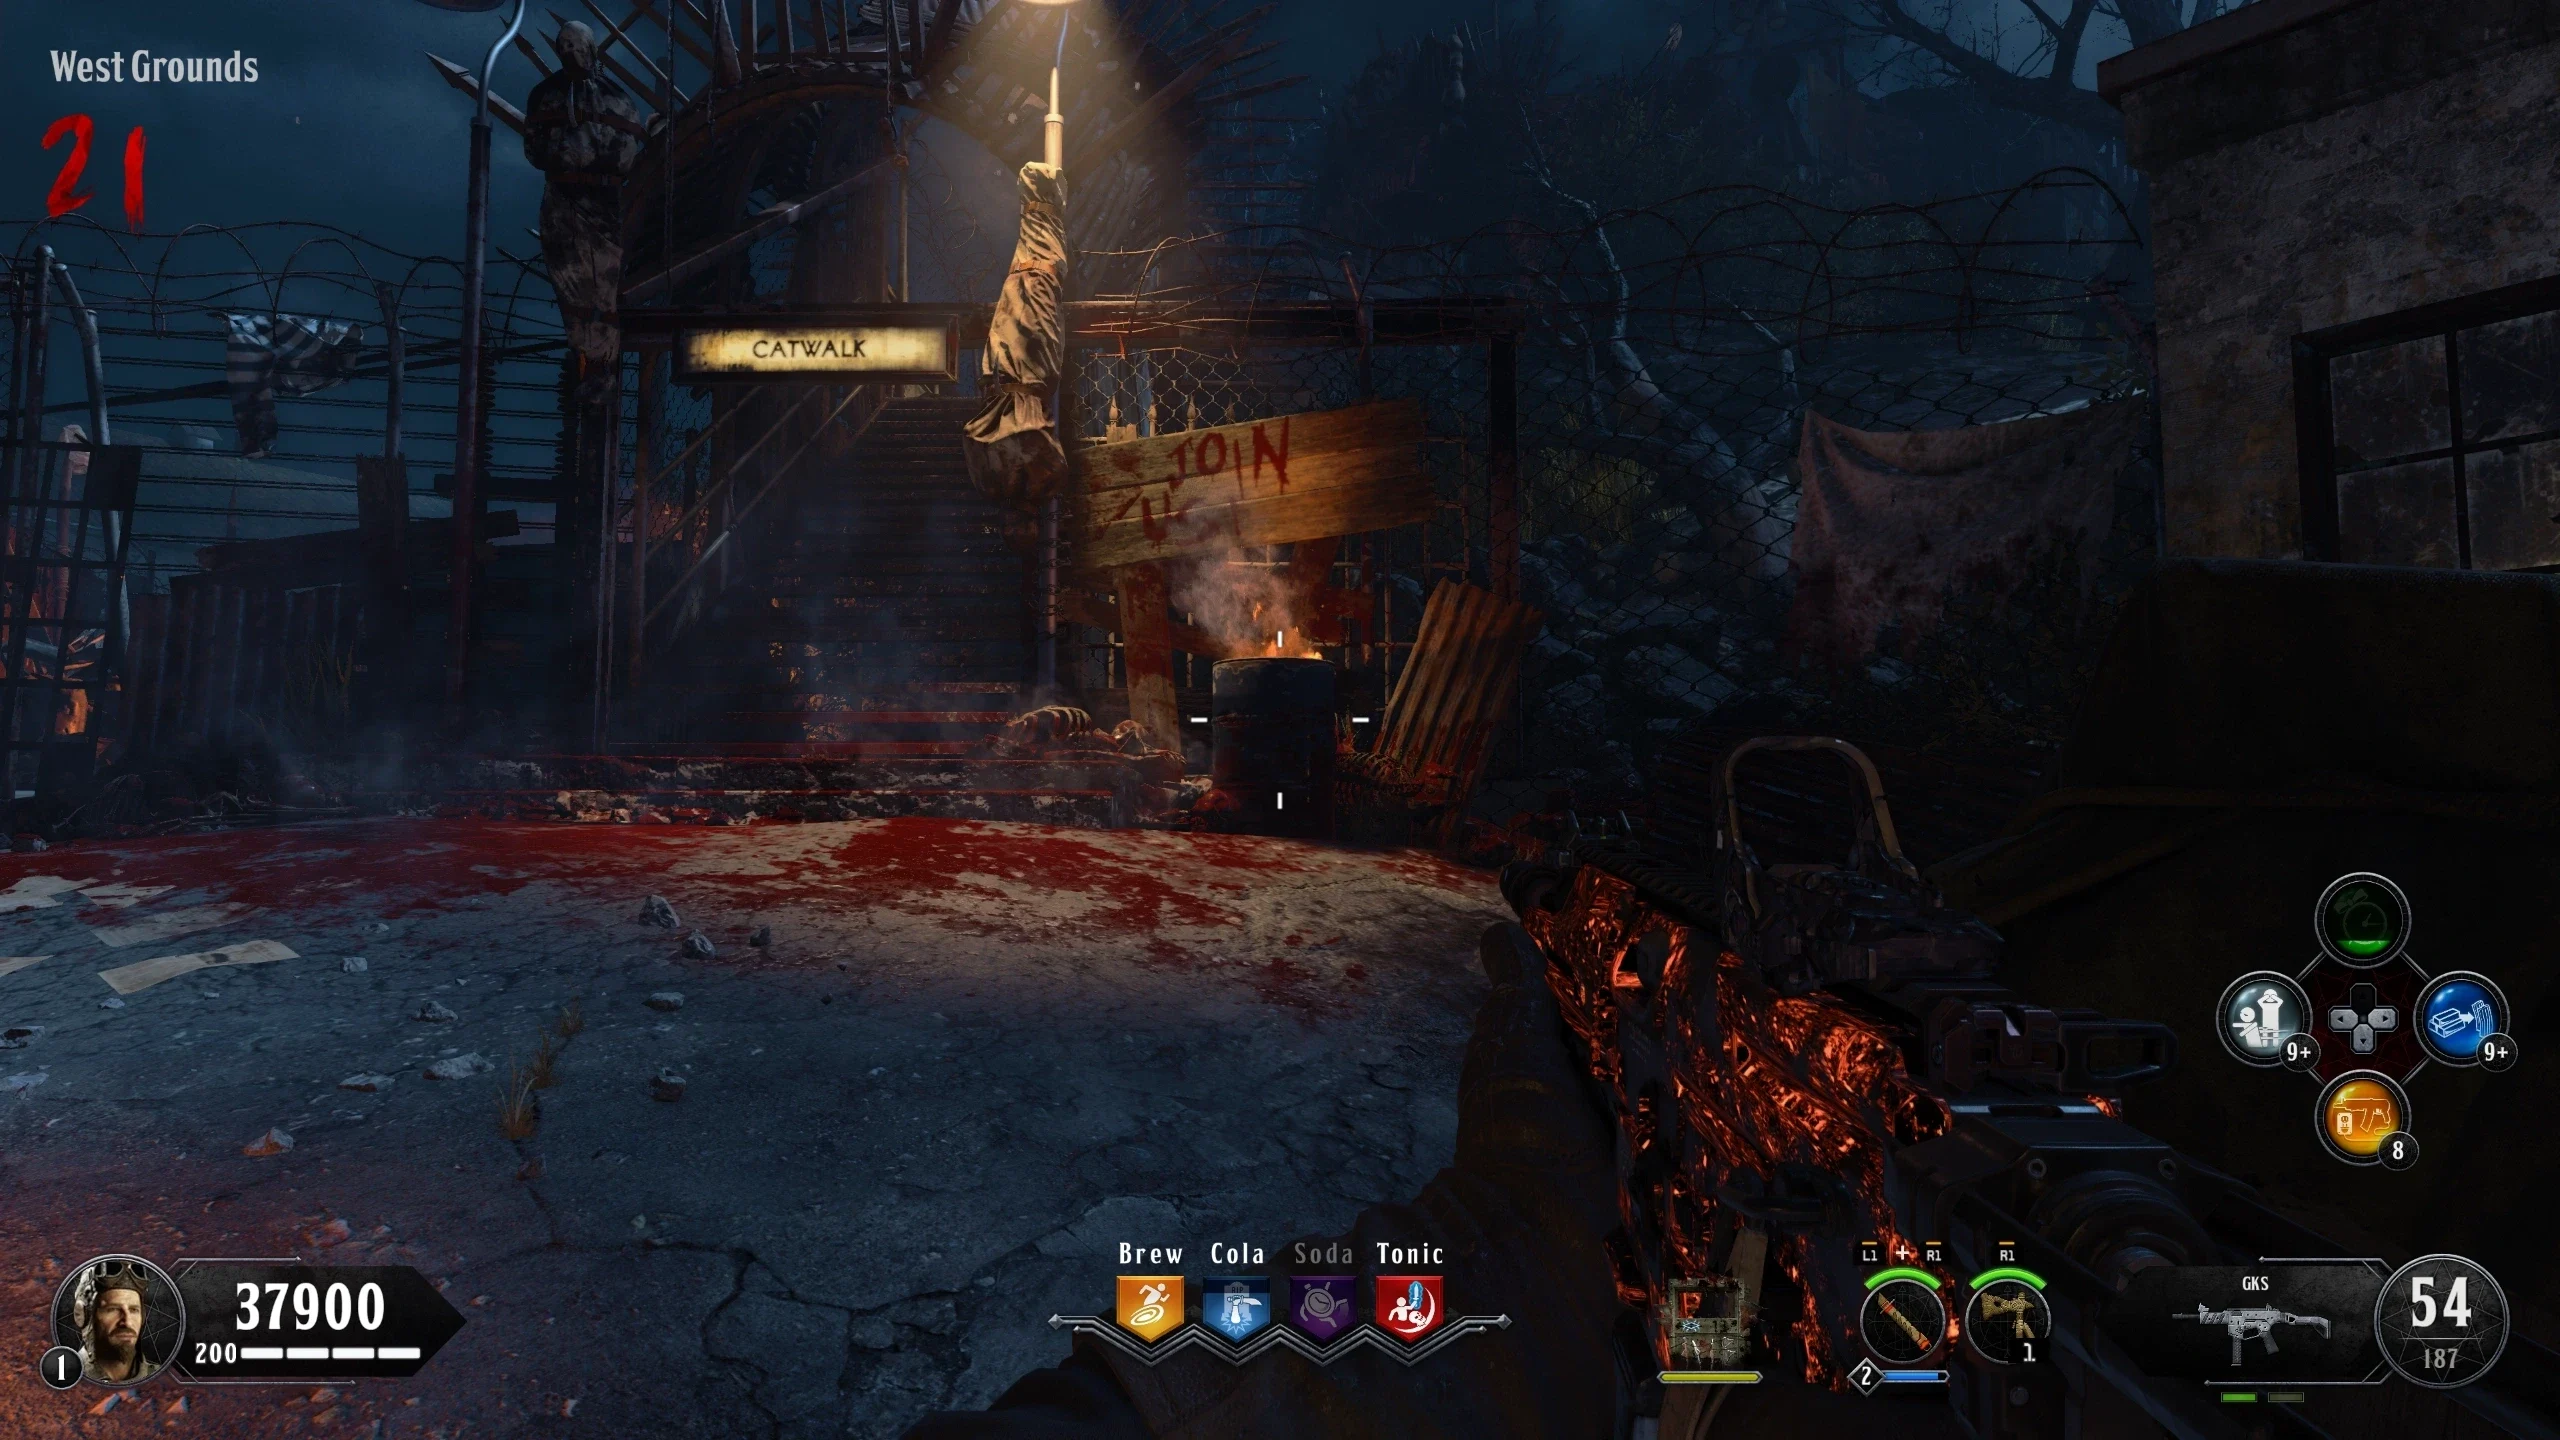
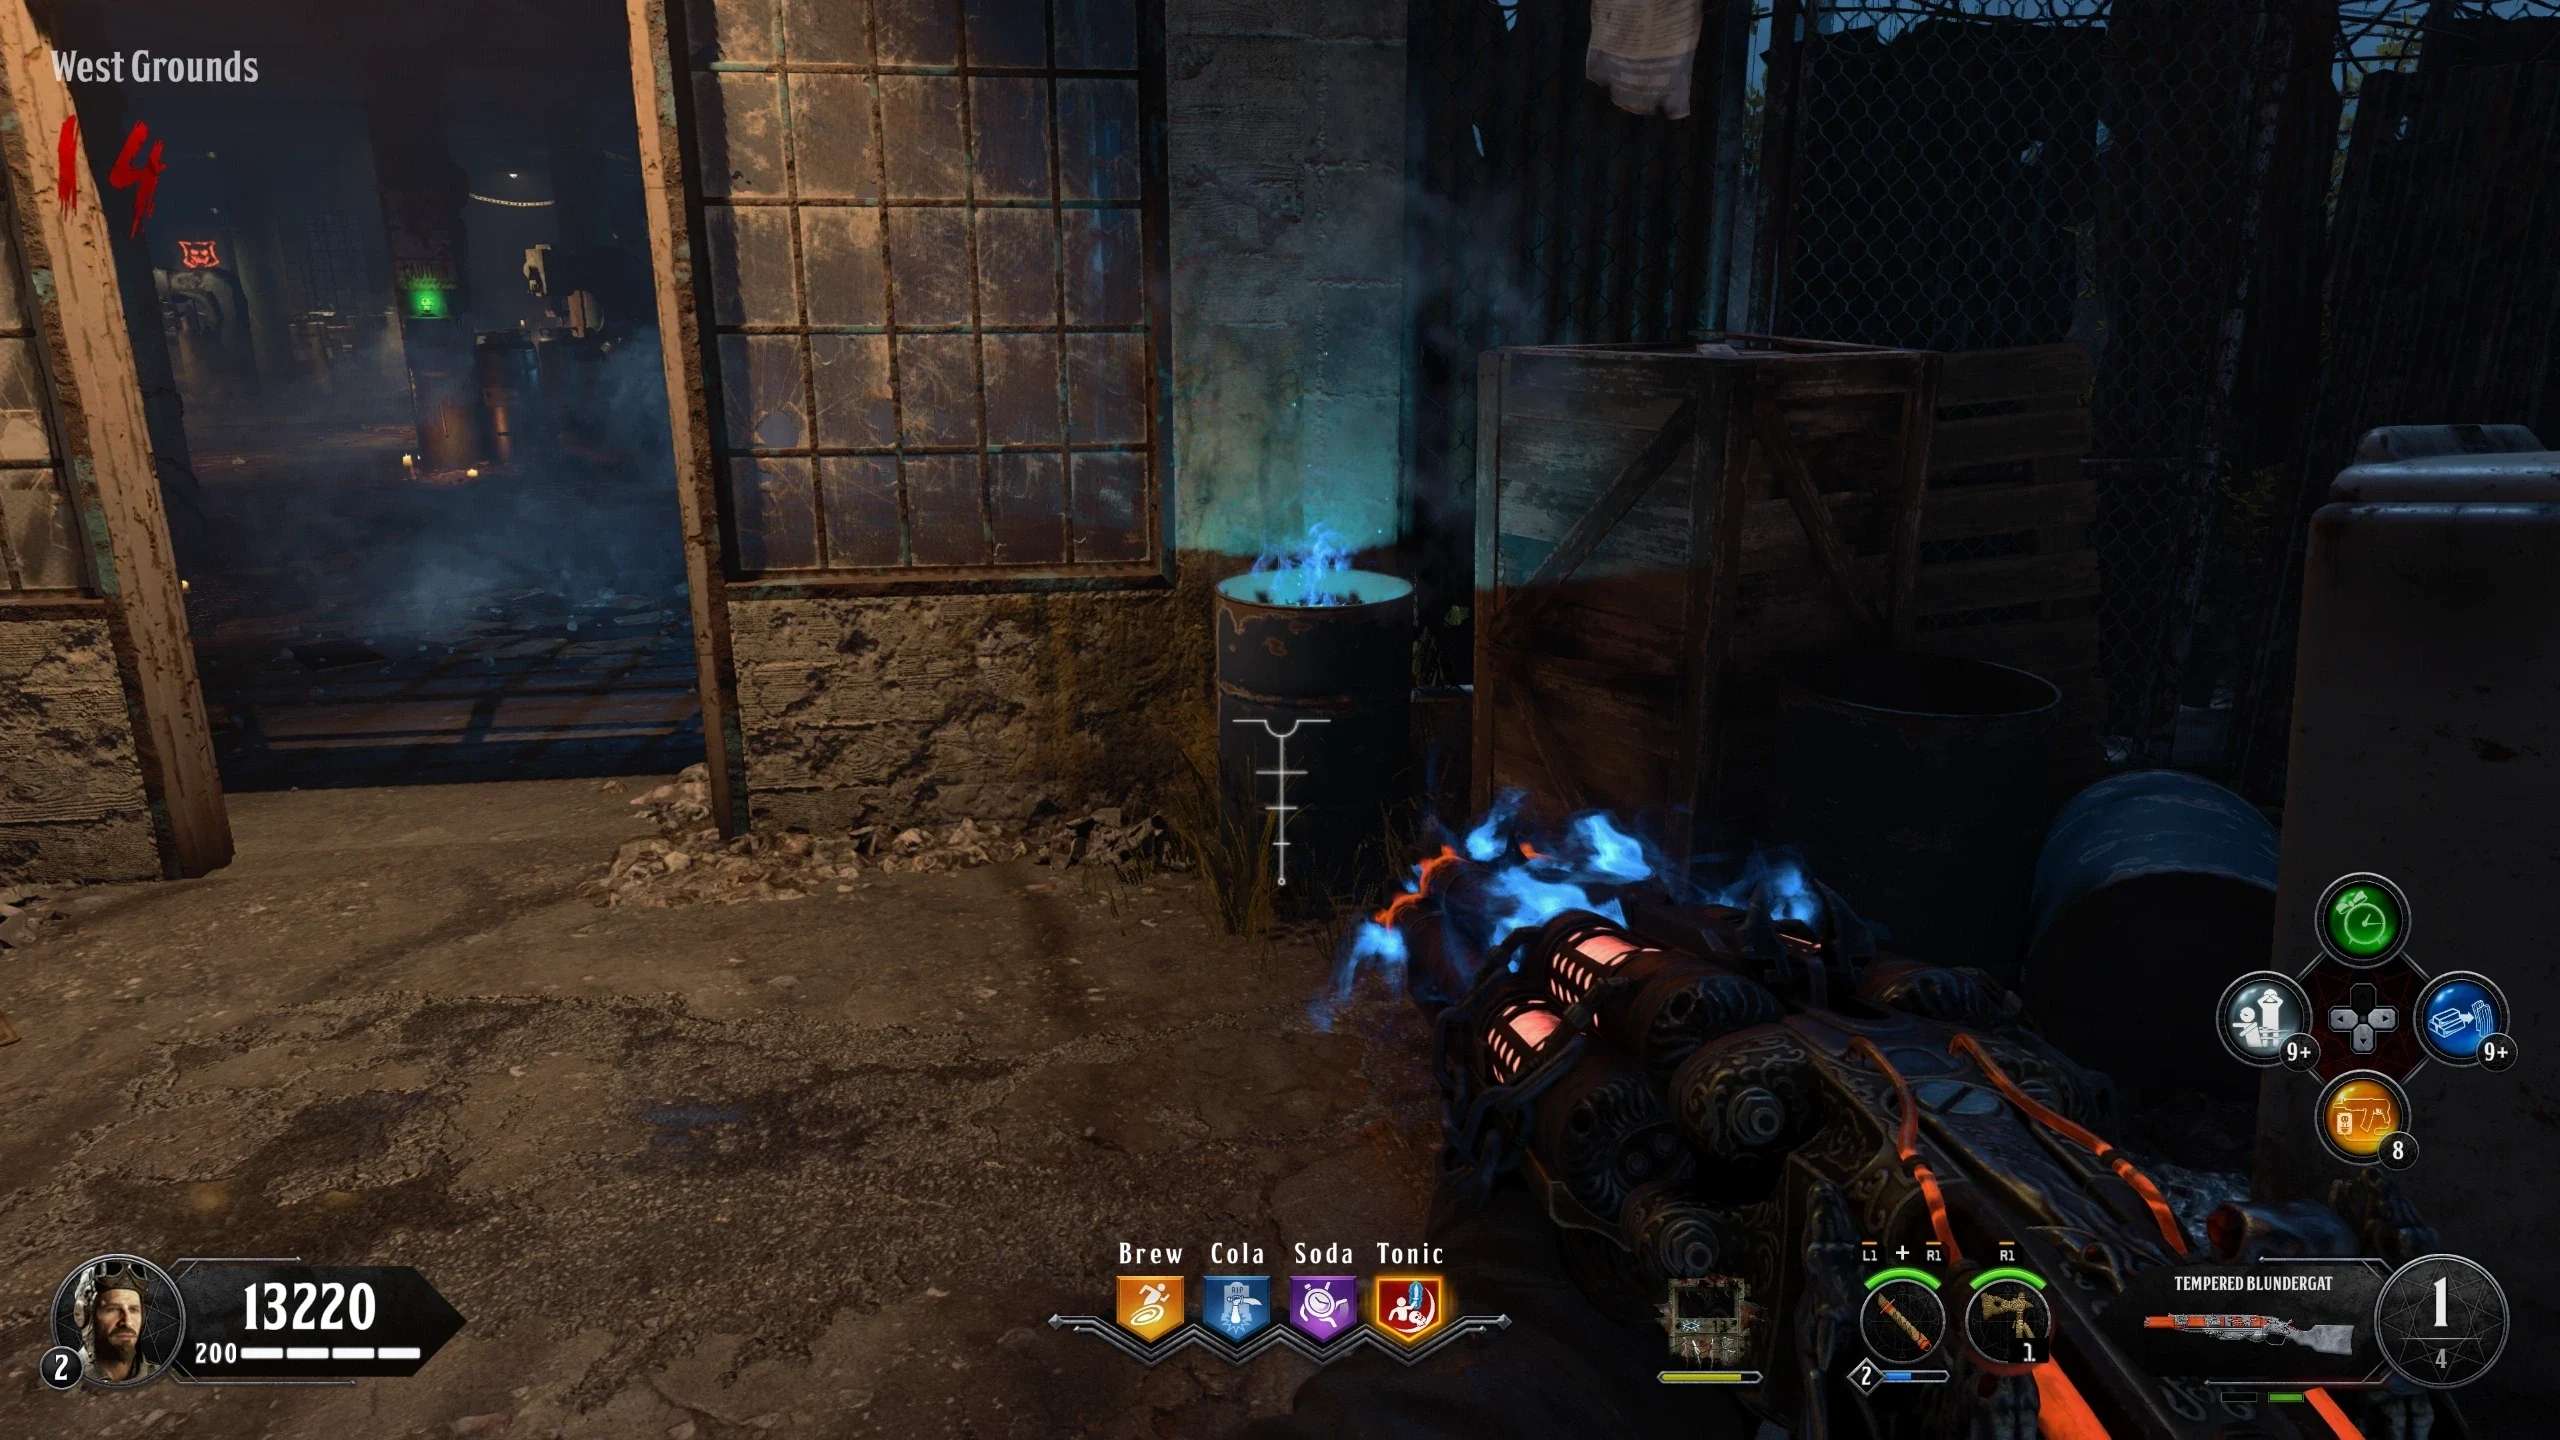
- West Grounds - On the overturned truck near the 'Catwalk' Entrance
- West Grounds - On the truck left of the spawn door
- Model Industries - On a machine, right of the RK 7 Garrison wallbuy
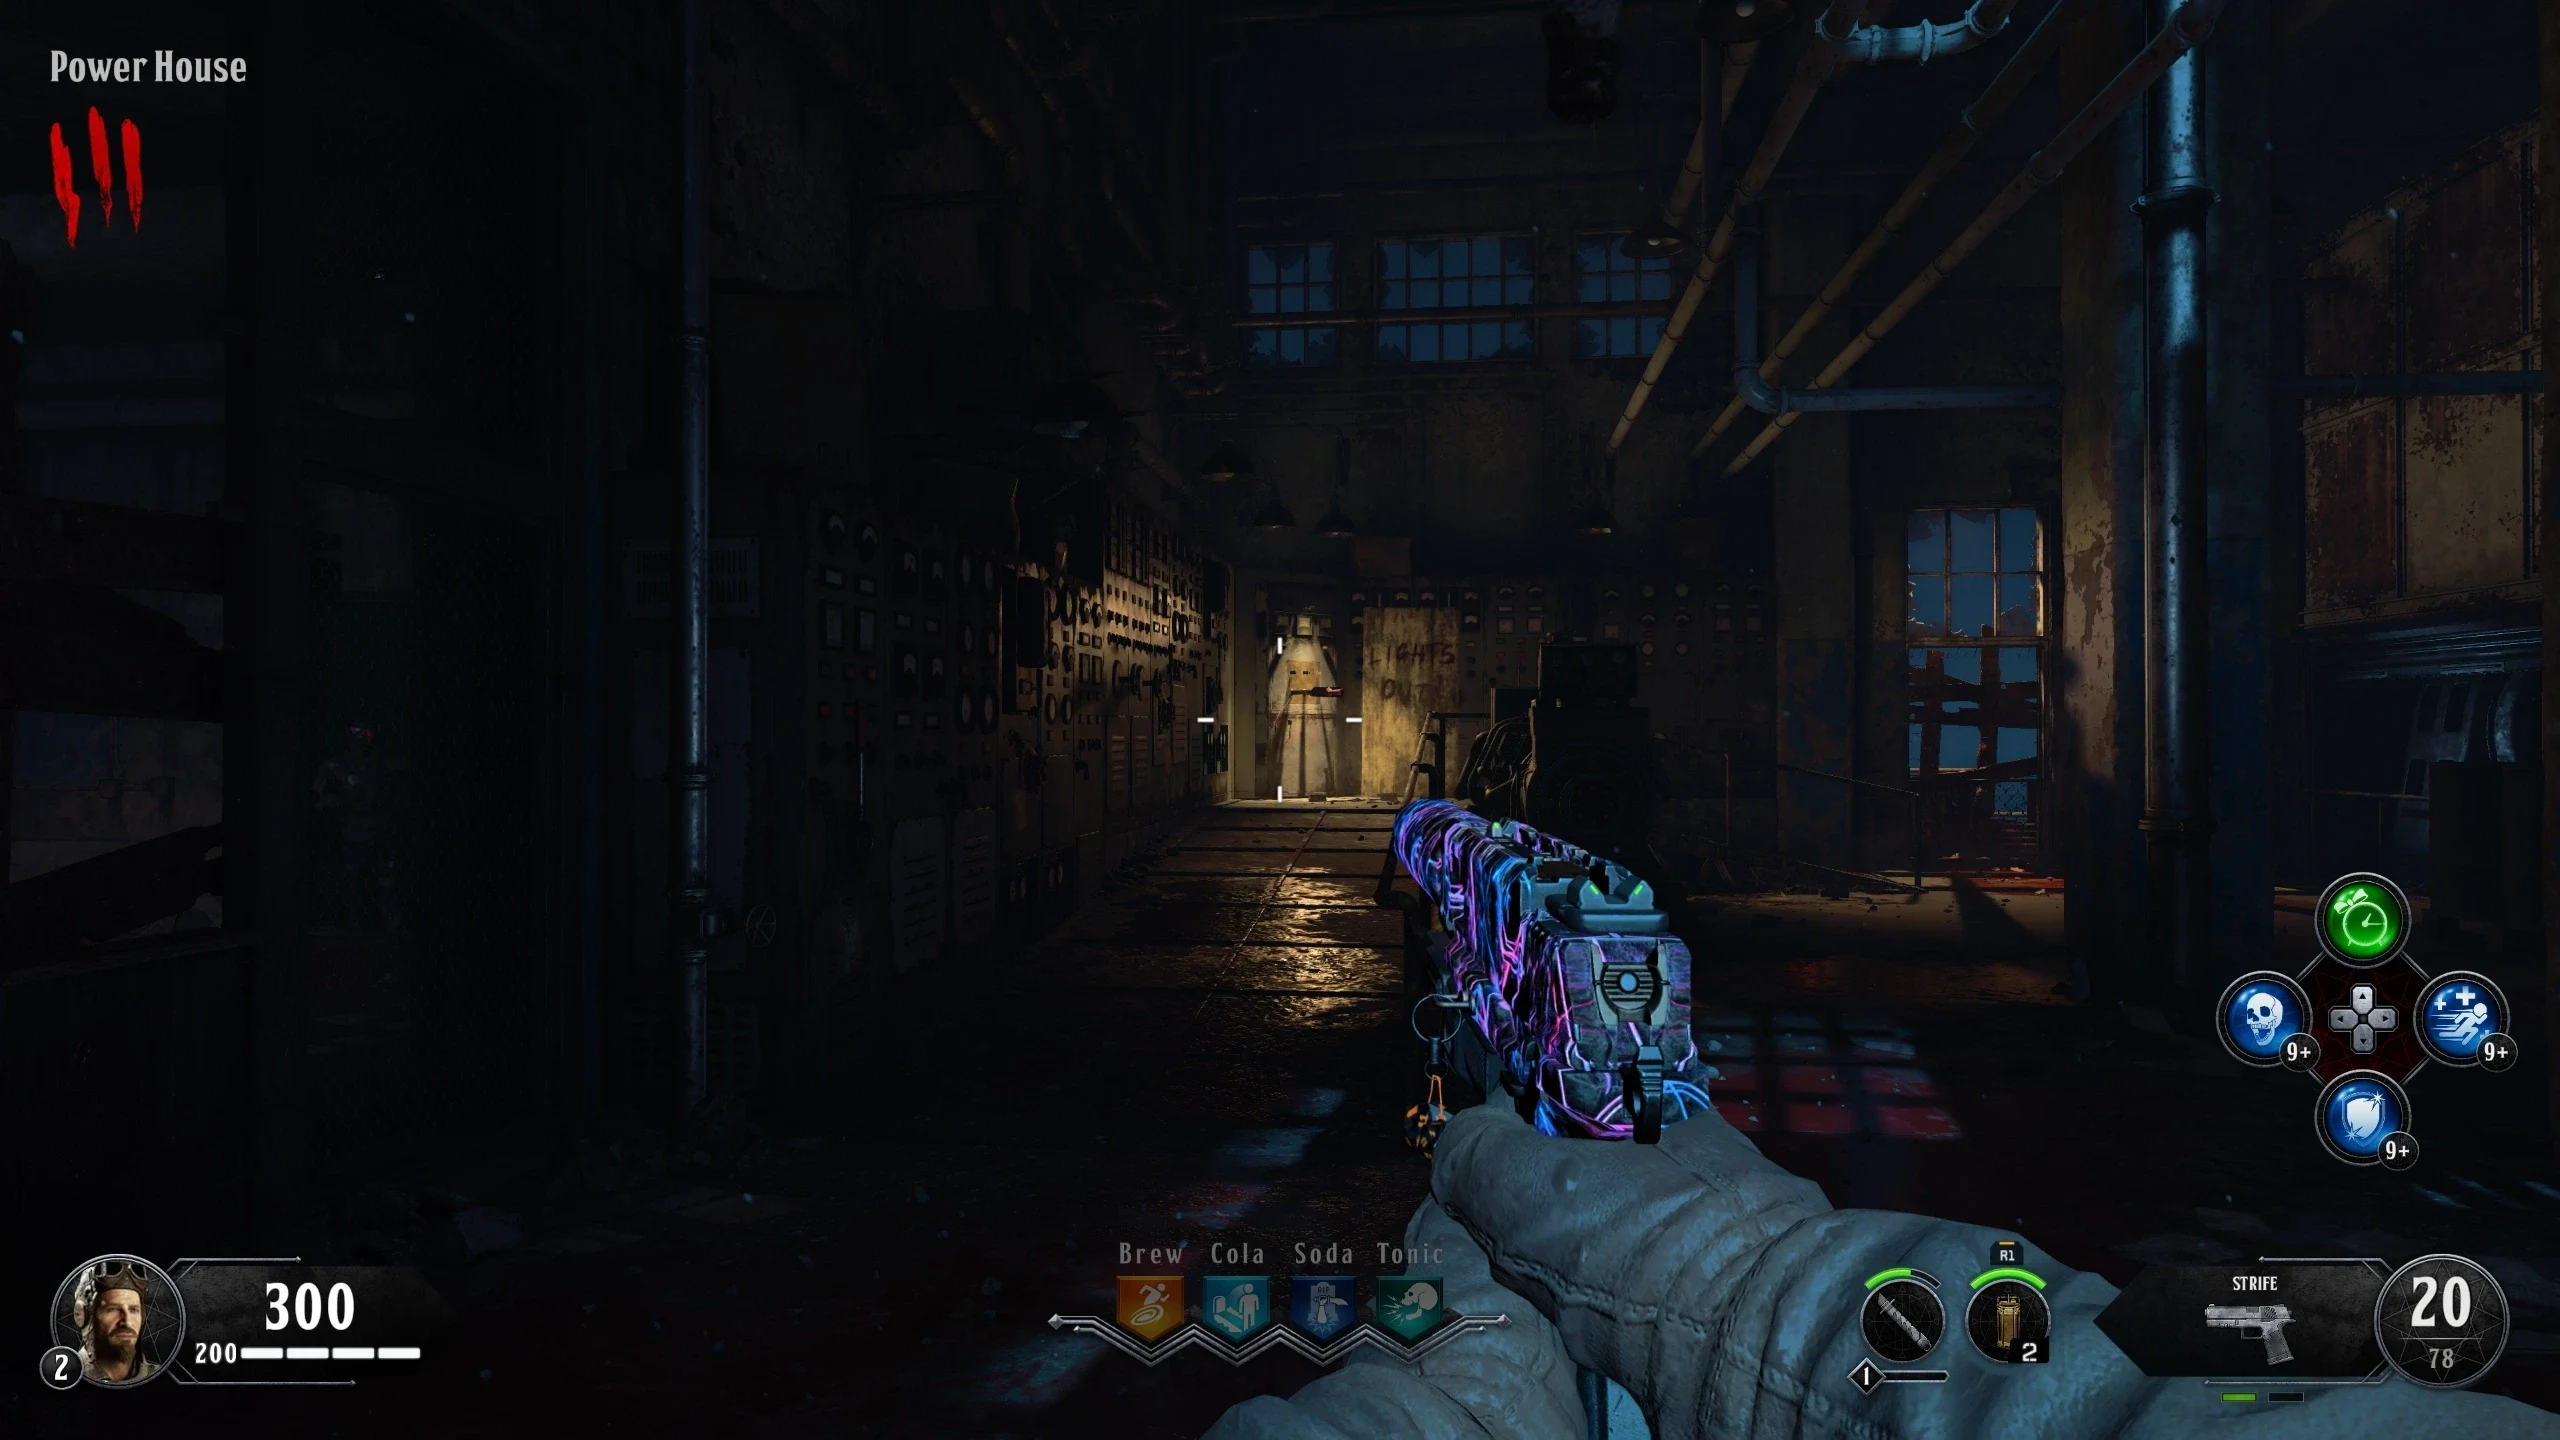
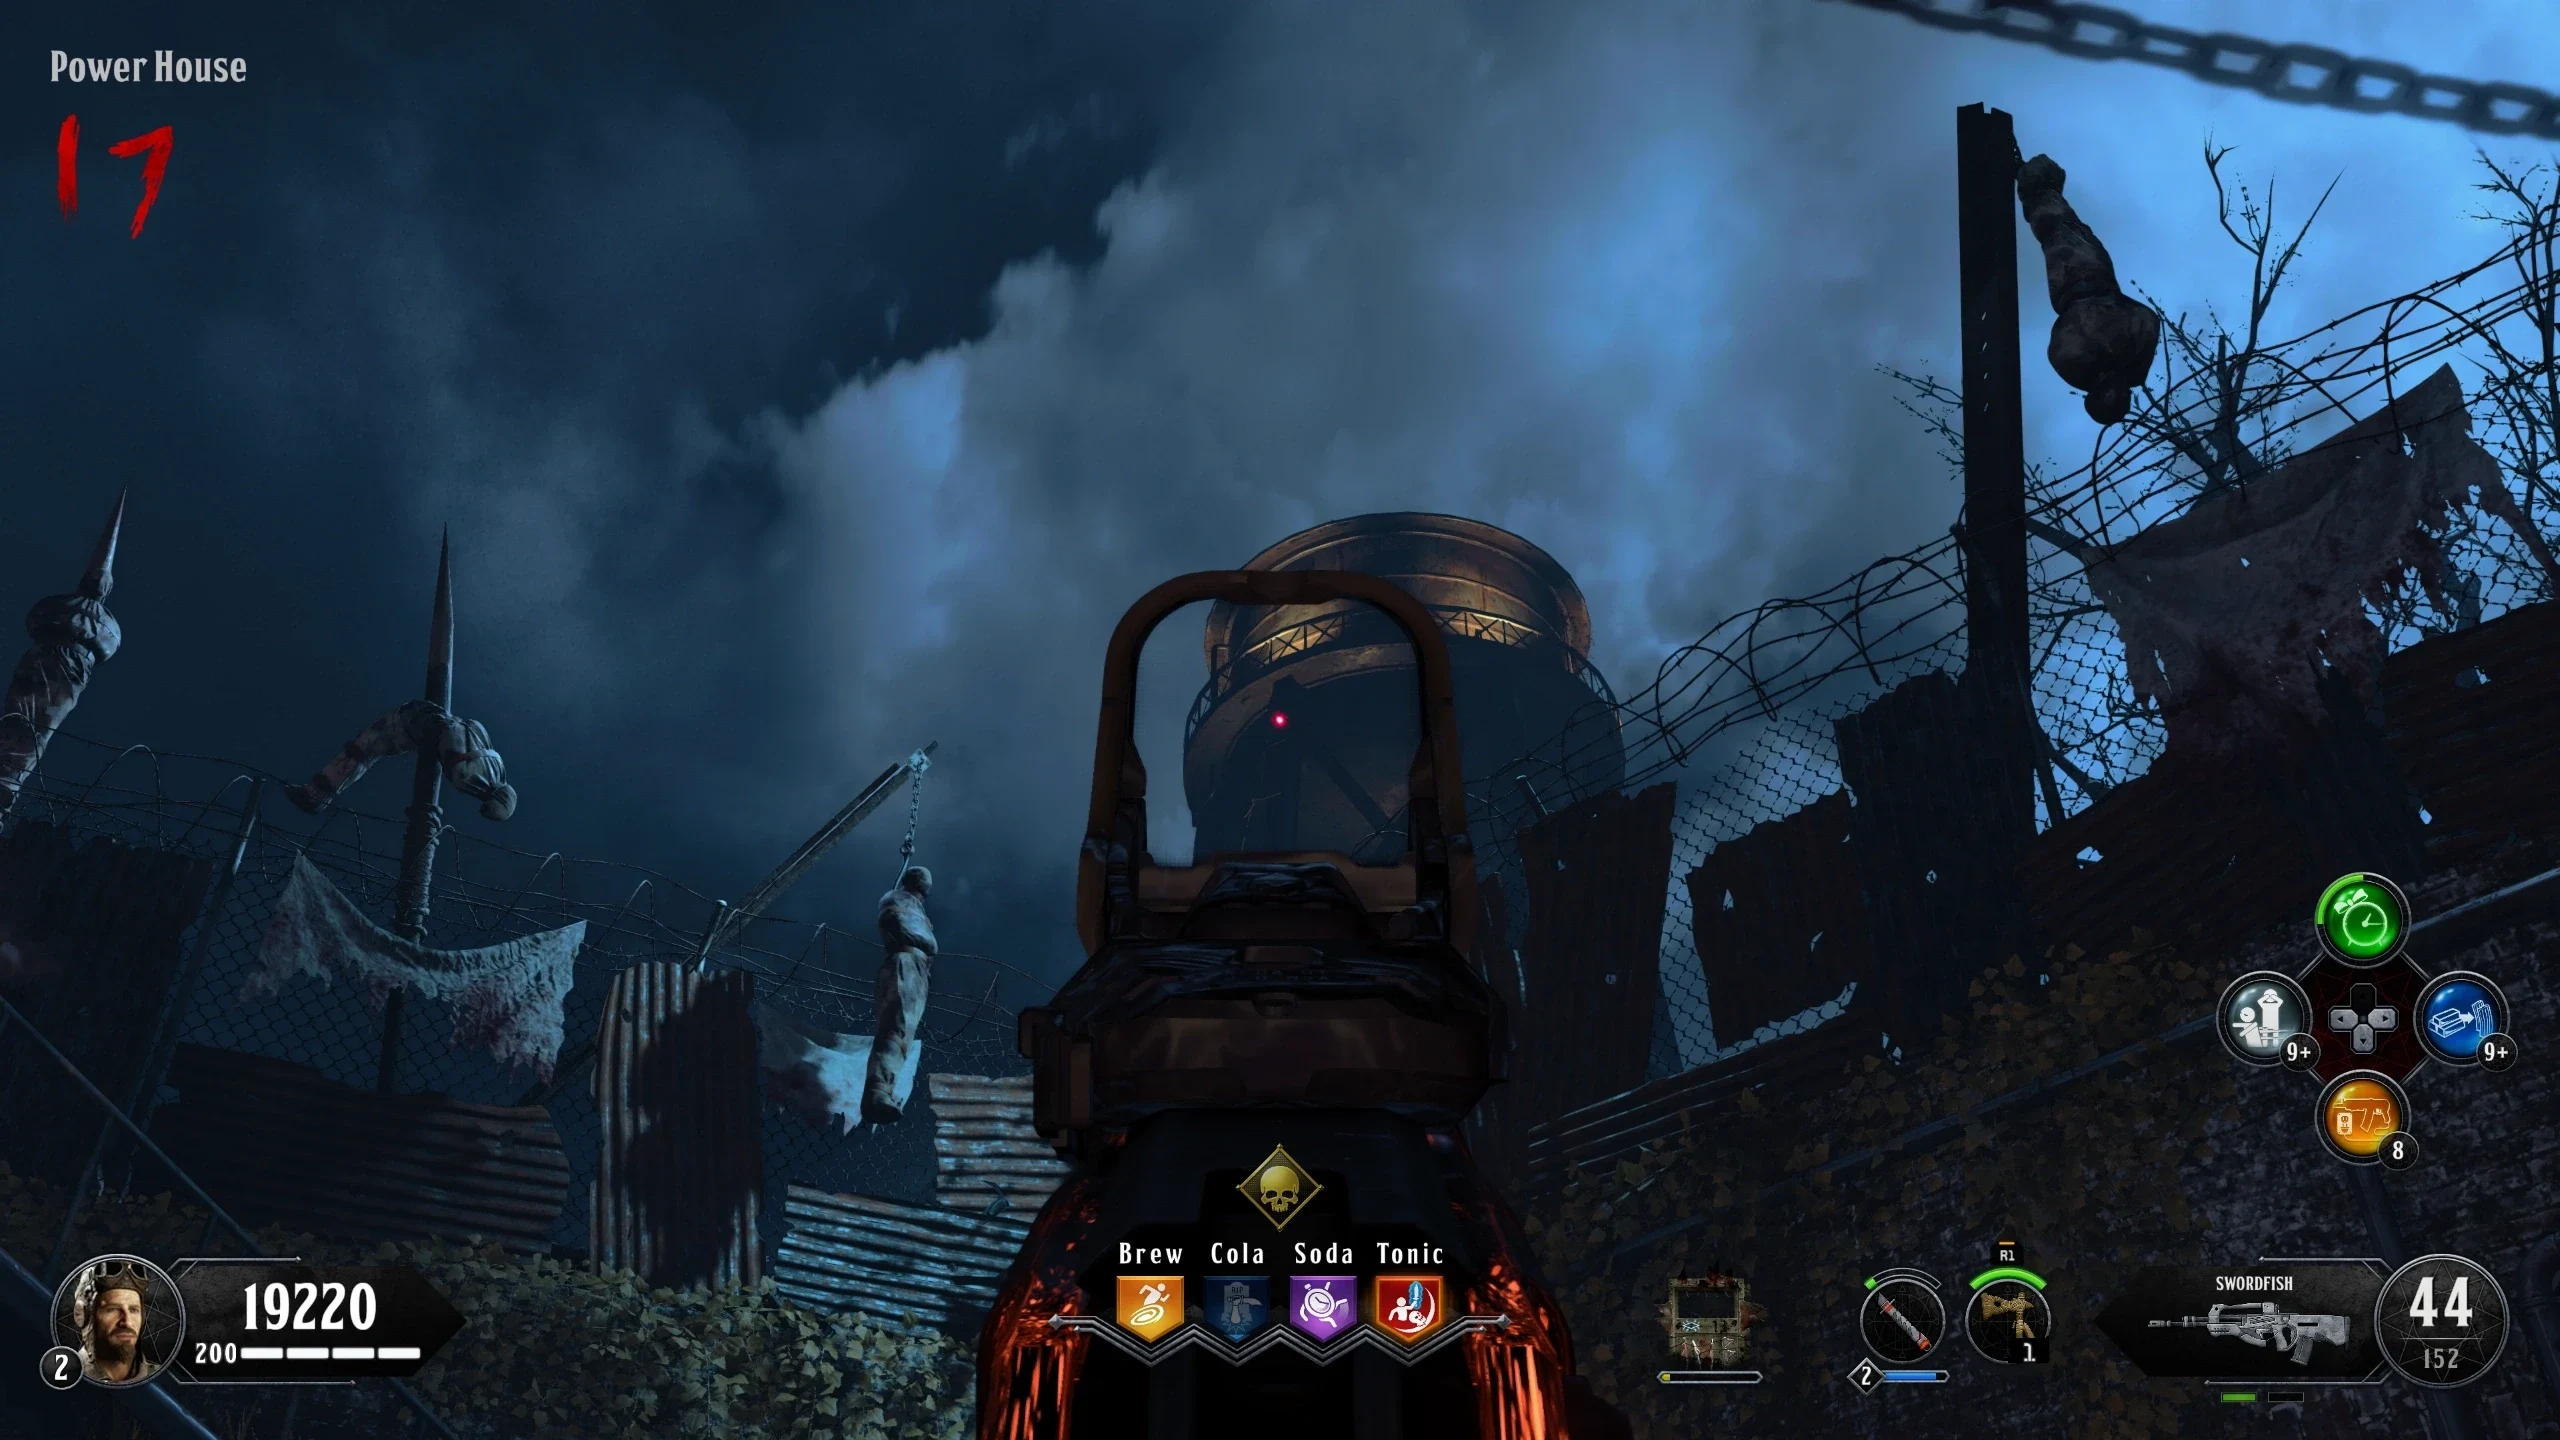
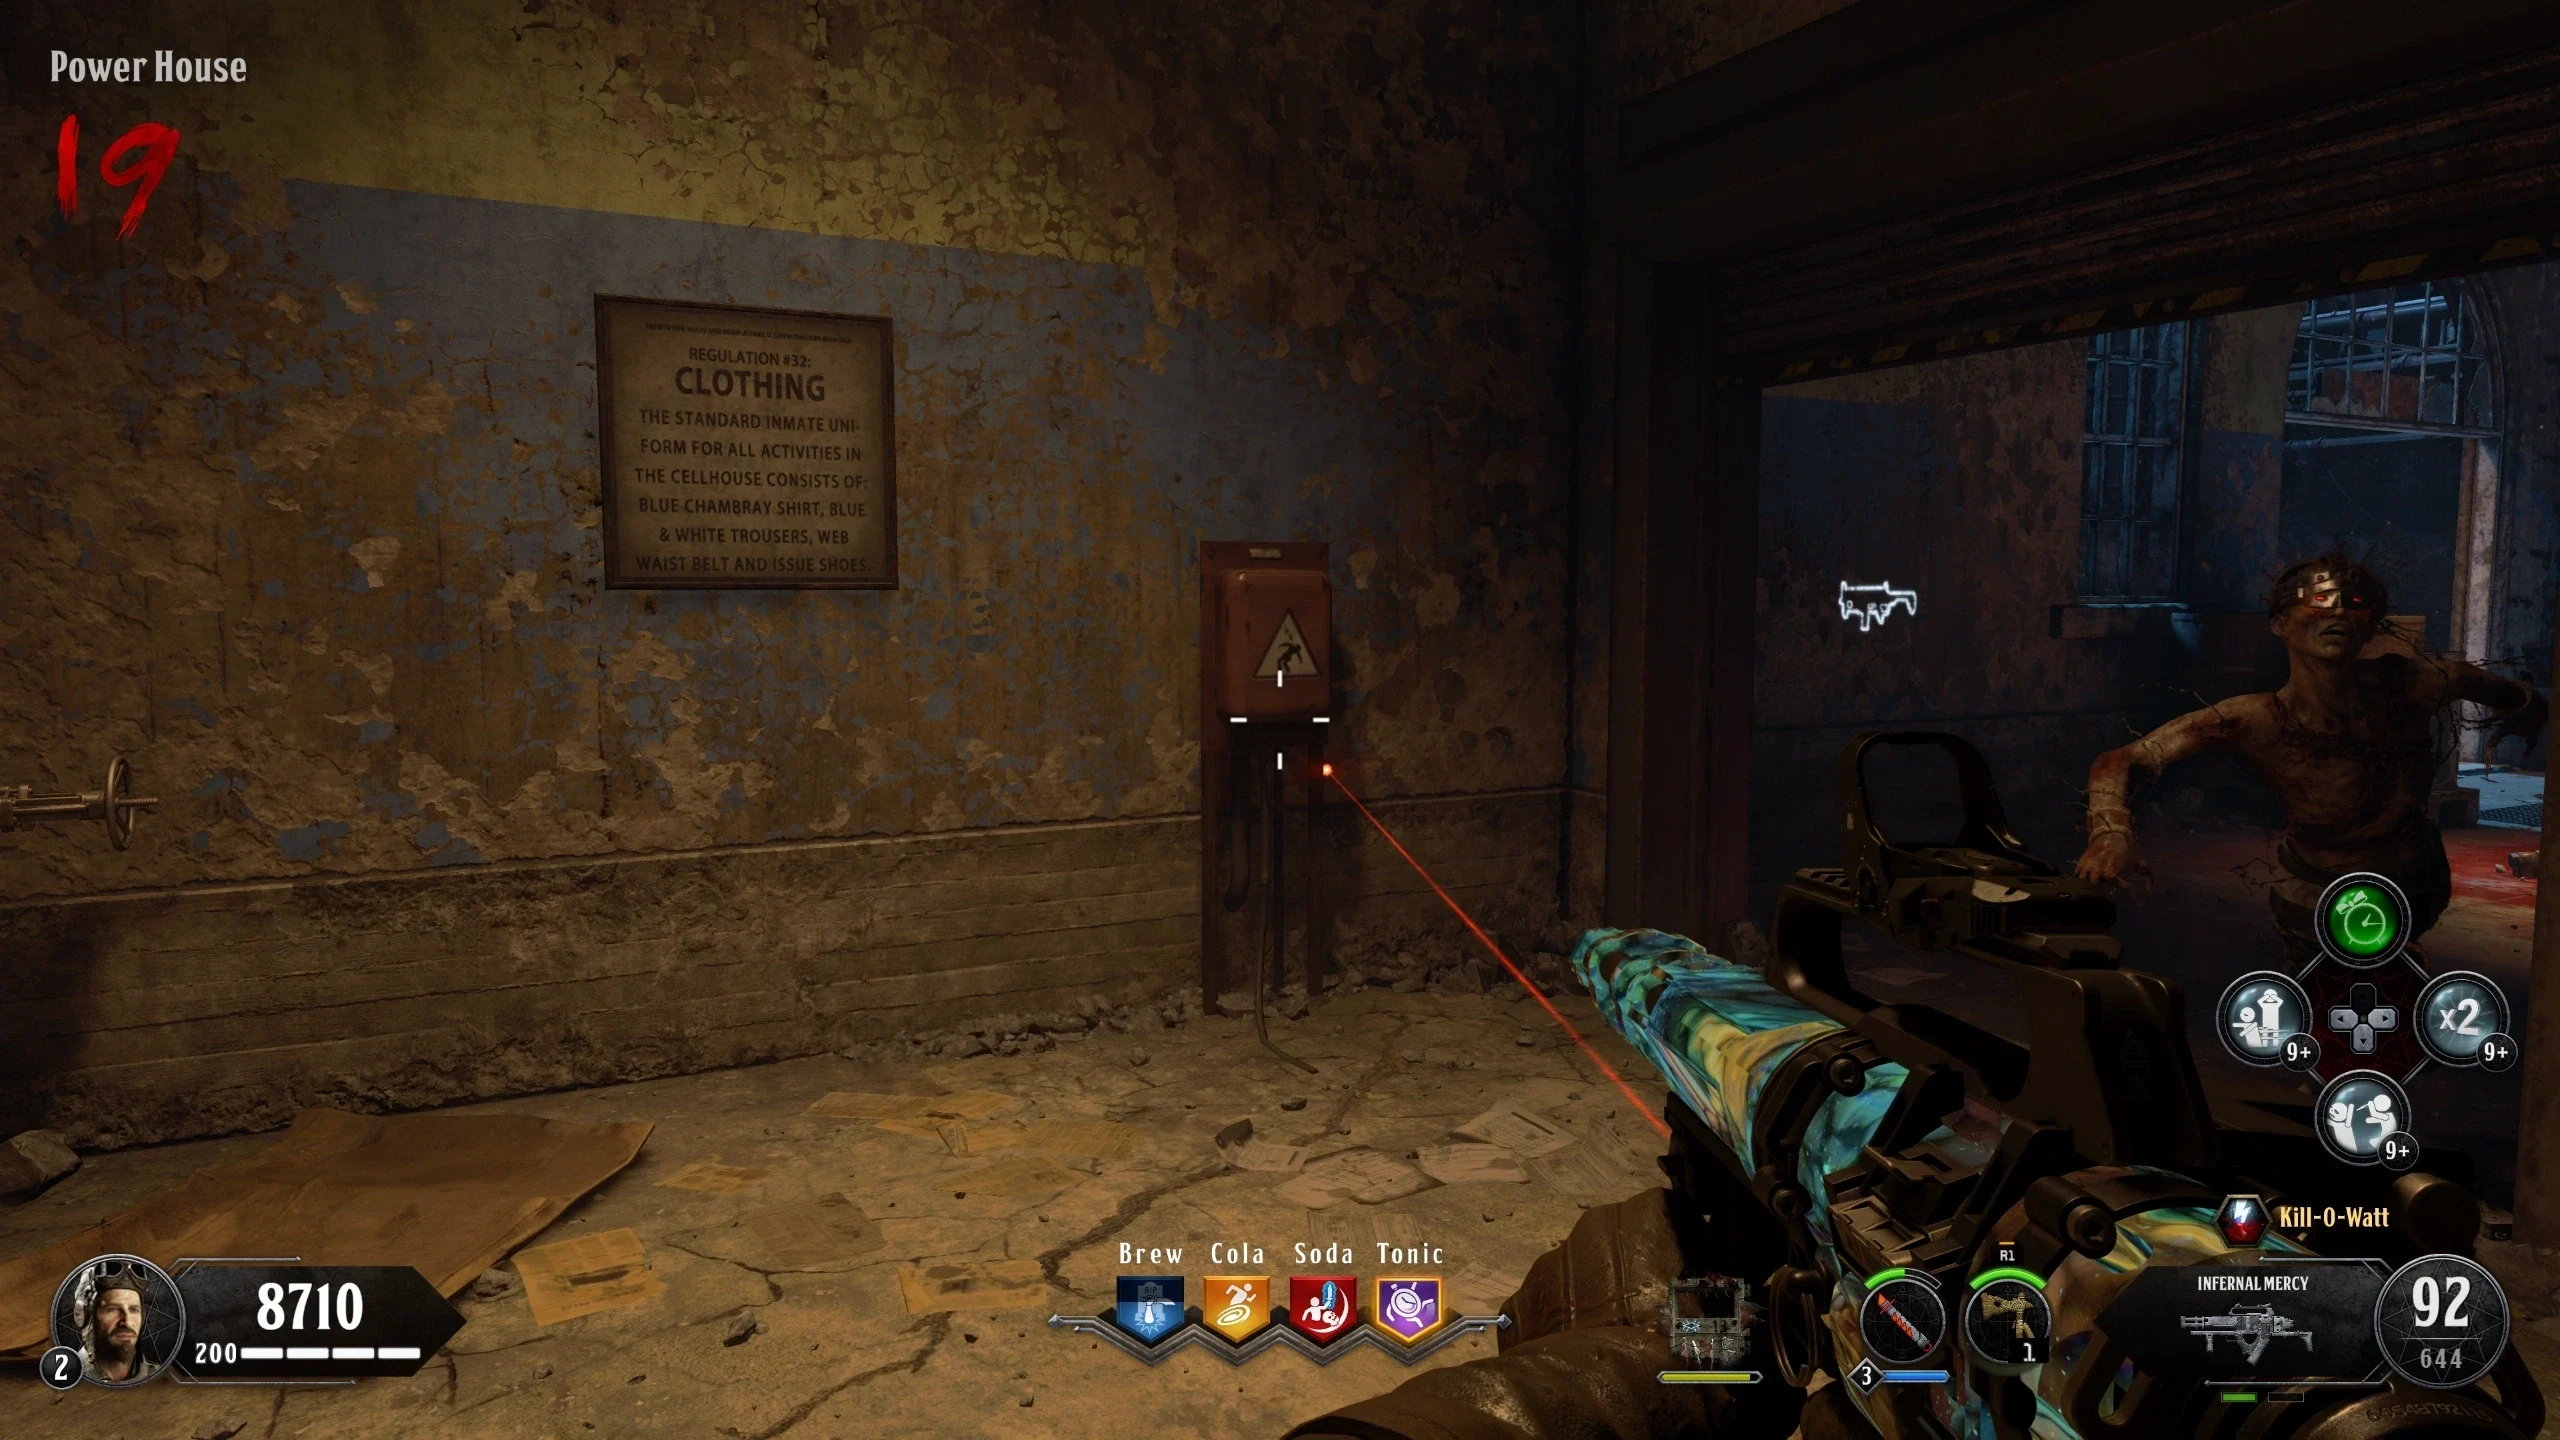
- Power House - On the pipe overhead outside
- Power House - On the pipe overhead, left of the giant cylinder near the Mystery Box
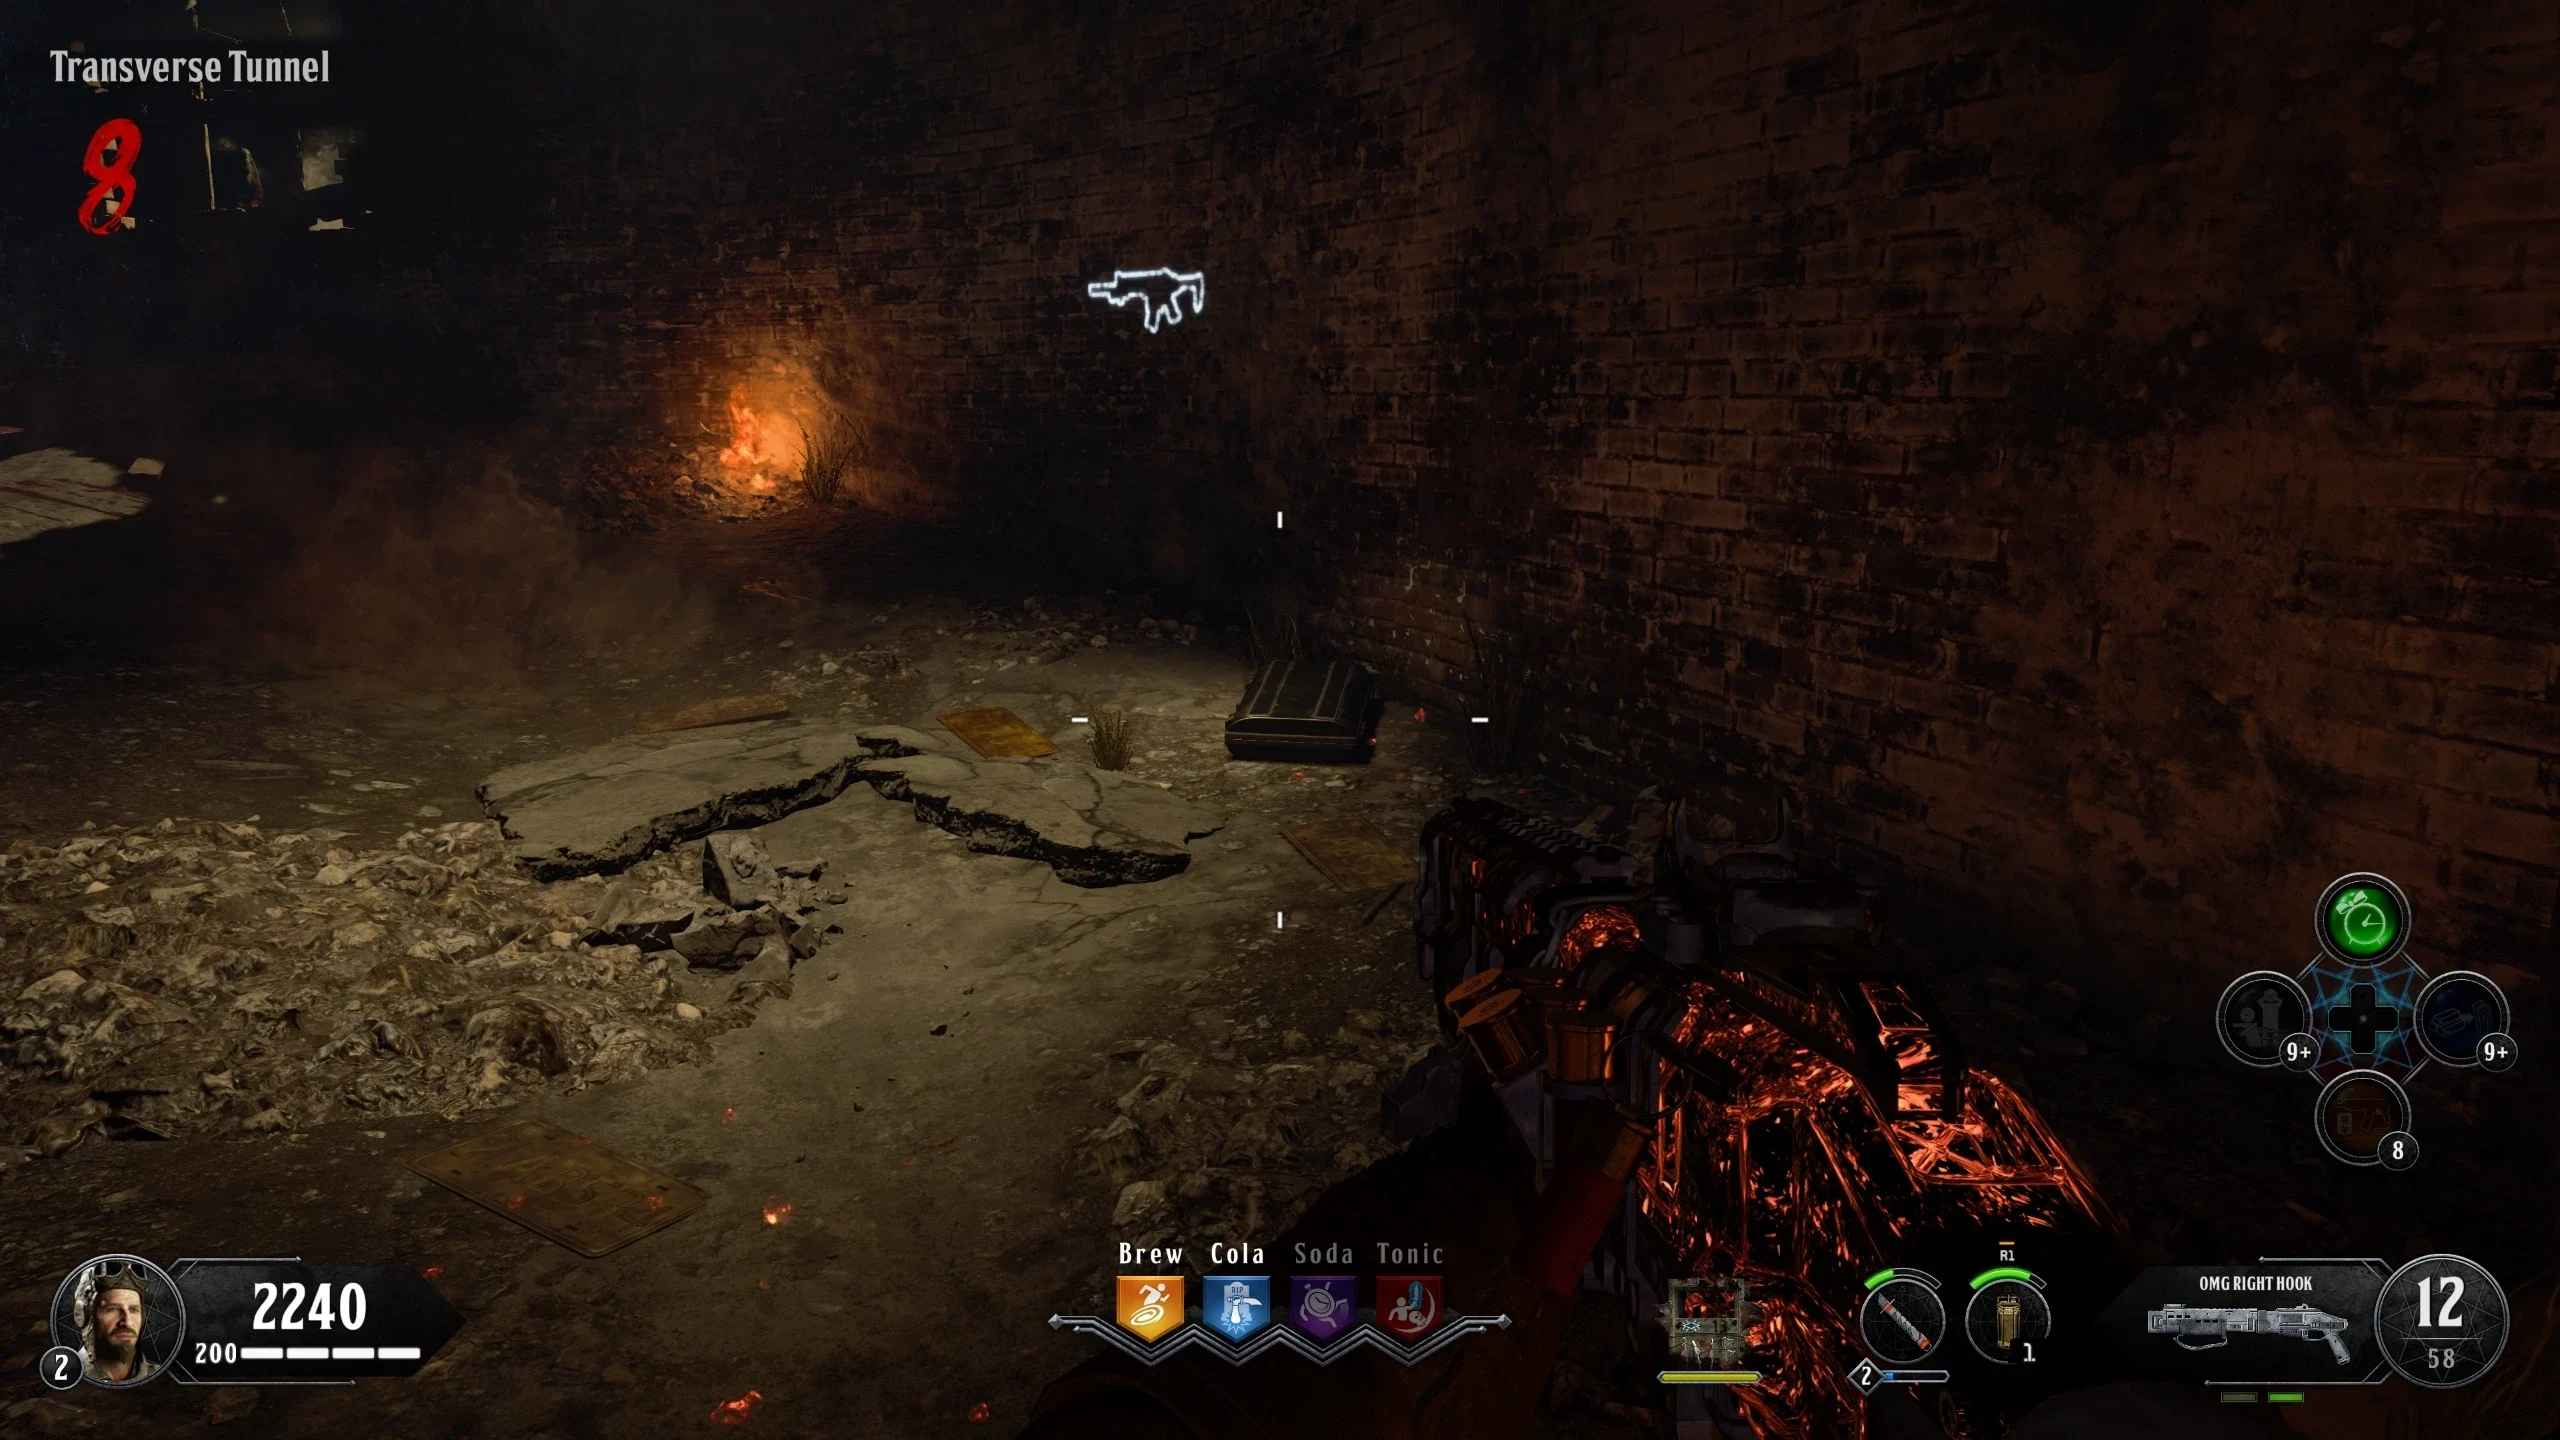
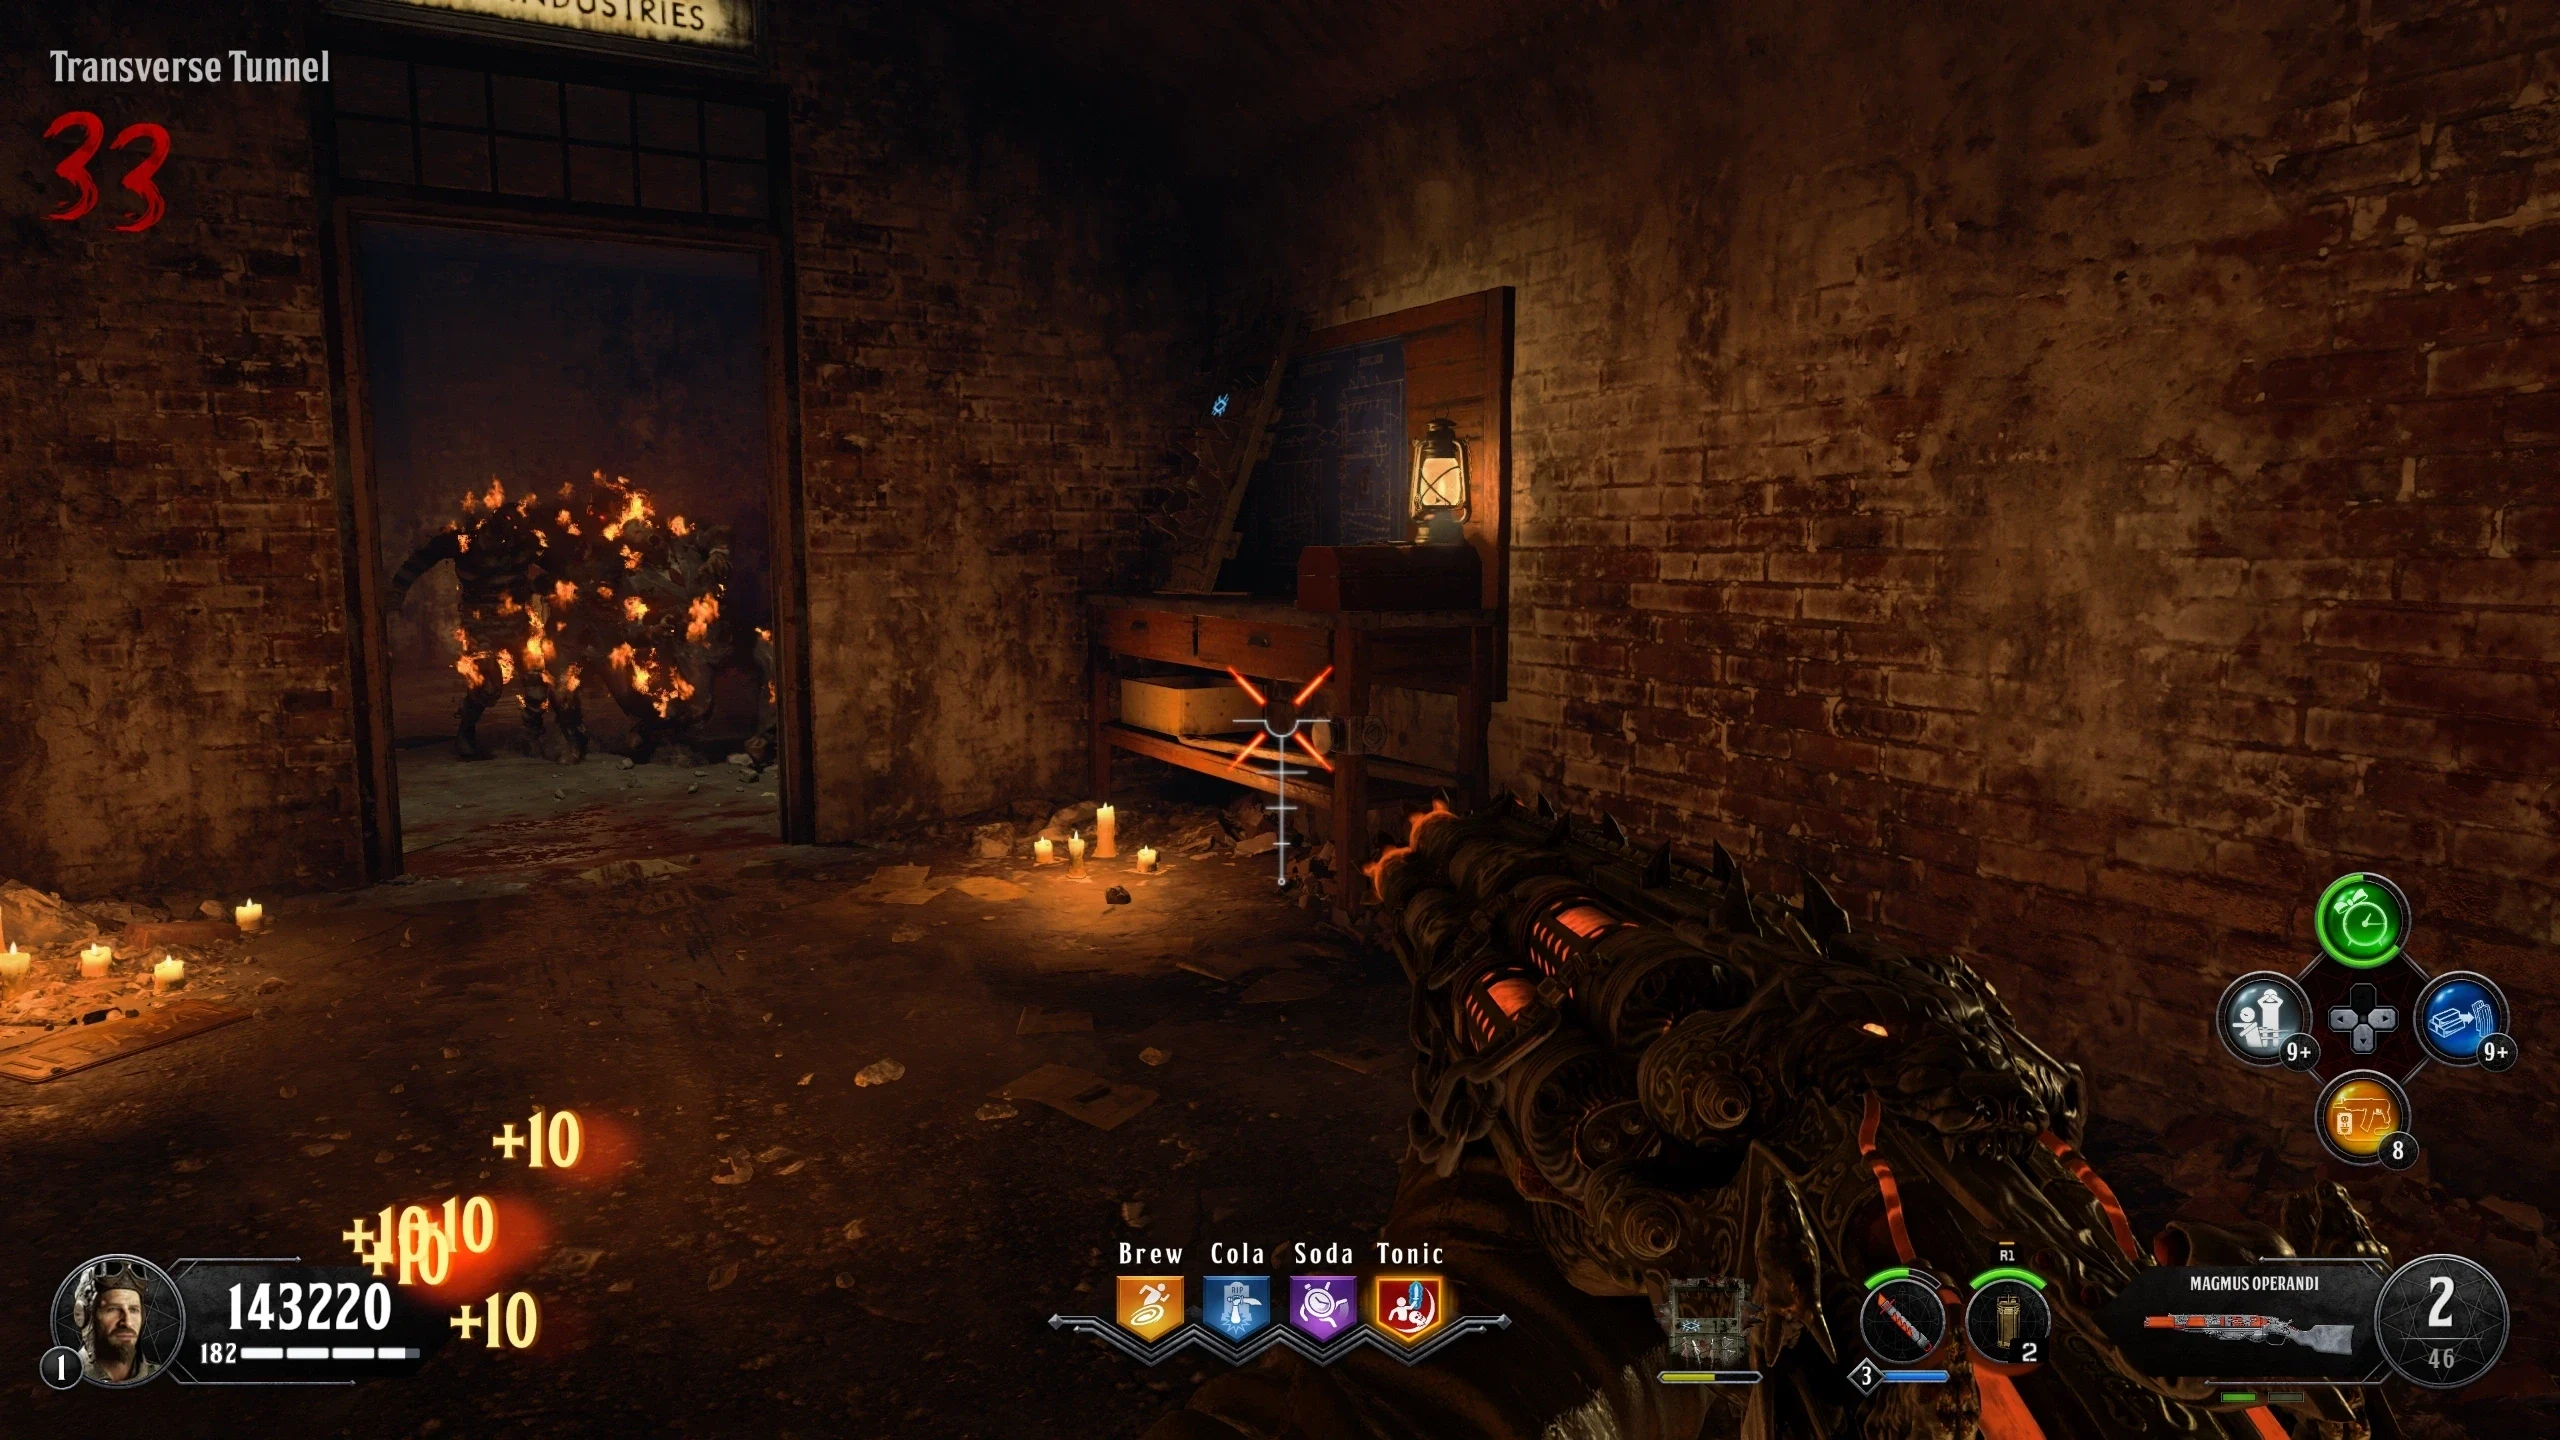
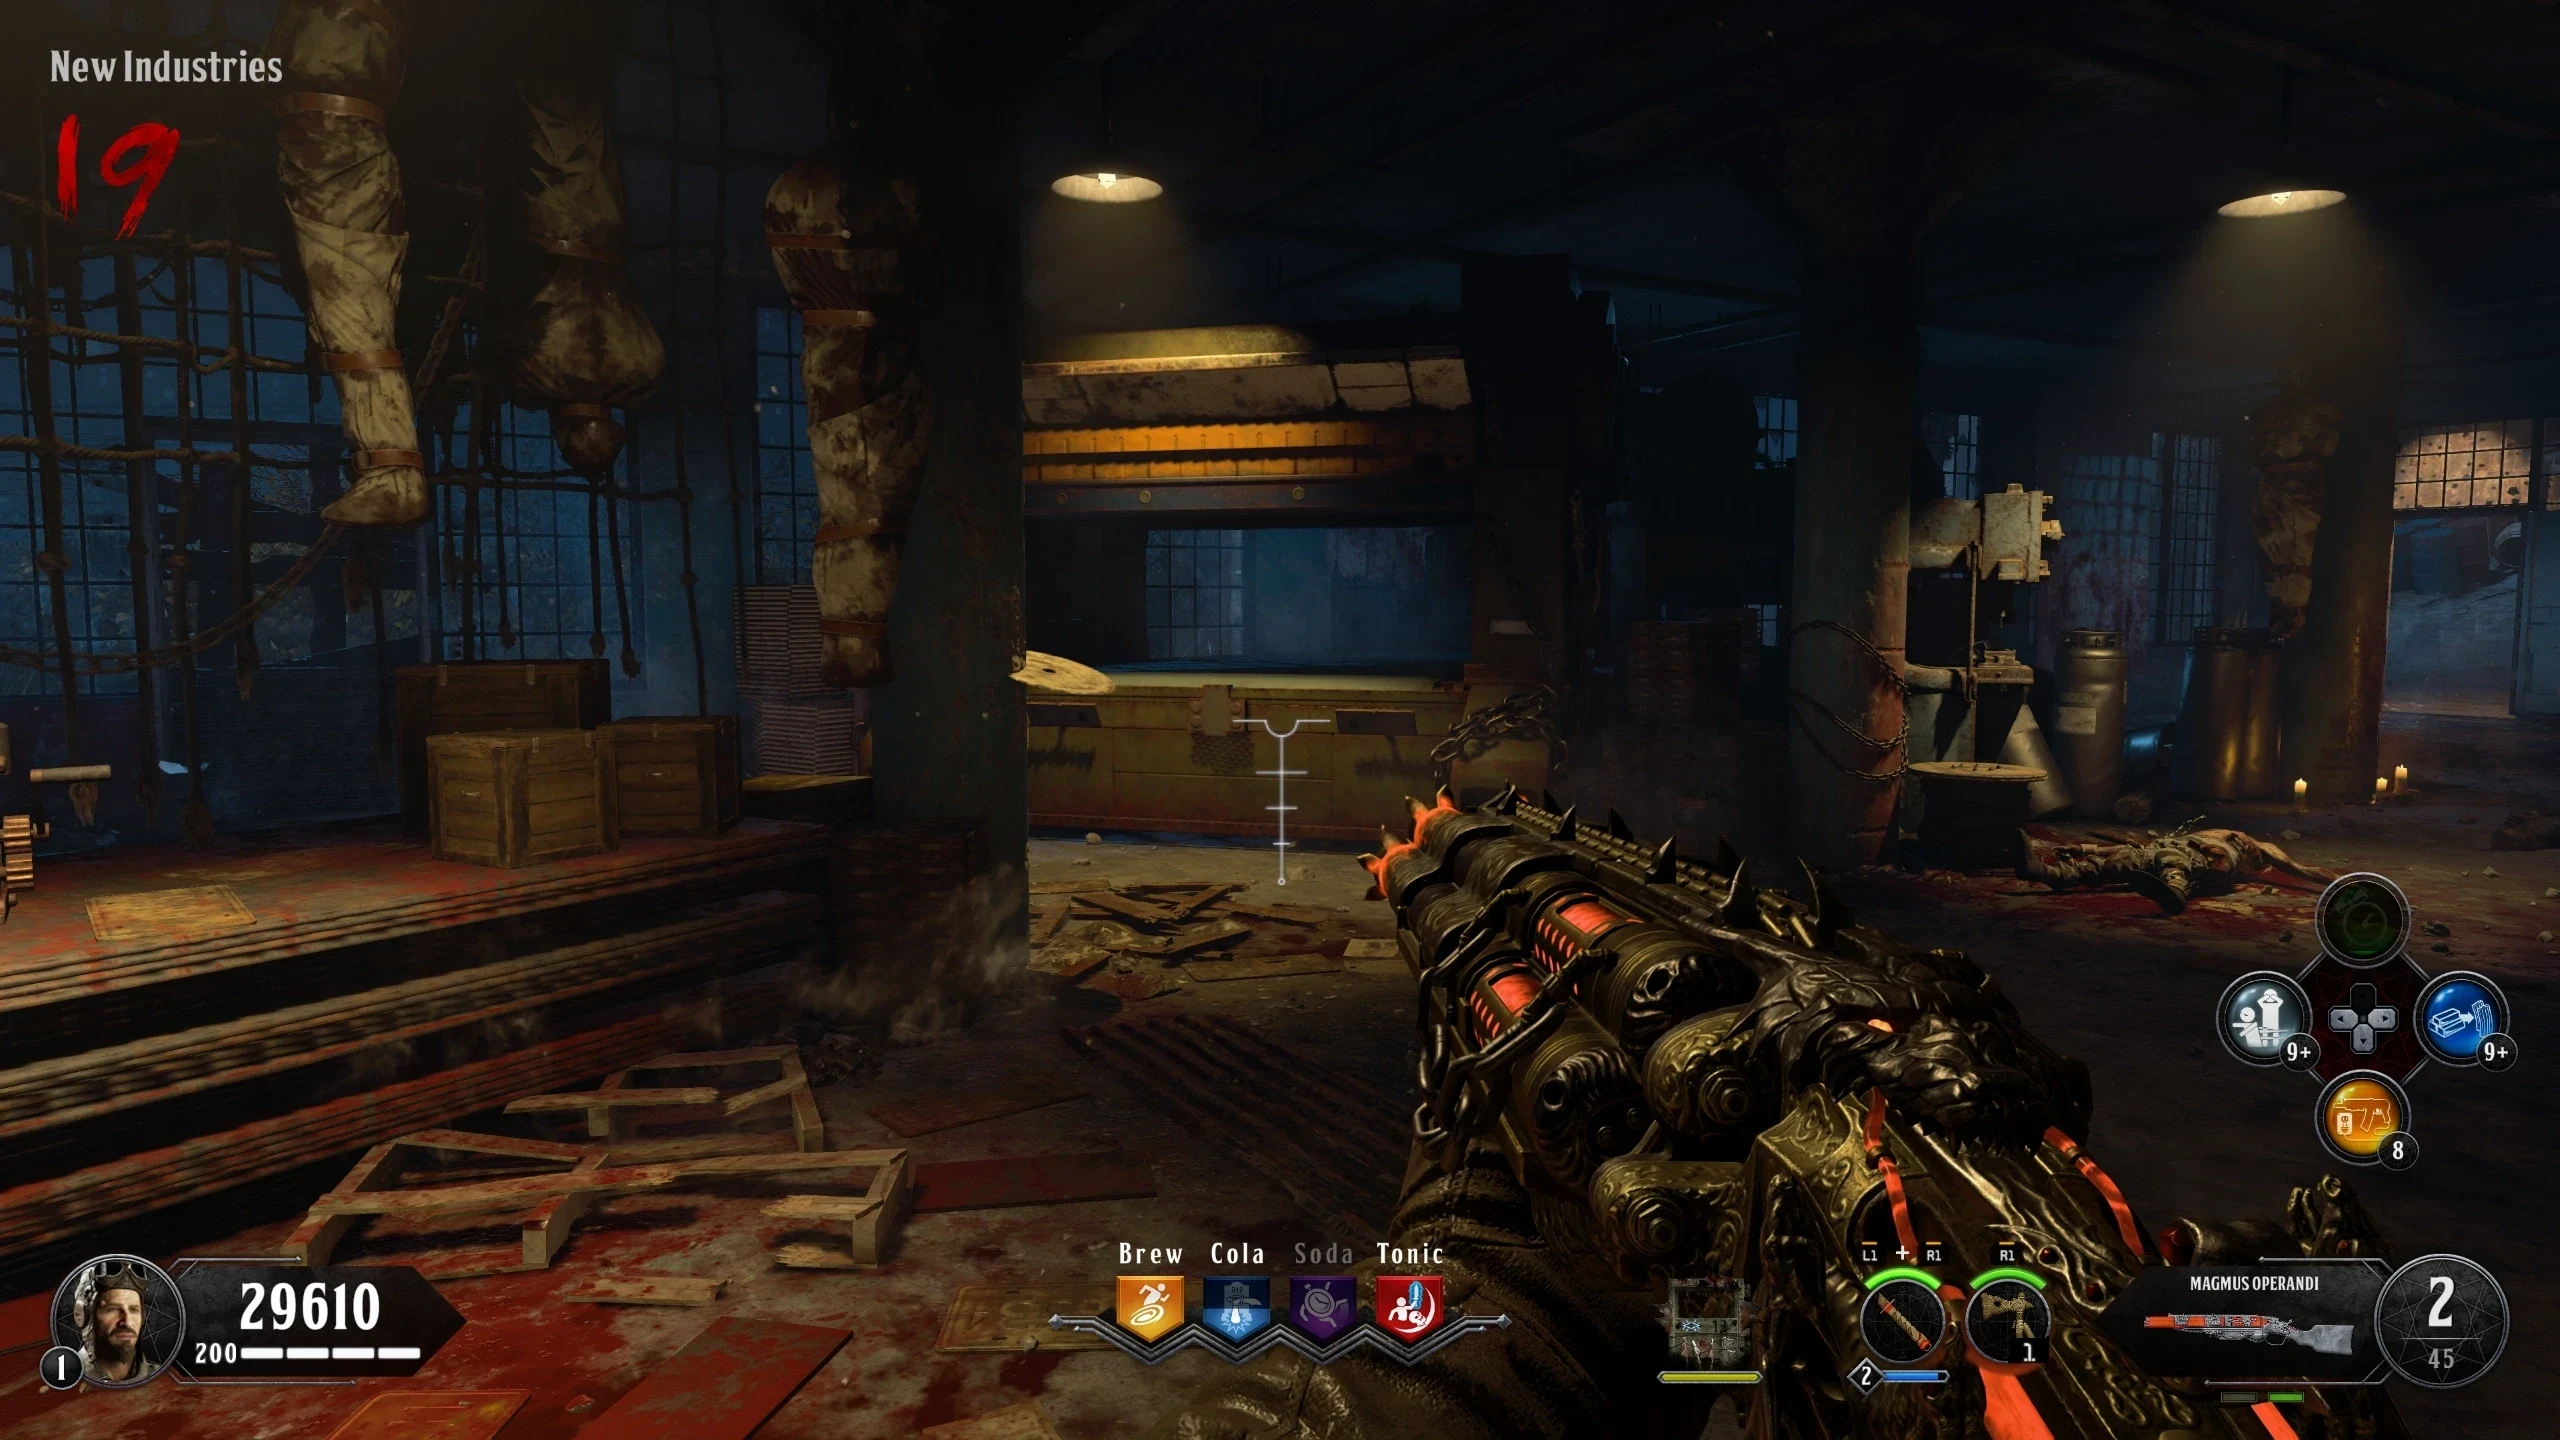
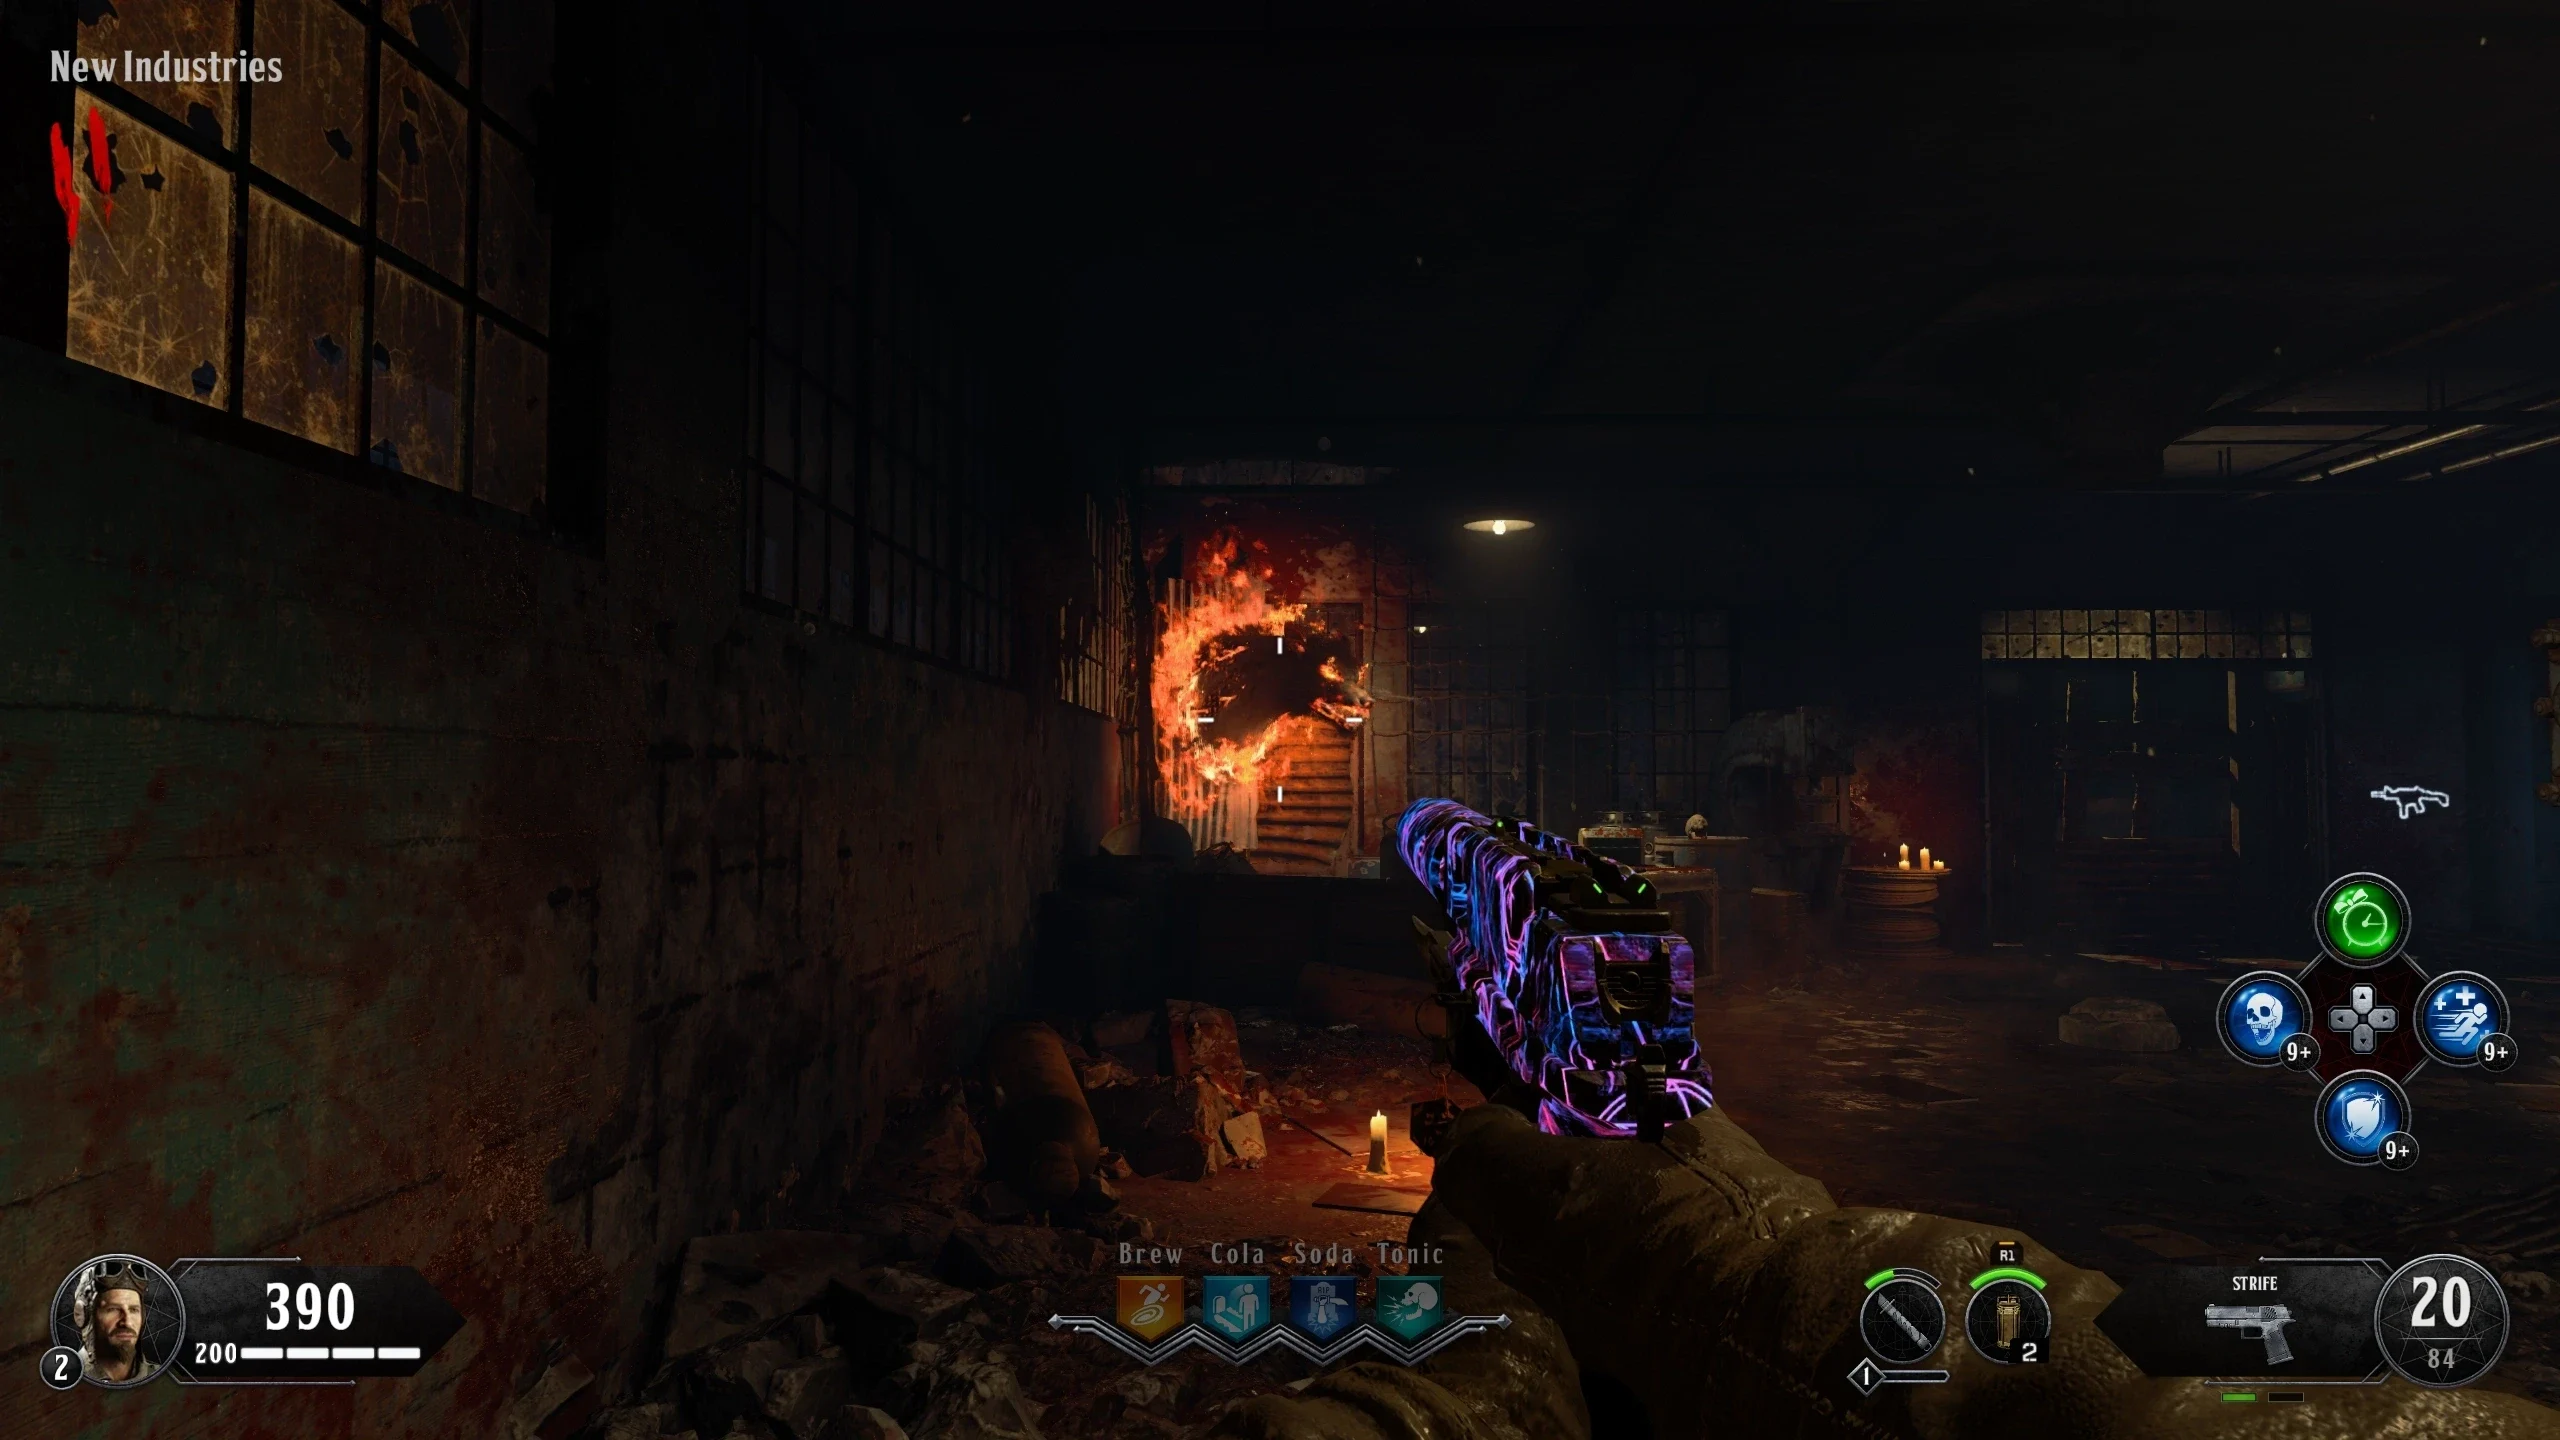
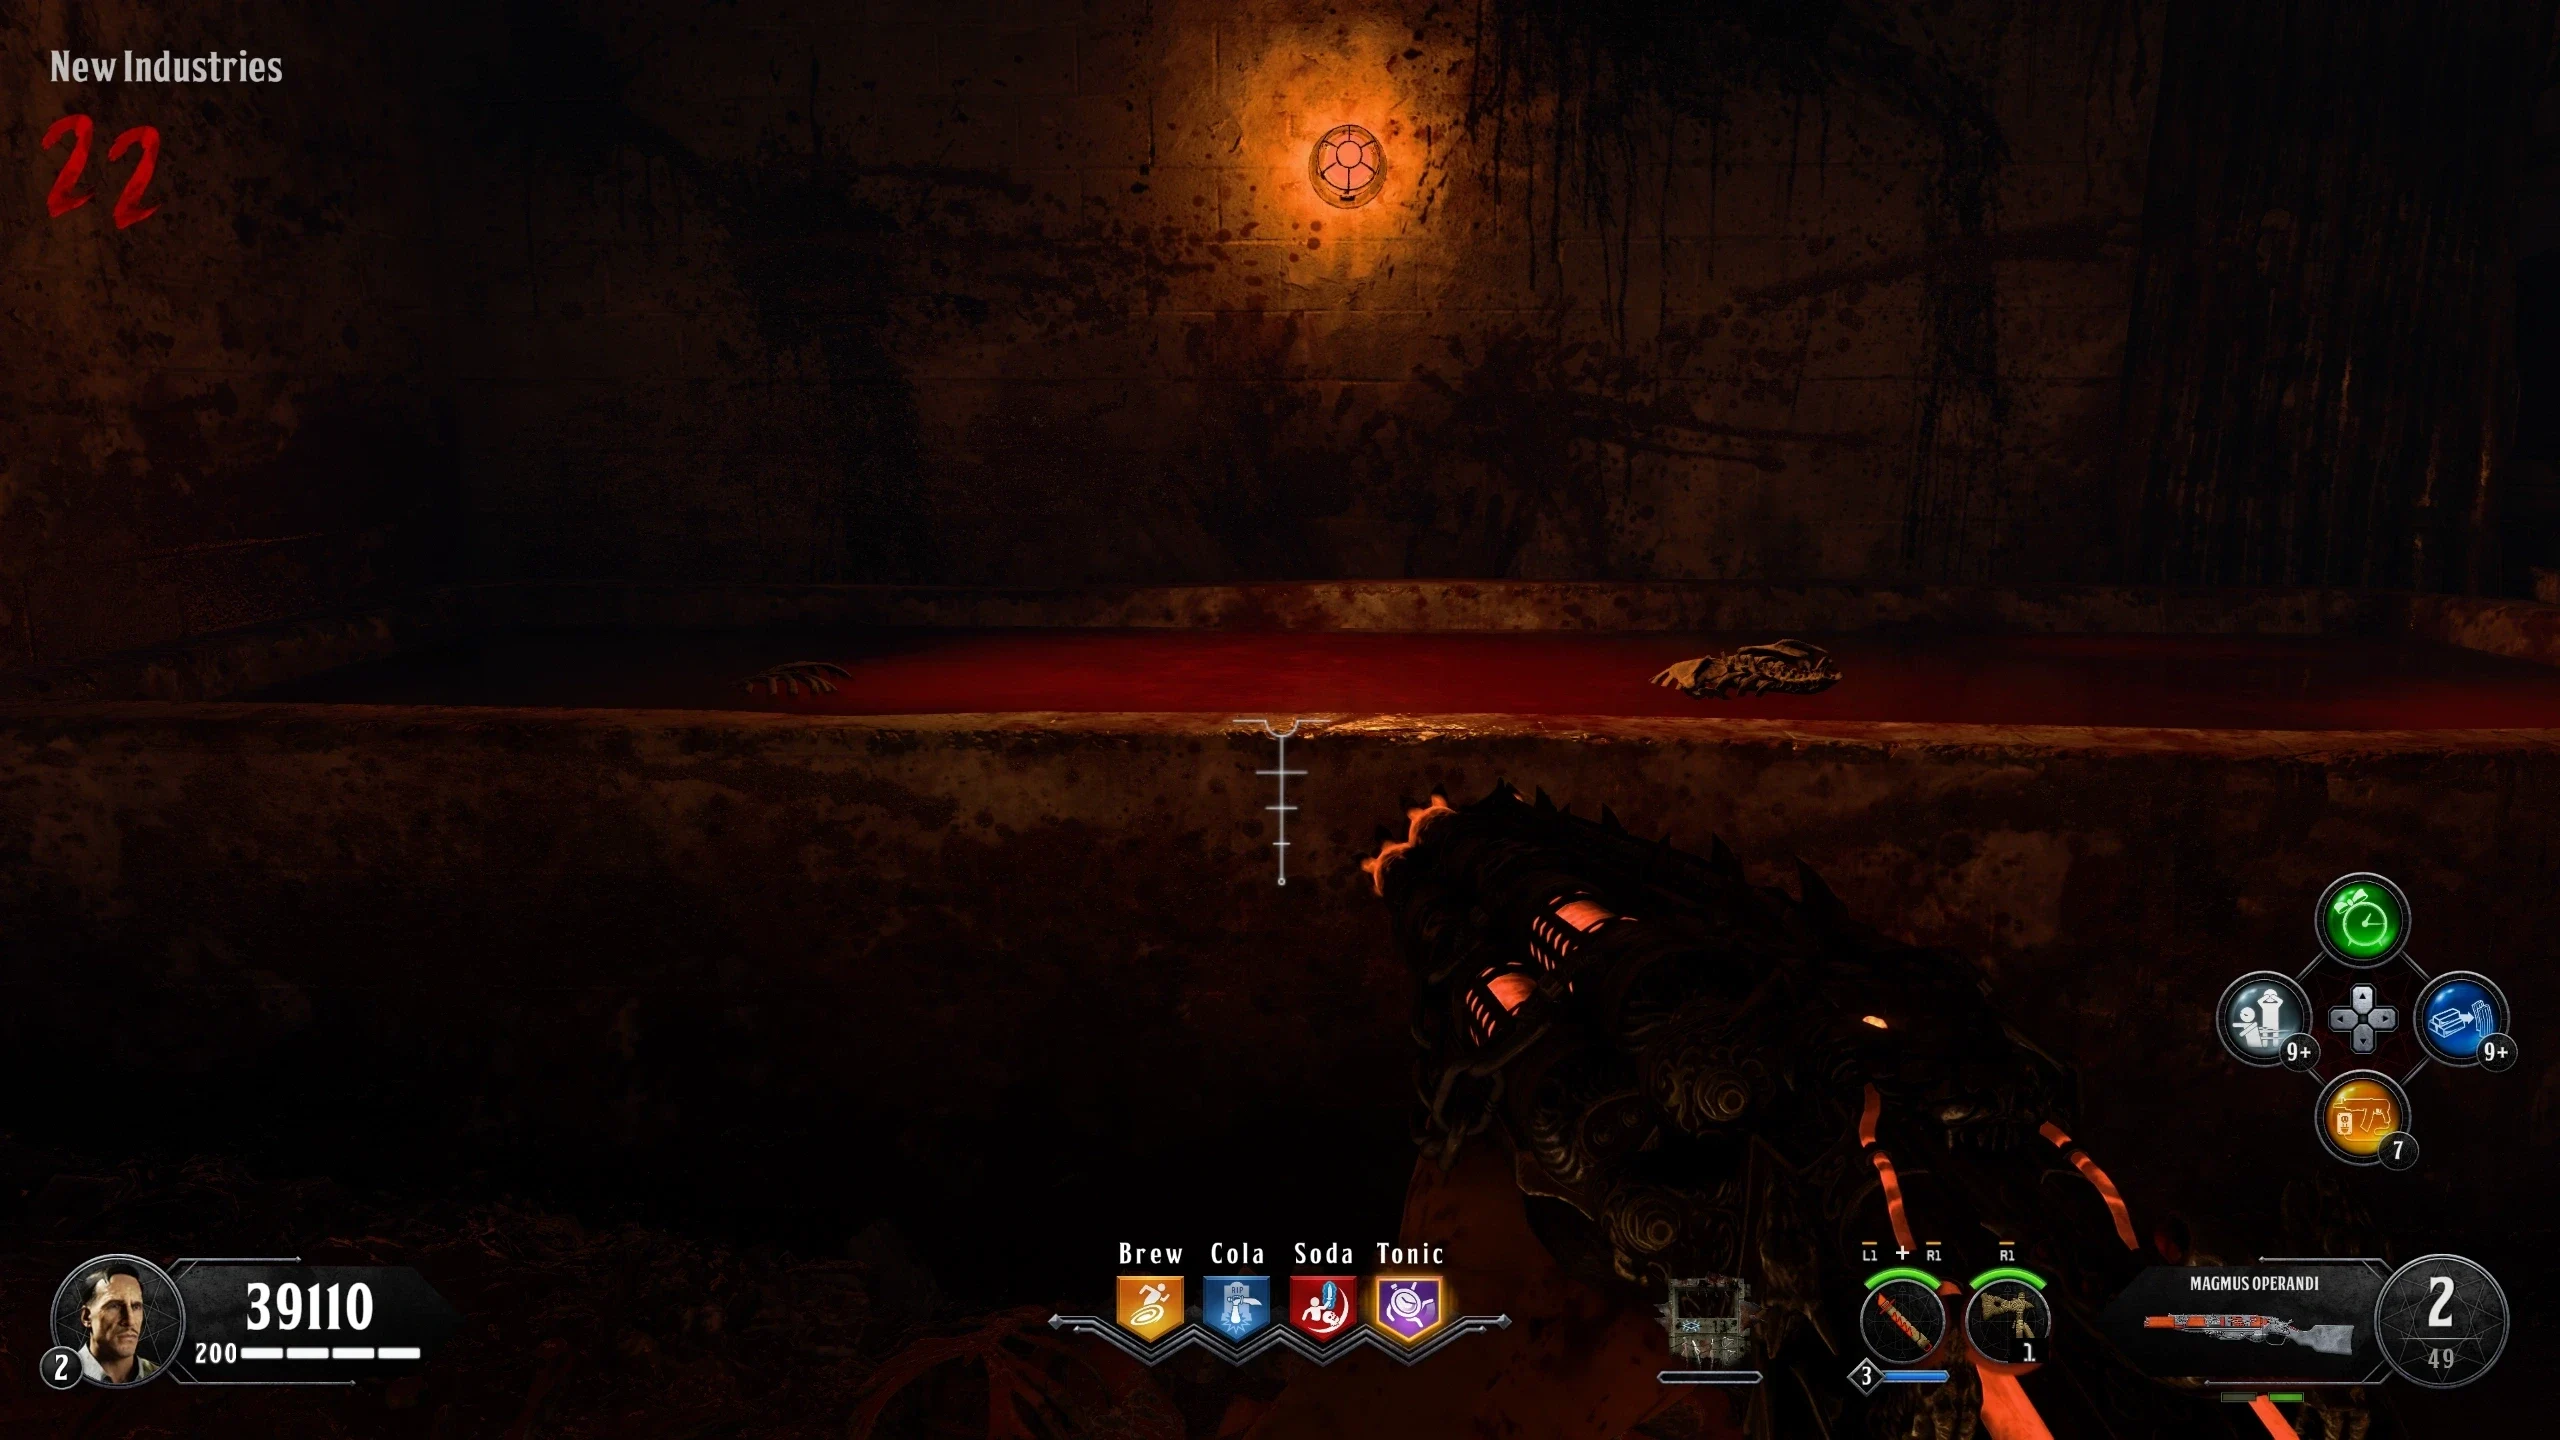
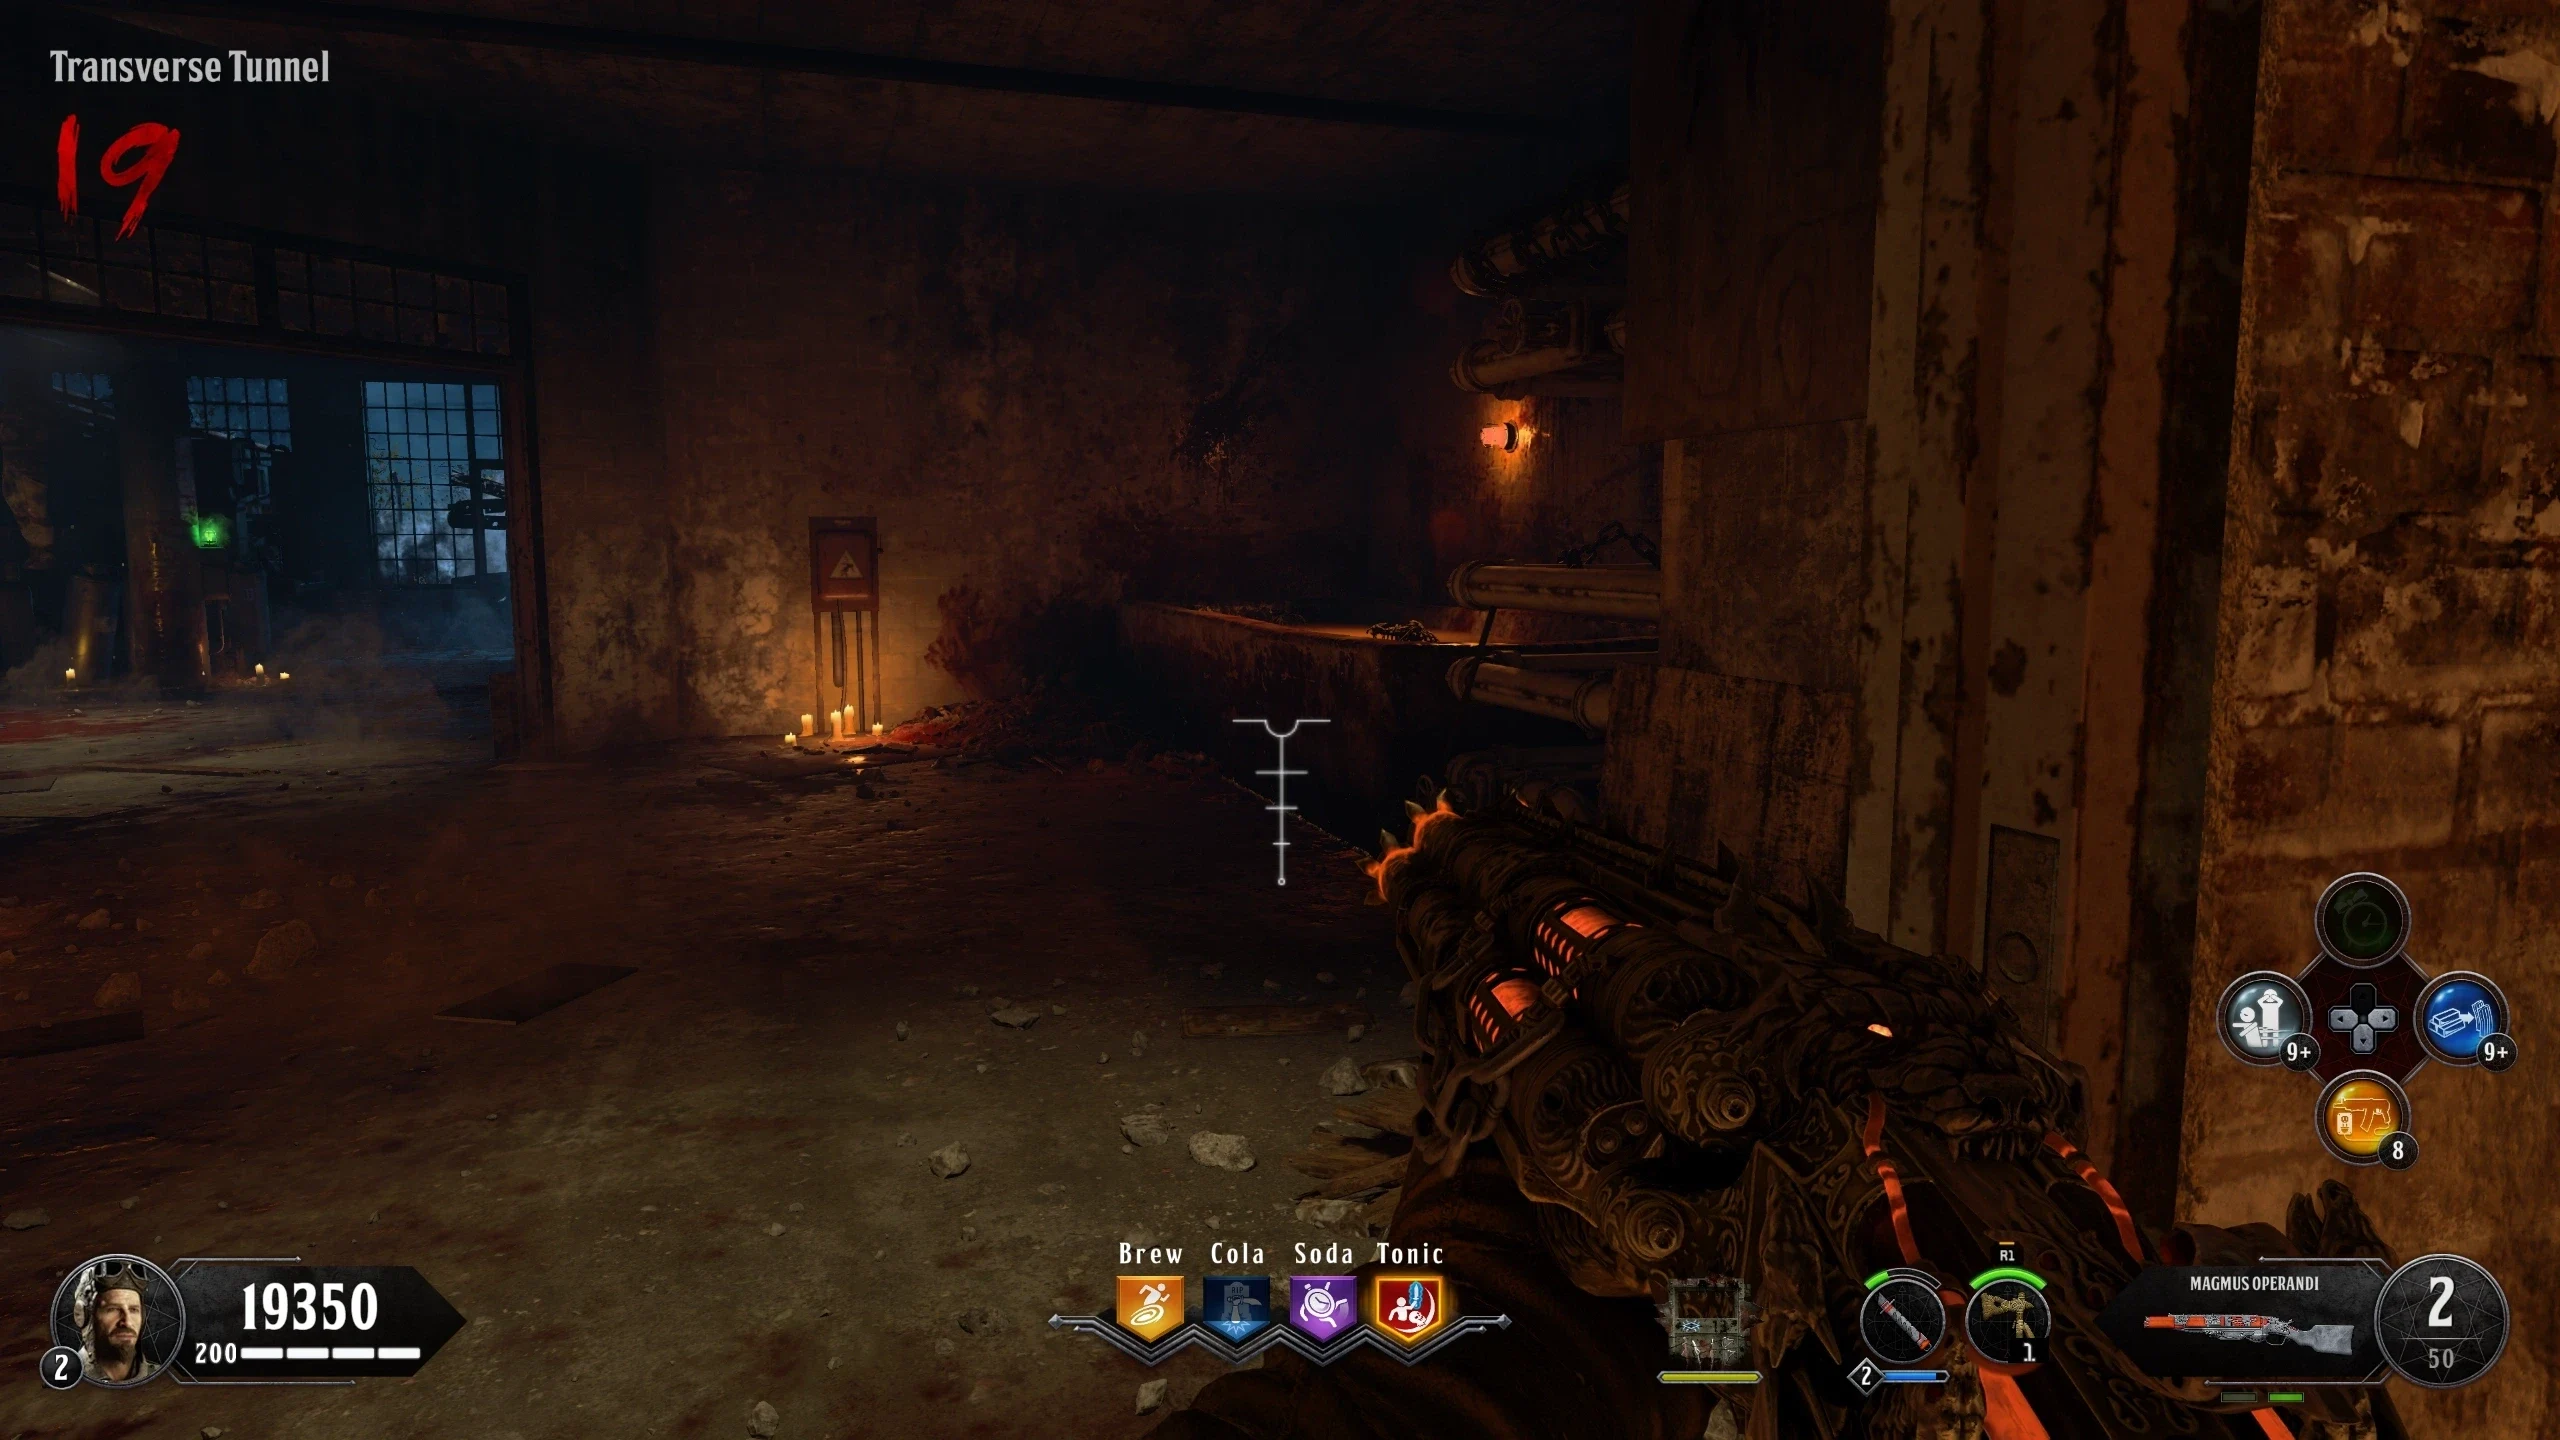
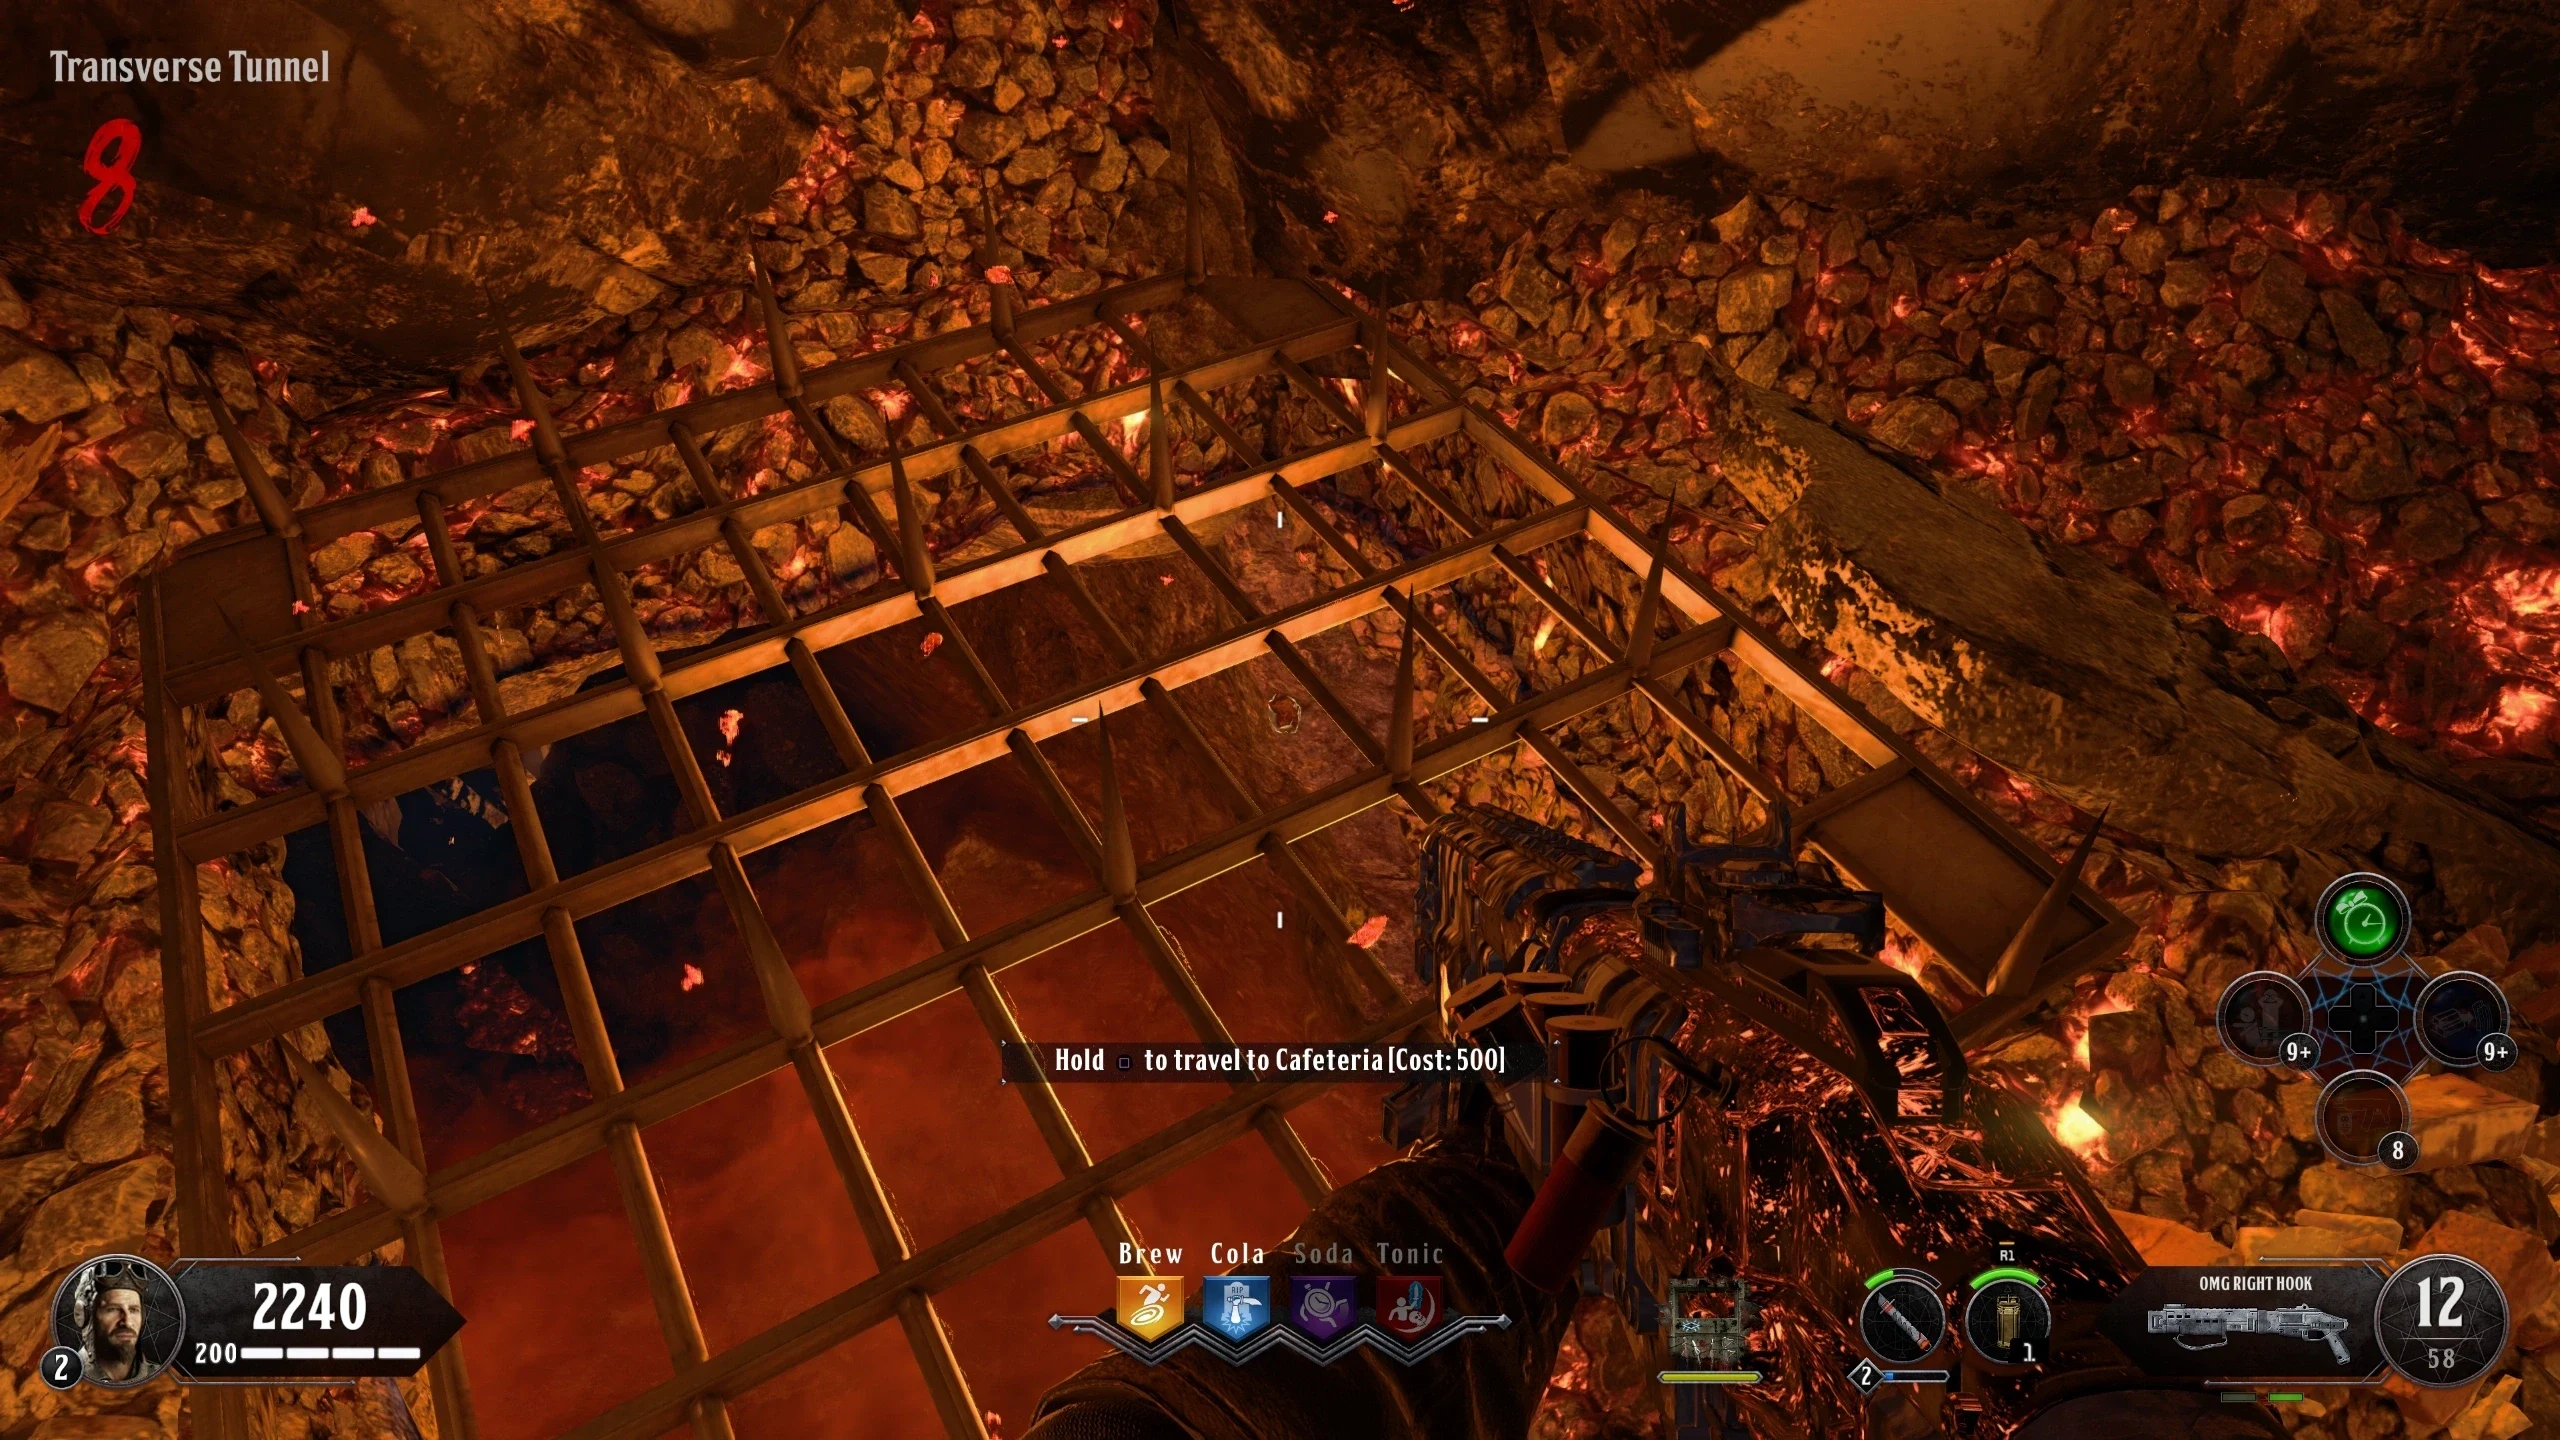
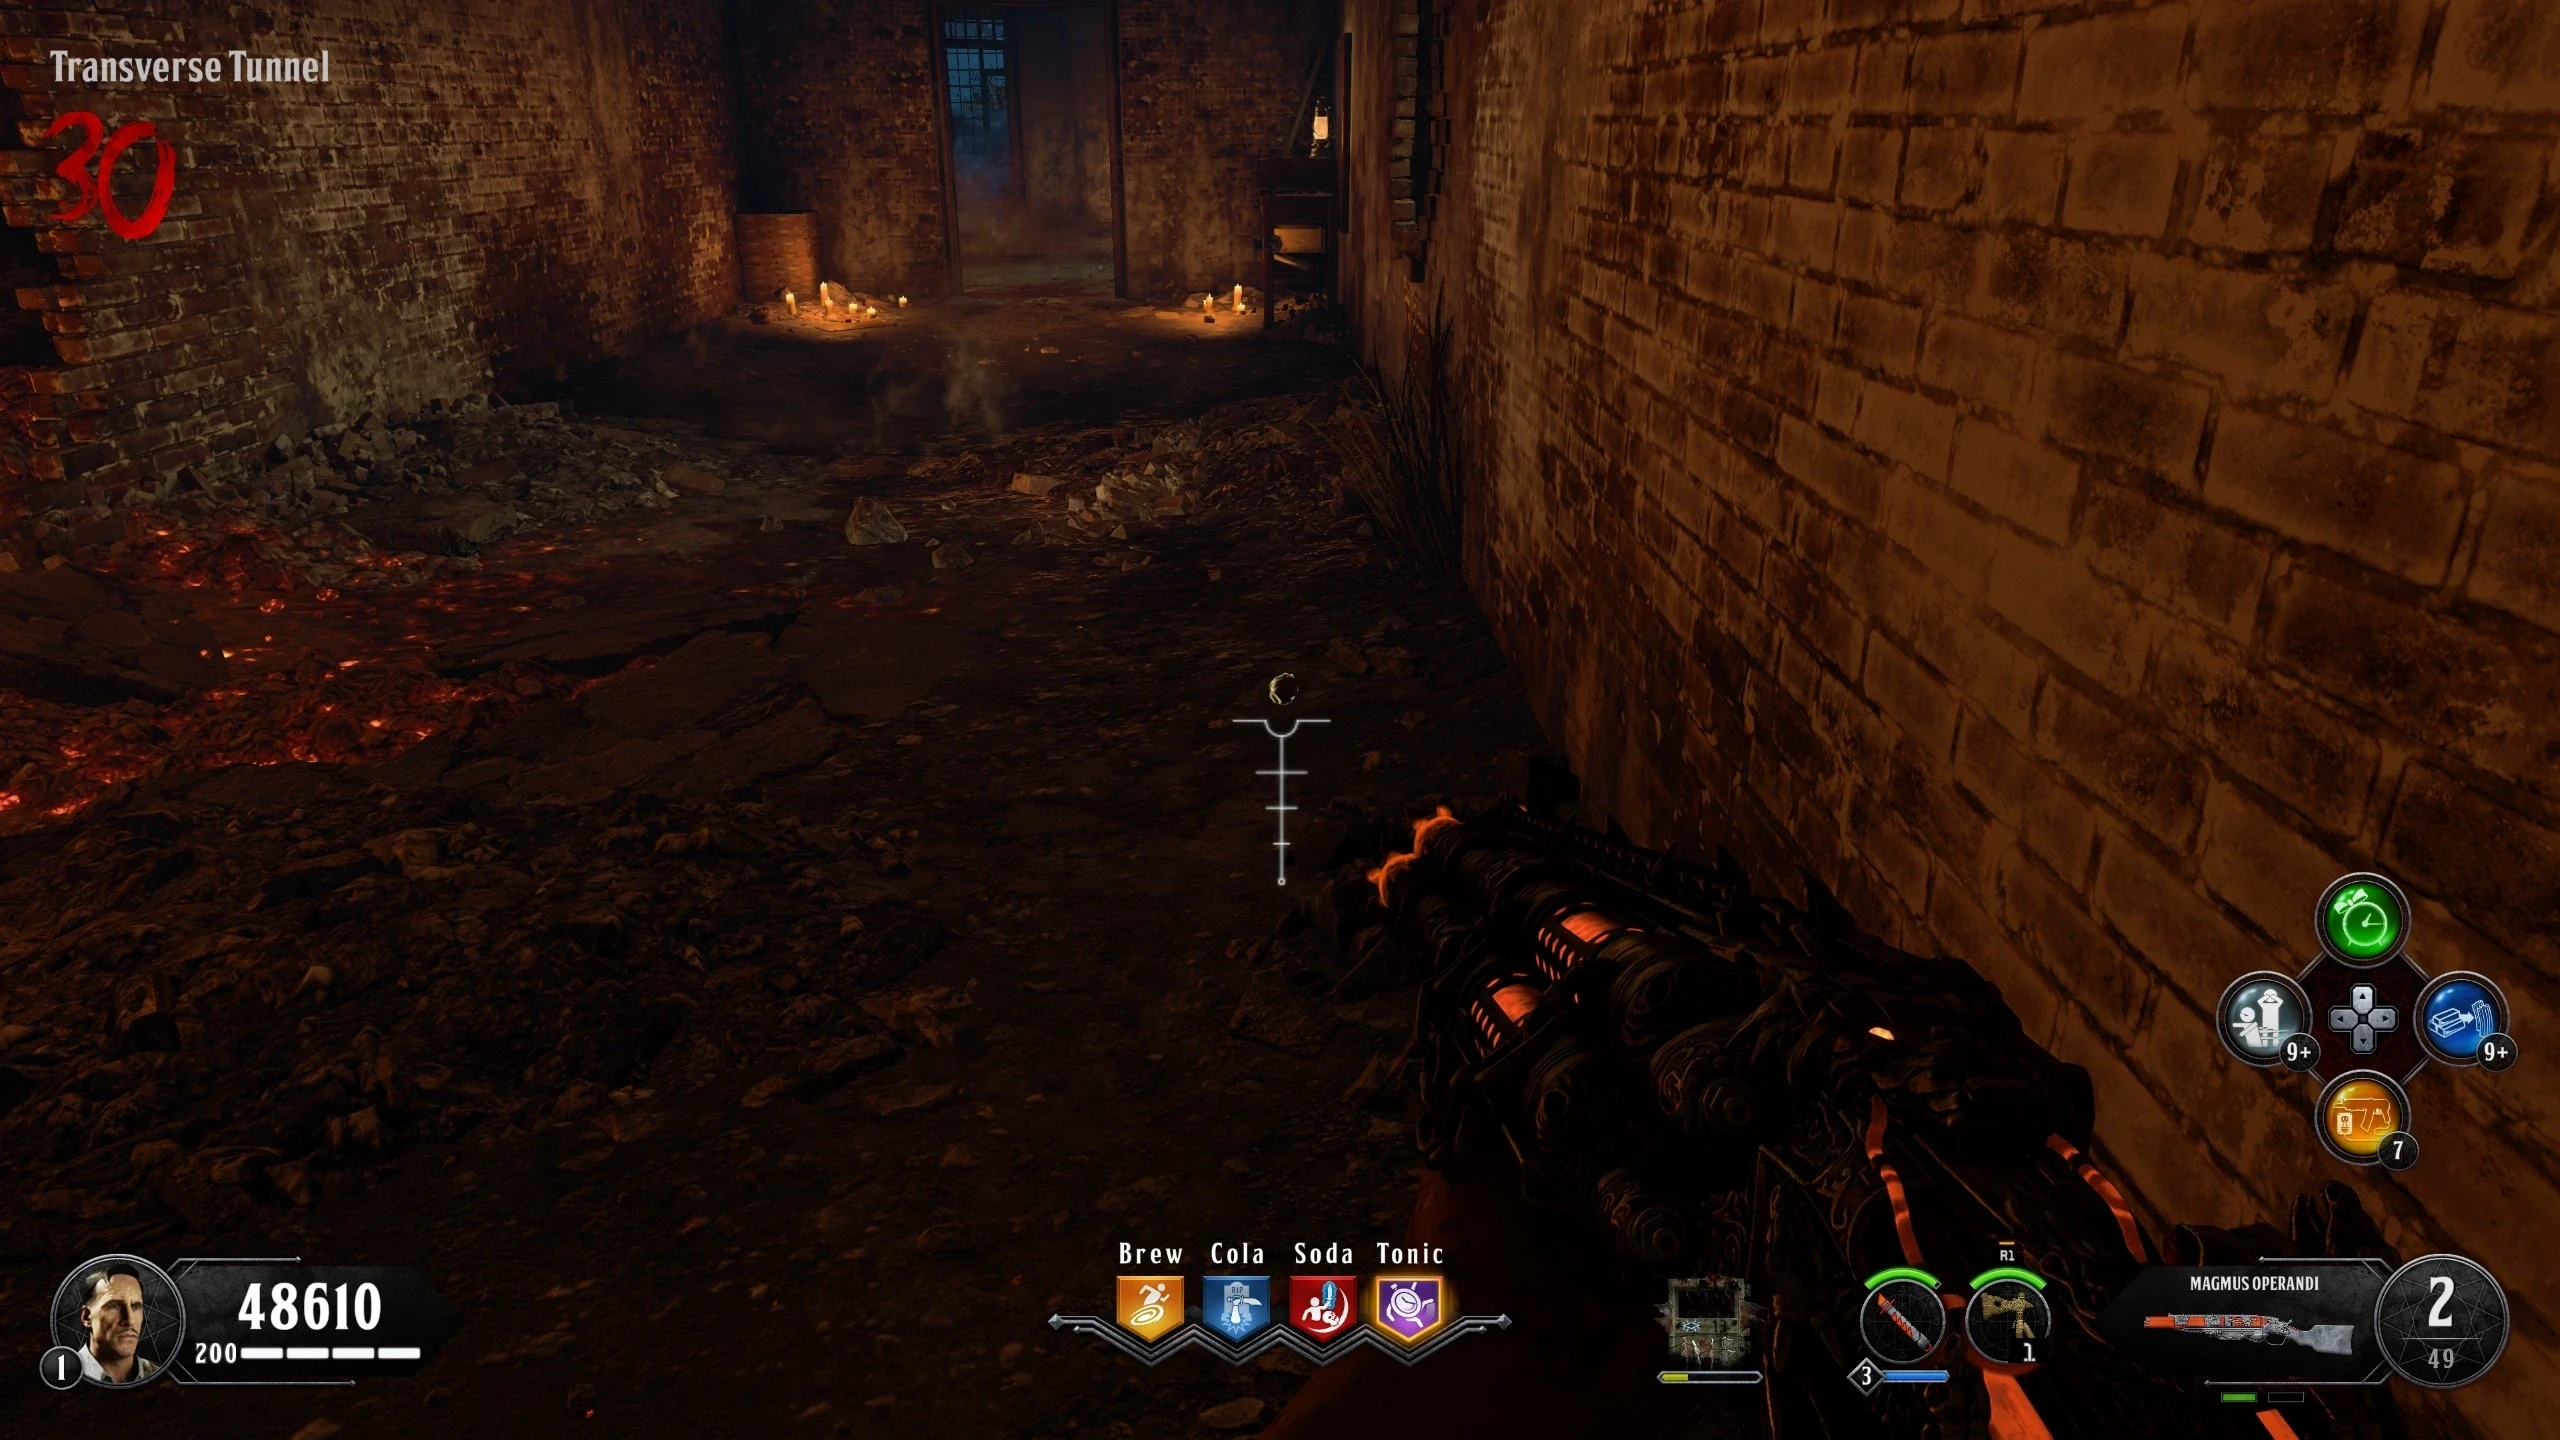
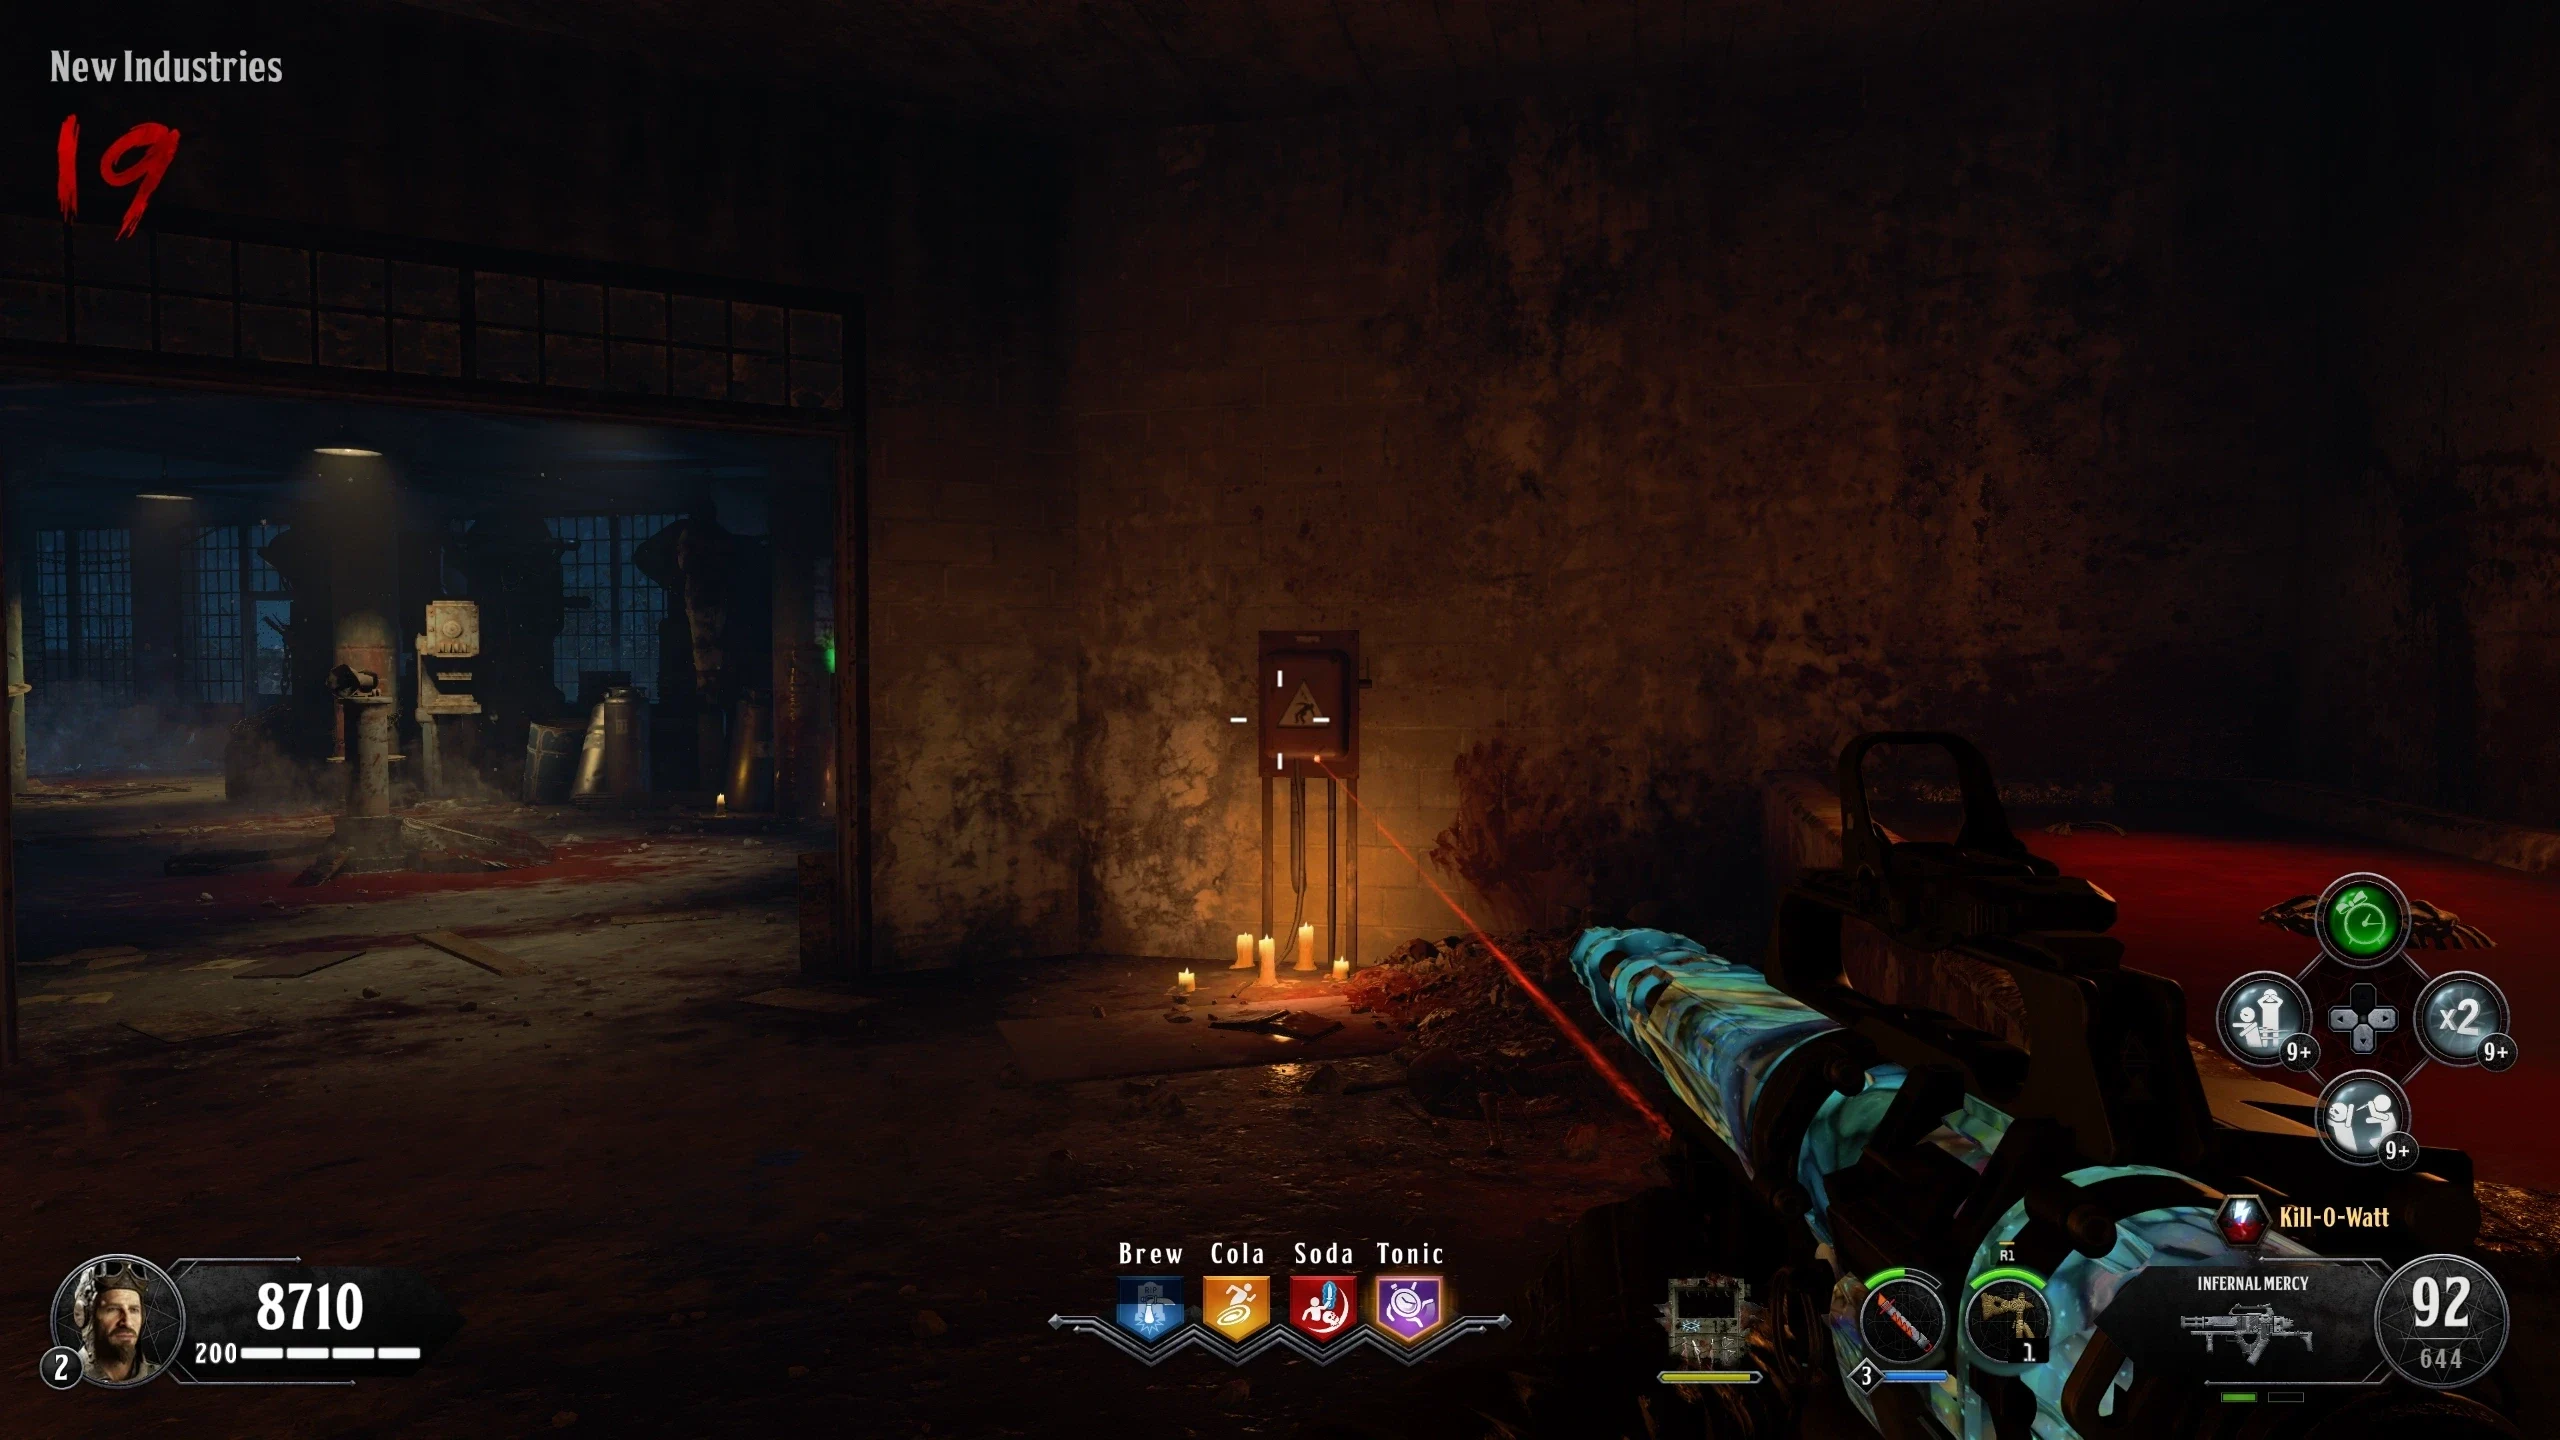
- New Industries - In the room between the Spin Trap and the 'Transverse Tunnel,' on a pipe
- Once the bird has been spirit blasted three times, on the following round, in addition to a Seagull squawking, a man can also be heard crying. When looking through the shield, the Bird will have been replaced with a white light that flashes every couple of seconds. The light can only be in the locations in orange in the list above.
- Obtain the Hell's Retriever if you replaced it with Monkey Bombs for step 4.
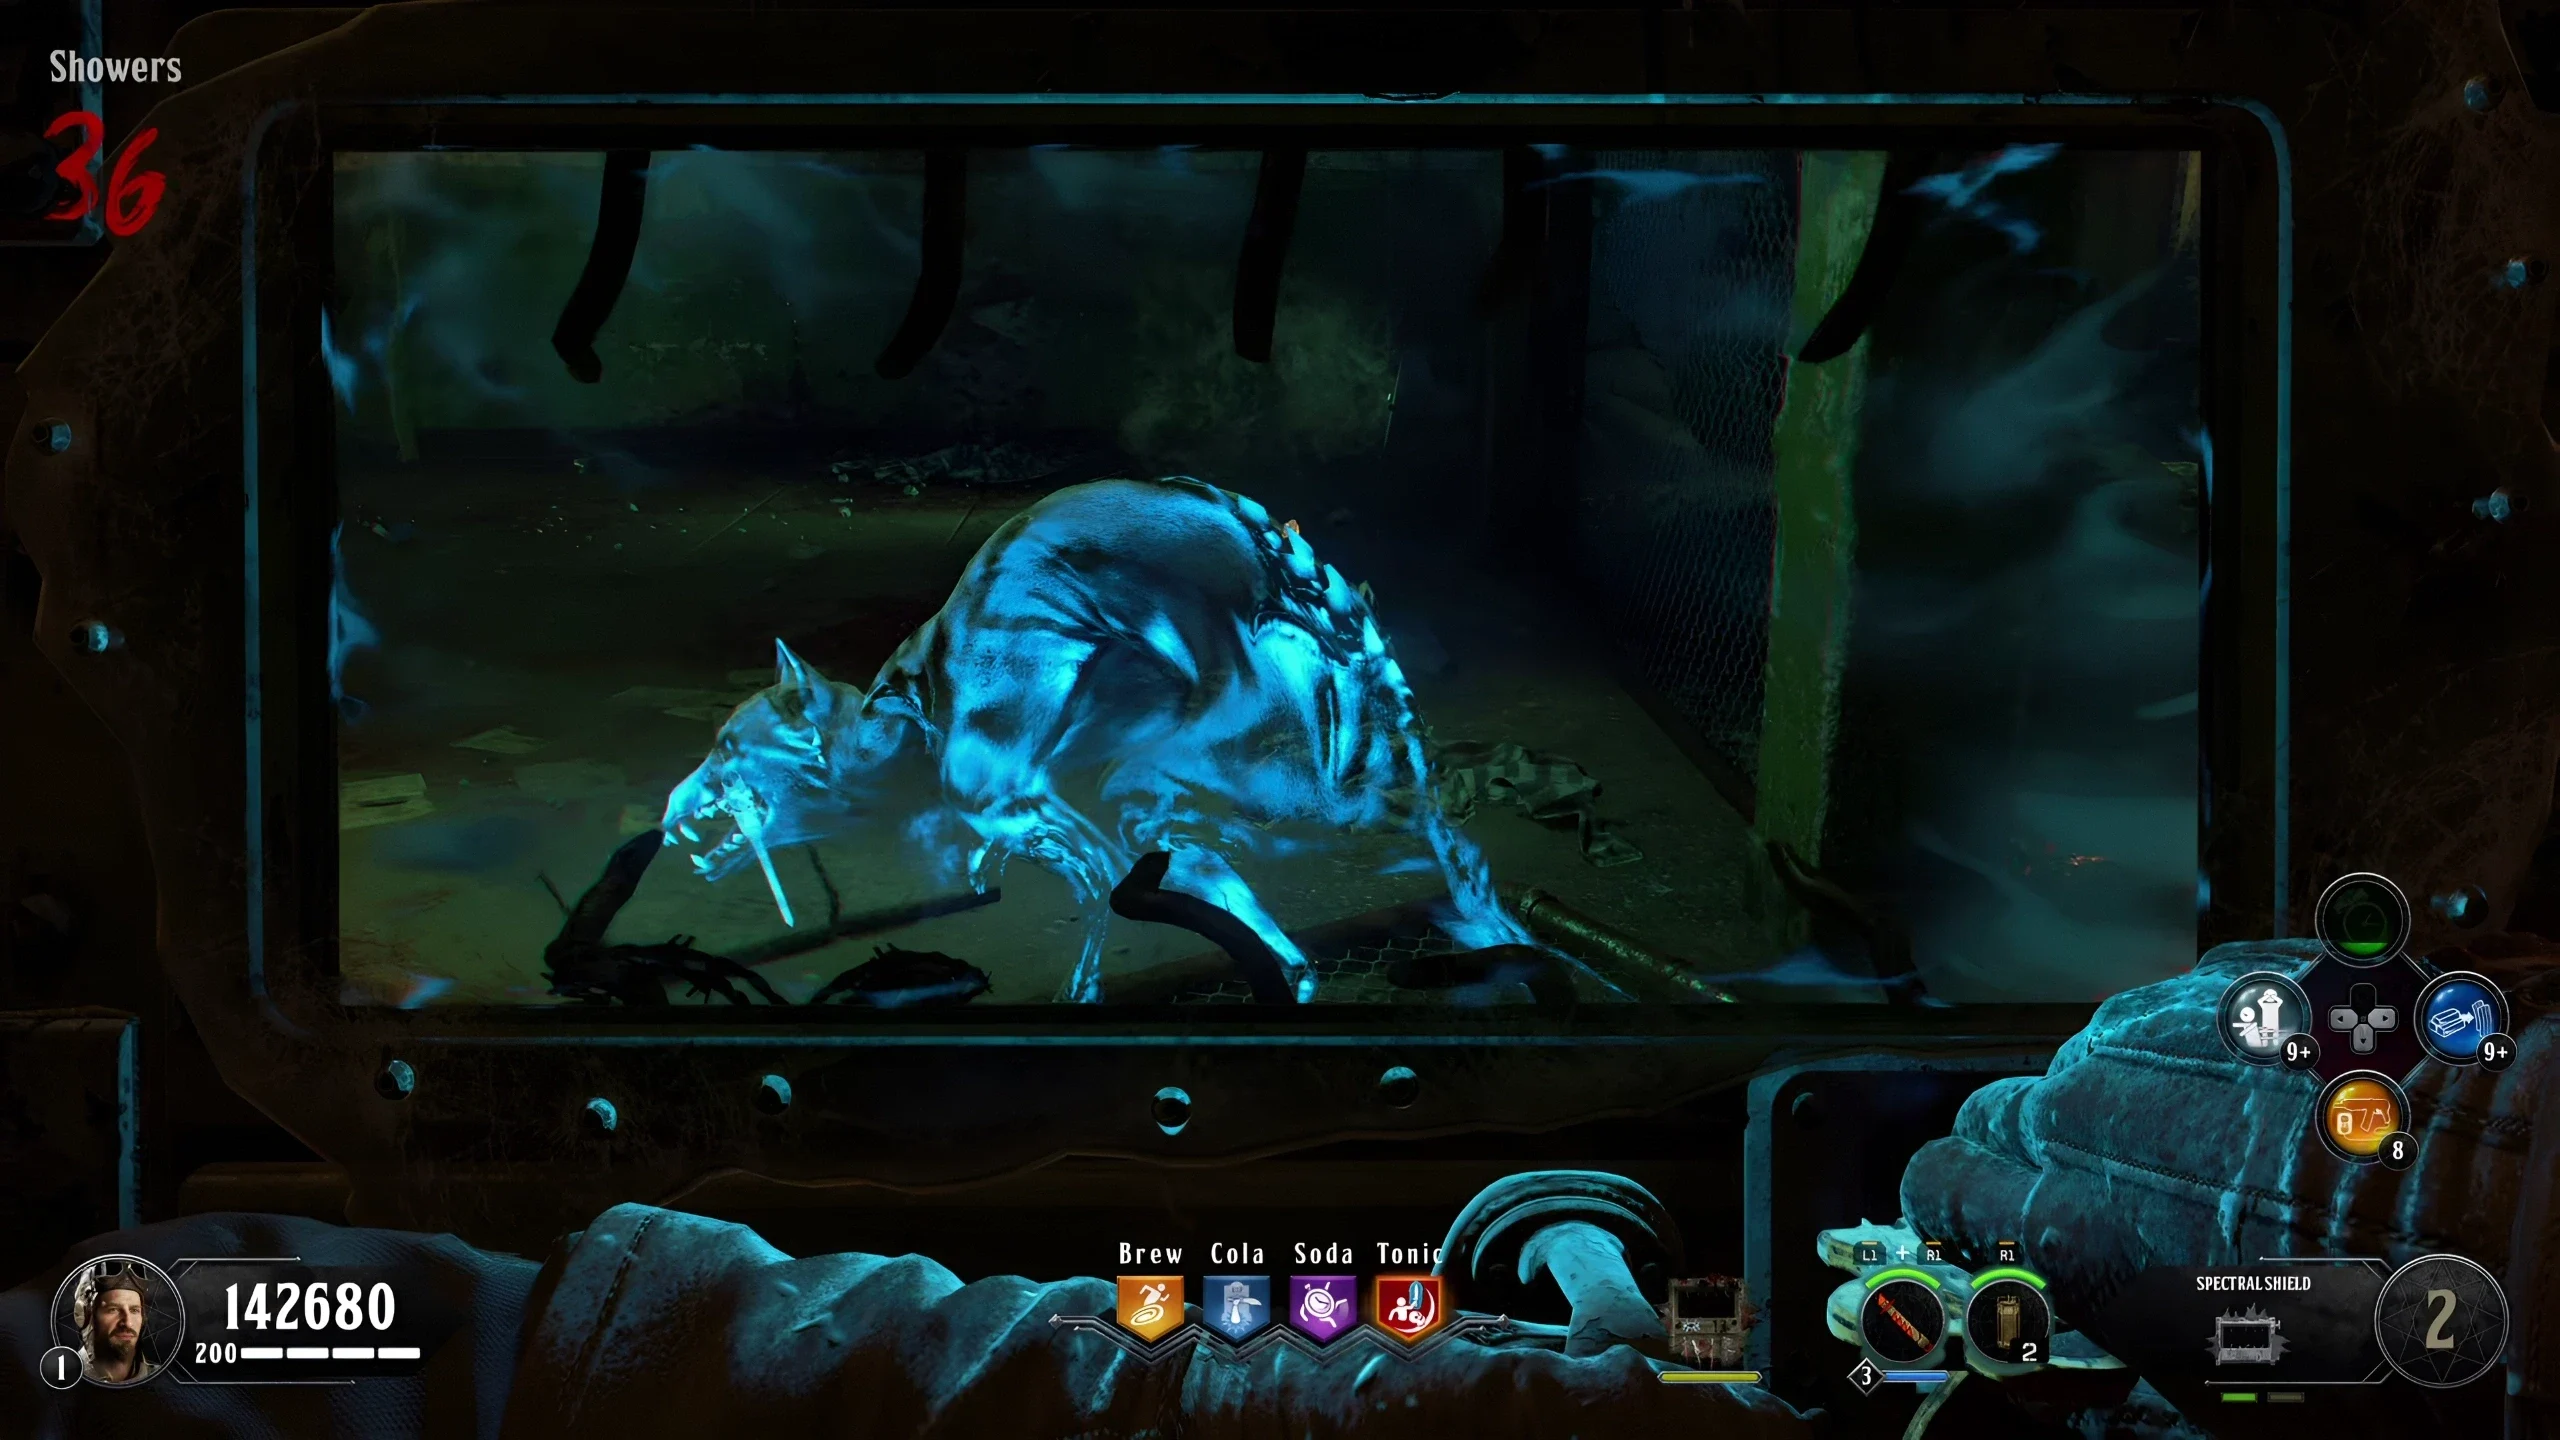
- The Bird can now only be seen while in 'Zombie Blood.' To obtain 'Zombie Blood,' spirit blast the Number Pad in 'Citadel Tunnels' and enter "872". A 'Zombie Blood' Power-up will spawn (The Temporal Gift Elixir will increase the duration of the Zombie Blood Effect).
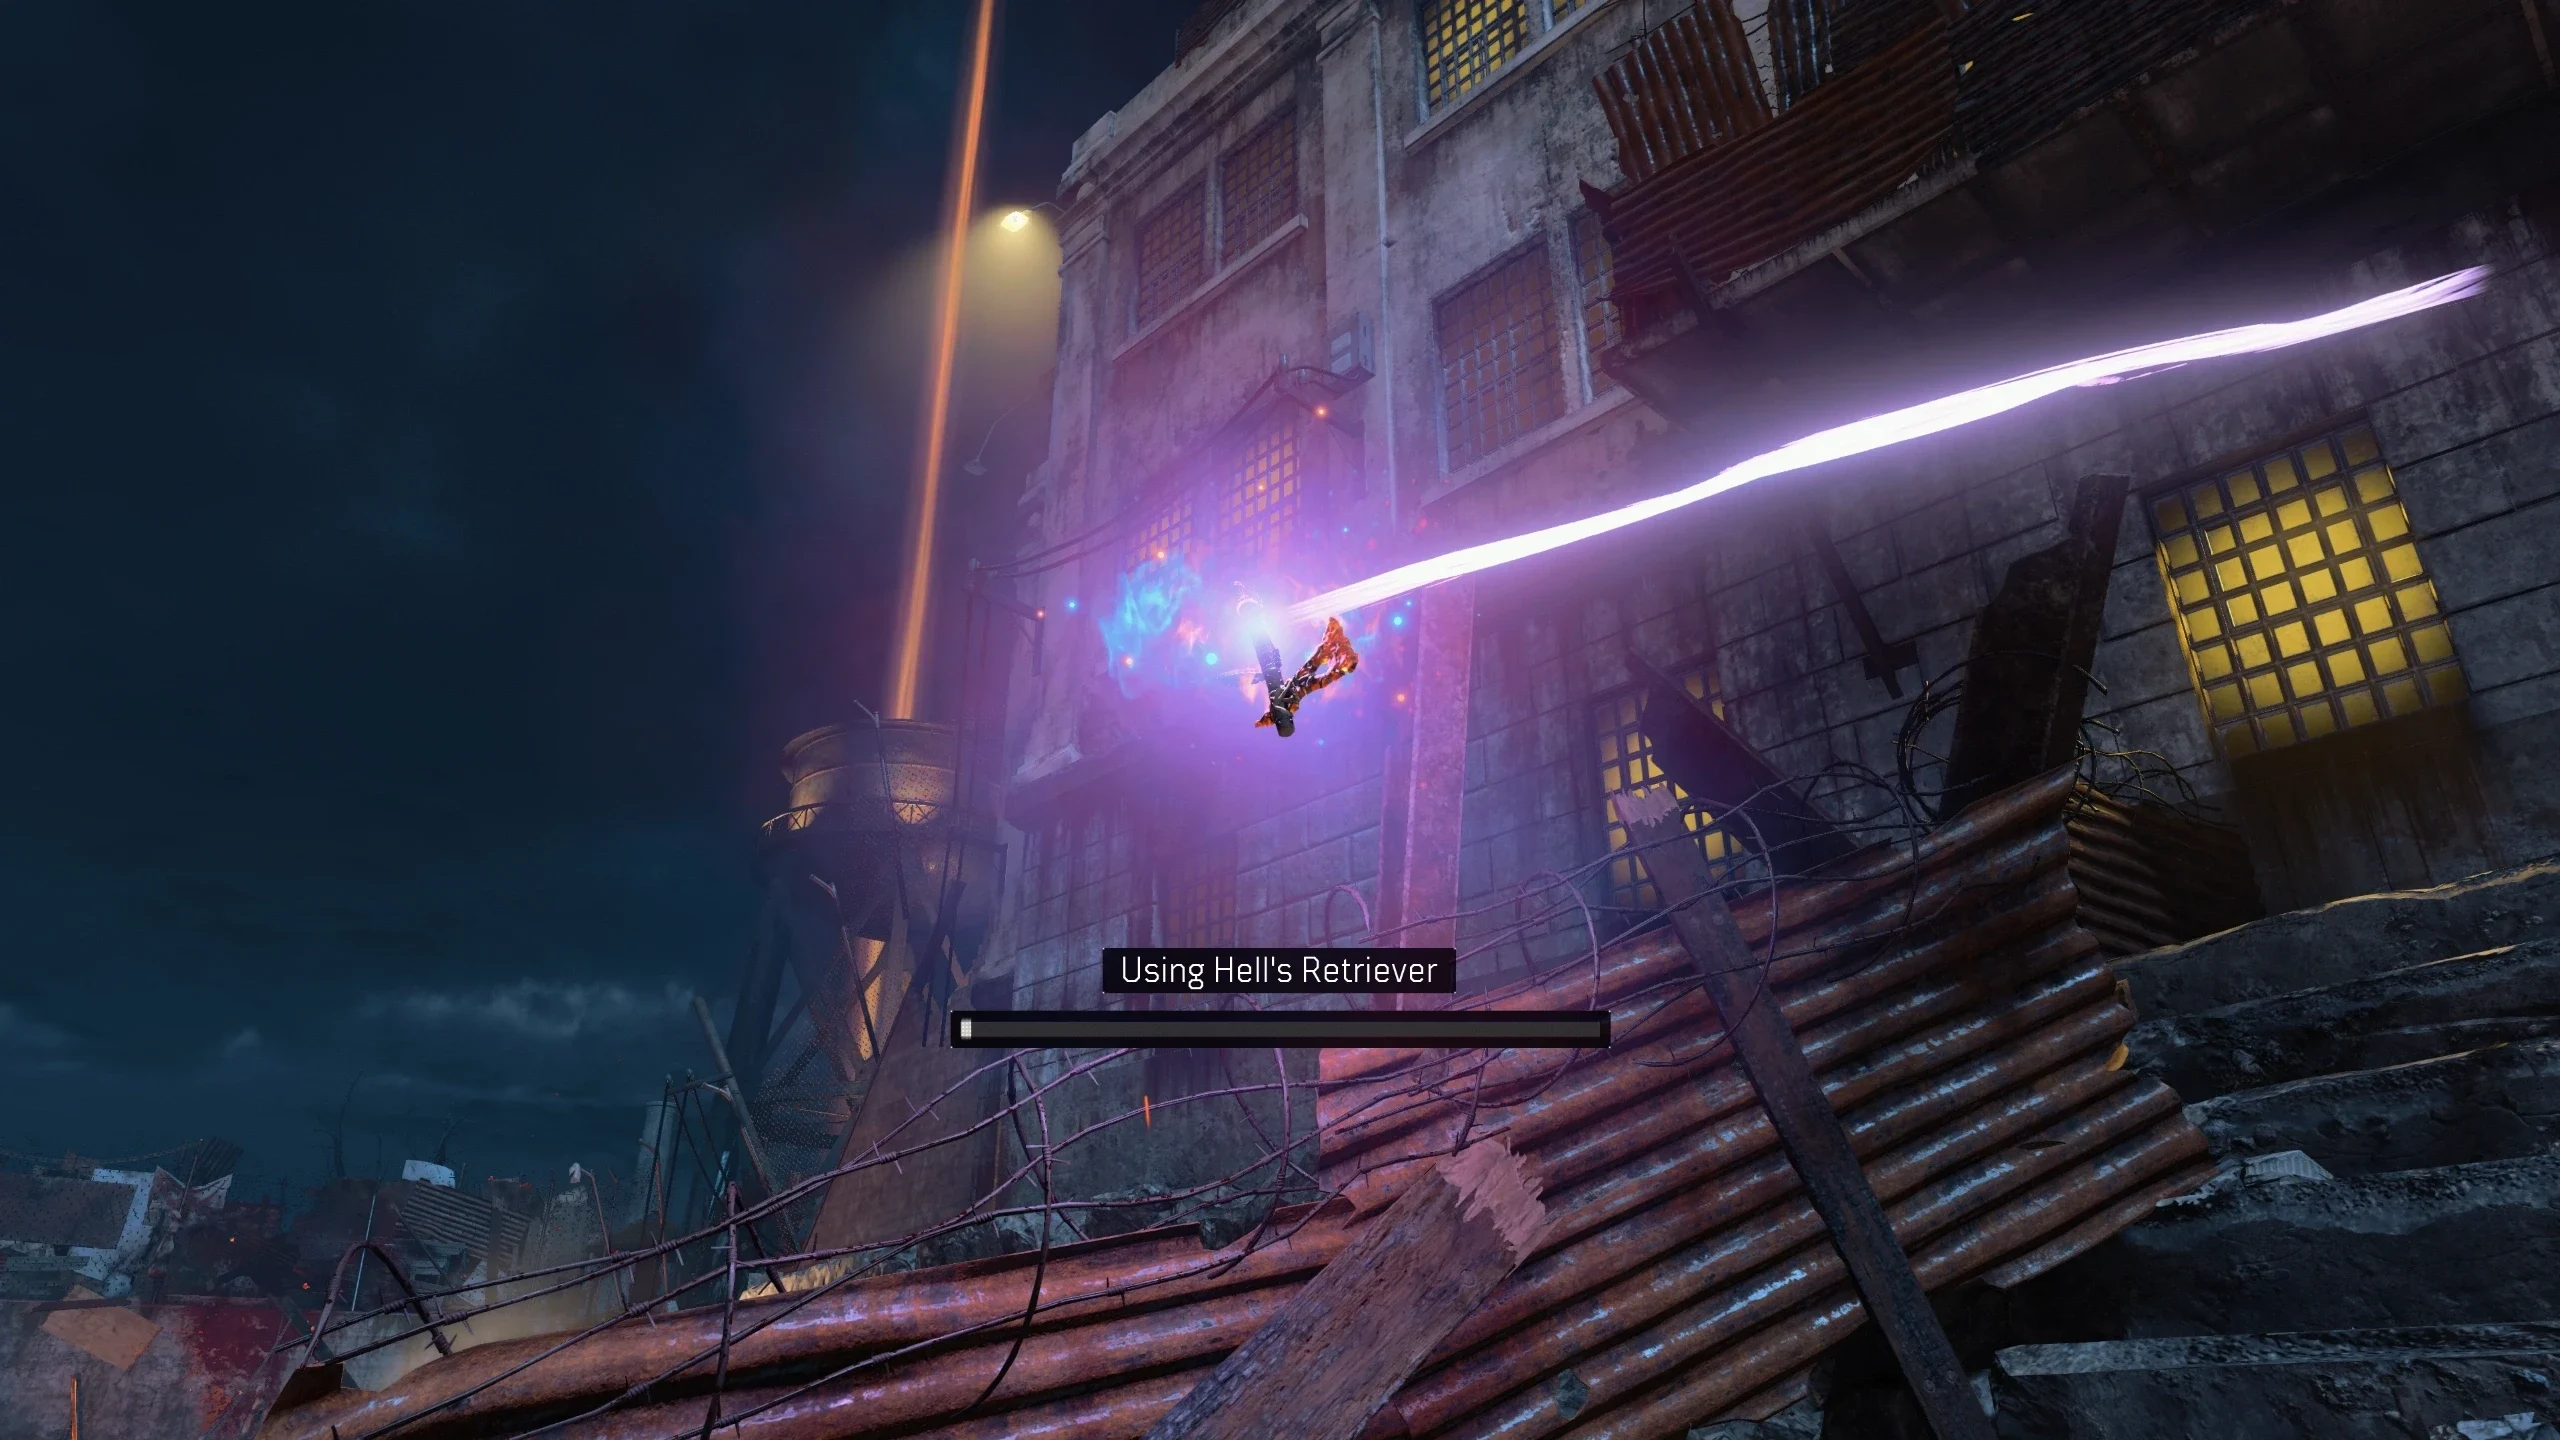
- With 'Zombie Blood' active, return to the White Light and look through the shield to see if the Bird is standing on the Kronorium. DON'T look at the bird through the shield for too long, just look until the Kronorium spawns below the bird. Once you see the Kronorium spawn, quickly put away the shield and make sure no other players are in the room. Throw the Hell's Retriever at the Kronorium to make it appear at your feet. Pickup the Kronorium.
- Recommended but NOT required: The remainder of the Main Quest utilizes the shield a lot, so you should obtain the Attuned Spectral Shield for the increased "ammo" capacity and health. Also, The Hell's Retriever is no longer required for the Main Quest (but is required for many side Easter Eggs, like the shield upgrade), so if you'd prefer to get Monkey Bombs it's safe to do so now.
- Return to the 'Warden's Ritual Room' and place the Kronorium on the corpse in the chair. The pages should begin flipping; interact with them to make them stop.
Anger and Bargaining
- Look through the shield to see what numbers the book shows, and enter those numbers into the Number Pad in the 'Citadel Tunnels.'
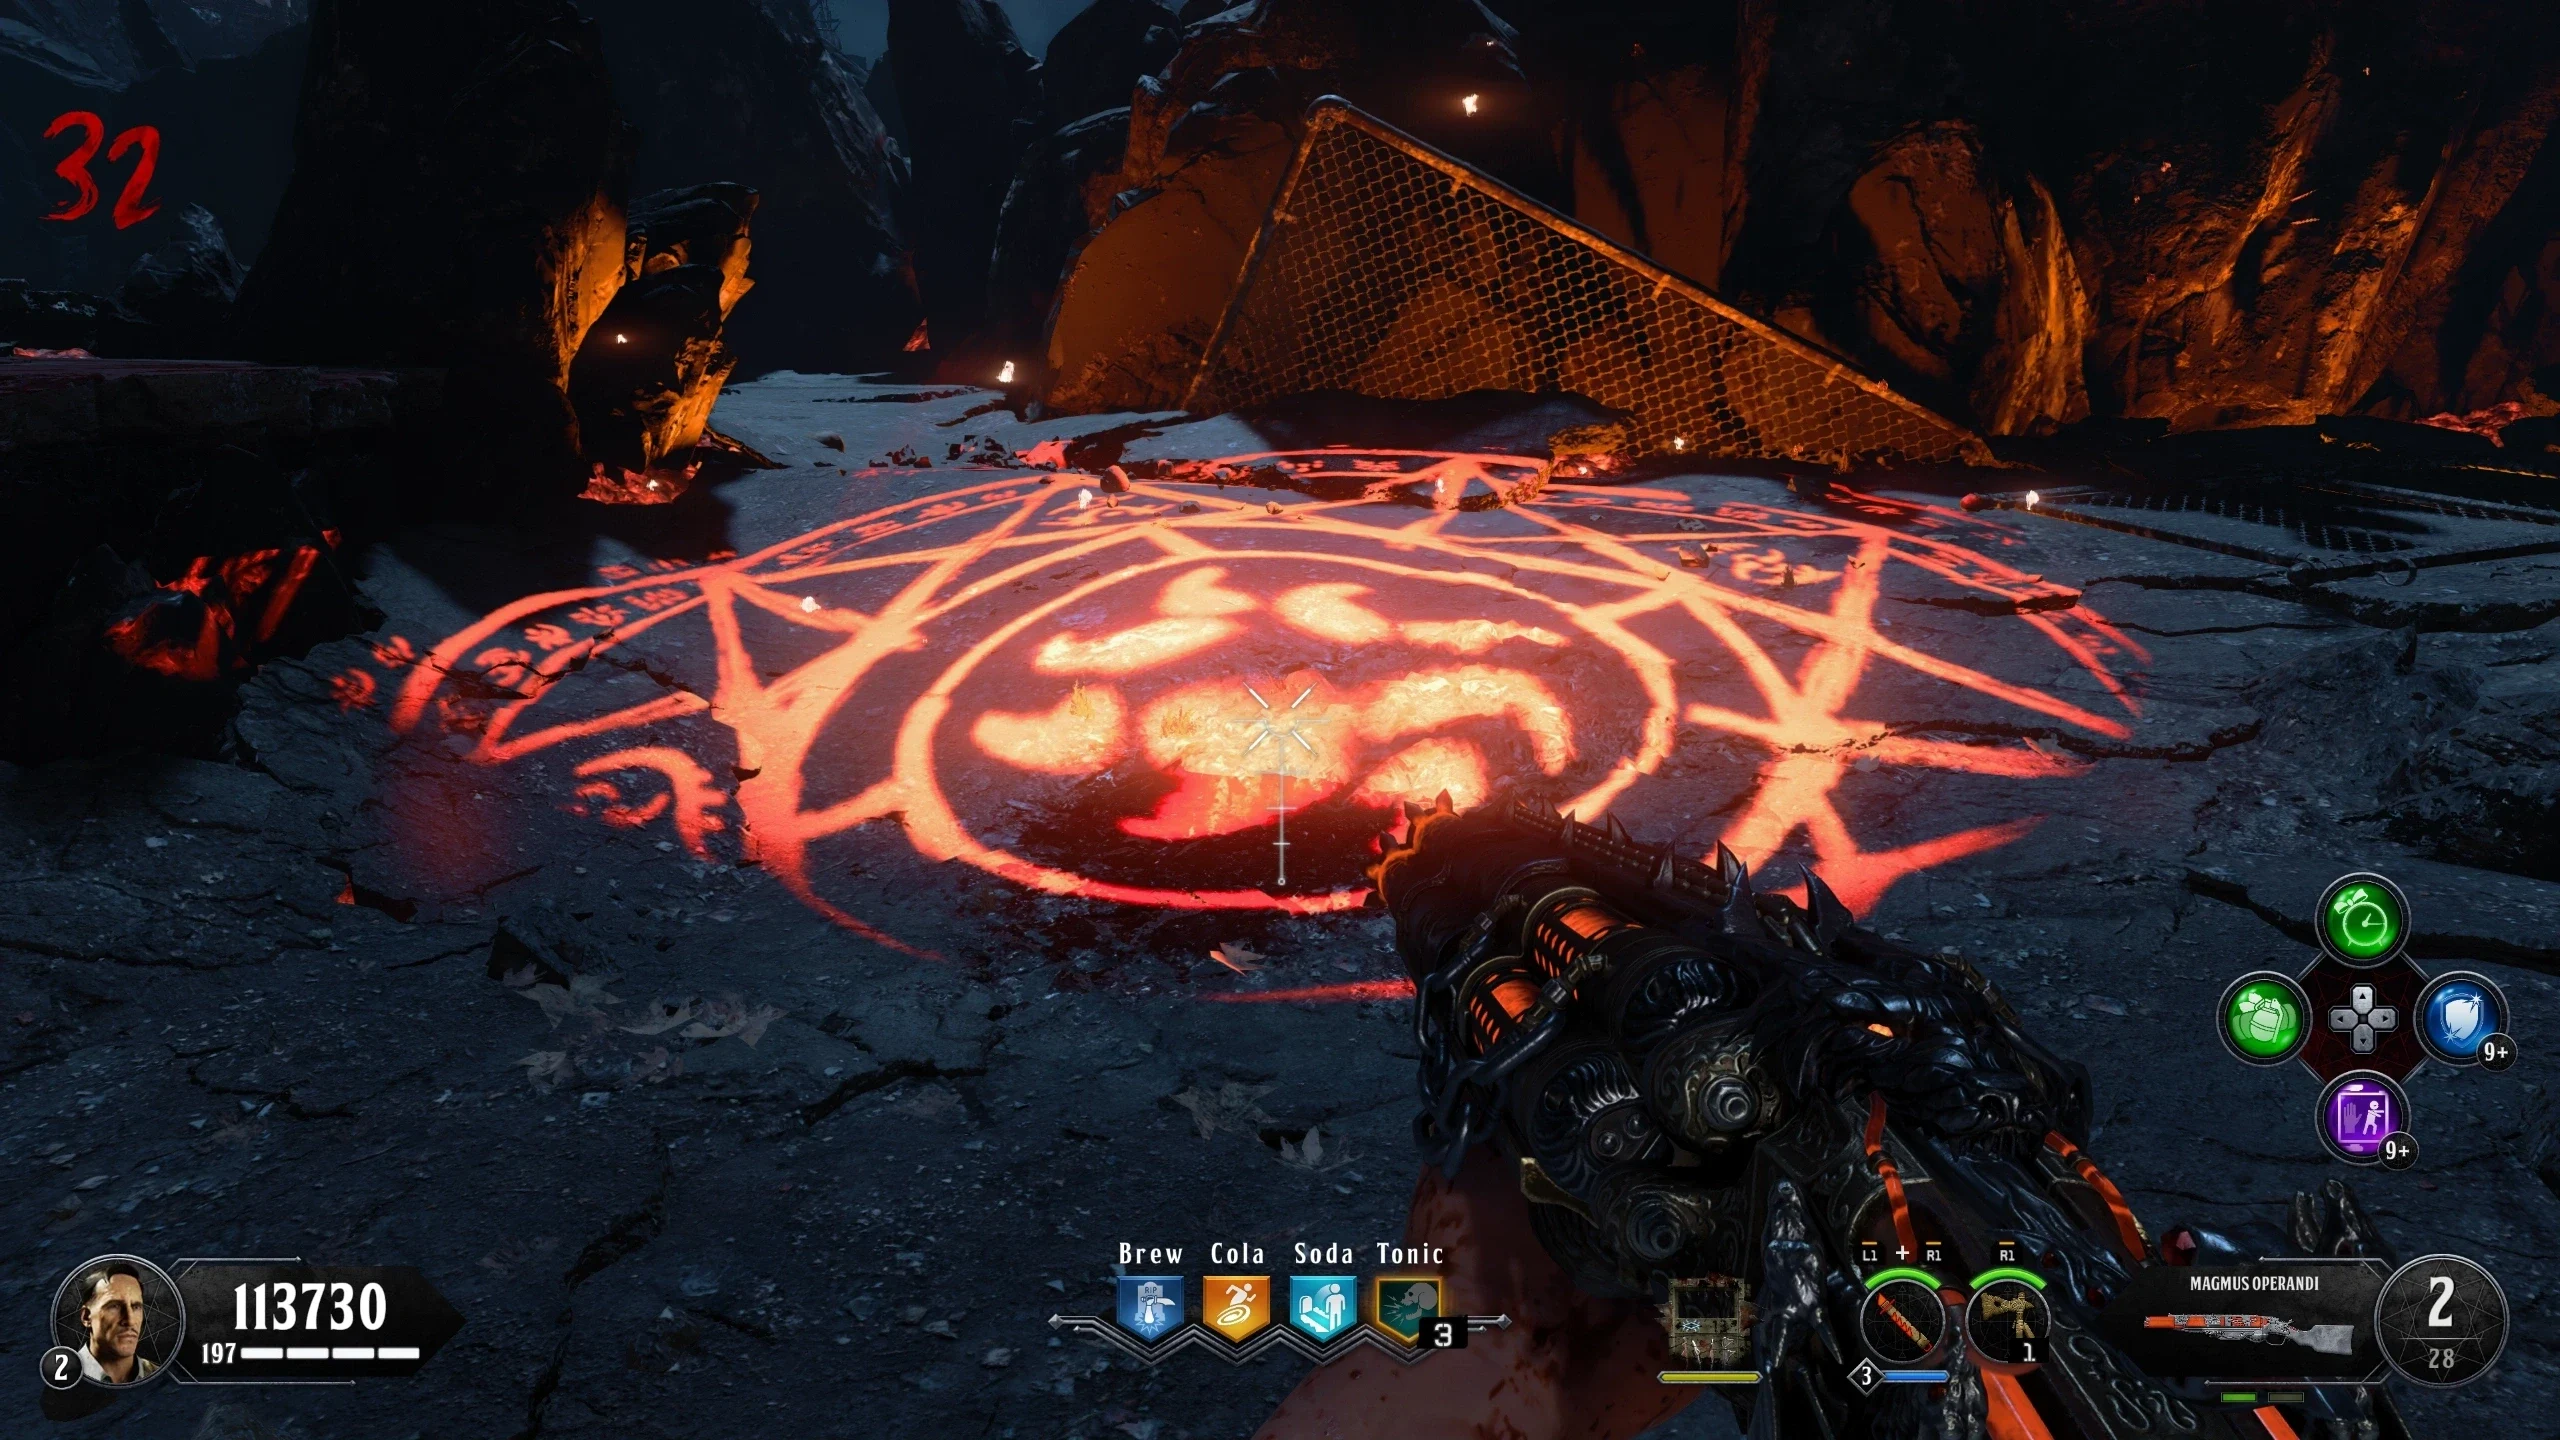
- The Lighthouse near the 'Warden's House' will now be shining its light on a Red Orb, which can only be seen with the shield. The red orb is in one of five locations and corresponds to a challenge the players must complete. Spirit Blast the orb to make it visible without the shield and to start the challenge.
- Once a Challenge is complete, return to the Kronorium in the 'Warden's Ritual Room' for another set of numbers. Red Orb Locations:
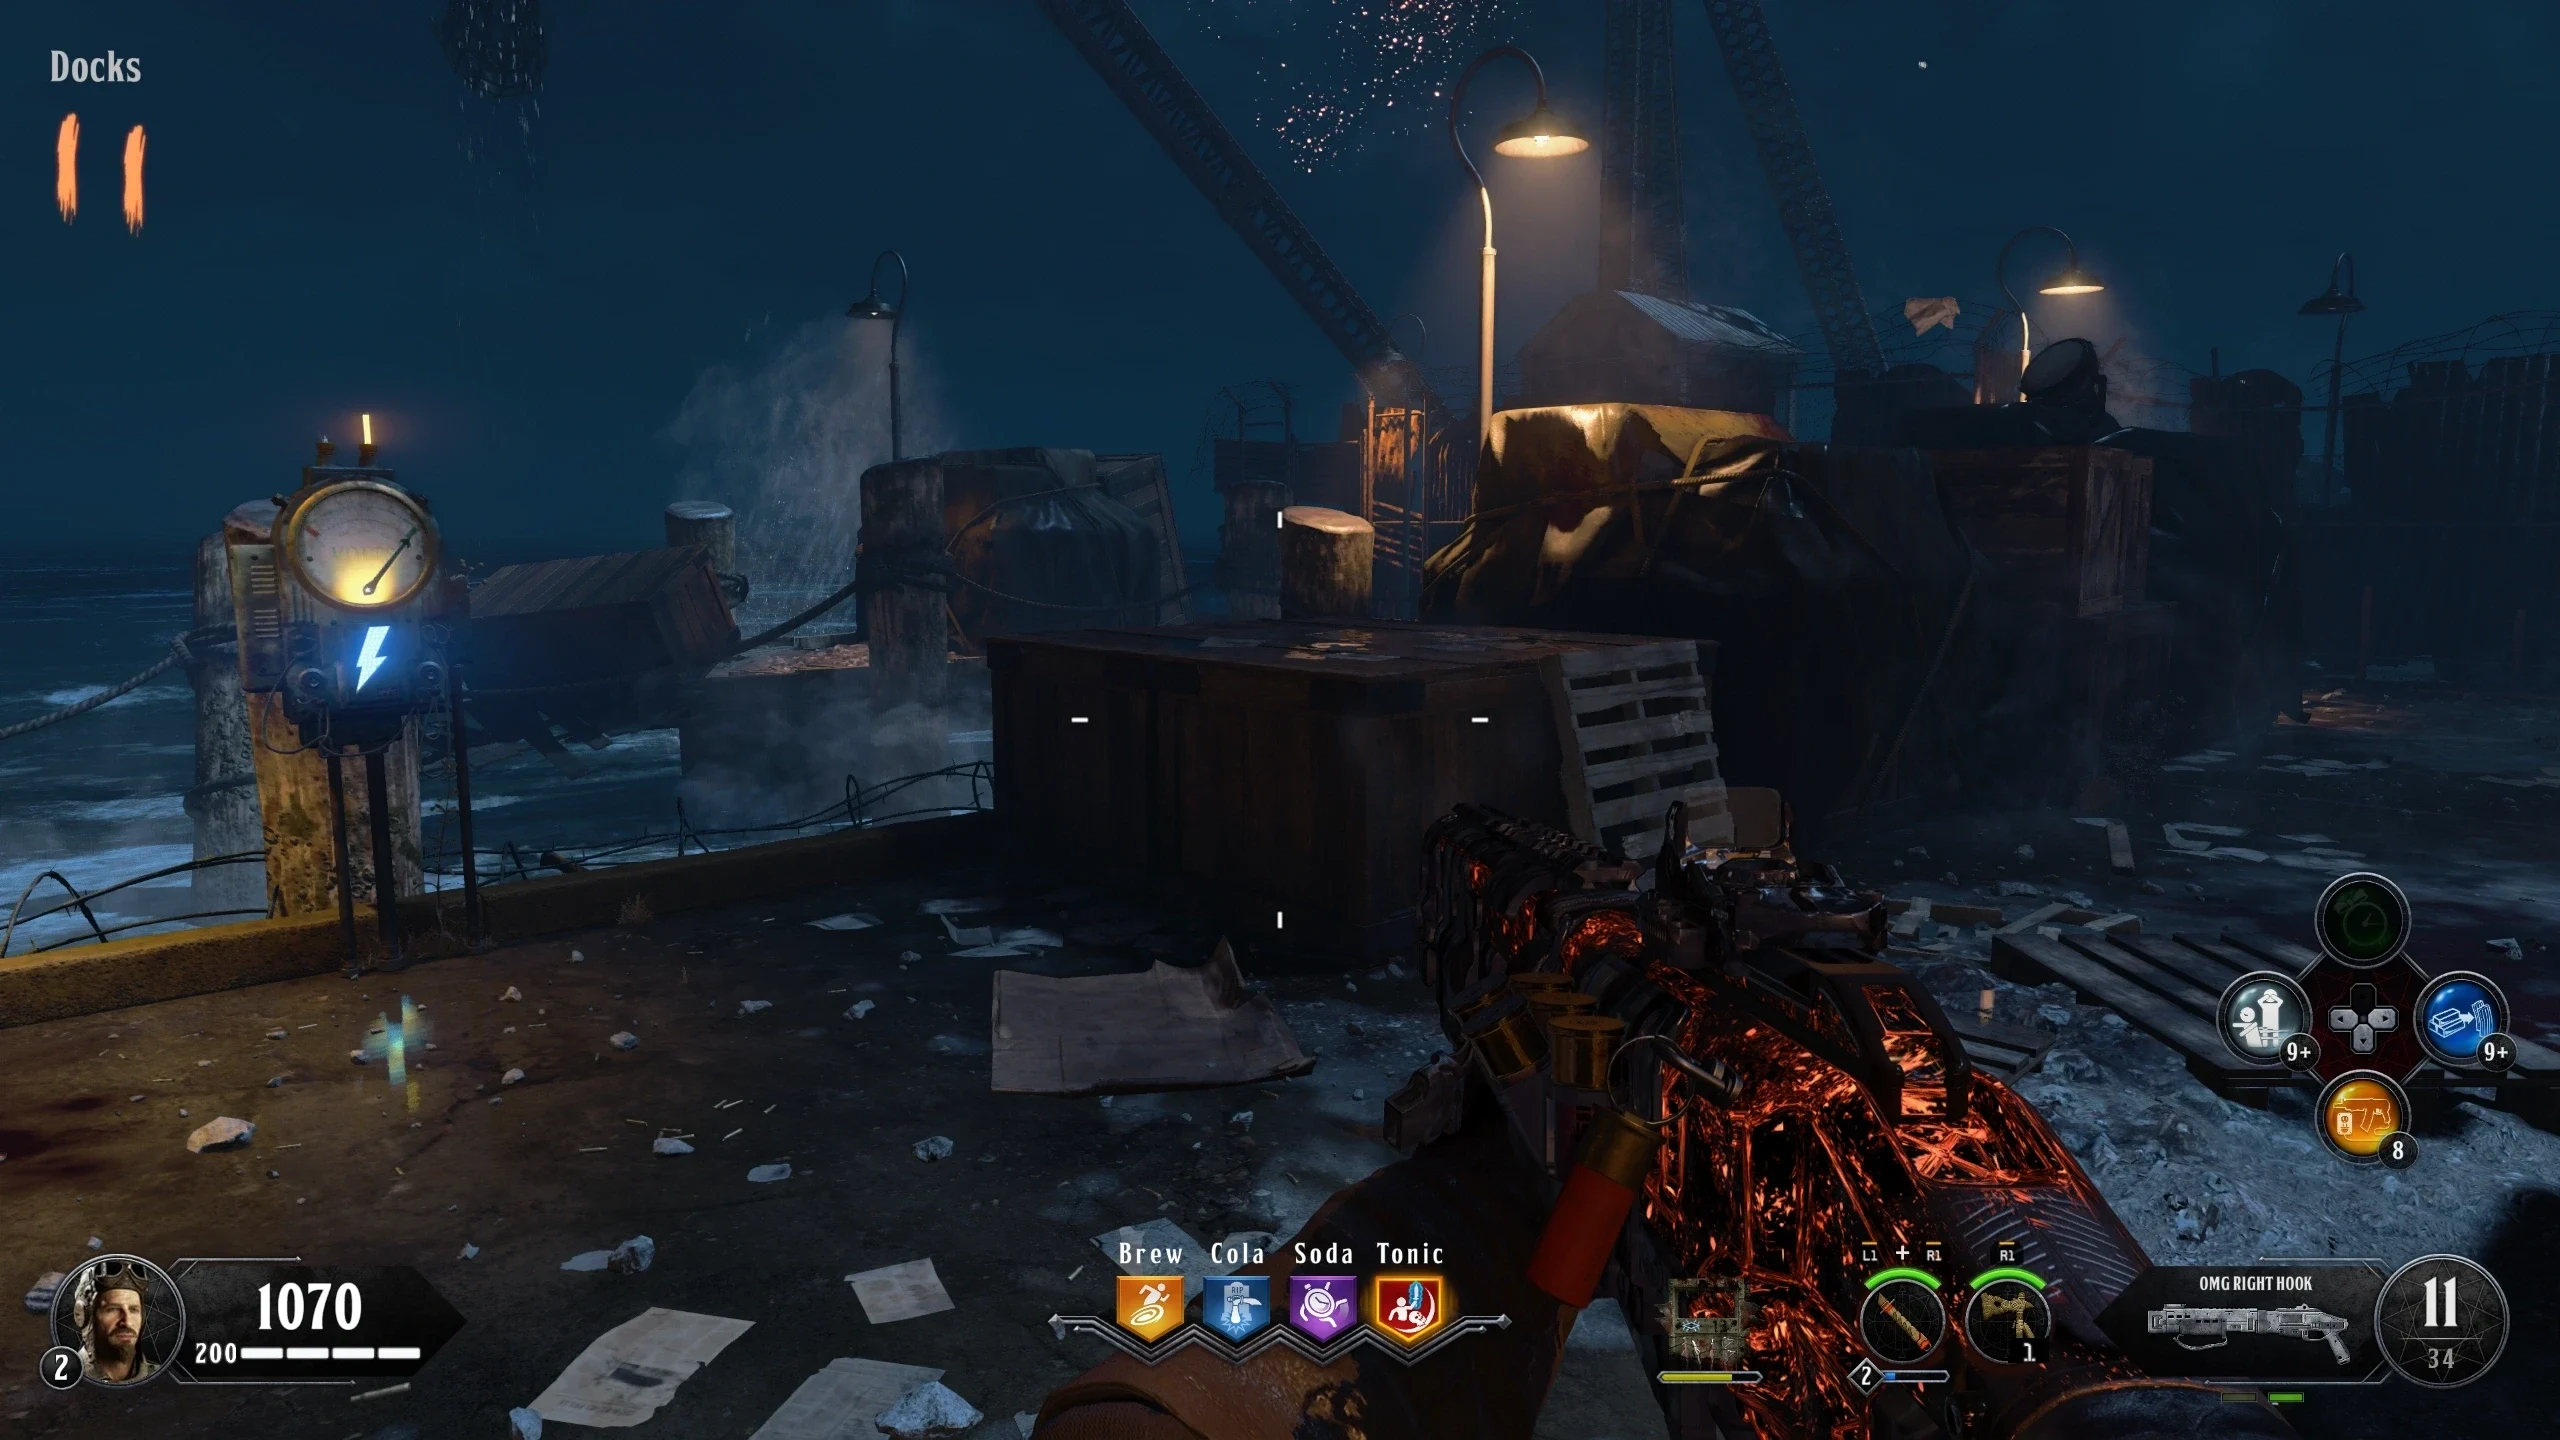
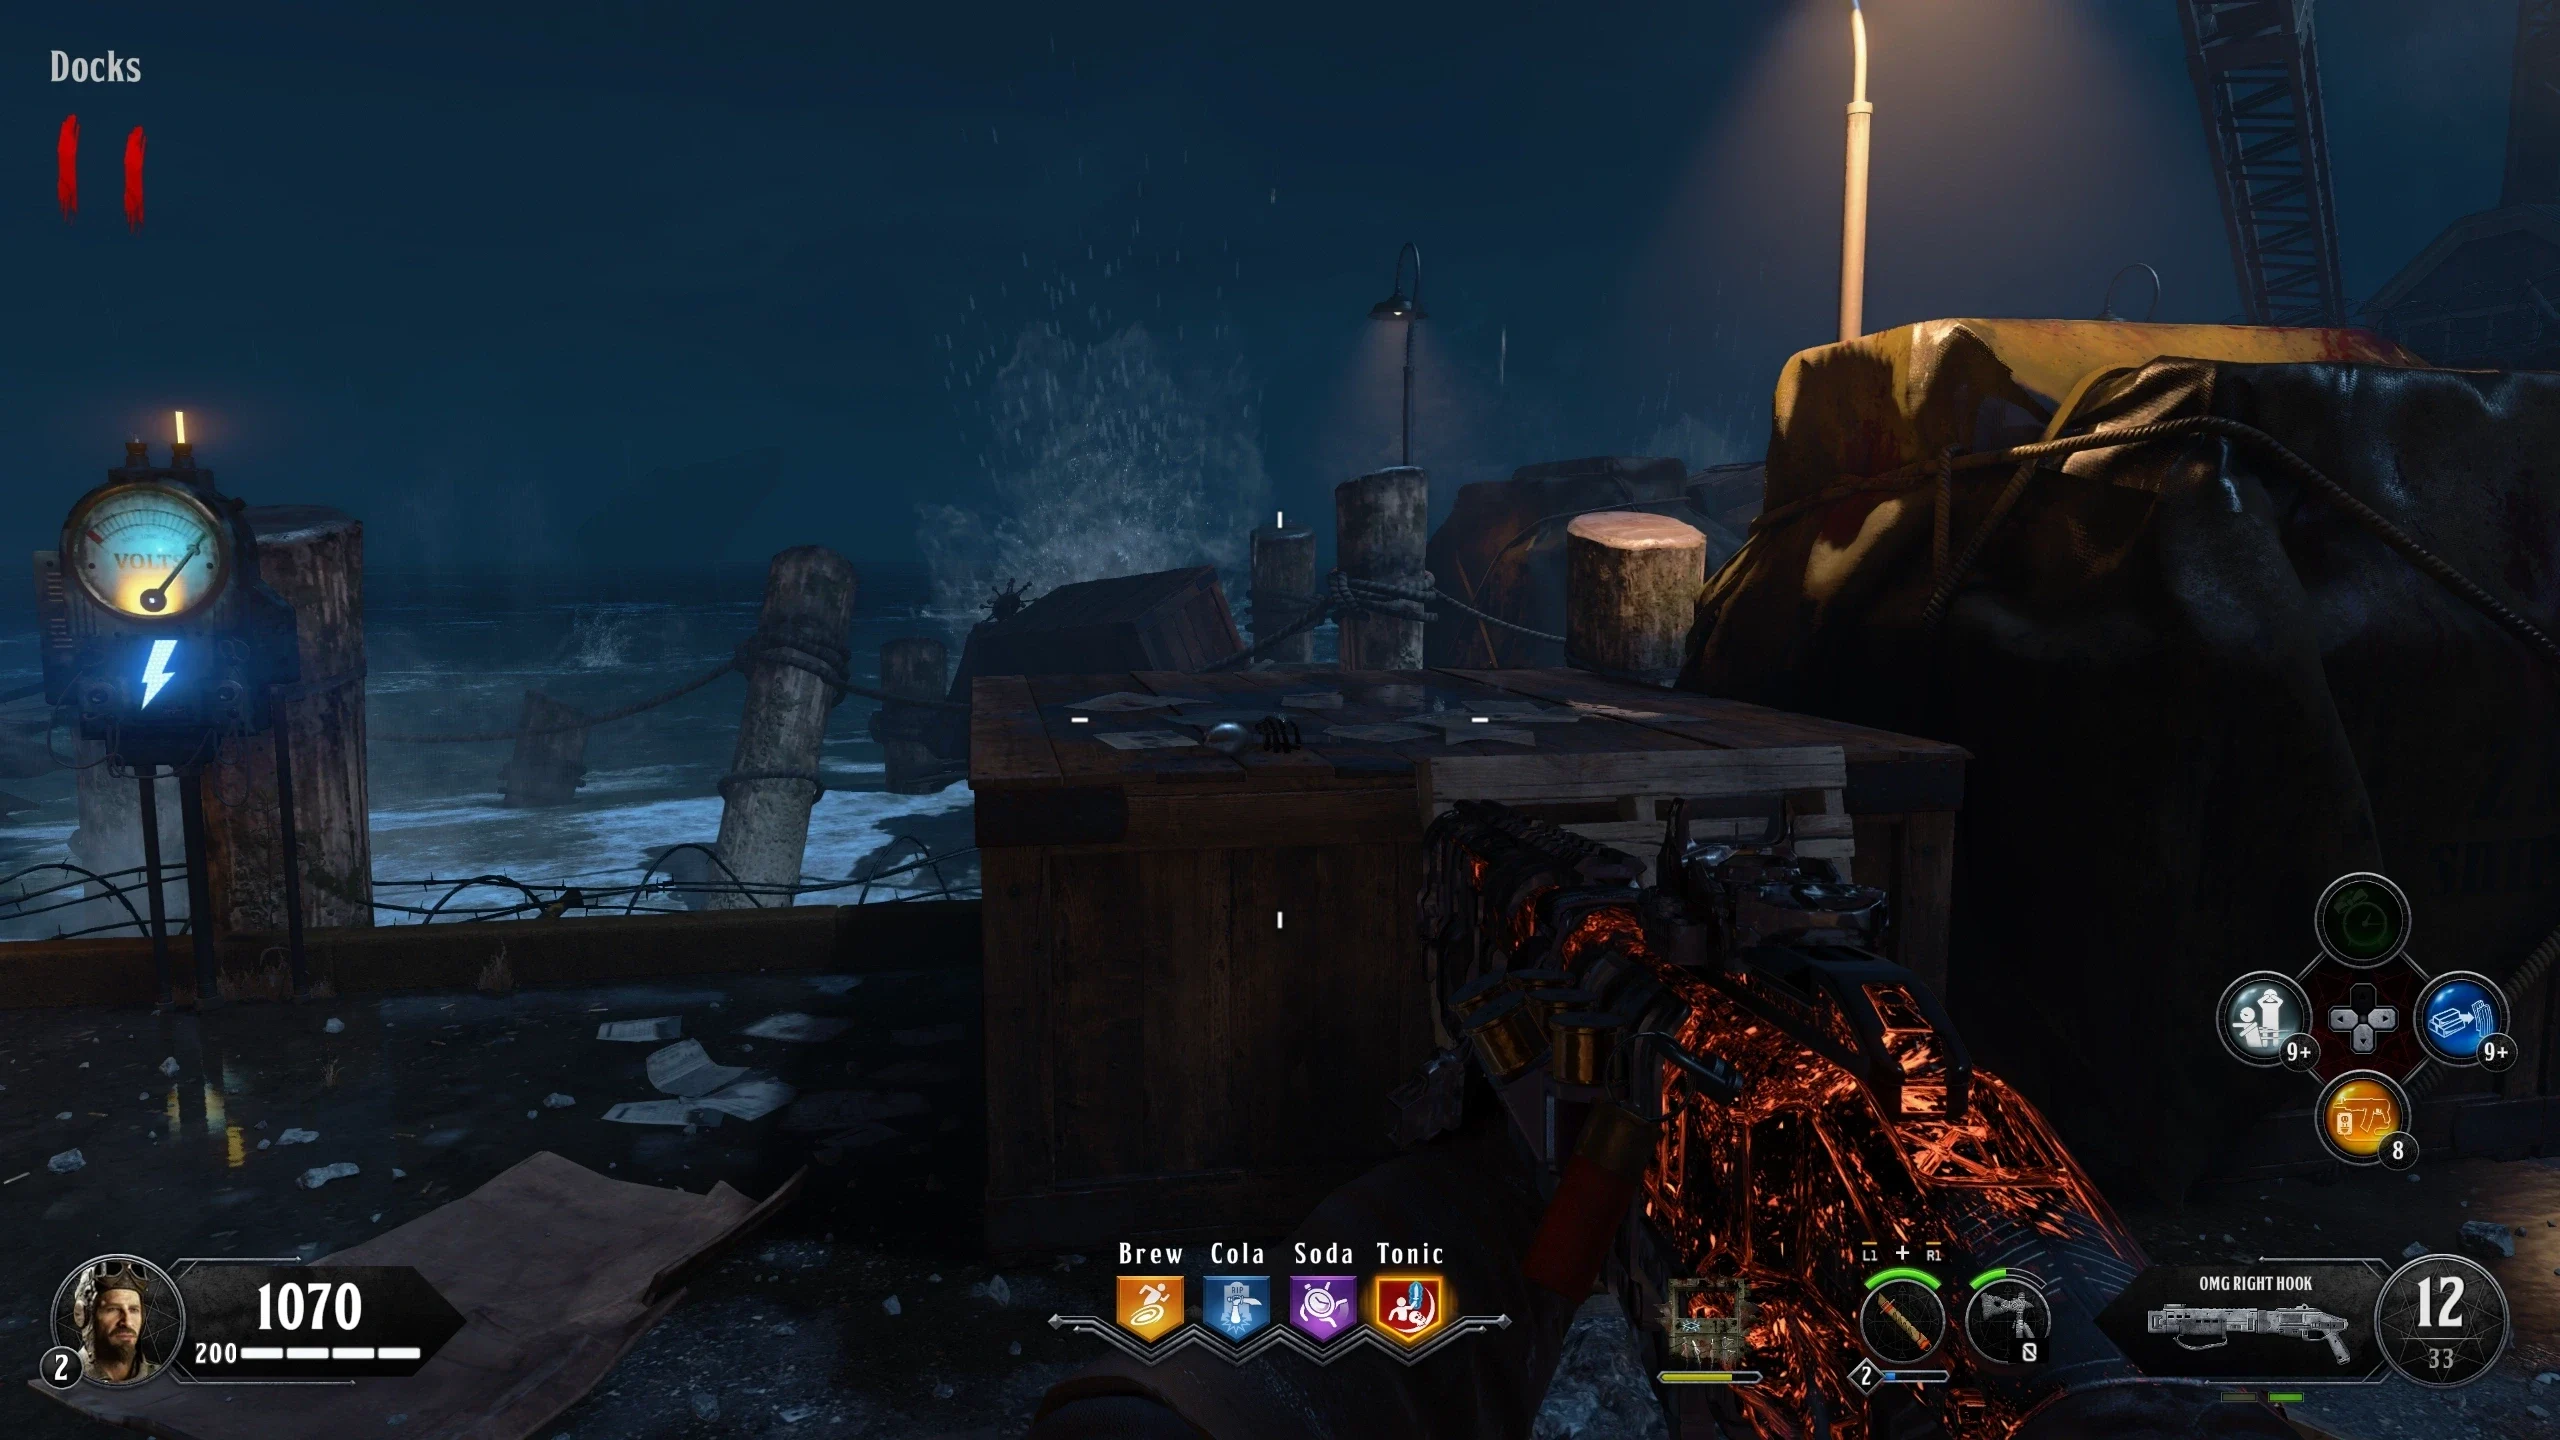
- Docks --- Orb Location
- Showers --- Orb Location
- Michigan Avenue --- Orb Location
- Power House --- Orb Location
- New Industries --- Orb Location
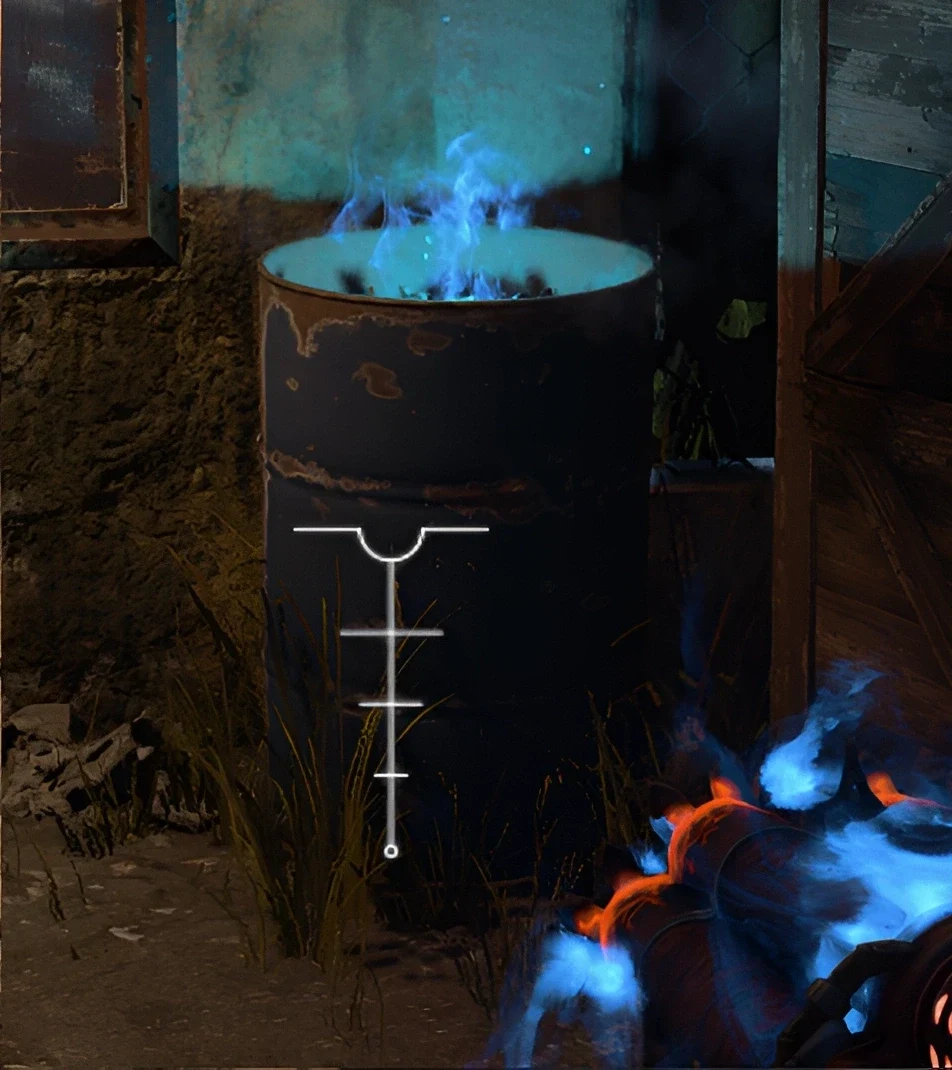
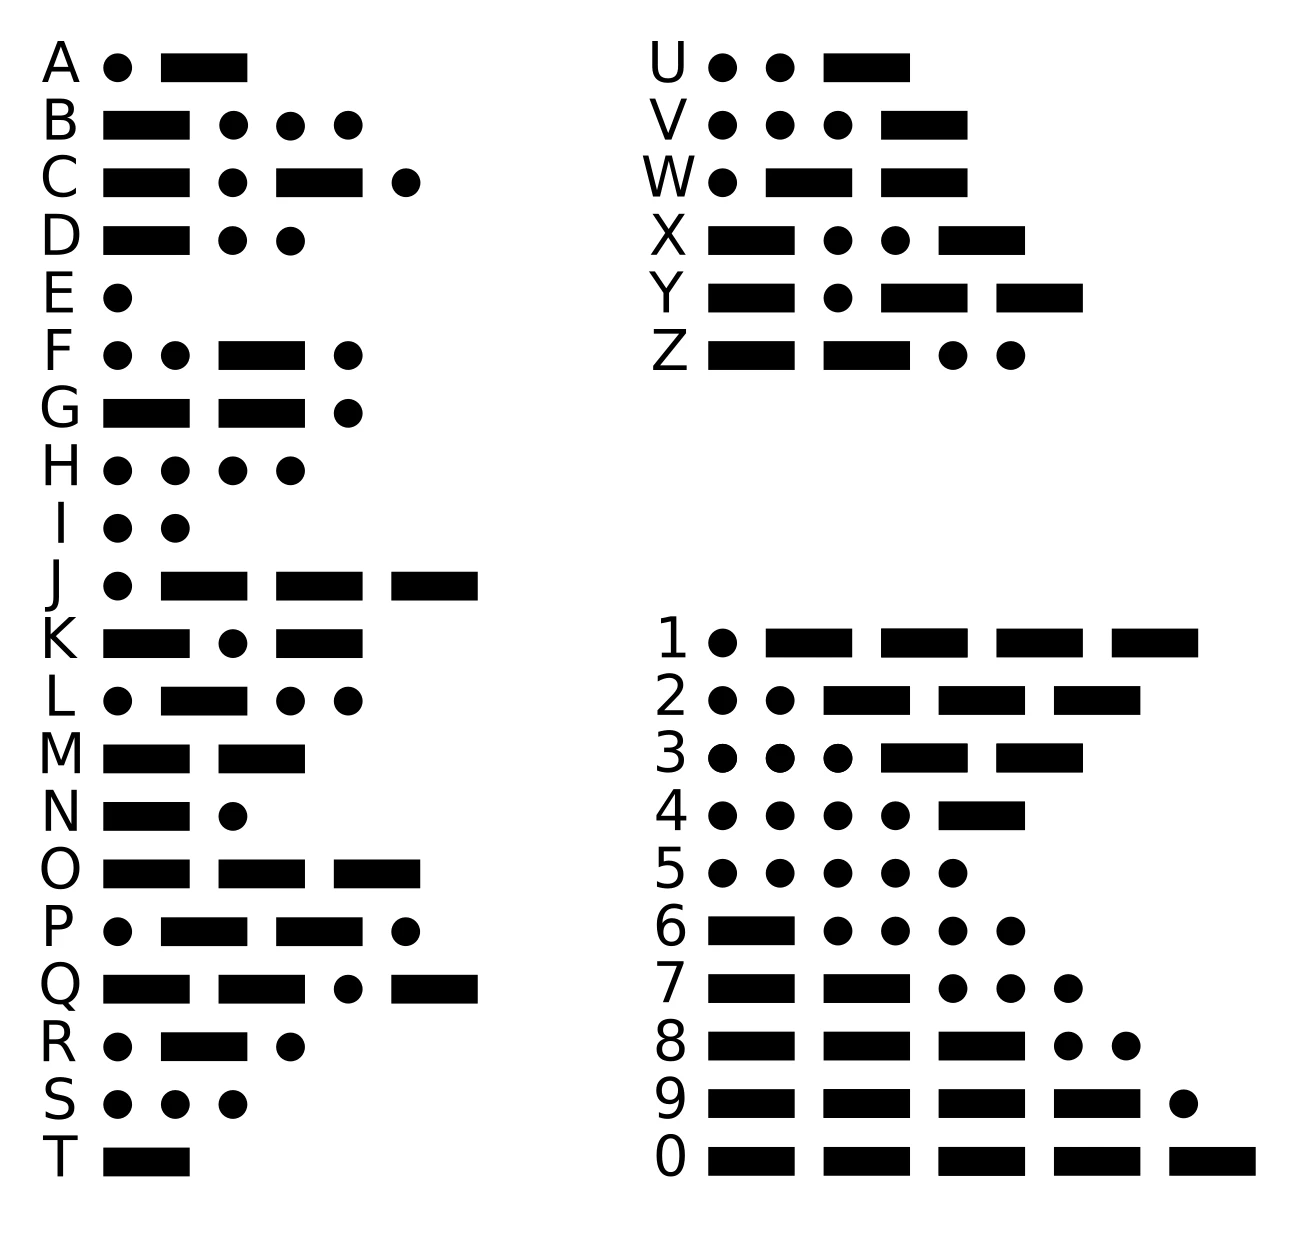
- In the water around the map, three buoys will begin flashing a single-digit number in Morse code (Cheat Sheet or Decoder website). The flashing can only be seen with the shield. Note down the number each buoy is flashing. Buoy Locations:
- Upper Gondola Platform - To the left of the Gondola
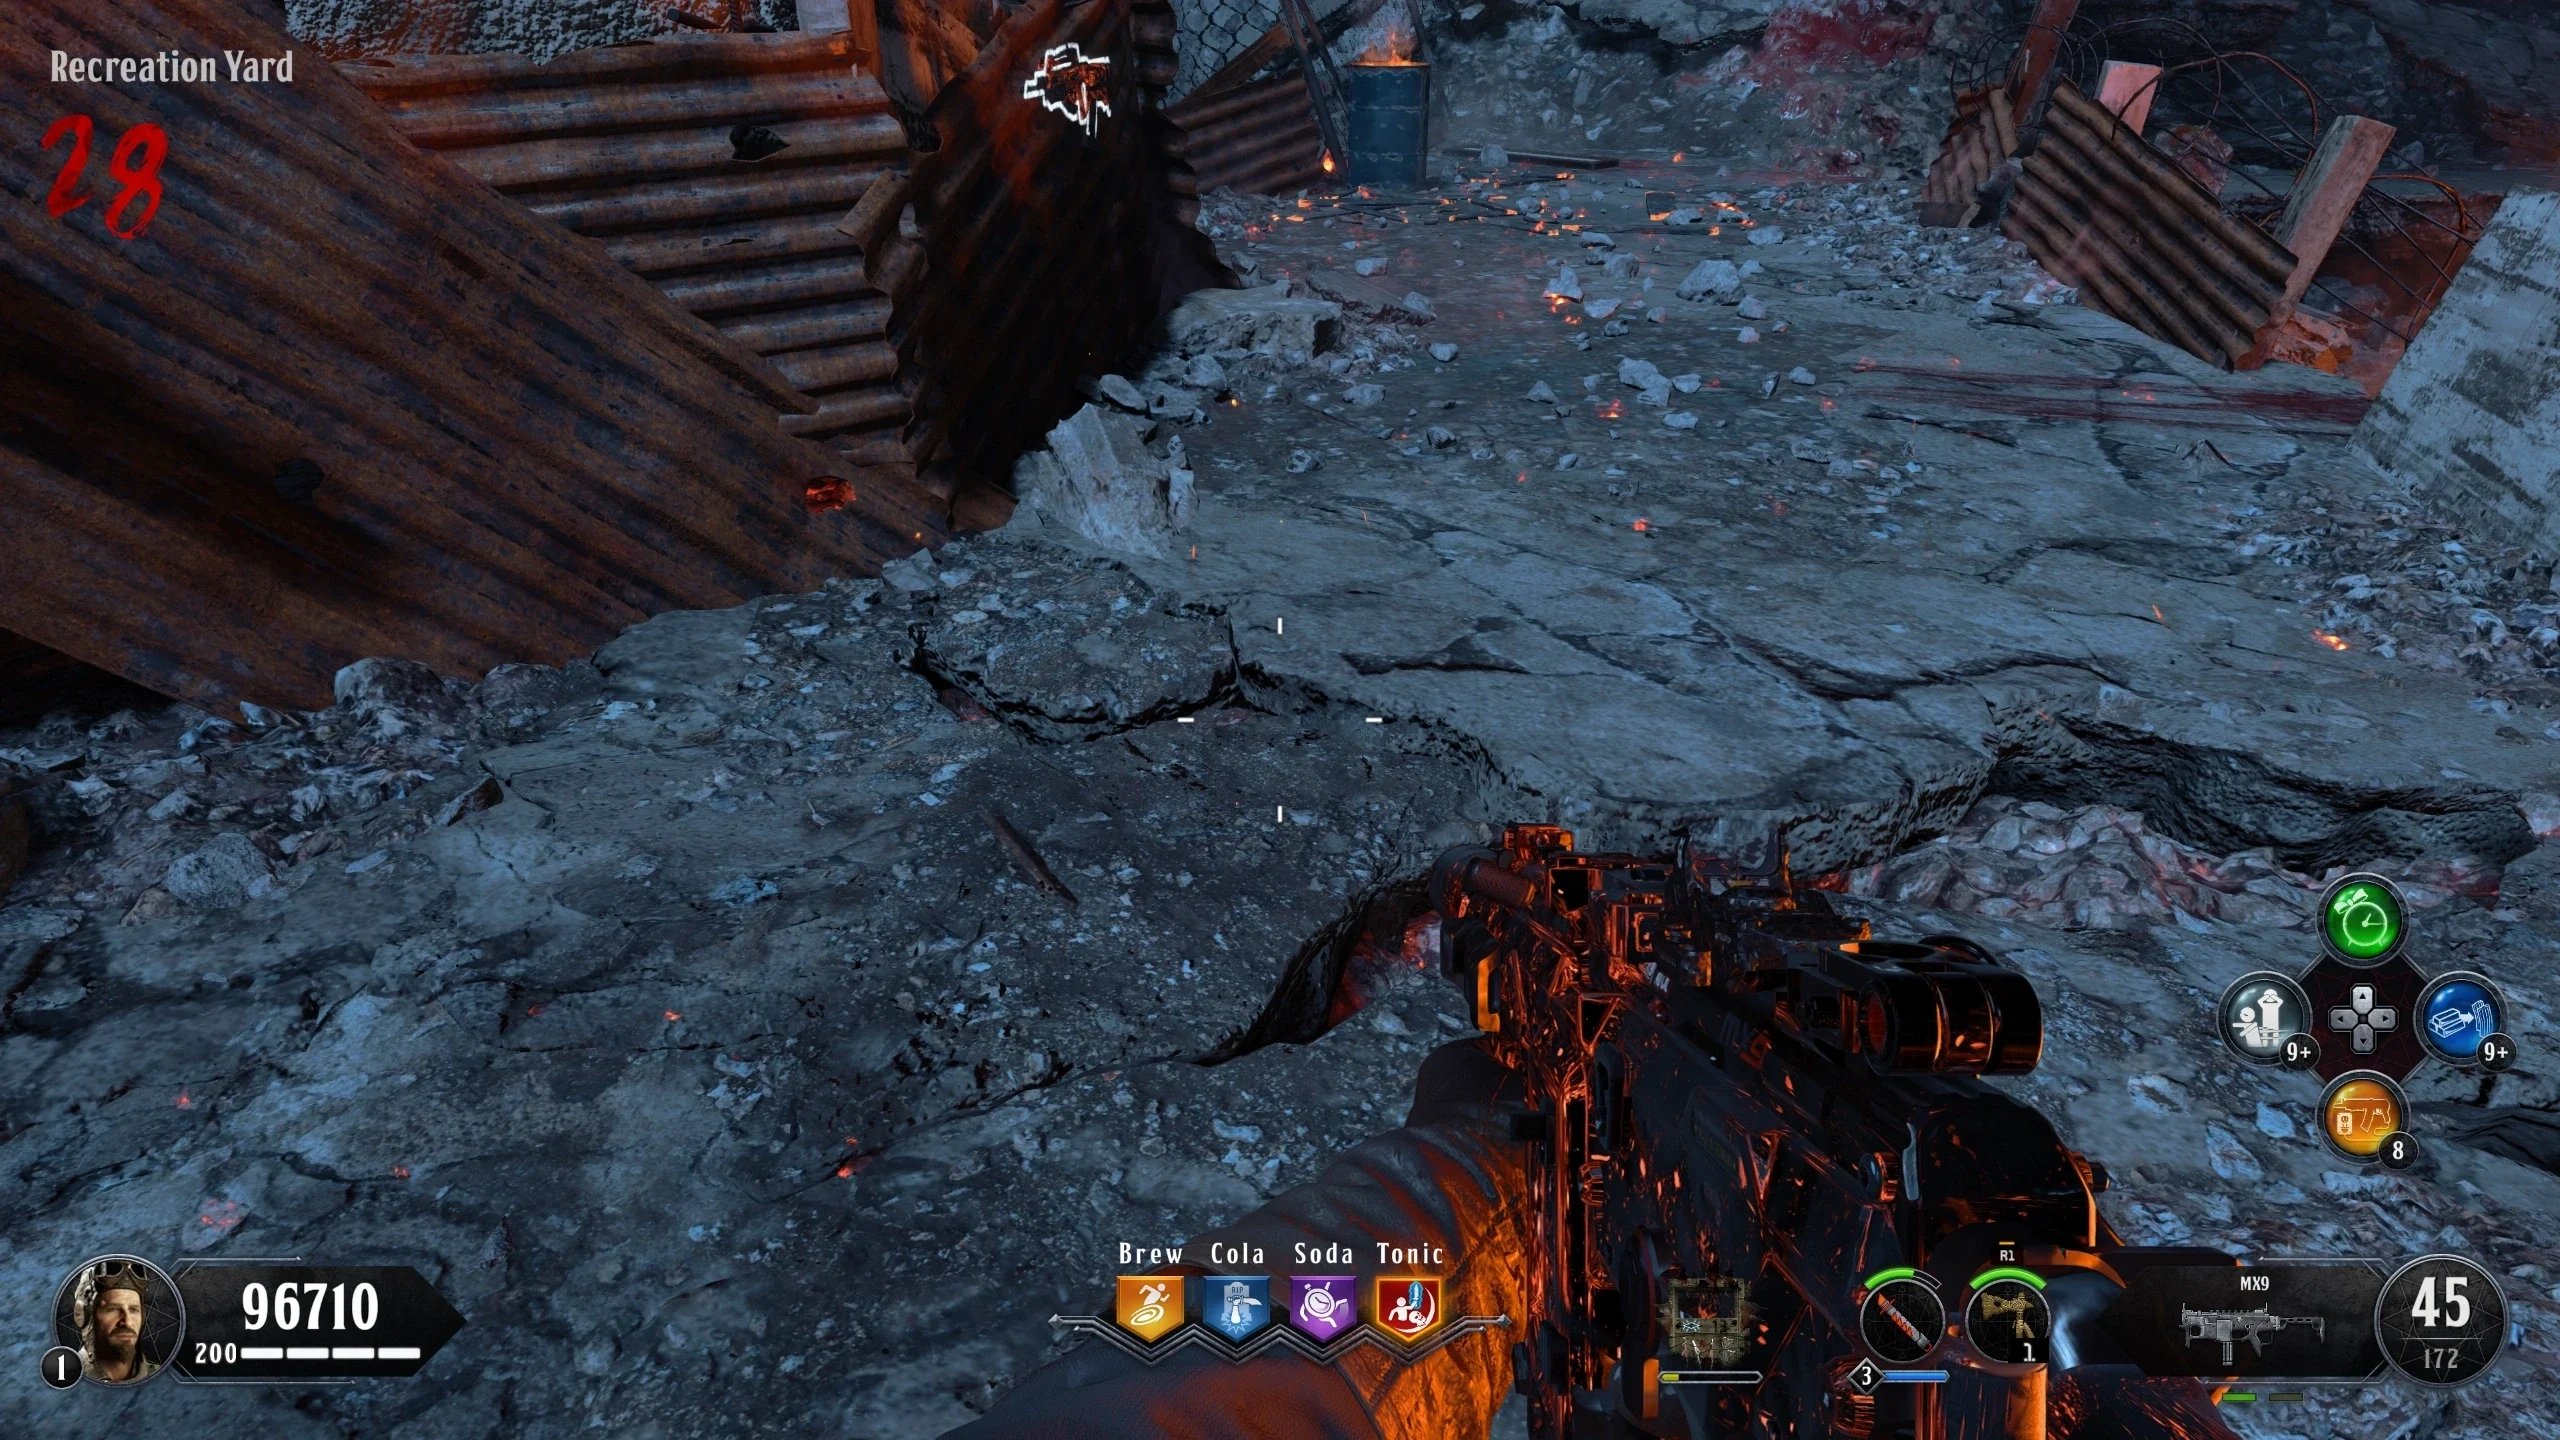
- 'Recreation Yard' - Top of the slope, near the Swordfish wallbuy --- Window to stand at --- Buoy in water
- 'Model Industries' - Out the barrier, right of the RK 7 Garrison wallbuy --- Window to stand at --- Buoy in water
- Once you get the number from each buoy, add them together and convert that number to Morse code. Example: Buoy 1 = 4, Buoy 2 = 7, Buoy 3 = 2, Total = 13 or ".---- ...--" (There are no equivalents for double digits, so 13 would just be 1 in Morse code then 3 in Morse code).
- In the 'Sally Port,' there is a telegraph key on a table which you can use to input your number. For a short beep, hold for 1 second and a long beep, hold for 3 seconds. If the Warden laughs, then you input the incorrect beep and can try again immediately.
- If the correct number was input, the Warden won't laugh, your character will say you did it correctly and a ghost boat will spawn near the 'Docks' and float around.
- Kill a Zombie in this room in the Infirmary to spawn a Ghost who will begin to wander around the Infirmary. Spirit blast and interact with the Ghost to make him follow you.
- Kill Zombies near the Ghost to make him move. If he stops moving, kill more Zombies near him. Escort the Ghost to the 'Docks' via the Gondola. Zombies don't attack the Ghost.
- Once at the 'Docks,' the Ghost will make its way to the Red Orb and enter it.
- Once the Ghost enters the Orb, a Red Stone will drop to the floor for you to pick up.
- A Ghost will spawn left of the Orb with a Banjo.
- Interact with the Ghost to make him hold out the Banjo. Once he is holding out the Banjo, interact with the Ghost again to take the Banjo. The Banjo will now be on the player's back.
- In the 'Showers,' find and stand in a blue circle. While in the blue circle, kill Zombies to fill the Banjo.
- If you are outside a circle for too long, you will start taking damage. If you start slowly taking damage while in a circle, return the Banjo to the Ghost, wait a few seconds, then pick it back up and try again.
- Once you get enough kills quickly enough in a circle, a Banjo sound will play and the corners of the screen will turn red.
- If the circle disappears with no sound, find another circle and get more kills. If there are no circles, return the Banjo to the Ghost. He should start walking backward and disappear, otherwise take the Banjo back and get more kills.
- When the Ghost disappears, a Red Stone will drop where the Ghost was for you to pick up.
- Kill a Zombie in the 'Cafeteria' to spawn a Ghost. Spirit blast the Ghost to start the escort. This will lock down some doorways, creating a linear path to the Michigan Avenue Orb.
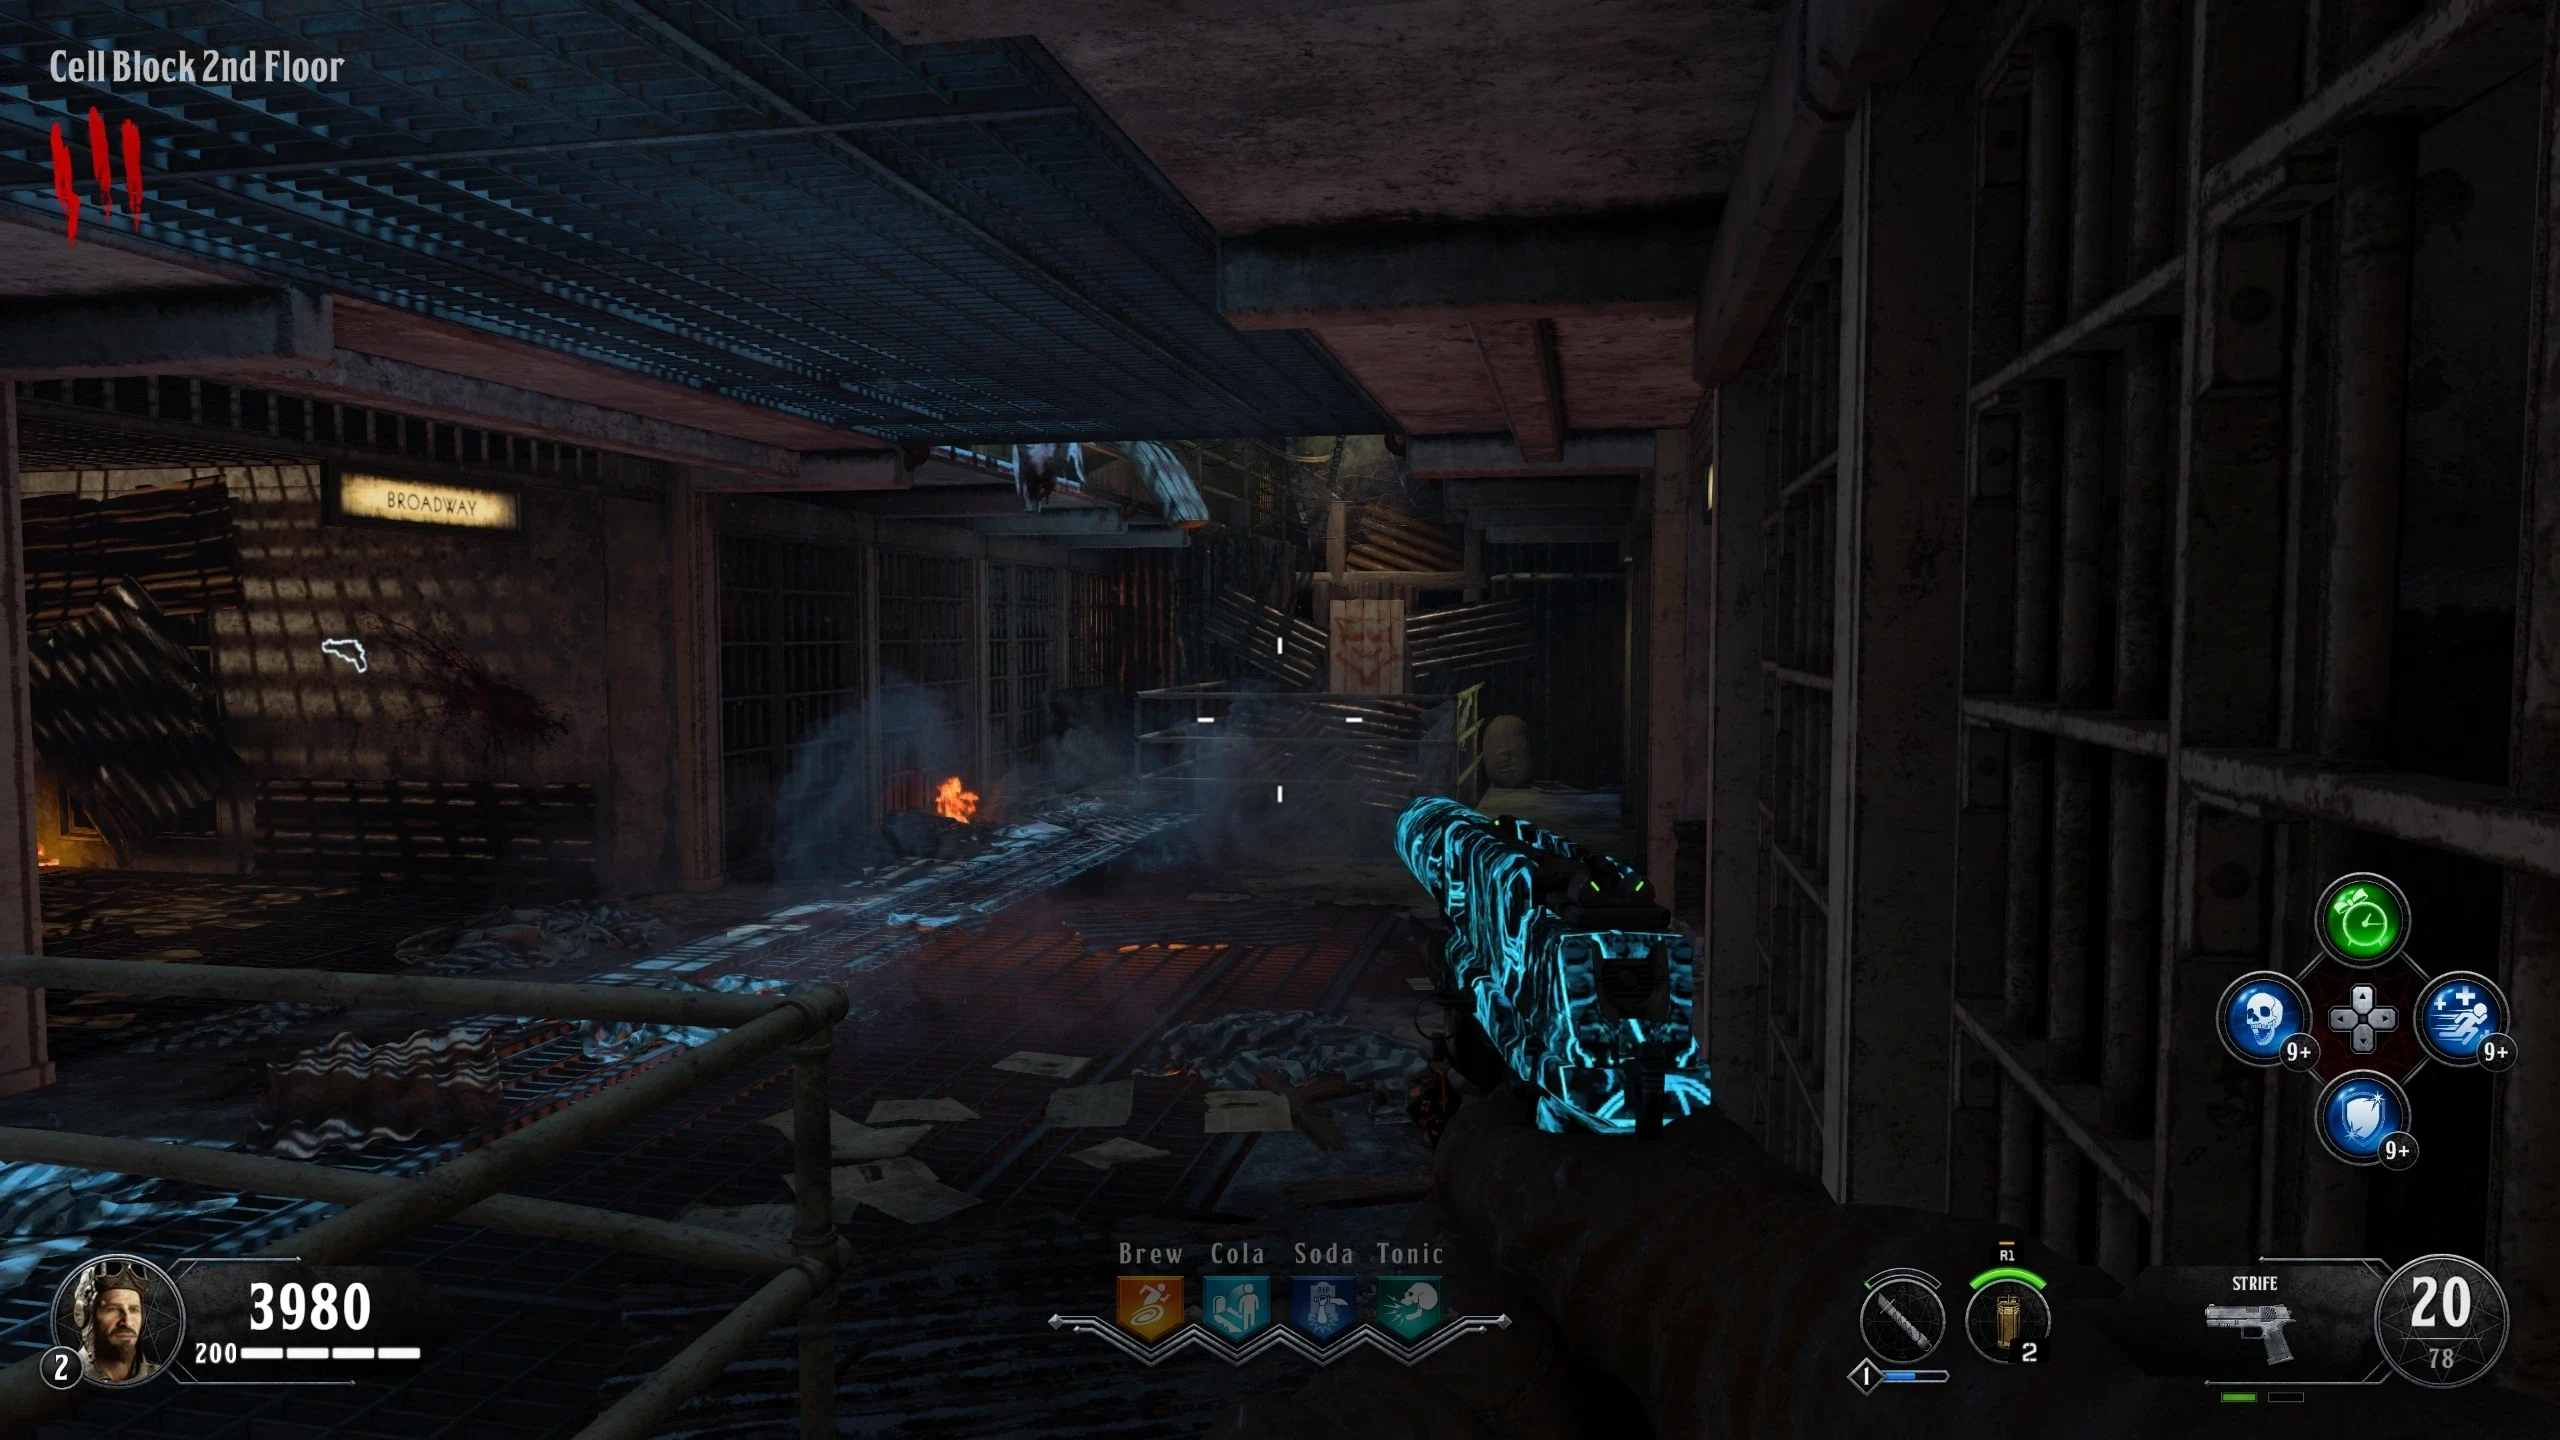
- All players must defend the Ghost from infinitely spawning Zombies as he makes his way to the 'Michigan Avenue' Orb. Starting in the 'Cafeteria,' the Ghost needs to be escorted to 'D-Block,' followed by the 'Library,' then to the 'Cell Block 2nd Floor,' and finally to the 'Michigan Avenue' Orb. As the Ghost takes damage, he will become red. If the Ghost receives too much damage, it will disappear, and you can try the escort again in the next round.
- Once the Ghost reaches 'Cell Block 2nd Floor,' the Warden will spawn.
- Once the Ghost enters the Orb, a Red Stone will drop from the Ghost.
- Look at the Ghost near the power switch in the 'Power House' till your character says something about it to avoid a glitch.
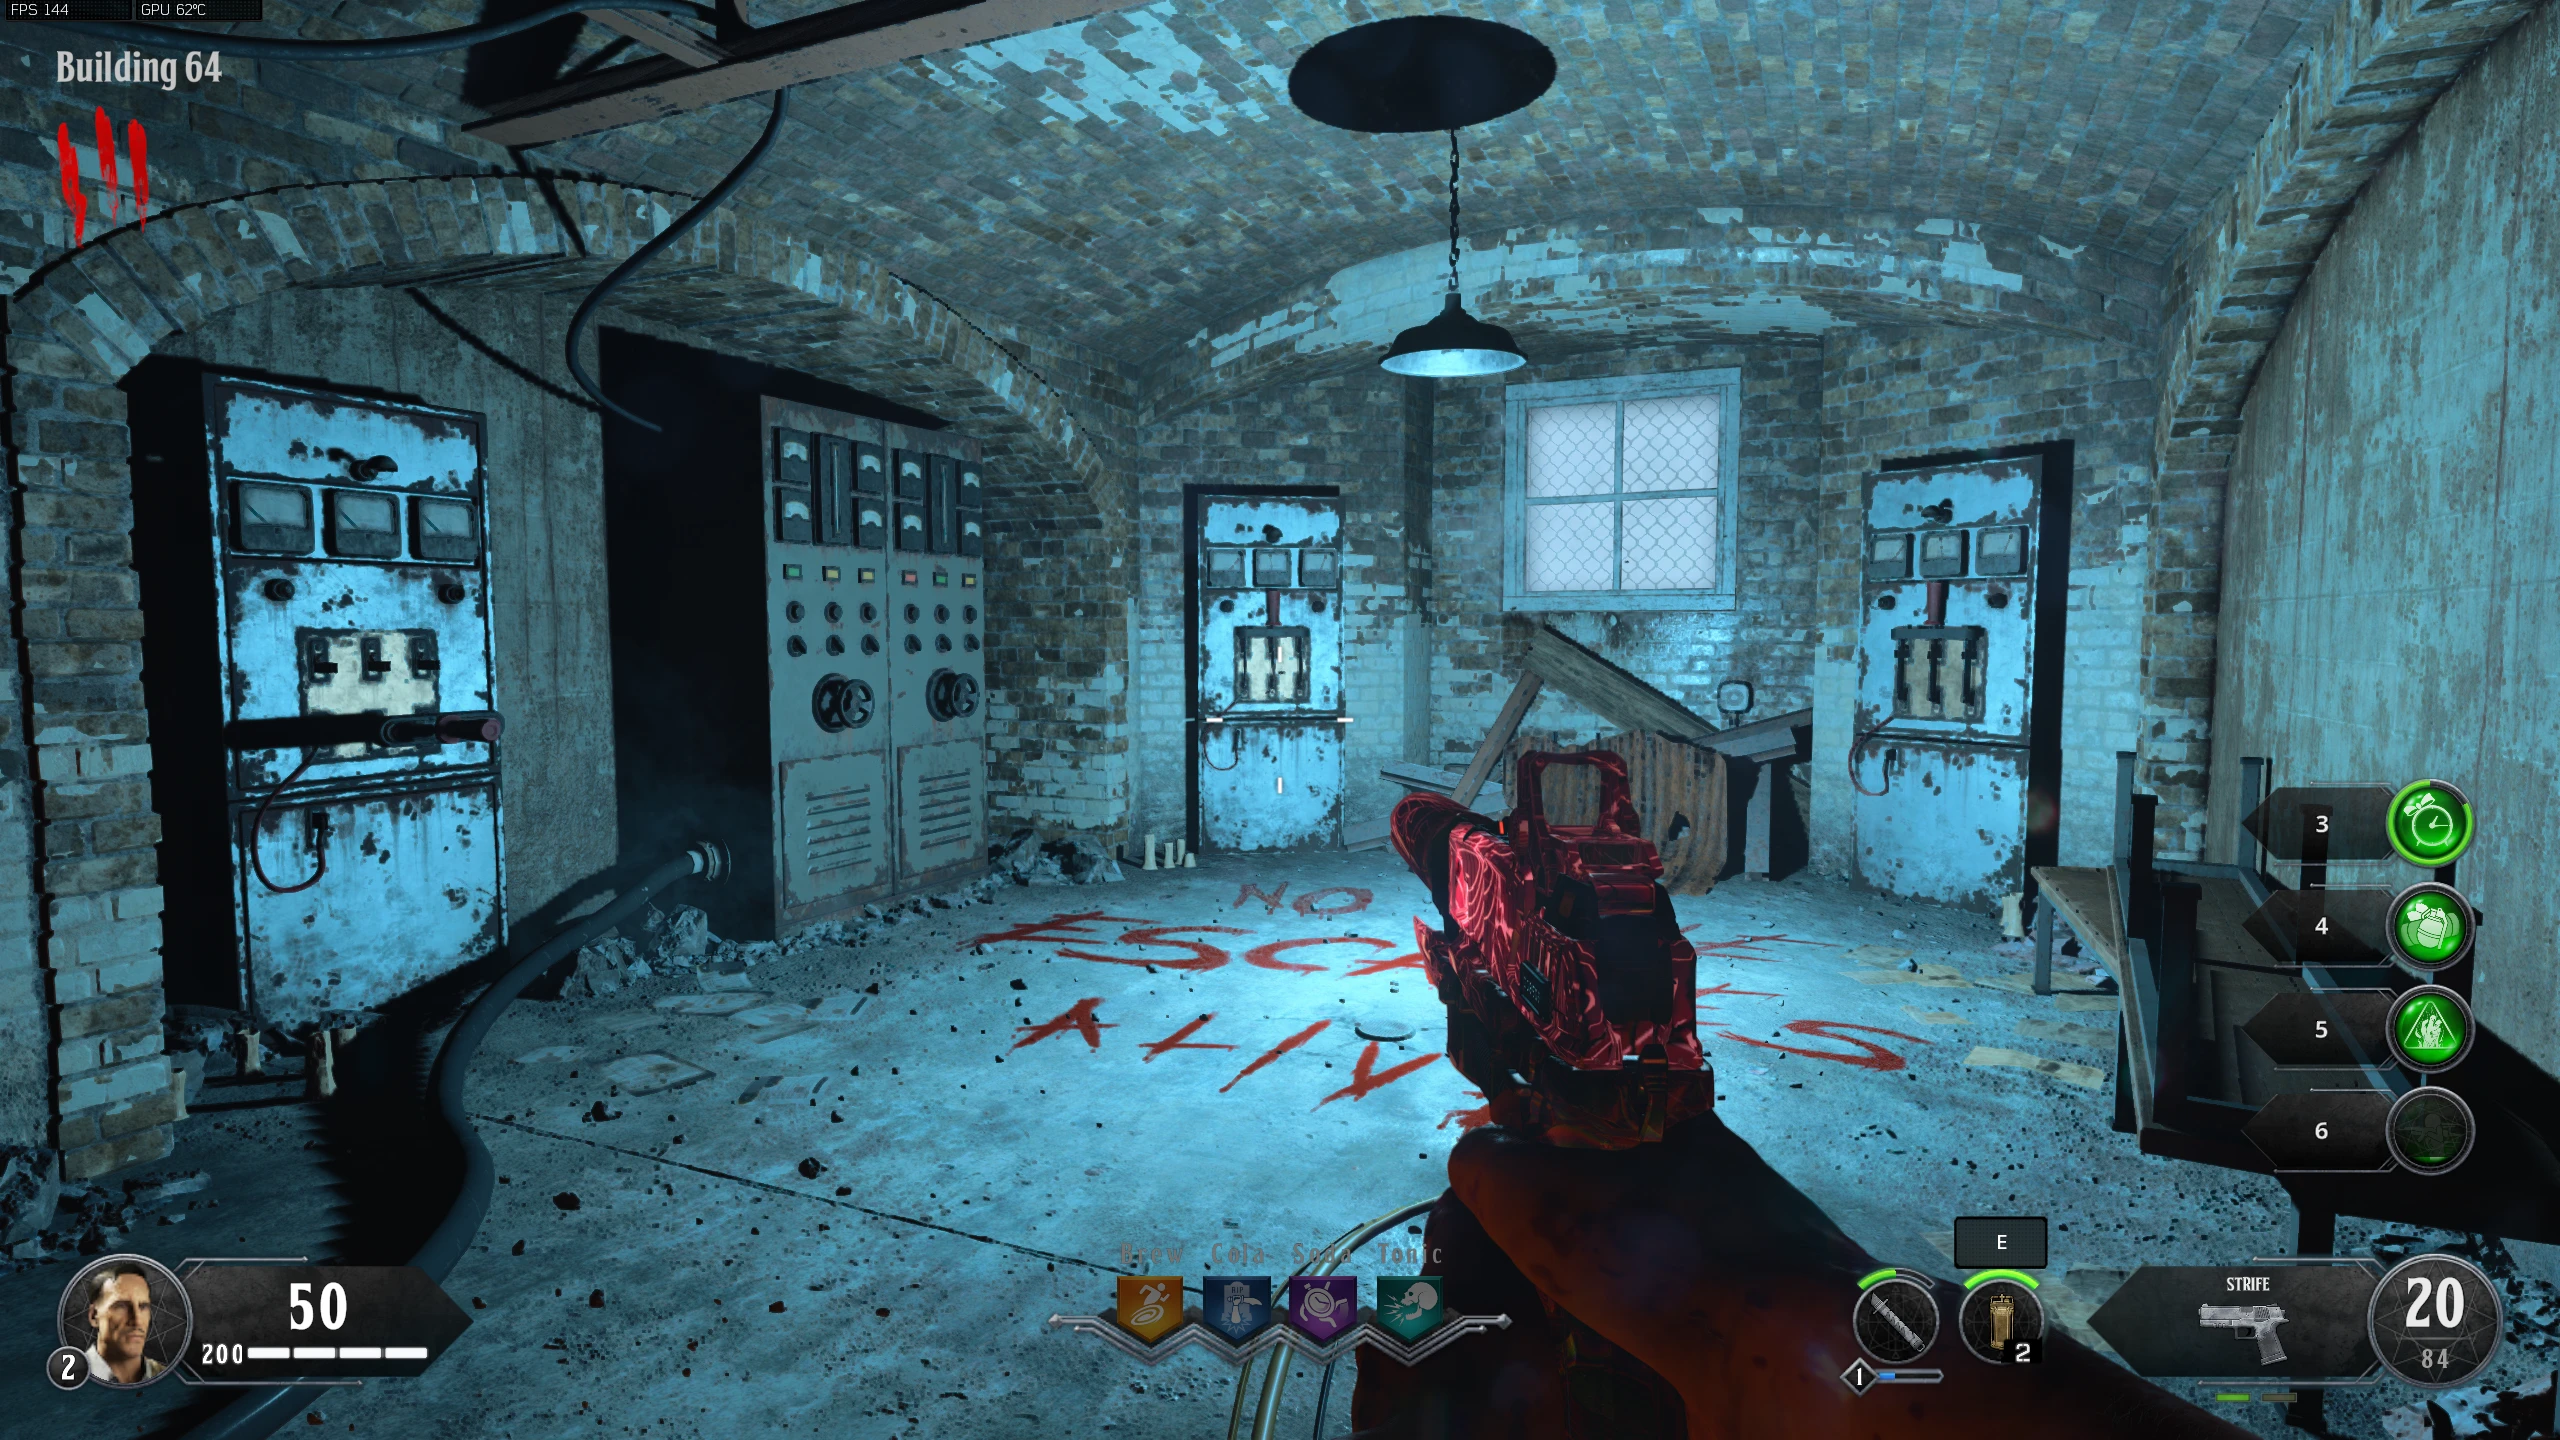
- In 'Building 64,' you must play five rounds of "Simon Says" using six panels in the room that light up. Each round the number of lights in the sequence increases, so round 1 has only one light, round 2 has two lights, etc. There's a new random sequence every round. Also, the same light can light up multiple times in the same round. Once the sequence has played out, interact with the panels in the same order they flashed.
- To start the Simon Says mini-game, interact with this sparking and smoking machine, this will make the main lights in the room go out. Stand here (where the blood is on the floor in the image) to get a good view of all the panels. Panel Locations:
- Left of the Power Box
- Right of the Power Box #1
- Right of the Power Box #2 (Left of the Above)
- Beside the doorway to 'China Alley'
- In the middle of the room (Left of the Above)
- Right of the sparking generator
- Upon completing the fifth round, three of the panels will remain illuminated, while one panel will be blinking. Ignore the blinking one and quickly note the panels that are lit.
- On each of the panels, there's a symbol on a sticky note. Using this cheatsheet, note which symbols were on the lit panels (only the numbered symbols are used for now).
- Grab the Punch Card from the shelf in between the doorways to the 'China Alley.'
- In the 'Model Industries' building (spawn), place the Punch Card into this machine.
- Six monitors in the room will turn on, each showing one of the symbols from the panels.
- For each of your symbols, interact with the monitor displaying that symbol. The symbol will change to one of the lettered symbols, note down which ones.
- Once you have your new symbols, go back to the Ghost in the 'Power House' where he will be trying and failing to pull levers. Each lever has a note beside it that has one of the lettered symbols on it.
- You must get the Ghost to pull the levers corresponding to your symbols. To make the Ghost able to pull a lever, spirit blast him with the shield as he is grabbing at the correct lever, not before (like old guides say). If done correctly, he will stop grabbing at it, then after a few seconds, he will grab it and turn it down. Repeat for the other two symbols. After the third lever is pulled, a Red Stone will drop from the Ghost.
- Obtain the Attuned Spectral Shield with 3-4 Charges. Technically, the upgraded shield is not required, but without it, it's a lot harder. You can get a free full refill for the shield once per round.
- Kill a Zombie in 'D-Block' to spawn a Ghost, which can only be seen with the shield.
- If you do not have the Undead Man Walking elixir, pull out your Specialist Weapon near a Zombie to spawn the Ghost without ending the round.
- If do have Undead Man Walking, only activate it once the zombies start getting close to you on the next round, as the escort through the prison is the hardest part, and using Undead Man Walking makes it easier.
- The Ghost will make his way from 'D-Block' to the 'Cell Block 2nd Floor' or 'Michigan Avenue' or 'Cafeteria' to pick up a spoon then to the 'New Industries' Building via the 'Catwalk' to kill another Ghost. Your goal is to damage the Ghost enough to make him red, so he can be killed with the Spin Trap in the 'New Industries' building before he can kill the other Ghost.
- To inflict damage on the Ghost, first, use a spirit blast to make it visible without the shield. Once visible, damage it using the Key from the shield. Keep in mind that the Ghost can only be harmed when it is visible. If it turns invisible, use another spirit blast to reveal it again. Note that the Ghost remains visible for approximately 15 seconds after being hit with a spirit blast before becoming invisible again.
- In some spots, you can stand in front of the Ghost to stop him from moving even if he's invisible to buy you some time to get another shield charge.
- As you do damage with the Key, he will slowly turn red. Once you do enough damage, his arms will go out (almost like a t-pose), you will no longer be able to damage him, and he will no longer turn invisible.
- Run to the MOG 12 wallbuy and wait till the Ghost is close to it. Once he's beside the wallbuy, run to the Spin Trap and activate it. If the Ghost is damaged enough, he will walk into the trap, die, and drop a Red Stone for you to pick up.
- Once all five challenges have been completed, and all stones have been picked up, place them on the map on the wall in 'Richtofen's Laboratory.'
- Return to the 'Warden's Ritual Room' and interact with the electric chair to place the Summoning Key in the corpse's chest cavity.
- After some cutscenes, you will be freed from the cells and be able to grab your equipment from the Bag at the top of the stairs.
- Follow the Seagull to the 'West Grounds' where a larger version of the Warden will spawn blocking the entrance to the 'Model Industries' building.
- After a short cutscene, the Warden will be taken away by ghosts and a Red Stone will drop.
- Place the Red Stone on the map on the wall in 'Richtofen's Laboratory' to reveal a Cryo-pod and secret staircase to the right of the pod.
- At the top of the stairs, there will be a Metal Door. All players must interact with the door to start the Boss Fight.
- The door will open, and all players will be put into the boss fight arena. The Warden will shake off the Ghosts and teleport away.
- Zombies, Hellhounds and Wardens will begin to spawn. You must get at least one shield charge from these enemies. Kill all the enemies that spawn.
- Once all the enemies are dead, the larger Warden will spawn somewhere in the arena with a red cylinder around him and three red orbs above him.
- You must quickly run into the cylinder, and shoot and destroy the orbs. Standing outside the cylinder will cause you to take damage.
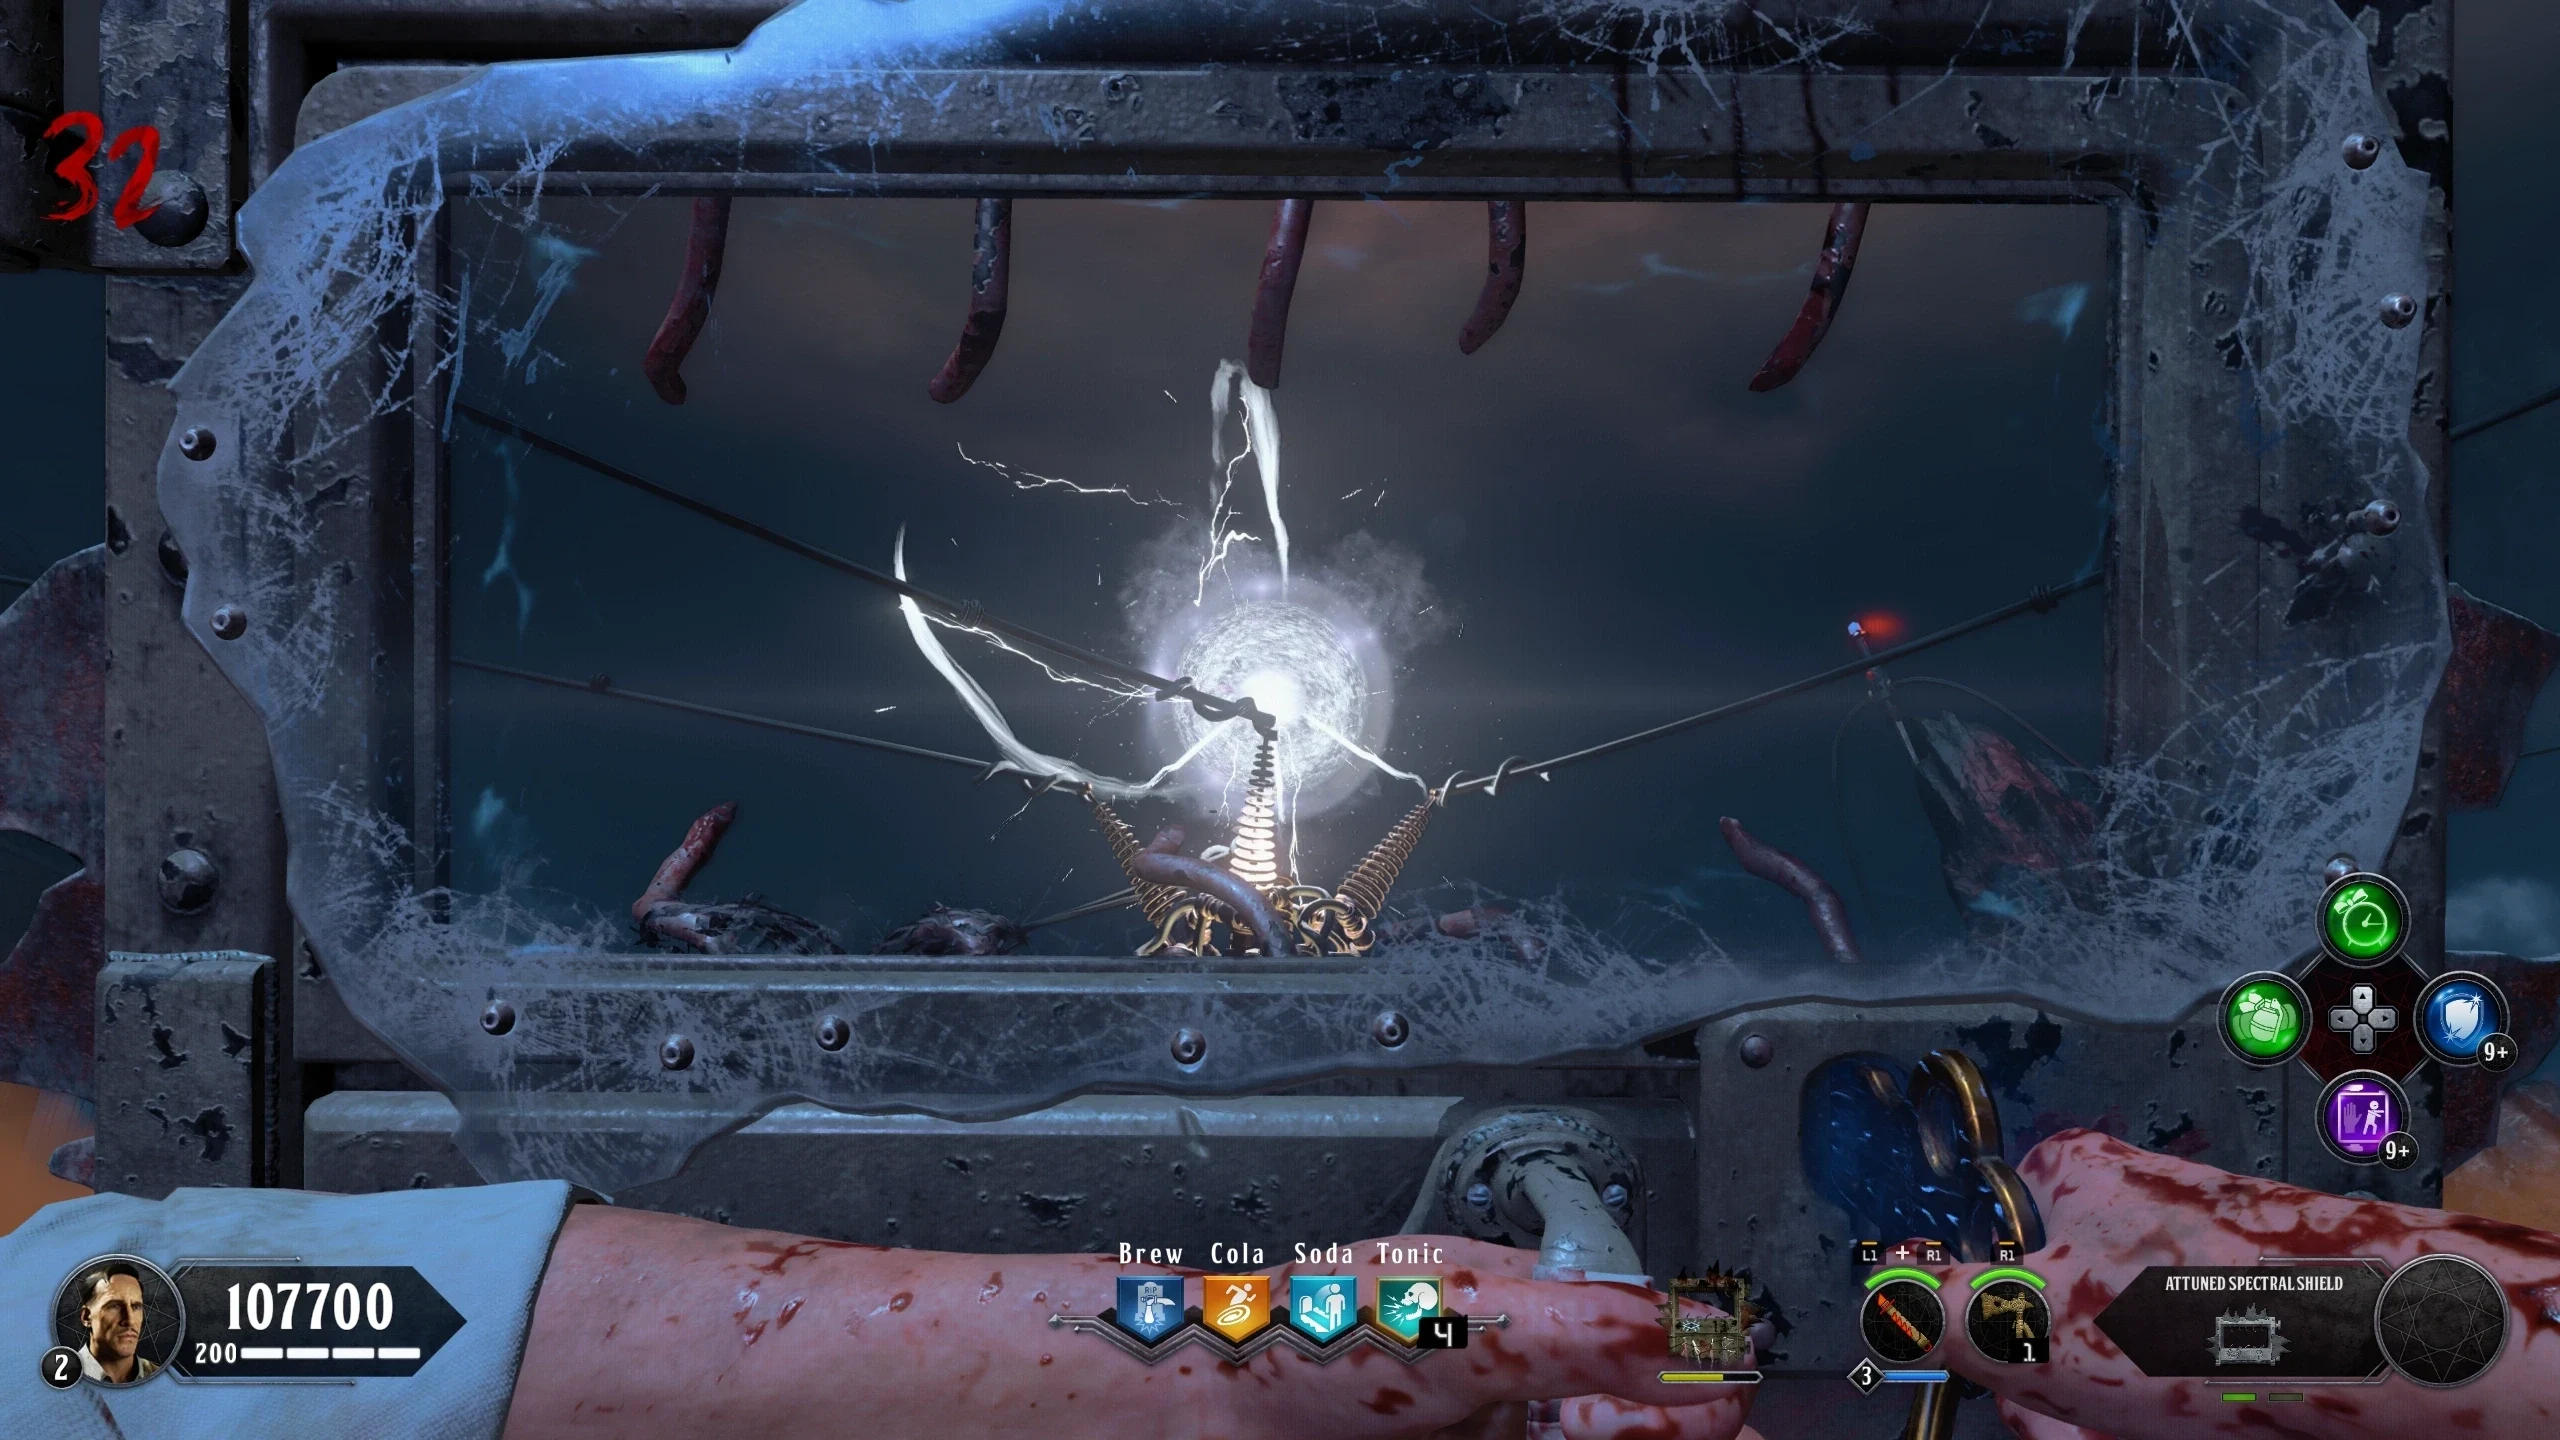
- Once the Orbs are destroyed, wait a few seconds then spirit blast the white orb above the Dark Mechanism.
- If done correctly, the Larger Warden will disappear, and after a few seconds, Zombies will start to spawn again.
- Repeat one more time. During the second phase, Red Circles on the floor will spawn. If you are standing in them when they activate, then you will be downed instantly.
- After spirit blasting the white orb above the Dark Mechanism the second time, the Dark Mechanism will activate, and the player playing as Richtofen must interact with the Dark Mechanism. If no one is playing as Richtofen, a bot will spawn.
- A cutscene will play and the player playing as Richtofen will respawn in the lab. They must interact with the Metal Door to enter the arena. The players, not playing as Richtofen, will face off against infinite enemies and the invincible, larger Warden until Richtofen returns to the arena. As Richtofen re-enters the arena, a small cutscene will play and the larger Warden will no longer be invincible.
- Kill the larger Warden. Once he is dead, the final cutscene will start.
Before you Start
Unleash the Spirits
Shock and Denial
Pain and Guilt
Click to expand/collapse the list of Seagull Locations
Docks:
Building 64 Area:
Citadel Tunnels:
Citadel:
Warden's Office Area:
Eagle Plaza:
Michigan Avenue:
Cellblock Area:
Library Area:
Infirmary/Roof Area:
Cafeteria Area:
Showers:
Recreation Yard/Catwalk:
West Grounds Area:
Power House Area:
New Industries:
Docks Challenge - 2/5 Difficulty
Showers Challenge - 1/5 Difficulty
Michigan Avenue Challenge - 4/5 Difficulty
Power House Challenge - 3/5 Difficulty
New Industries Challenge - 5/5 Difficulty (4/5 with the Undead Man Walking elixir)
Reflection and Loneliness
The Upward Turn
Warning: Point of No Return. Once the Metal Door is interacted with, the Boss Fight will start.
Reconstruction (Boss Fight)
Acceptance